Cooking and Cussing

menu icon
go to homepage
search icon
Homepage link
  • Recipe Index
    • Bloglovin
    • Facebook
    • Instagram
    • Pinterest
  • ×
    Home

    Sour Cream and Onion Skillet Biscuit

    April 9, 2023 by Hailey Leave a Comment

    Skillet Biscuit on a white plate with a pat of butter on top.

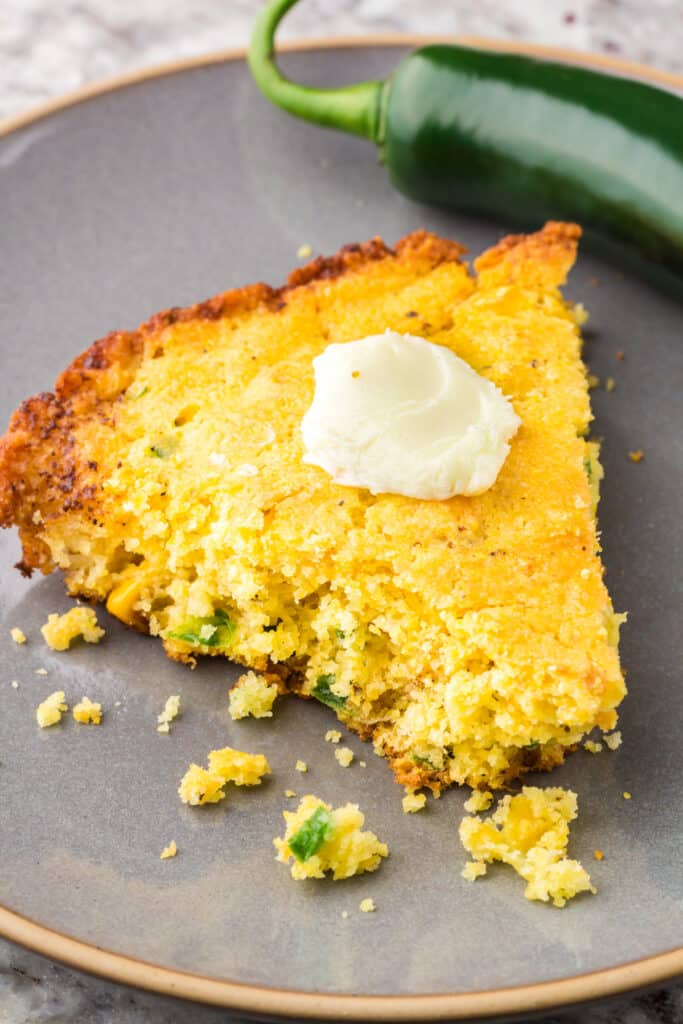
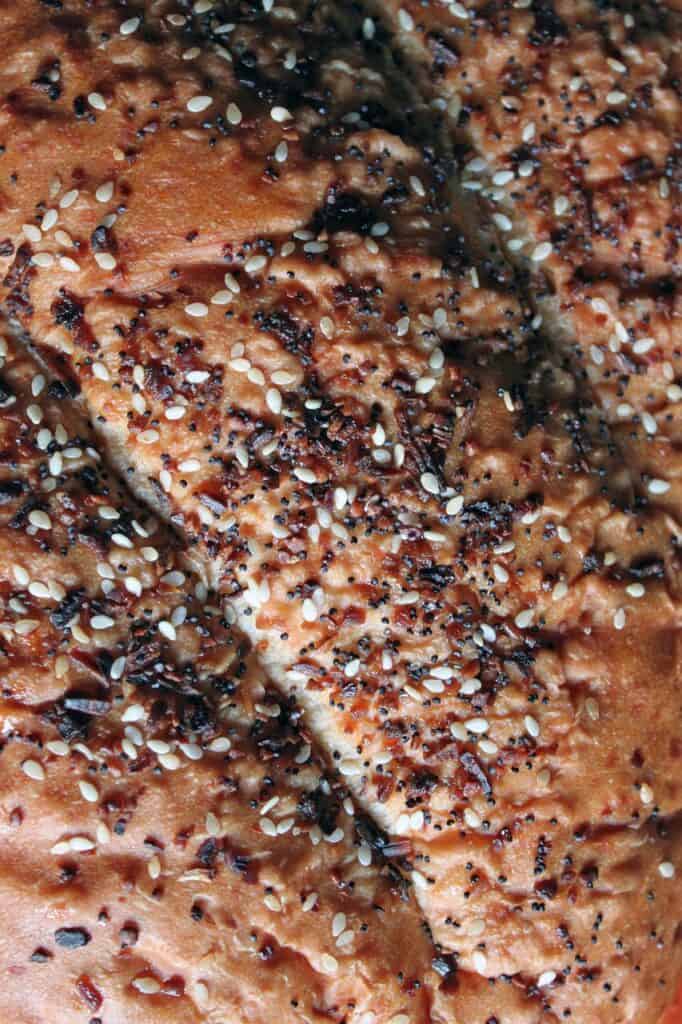
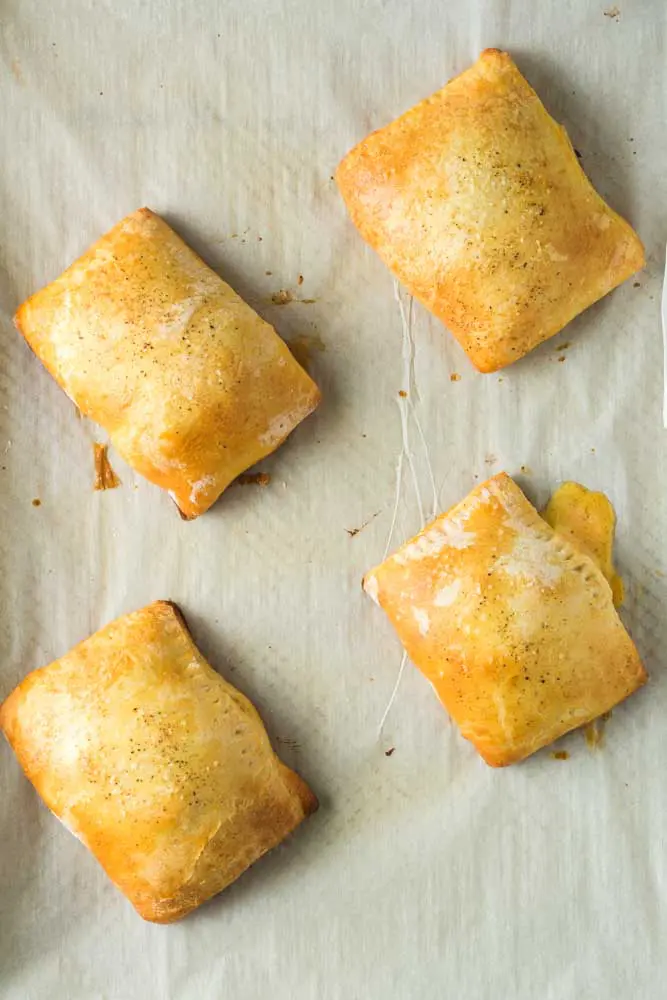
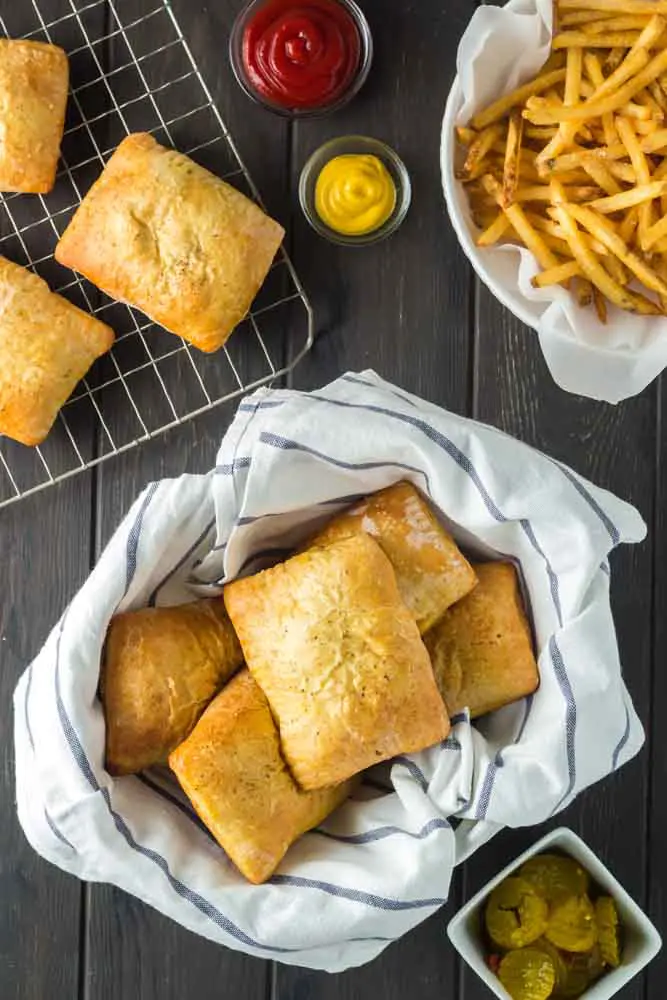
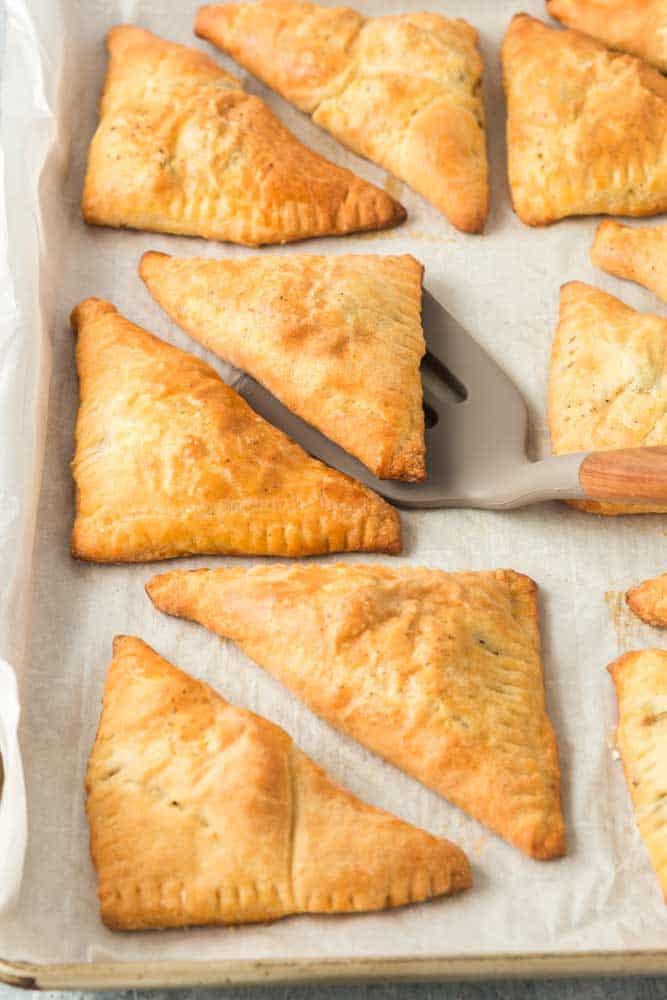
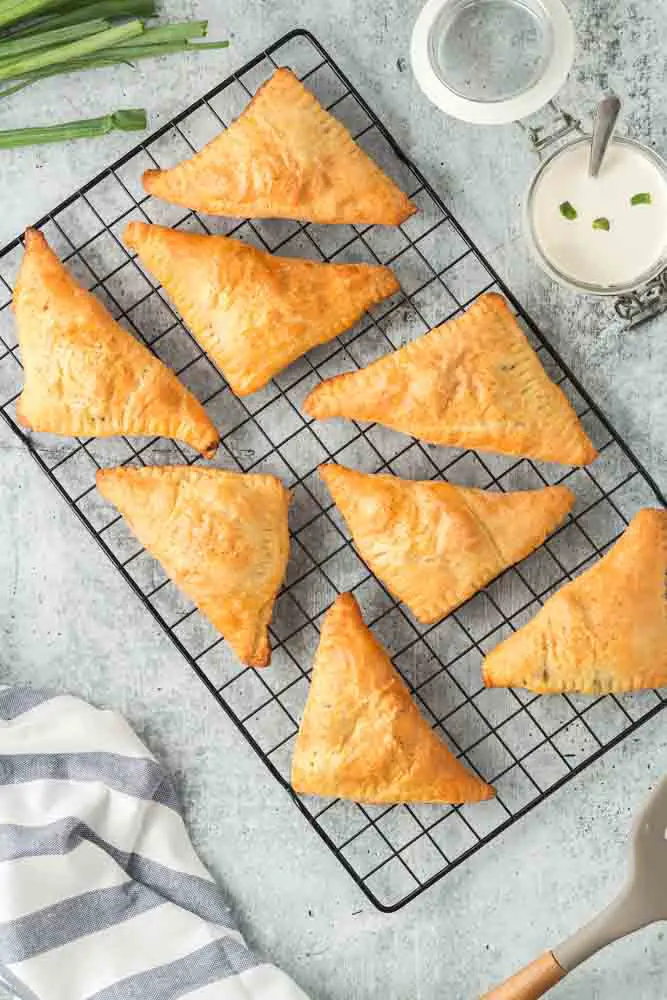
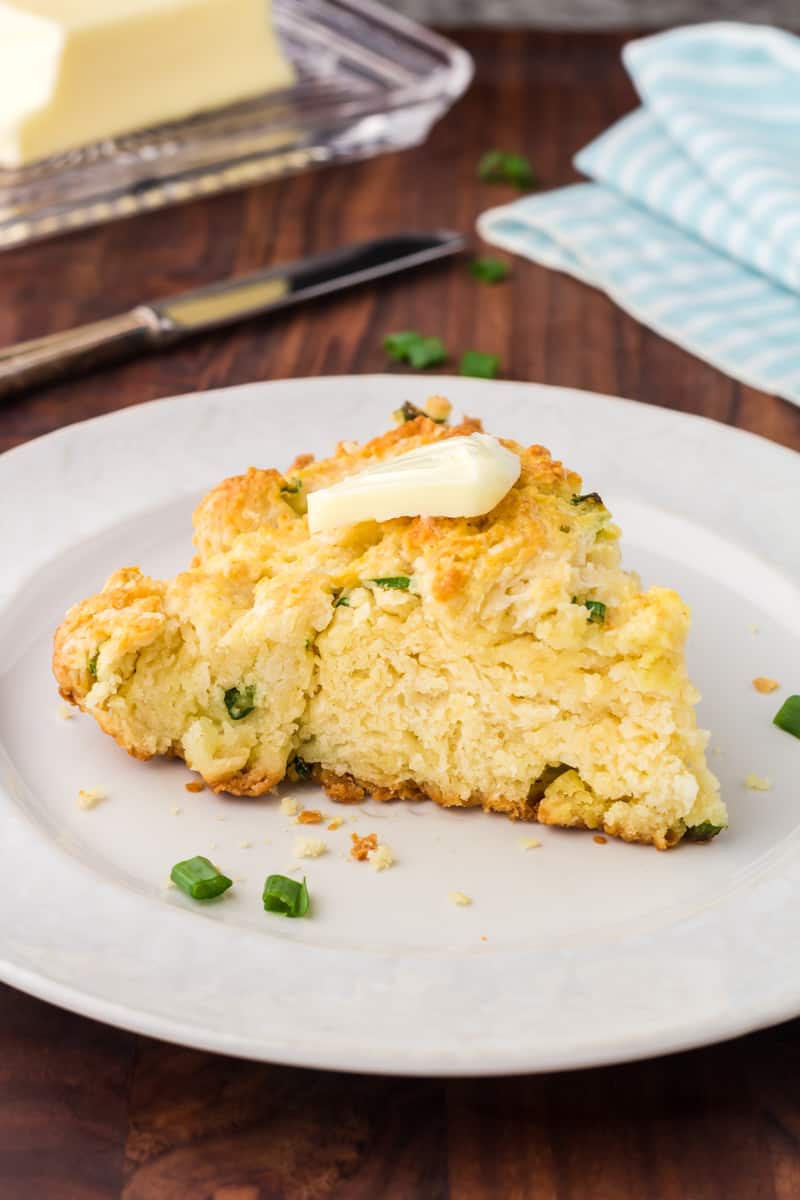
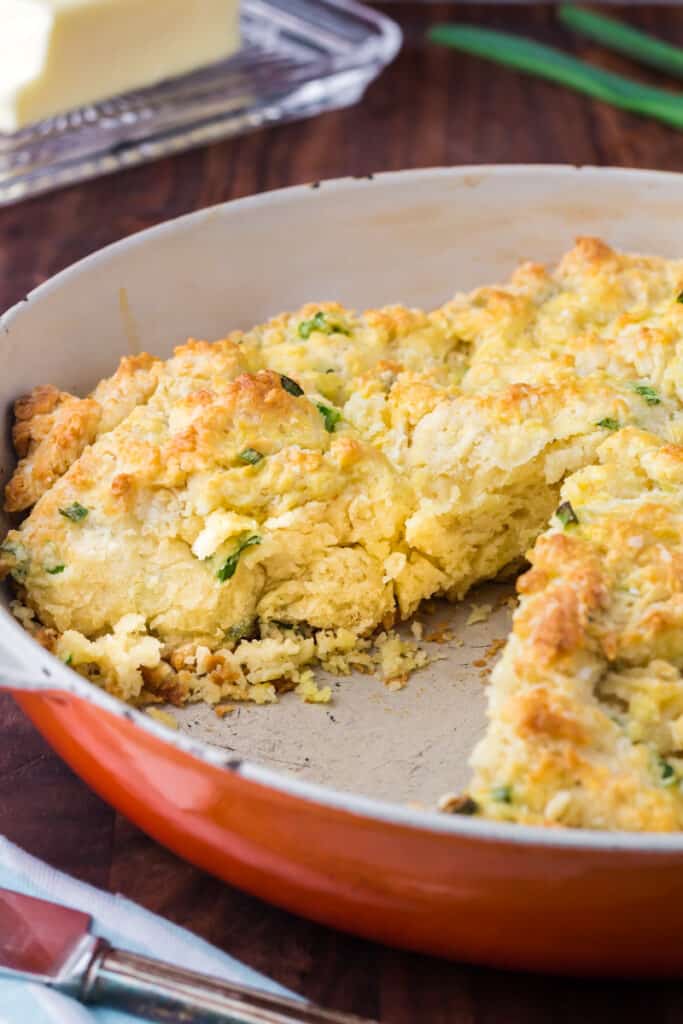
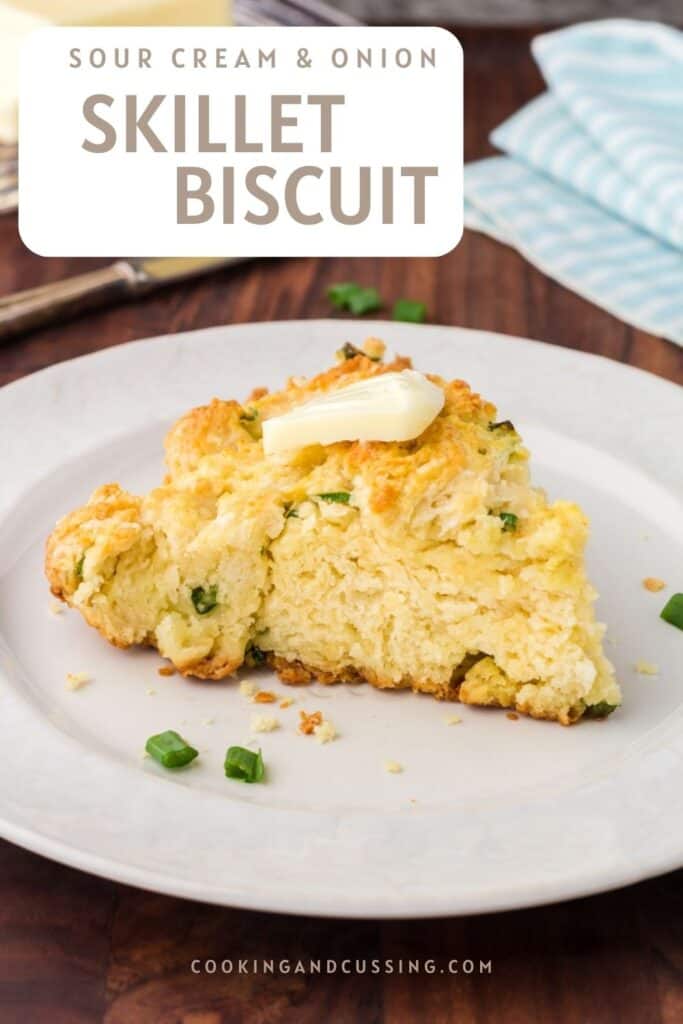
    If you love homemade biscuits but hate the mess it makes in your kitchen, you’re going to love skillet biscuits. Skillet biscuits have the same crunchy outside and soft, fluffy interior as biscuits but with half the effort. Sour Cream and Onion Skillet Biscuits are good any time of day with any meal. Breakfast, lunch or dinner, you’re going to love them.

    Skillet Biscuit on a white plate with a pat of butter on top.

    I love making homemade biscuits. Making the dough with my hands is so enjoyable, but I hate the mess it makes on my countertop. Biscuit dough is supposed to be messy. Having a loose, shaggy dough is what ensures a fluffy interior.

    Unfortunately, when you dump biscuit dough onto your counter, it makes a mess, and if you’re clumsy like me, half of it also ends up on the floor. This recipe simplifies things by doing the work in one single bowl, no countertop mess required!
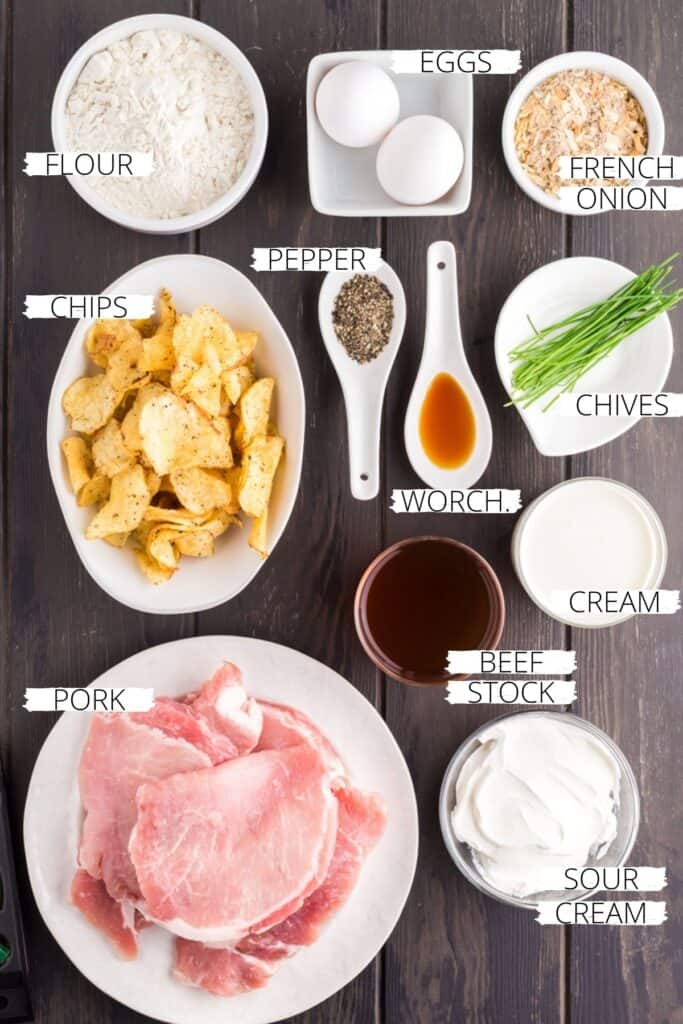
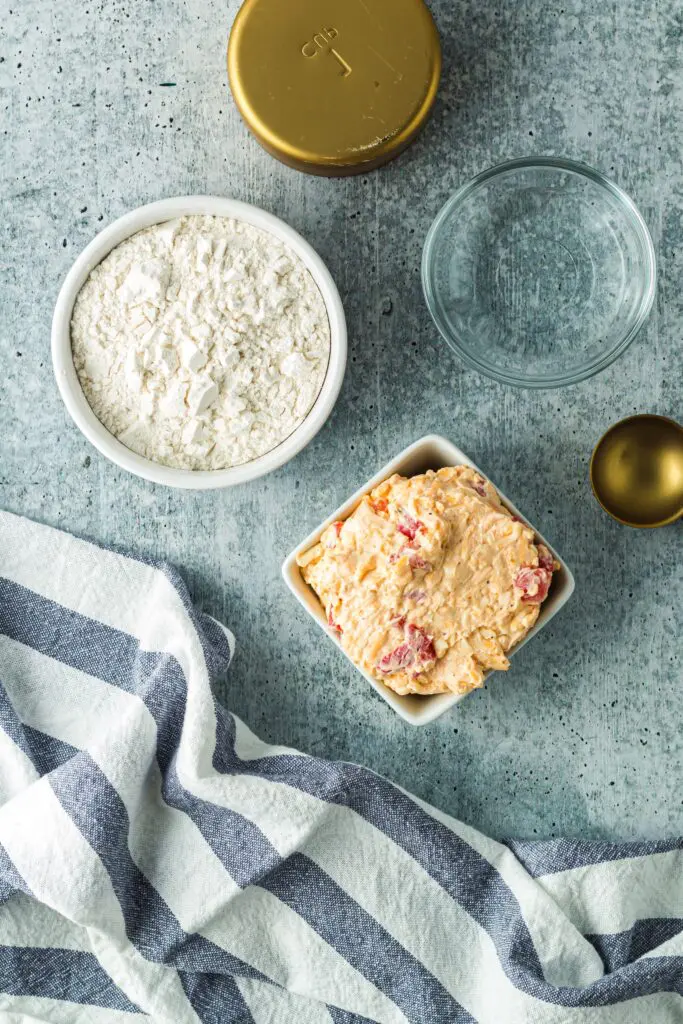
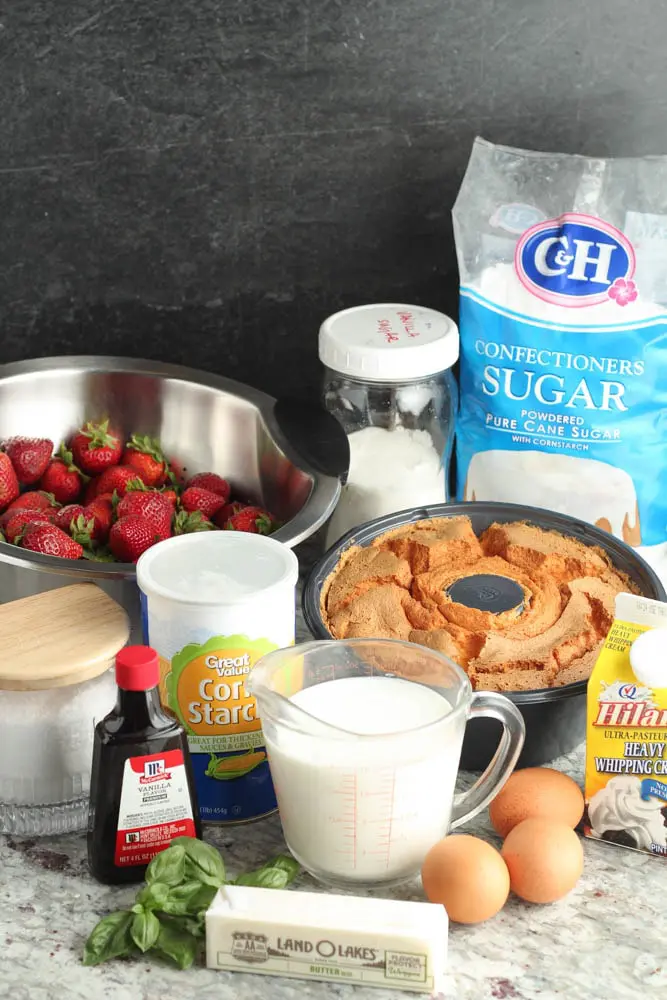
    Ingredients

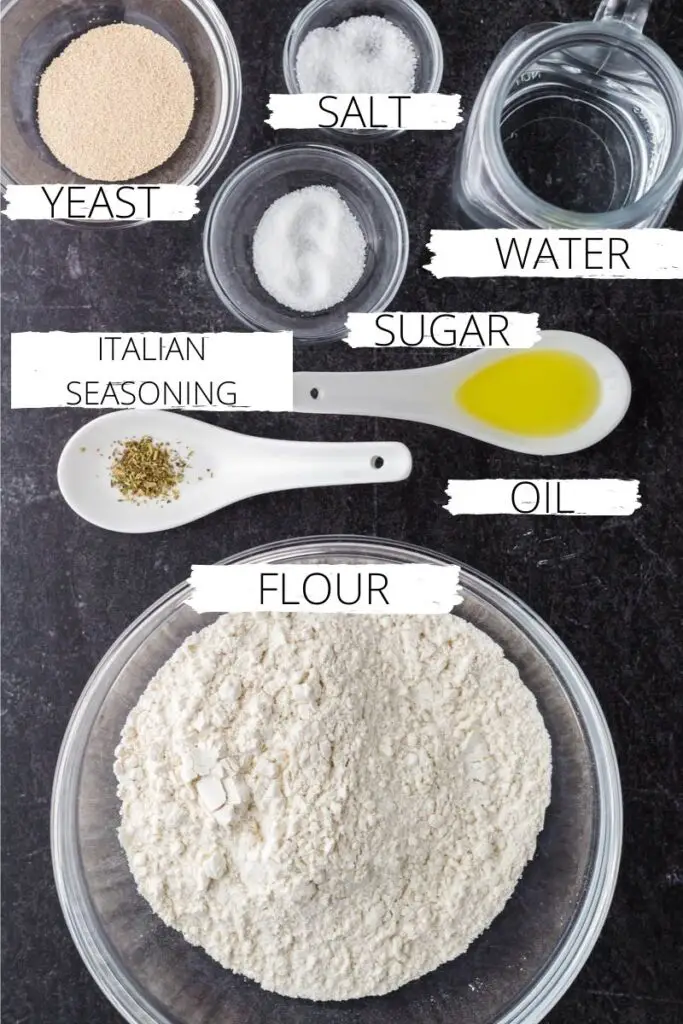
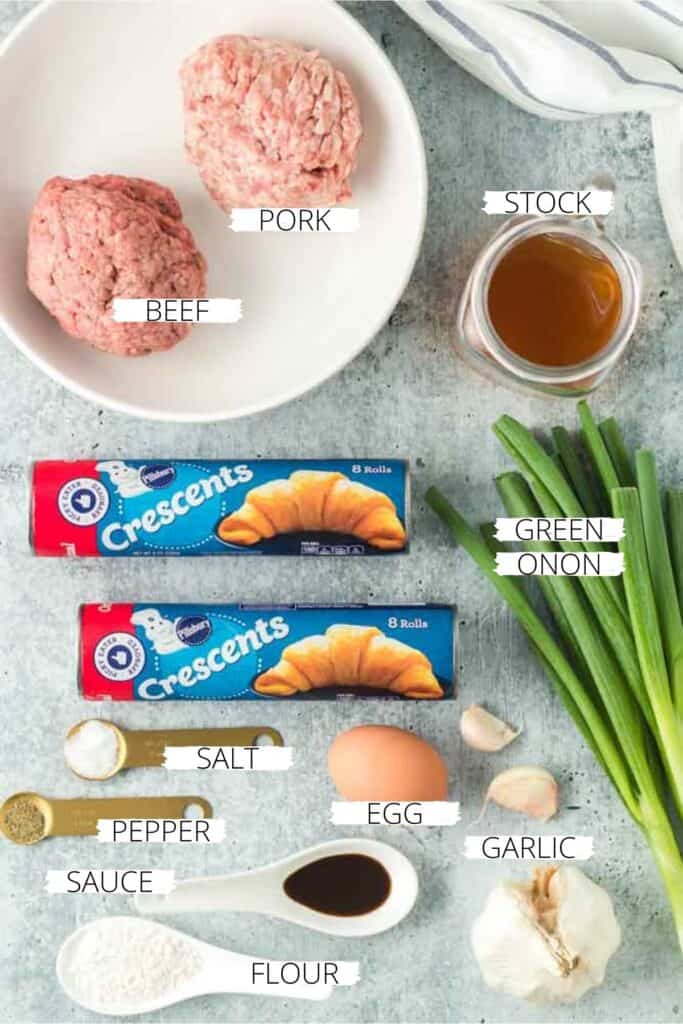
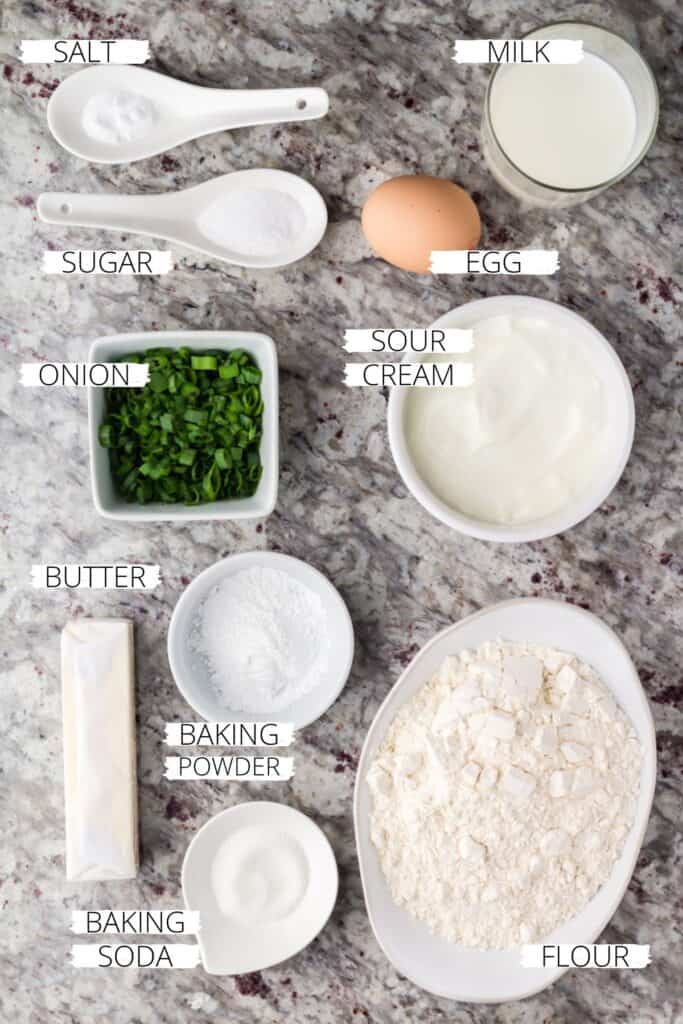
    The ingredients for this recipe are simple and like most biscuit recipes. To make the recipe you need:

    • Flour
    • Sugar
    • Baking soda
    • Baking powder
    • Salt
    • Butter- ice cold!
    • Sour Cream
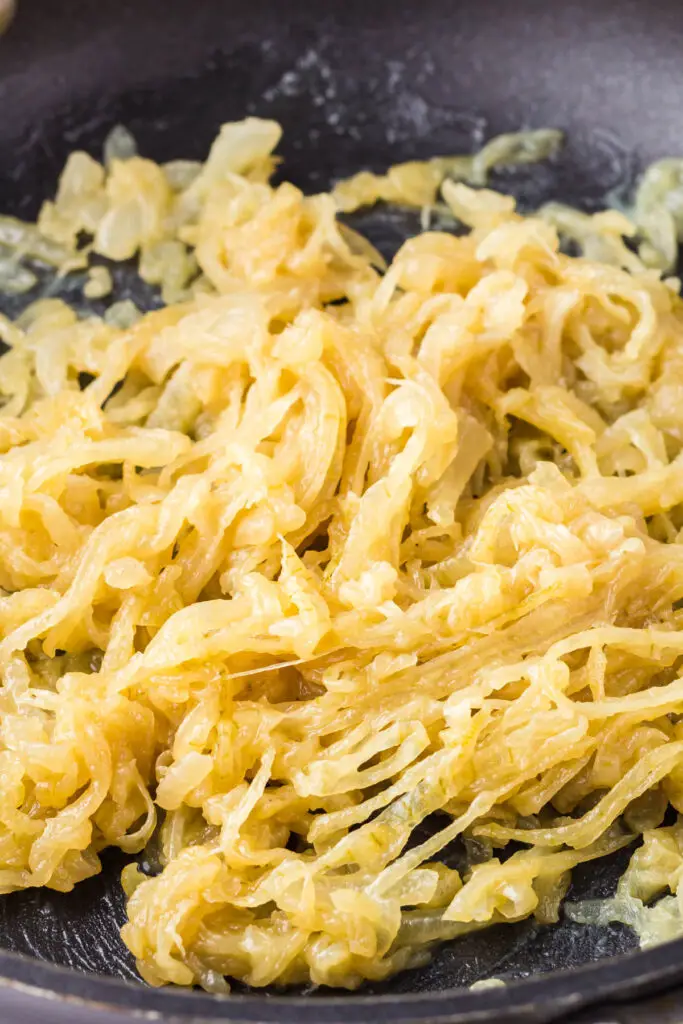
    • Green onions- green parts only
    • Egg
    Ingredient for Sour Cream Onion Skillet Biscuit.

    Instructions

    To make Sour Cream and Onion Skillet Biscuits, you need to:

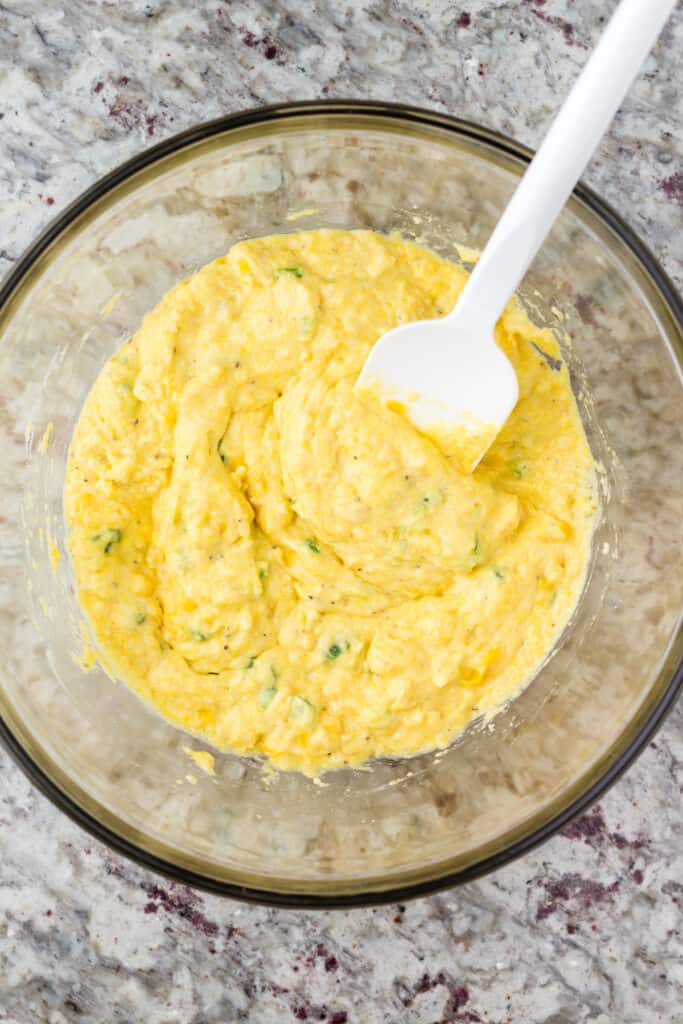
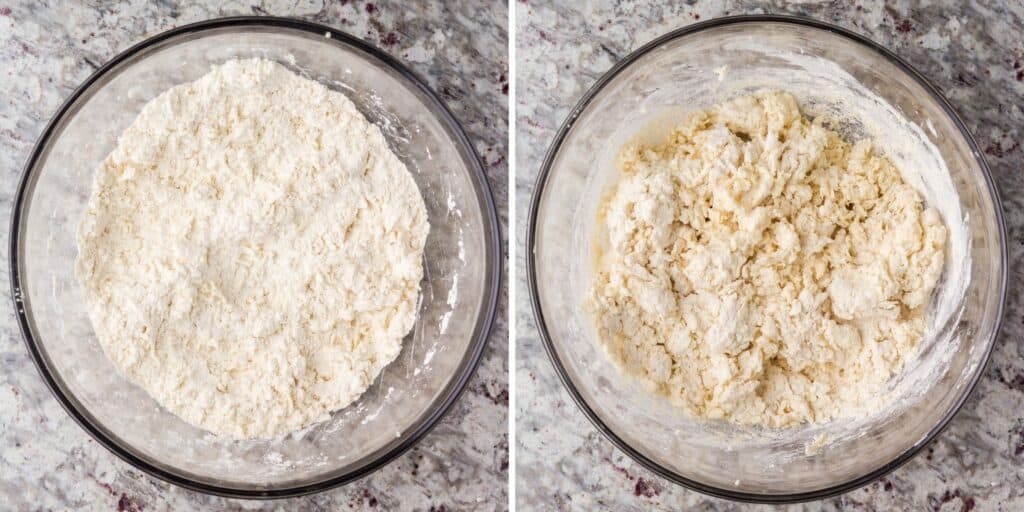
    1. Sift the dry ingredients into a large bowl, and grate the butter into the same bowl. Mix very lightly until just combined.
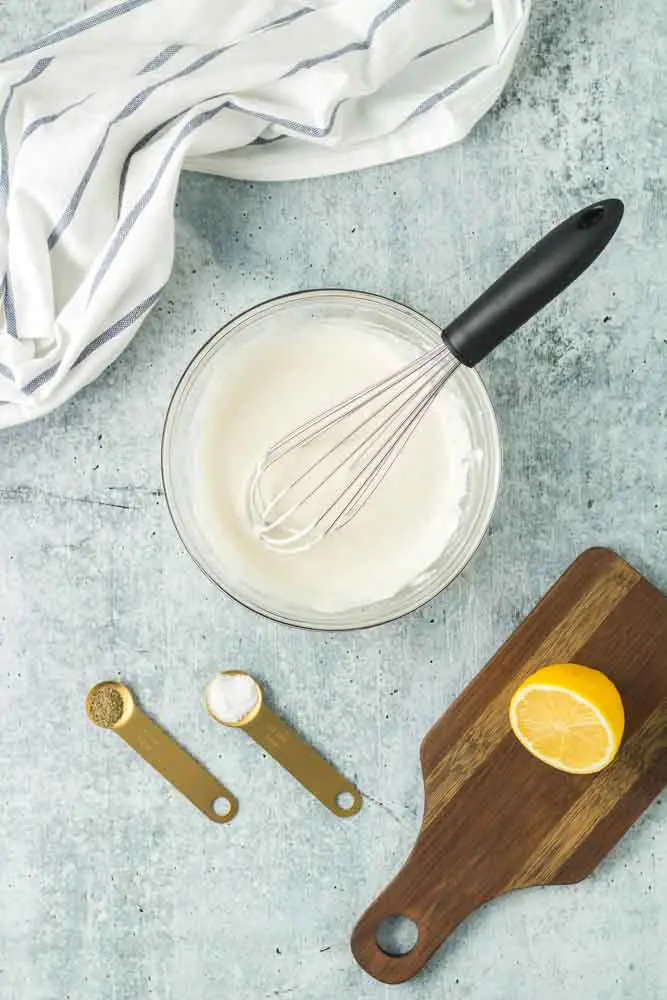
    2. Make a well or an indentation in the flour-butter mixture, and pour the sour cream, milk, and green onions into the well
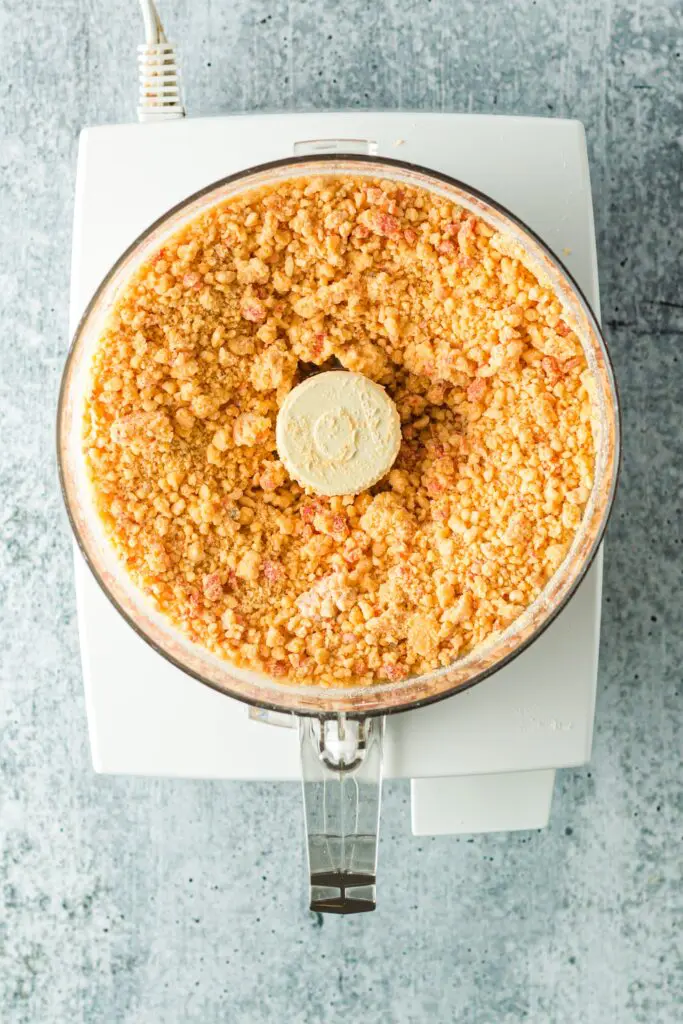
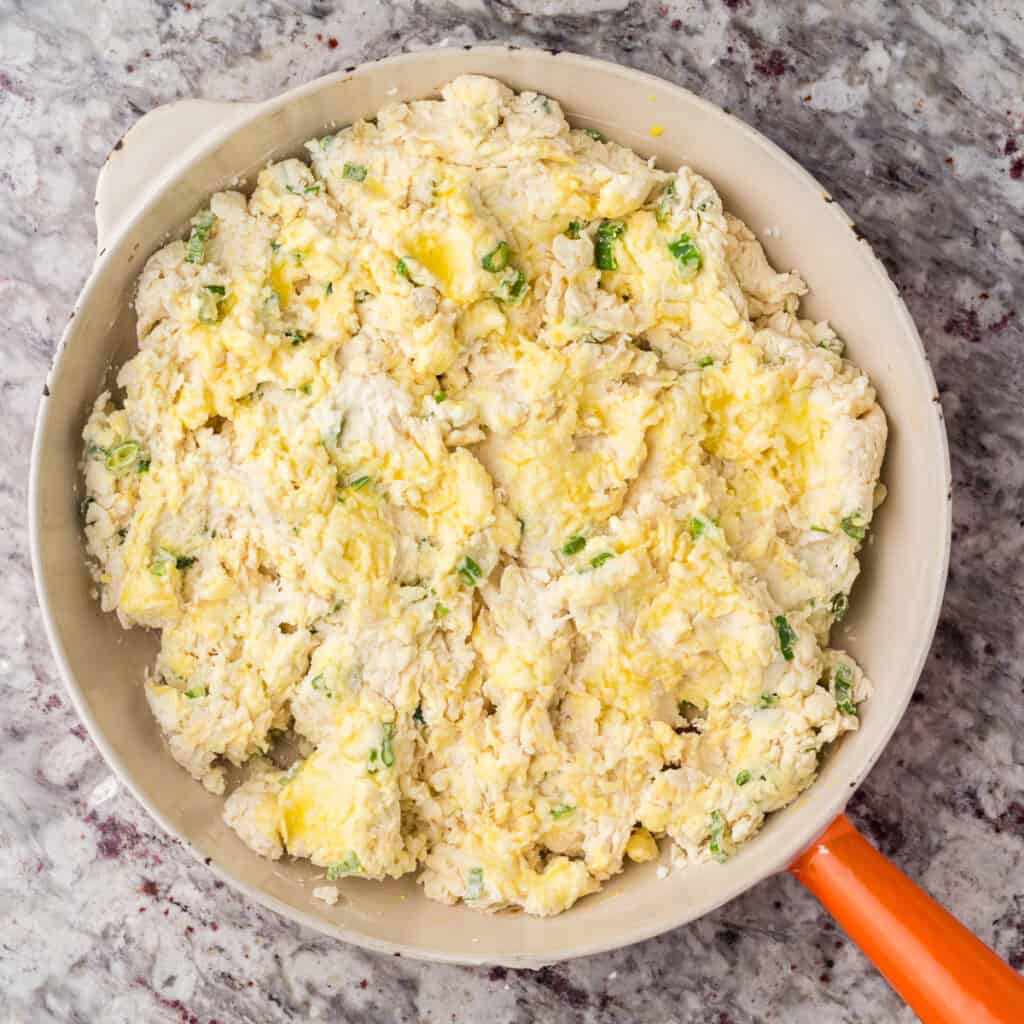
    3. Using your hands, very gently mix together the ingredients. You want a shaggy crumble that looks like it almost won’t hold together. Trust me, it will.
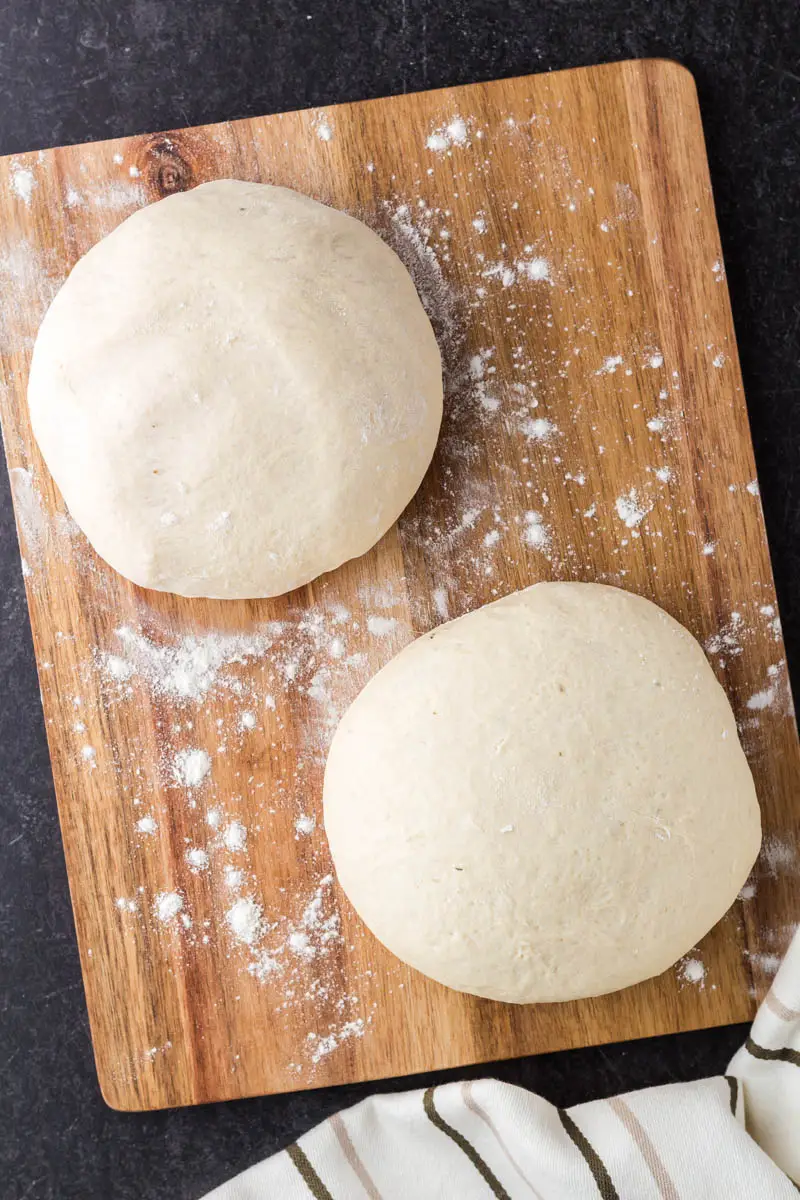
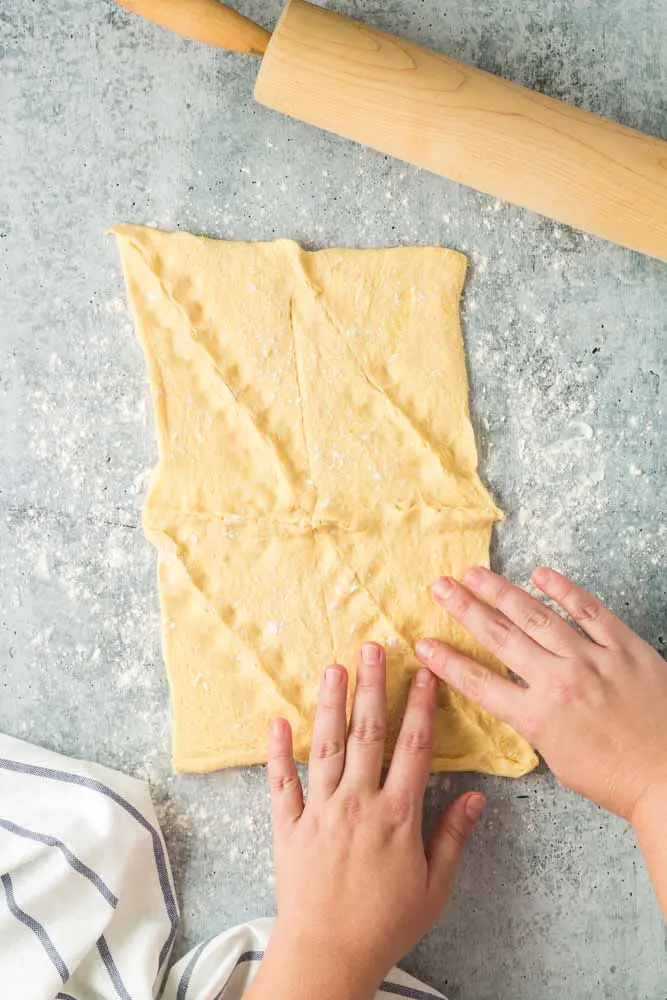
    4. The secret to a fluffy skillet biscuit is in the folds. Once you have a shaggy dough, form it into a loose ball in the bowl. Use a butter knife to cut the ball in half. Stack each half on top of the other and gently press to combine. Repeat this process two more times to create a total of six layers. Take a look at the TikTok video posted right before the recipe for a better visual.
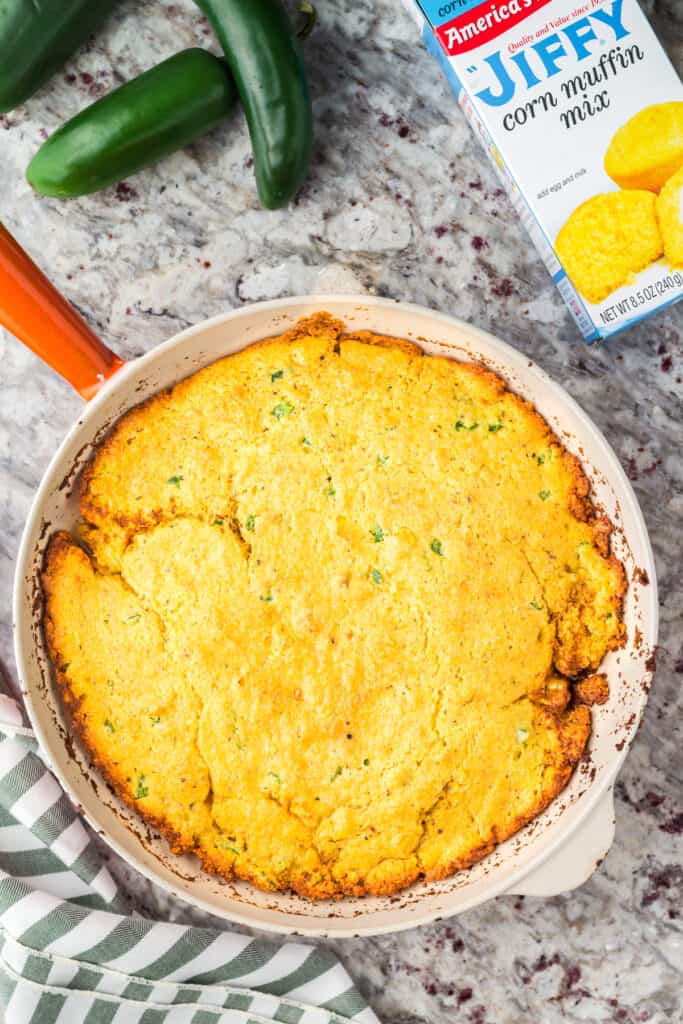
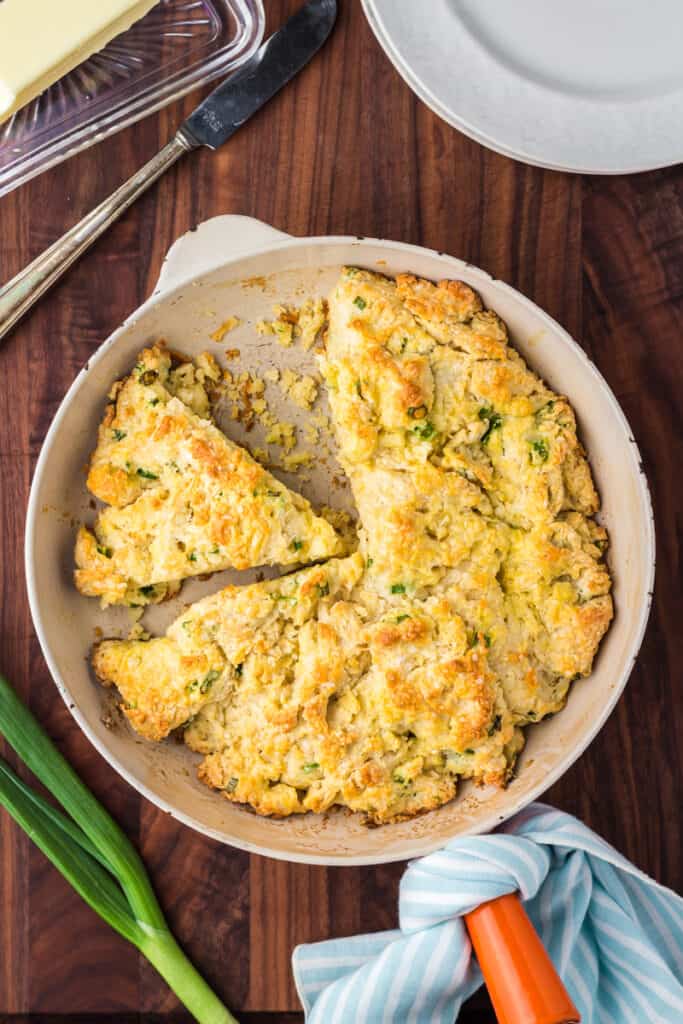
    5. Once you have completed the folds, place the dough into a greased 9-inch skillet. This is the most important step… Do not press or smash the dough. You want to gently spread it across the pan. If you smash the dough, you will end up with a tough and dense biscuit. If you want a light fluffy texture, spread, don’t smash.
    6. Bake and enjoy!
    Process photos of skillet biscuit dough.

    Variations

    If you’re looking to mix up your skillet biscuit flavors, there are a couple of variations that work well with this recipe. Add chopped bacon and/or shredded cheese (¼ cup each) to the recipe for a fully loaded skillet biscuit.

    If you prefer your biscuits plain, feel free to omit the green onions from the recipe. Do not omit the sour cream though; it’s important to the texture of the cooked biscuits.

    Skillet biscuit dough before being baked.

    Equipment

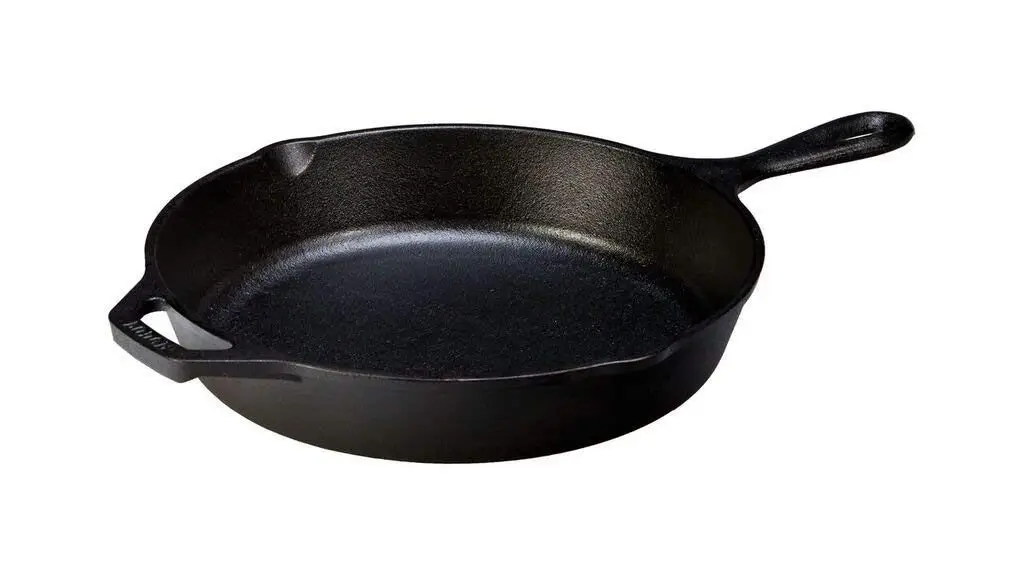
    Any heavy-bottomed skillet will work for this recipe. Cast iron is a fail-proof choice for baking biscuits, but anything similar will work. Lodge makes my favorite cast iron pans. If you don’t have one, it’s worth the investment. Check out this Lodge 9-inch skillet. I have the same one, but because I'm sentimental, I always use my mammaw’s orange skillet when making biscuits or cornbread.

    Overhead view of skillet biscuit sliced into wedges.

    Top tip

    There is one crucial step to fluffy, tender skillet biscuits. I’ve already stated it above and on the recipe card, but it’s so important that it’s worth repeating.

    DO NOT SMASH THE DOUGH INTO THE SKILLET.

    The first time I made this recipe I pressed the dough down, and the result was a tough biscuit. Since then, I learned to gently spread the dough instead to keep the biscuit light and fluffy. Also, don't forget to sift your dry ingredients!

    Skillet biscuit in an orange pan with a piece removed.

    If you love biscuits, be sure to check out my Buttermilk Biscuits and Biscuits and Sausage Gravy recipes. Sour Cream and Onion Skillet Biscuits are packed with flavor but simple to make. Give the recipe a try and let me know what you think in the comments section below.
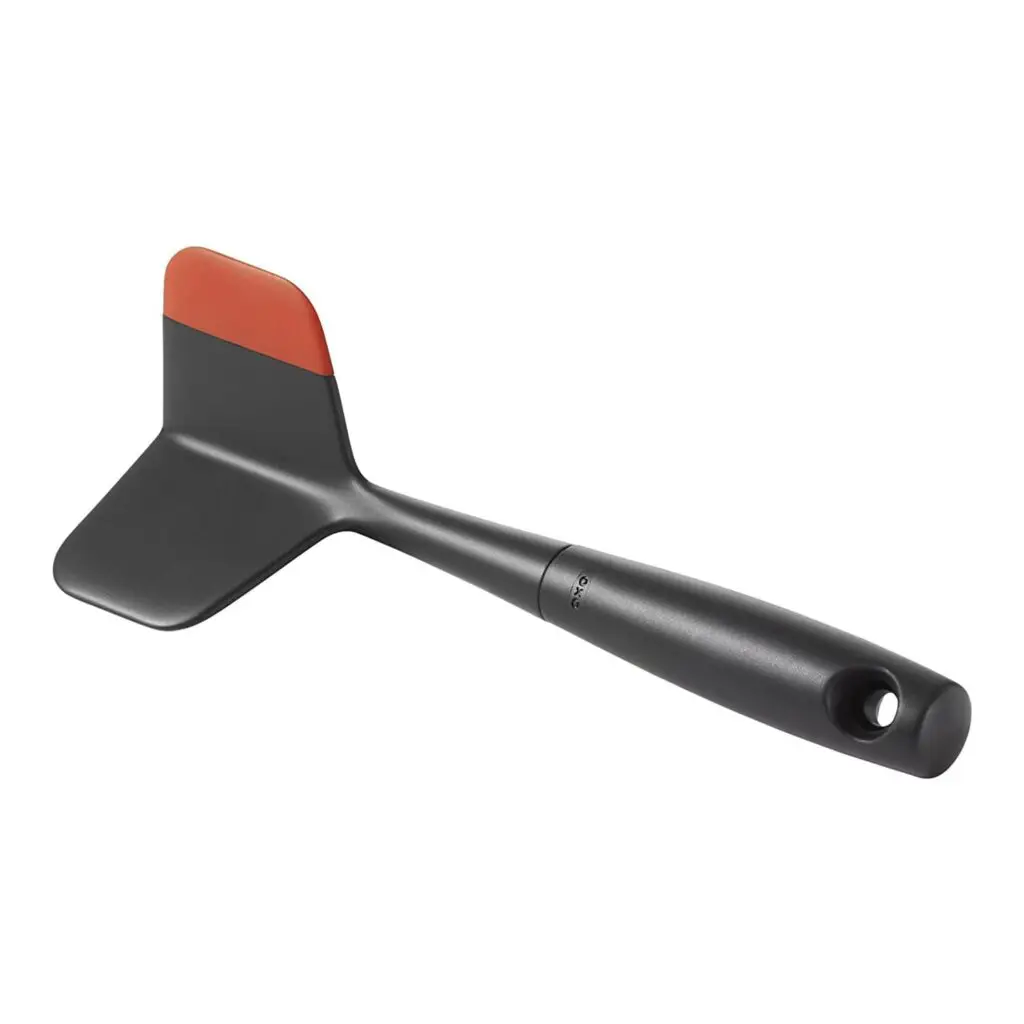
    Helpful Equipment

    black cast iron skillet

    Lodge 9-inch Skillet

    @cookingandcussingblog

    Sour Cream and Onion Skillet Biscuits are light, fluffy and half the work of normal biscuits. 🧈 💗 Full recipe on the blog. https://cookingandcussing.com/sour-cream-and-onion-skillet-biscuit/ #biscuits #butterybiscuit #homemadebiscuits #easybiscuitrecipe #sourcreamandonion #biscuitlove #skilletbiscuit

    ♬ Up and Away (Vocalese) - GHOSTLAND
    Skillet Biscuit on a white plate with a pat of butter on top.
    Skillet Biscuit on a white plate with a pat of butter on top.
    Print Recipe
    5 from 2 votes

    Sour Cream and Onion Skillet Biscuit

    Flavorful and fluffy biscuits without messing up your countertop! Sour Cream and Onion Skillet Biscuits come together in one bowl.
    Prep Time10 minutes mins
    Cook Time25 minutes mins
    Course: Side Dish
    Cuisine: American
    Servings: 8 biscuits

    Equipment

    • 1 9" skillet cast iron or similar

    Ingredients

    • 2½ cups all purpose flour
    • 2 teaspoon white sugar
    • 2½ tsp baking powder
    • ¼ teaspoon baking soda
    • 1 teaspoon salt plus more for top
    • ½ cup butter cold, plus more for greasing
    • ¾ cup sour cream cold
    • ¾ cup whole milk cold
    • ¼ cup green onions green only, finely chopped
    • 1 egg

    Instructions

    • Preheat the oven to 425°F. Grease a 9-inch skillet with butter.
    • Sift the flour, sugar, baking powder, and soda into a large mixing bowl. Add the salt and mix. Grate the cold butter into the same bowl.
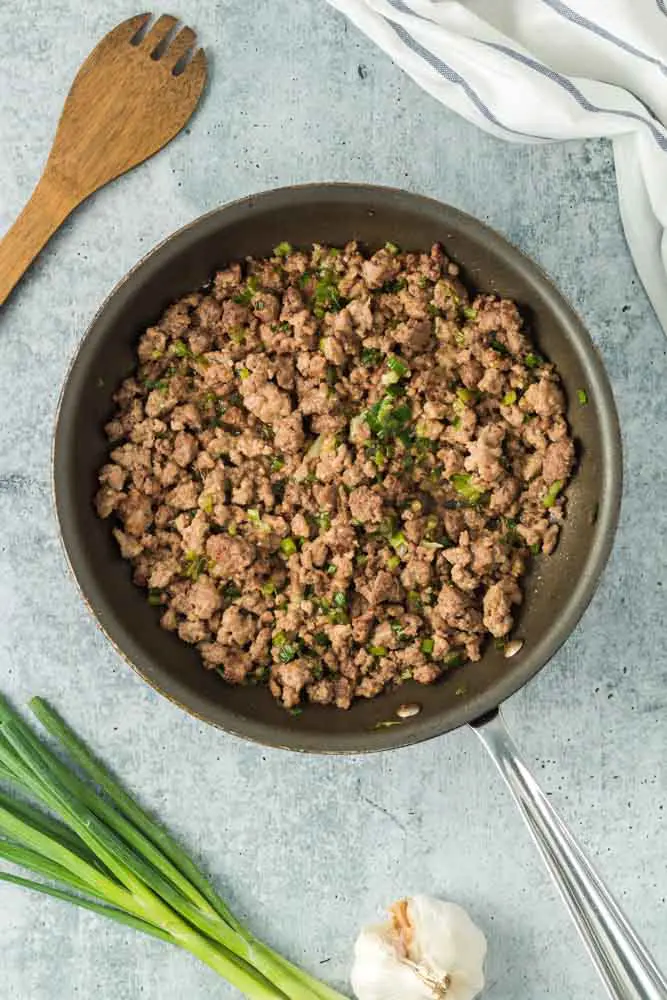
    • Gently mix together until the dough forms large crumbles. Add the green onions and lightly mix.
    • Using your hand, make a well in the center of the dry ingredients and add the sour cream and ½ cup plus 2 tablespoons of milk. Reserve 2 tablespoons to be used if needed.
    • Combine the wet and dry ingredients using your hands until the dough just starts to come together. Use the reserved milk if necessary, adding one tablespoon at a time. Bring the dough together into a loose ball in the center of the bowl.
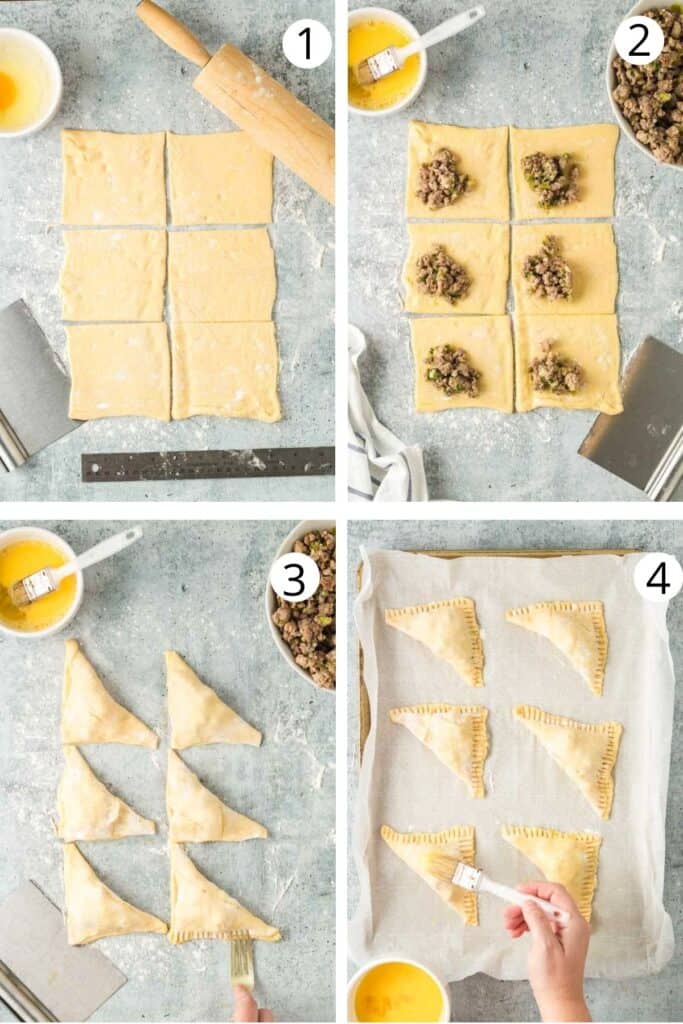
    • Using a butter knife, cut the dough ball in half and place one half on top of the other. Gently press down to combine the two halves. Repeat this two more times.
    • Place the dough into the prepared skillet. DO NOT SMASH THE DOUGH. Instead, gently spread the dough to fill the skillet. If you push down on the dough, the biscuits will be tough. The dough spreads when baking so don't fuss too much about filling every nook of the skillet.
    • Beat the egg with 1 tablespoon of water. Brush the top of the biscuit dough with egg wash and sprinkle with a pinch of extra salt if desired. Bake for 25 minutes. Cool for 5-10 minutes before serving.

    Video

    https://www.tiktok.com/t/ZTRcoTgkC/

    Frequently Asked Questions

    I don't like onions. Do I have to include it?

    No, you can leave the onions out but don't exclude the sour cream.

    Can I make my skillet biscuit ahead of time?

    Biscuits are best when eaten fresh from the oven. I don't recommend making it too long before serving.

    My biscuit turned out tough. What happened?

    There are two most common reasons skillet biscuits go tough. First, make sure your butter, milk and sour cream are all really cold. Try to work quickly when making the dough so the heat from your hands doesn't warm up the ingredients. Second, did you smash the dough down before baking? Be sure to spread the dough, not smash it, to fill the skillet.

    Bacon Pesto Pasta

    March 30, 2023 by Hailey 4 Comments

    White bowl filled with bacon pesto pasta.

    Bacon Pesto Pasta is the perfect quick weeknight dinner. Store-bought pesto makes this recipe simple and easy to put together. Bonus- a healthy dose of greens means you can feel good about eating it, too!

    White bowl filled with bacon pesto pasta.

    Bacon and greens are a delightfully classic duo. The smoky and salty flavors of bacon are the perfect complement to earthy greens. The pesto cream sauce brightens up the flavor, and a dash of balsamic vinegar brings it all to life.

    If you’re a fan of easy pasta dishes, Bacon Pesto Pasta is right up your alley.

    Ingredients

    To make Bacon Pesto Pasta, you’ll need:

    • Bacon
    • Pasta- I used penne, but any type will work.
    • Pesto
    • Cream
    • Greens- I used collard greens, but any green works. See the ‘Substitutions’ sections for ideas.
    • Pecorino Romano cheese- Parmesan would also work.
    • Onion
    • Garlic
    • Butter
    • Balsamic vinegar
    • Red pepper flakes
    • Black pepper
    Ingredients for Bacon Pesto Pasta.

    Instructions

    Making this recipe is unbelievably easy. A couple of steps ahead of time can make the recipe even faster. Knock out steps one and two beforehand for an extra speedy dinner. To create Bacon Pesto Pasta, you need to:

    1. Clean and cut your greens. Most greens have a lot of dirt on them, so be sure to clean them well. My favorite way to clean them is to soak the leaves in a few inches of water. Toss the greens a bit to loosen any dirt, then let them sit for a few minutes so the dirt settles to the bottom. Once clean and dry, remove the stem and cut the greens into pieces. Check out the image below for a visual on how to trim. This article also includes more details on cleaning greens.
    2. Cook the bacon. I like to cook bacon in the oven (400° for 20 minutes, flipping halfway through), but use whatever method you like.
    3. Prepare the pasta according to package instructions.
    4. Cook the onions and garlic in butter. Once soft, add the greens and vinegar.
    5. Add the pesto, cream, cooked pasta, and half of the grated cheese.
    6. Serve it up, garnishing with extra cheese and red pepper flakes.
    Two collard green leaves on a dark wood cutting board. One has the stem removed and the other is cut into pieces.

    Substitutions

    You can get creative with your Bacon Pesto Pasta. There are a few ingredients you can substitute to suit your preferences. First, if you’d rather use Canadian or turkey bacon to cut down on the fat and salt, feel free! I don’t use bacon fat from cooking in the recipe, so any variety of bacon or ham will work.

    Next, there are so many different options for dry pasta. I used penne pasta, but bowtie, rotini, or elbow macaroni would all work as substitutes. You could even switch out the short pasta for a longer style like spaghetti or fettuccine if you prefer. There isn’t a wrong pasta choice for this dish.

    Sauteed onions and garlic in a saute pan next to the second step of cooking greens with onion and garlic in the same pan.

    Lastly, the greens you pick for this recipe should suit your taste. I use collard greens because I like the texture they keep after cooking. Mustard or turnip greens, as well as kale, would work as substitutes if you want to maintain some bite in your greens.

    Alternatively, you can use baby spinach or baby kale as a sub if you want the greens to be softer after cooking. Baby greens like these will wilt more quickly and have the added benefit of coming clean and ready to use. If you don’t want to include the greens, omitting them completely is also an option.

    Large black pan filled with cooked greens, bacon, garlic and onions next to the final step of combining the pasta and sauce with the greens.

    Variations

    If you want to boost the protein in your Bacon Pesto Pasta, feel free to add chicken or shrimp. Cook the protein in bacon fat for extra bacony goodness.

    Storage

    • Serve: Best served hot and fresh, garnished with red pepper flakes and grated Pecorino Romano.
    • Store: Can be kept in an airtight container in the fridge for up to three days before eating.
    • Freeze: I don’t like how pasta freezes, so I wouldn't advise freezing.
    Two white bowls filled with bacon pesto pasta.

    Top tip

    Bacon Pesto Pasta is a quick recipe, no matter how it’s made, but if you want to speed up prep, cook the bacon and prepare the greens (including cleaning and chopping) beforehand. If you knock out these prep steps ahead of time, you can easily make the entire recipe in 20 minutes.

    If you're a fan of Bacon Pesto Pasta, be sure to check out all of my other delicious pasta recipes, like Creamy Garlic Chicken Pasta and Cajun Shrimp and Sausage Pasta.

    @cookingandcussingblog

    Bacon Pesto Pasta is the kind of weeknight dinner I love. It’s quick and easy but still a flavor 💣. https://cookingandcussing.com/bacon-pesto-pasta/ #easypasta #baconfordinner #pestopasta #eatyourgreens #weeknightdinner

    ♬ Sunshine - WIRA
    White bowl filled with bacon pesto pasta.
    White bowl filled with bacon pesto pasta.
    Print Recipe
    5 from 6 votes

    Bacon Pesto Pasta

    Bacon Pesto Pasta is a quick and simple weeknight dinner. Store-bought pesto keeps the recipe easy and greens keep it healthy
    Prep Time10 minutes mins
    Cook Time20 minutes mins
    Total Time30 minutes mins
    Course: Main Course
    Cuisine: American
    Servings: 4

    Ingredients

    • 8 slices thick cut bacon cooked and drained of excess fat
    • 4 cups collard greens* cleaned, destemmed and roughly chopped
    • 8 oz dry penne pasta
    • 2 Tb salted butter
    • 1 Tb olive oil
    • 1 yellow onion thinly sliced
    • 2 cloves garlic finely minced
    • 2 Tb balsamic vinegar
    • 6.5 oz pesto sauce
    • 1 cup heavy cream
    • ¼ teaspoon ground black pepper
    • ¾ cup grated Pecorino Romano cheese divided
    • red pepper flakes optional garnish

    Instructions

    • Prepare the pasta according to package instructions. Reserve one cup of pasta water to thin out the sauce, if necessary.
    • Roughly chop the cooked bacon. Set aside ¼ cup to be used as a garnish.
    • Add the butter and oil to a large saute pan over medium heat. Once hot, add the sliced onion and minced garlic. Cook until soft or 3-5 minutes.
    • Add the chopped greens and balsamic vinegar. Cover the pan with a tight lid. After a minute, remove the lid and stir well. Place the lid back on for another minute or until the greens wilt.
    • Once the greens have reached your desired texture, reduce the heat to low and add the chopped bacon, pesto sauce, heavy cream, and black pepper. Mix well to combine.
    • Add the cooked pasta and ½ cup of grated Pecorino. Toss until well combined.
    • Garnish servings with additional chopped bacon, grated cheese, and red pepper flakes.

    Video

    https://www.tiktok.com/t/ZTRcDa1CA/

    Notes

    * You can substitute any greens you like. Mustard or turnip greens will be similar to collard greens. If you prefer a more tender green, try baby spinach or baby kale.

    Frequently Asked Questions

    I don't like collard greens. Do I have to include them?

    No. You can use any kind of greens you like or omit them. See the 'Substitutions' sections for more details on options.

    Pimento Mac and Cheese

    March 19, 2023 by Hailey 6 Comments

    Wooden spoon scooping out a serving of pimento mac and cheese.

    Pimento Mac and Cheese is a delectable combination of two of the South’s greatest food creations- macaroni and cheese and pimento cheese. My pimento cheese recipe is extraordinary and makes the perfect base for mac and cheese.

    Wooden spoon scooping out a serving of pimento mac and cheese.

      I feel pretty confident most of you have had macaroni and cheese so no explanation necessary on how delicious it is, but you may have never tried pimento cheese. If you’ve never had it, traditionally pimento cheese is a mixture of shredded cheddar, pimento peppers, and mayonnaise.

      My Best Ever Pimento Cheese recipe takes this basic idea and makes it extra flavorful and tangy. The recipe includes cream cheese which you might expect in macaroni and cheese, but the Boursin cheese is what really makes my Pimento Mac and Cheese extra special.

      Ingredients

      With only a few simple ingredients, you can make homemade Pimento Mac and Cheese. All you need is:

      • Pimento cheese- my recipe is the best there is, but if you have a brand you like, feel free to use it
      • Elbow macaroni
      • Whole milk- do not substitute with 2% or skim milk
      • Butter
      • Flour
      • Shredded colby jack cheese
      Ingredients for Pimento Mac and Cheese.

      Homemade pimento cheese is incredibly easy to make and can be stored in the fridge for up to two weeks. If you want to make this recipe quickly, be sure to make the pimento cheese ahead of time.

      Instructions

      The steps to make Pimento Mac and Cheese are pretty similar to how you make most homemade macaroni and cheese. There are only a few easy steps to follow.

      1. Make homemade pimento cheese at least an hour before assembling the mac and cheese
      2. Boil macaroni noodles
      3. Make a white sauce with a mixture of butter, flour, and whole milk
      4. Combine cooked noodles, white sauce, pimento cheese, and shredded cheese and pour into a 9” x 13” baking dish
      5. Top with additional shredded cheese and bake
      Cooked noodles in a large glass bowl with white sauce, pimento cheese and shredded cheese on the side.

      Substitutions

      Because the ingredient list is so simple for this recipe, there are not a ton of substitution options. You could play around with your choice of shredded cheese. I include colby jack in the recipe, but mild or sharp cheddar would both be delicious. You could really use any kind of cheese you like.

      I suspect that one of the more common questions I’ll get is if you can use store-bought pimento cheese instead of making it from scratch. In all of my recipe testing, I never tried using store-bought pimento cheese. Once you’ve had homemade, it’s hard to go back to the store-bought spread.

      No shade though; if you have a brand of store-bought pimento cheese you’d rather use, by all means go for it. What I will say is that most store-bought varieties contain only mayonnaise as the binder, so the mac and cheese will not have the same tang that my pimento cheese recipe provides.

      Noodles combined with white sauce, pimento cheese, and shredded cheese in a large glass bowl.

      Storage

      • Serve: Best when served hot from the oven.
      • Store: Can be kept for up to five days in an airtight container in the fridge.
      • Freeze: Mac and cheese tends to dry out in the freezer, so I don't often freeze it. This article has some good tips if you're interested in freezing the dish.
      Pimento Mac and Cheese before and after baking.

      Top tip

      My top tip for Pimento Mac and Cheese will come as no surprise if you’ve already read most of the post. The hot tip is to make my Best Ever Pimento Cheese instead of trying to substitute it with store-bought.

      Added bonus - making my recipe will also give you leftovers that you can eat as a snack or use to try some of my other favorite recipes like Pimento Cheese Wontons and Hand Pies.

      Wooden spoon scooping out a serving of pimento mac and cheese.

      Pimento Cheese will always be one of my favorite recipes on the blog. I love it so much that it continues to inspire me to come up with new and creative ways to cook with it. Pimento Mac and Cheese may not be how my Mammaw served up pimento cheese, but she for damn sure would have loved it. I hope you like it too. Let me know what you think of the recipe in the comments section below.

      @cookingandcussingblog

      Pimento Mac and Cheese combines two of the best dishes in southern cuisine into one extra cheesy masterpiece. Warning: there is more macaroni in a pot noise in this video than should legal. https://cookingandcussing.com/pimento-mac-and-cheese/ #macaroniandcheese #macandcheese #pimentocheese #pimentomacandcheese #comfortfood #extracheese #cheez #fyp #viralfood #macaroniinapot

      ♬ Piano Jazz Hip Hop - hope music
      Wooden spoon scooping out a serving of pimento mac and cheese.
      Print Recipe
      4.60 from 10 votes

      Pimento Mac and Cheese

      If you love pimento cheese, you're going to love Pimento Mac and Cheese which combines the classic southern dip with extra cheesy mac n' cheese.
      Prep Time15 minutes mins
      Cook Time30 minutes mins
      Course: Side Dish
      Cuisine: American
      Servings: 8 servings

      Ingredients

      • ½ pound elbow macaroni
      • 1½ cups whole milk
      • 2 Tb salted butter
      • 2 Tb all purpose flour
      • 1 cup pimento cheese* link to recipe in the Notes section
      • 2 cups shredded colby jack cheese

      Instructions

      • Preheat the oven to 375°F. Cook the macaroni noodles according to the package instructions.
      • While the pasta cooks, make the white sauce. Start by adding the butter to a saucepan over medium heat. Once melted, add the flour and stir to combine. Cook for 1 minute, stirring constantly, before whisking in the whole milk. Bring the mixture to a boil, stirring often, and boil for about 5 minutes.
      • Combine the cooked noodles, white sauce, pimento cheese, and 1 cup of shredded cheese in a large mixing bowl. Pour into a 9" x 13" baking dish and top with the remaining 1 cup of shredded cheese.
      • Bake for 25-20 minutes.

      Video

      https://www.tiktok.com/t/ZTR7W5RgP/

      Notes

      My Pimento Cheese recipe is the BEST! It's the only pimento cheese I would use to make this recipe.

      Frequently Asked Questions

      Can I use store-bought pimento cheese?

      Yes, but it will lack the tang that my pimento cheese recipe provides. That's because most store-bought pimento cheese only has mayo as a binder, while my recipe has cream cheese and Boursin cheese.

      Can I use a different kind of shredded cheese?

      Sure. Any cheese that melts well is fine to substitute.

      Jiffy Jalapeño Cornbread

      March 12, 2023 by Hailey 1 Comment

      A slice of Jiffy Jalapeño Cornbread on a grey plate with a green and white striped napkin.

      I don’t know of many recipes that are easier than Jiffy Jalapeño Cornbread, and this cornbread is absolutely delicious! If you like your cornbread spicy and less sweet, you have found your go-to recipe.

      A slice of Jiffy Jalapeño Cornbread on a grey plate with a green and white striped napkin.

      So many of the cornbread recipes out there include lots of sugar or honey. No shade as I like sweets as much as anyone, but I prefer my cornbread to be savory. I don’t include any additional sweetener in my recipe (there is a small amount of sugar in the Jiffy mix). Instead, I load my cornbread up with minced jalapeño and plenty of butter.

      Cornbread is a southern staple, and it is part of my family’s history. My sister and I would spend weeks with my grandparents every summer, and without fail, cornbread was on the table for every single supper. In fact, the orange skillet you see in these photos was the vessel that my Mammaw baked cornbread in for decades.

      Ingredients and Instructions

      Jiffy Jalapeño Cornbread takes only seven simple ingredients to make.

      • Jiffy Corn Muffin Mix
      • Black pepper
      • Baking powder
      • Egg
      • Canned cream-style corn- make sure to get the small 8.25-ounce can!
      • Jalapeño- fresh or pickled
      • Salted butter
      Ingredients for Jiffy Jalapeño Cornbread on a countertop.

      The ingredients and instructions sections are usually split up in my blog posts, but it felt silly giving the instructions for this recipe their own section. There are two steps to the recipe- yep, two.

      1. Combine all of the ingredients except butter to make the batter.
      2. Melt the butter in a skillet in the preheated oven, pour the batter over the melted butter, and bake.
      Cornbread batter being mixed in a glass bowl with a white spatula.

      Variations

      If you don’t want to mess with fresh jalapeño then you could instead use pickled, or you can omit the jalapeño altogether if you don’t want your cornbread spicy. Like your cornbread a little sweet? Feel free to add 2 tablespoons of sugar to the recipe.

      Equipment

      Jiffy Jalapeño Cornbread is baked in a 9-inch skillet. That’s the only way I ever bake cornbread because that’s how my Mammaw did it. You can easily make the recipe in an 8” x 8” baking dish if you don’t have a cast iron skillet. If you're interested in purchasing a skillet, here is a great one from Lodge.

      Skillet of Jiffy Jalapeño Cornbread with an empty box of Jiffy corn muffin mix on the side.

      Top tip

      Instead of combining the melted butter with the batter. I like to pour the batter into a hot pan with melted butter. The easiest way to do that is to place the butter in the skillet and the skillet into the preheated oven for a few minutes. Keep an eye on it though; the butter can burn quickly. When the butter fats just start to brown (around 5 minutes) remove the skillet from the oven and add the batter.

      A slice of Jiffy Jalapeño Cornbread on a grey plate.

      Jiffy Jalapeño Cornbread is a quick and easy recipe with almost no prep and very little cleanup. The cornbread is spicy, salty, and savory- it will be perfect with your favorite soup, stew, or chili!

      There’s really nothing it doesn’t go with, but I recommend it in particular with my Butter Beans or Shrimp and Grits. Try the recipe and let me know what you think in the comments section below.

      @cookingandcussingblog

      Jiffy Jalapeño Cornbread is spicy, soft and super easy to make. It’s also the best sidekick to the Butter Beans recipe in my last post. 👯‍♀️ https://cookingandcussing.com/jiffy-jalapeno-cornbread/ #cornbread #viralfood #sidedish #spicycornbread #spicy #easybread #quickdinnerideas

      ♬ Hip Hop with impressive piano sound(793766) - Dusty Sky

      Helpful Equipment

      black cast iron skillet

      Lodge 9-inch Skillet

      A slice of Jiffy Jalapeño Cornbread on a grey plate with a green and white striped napkin.
      Print Recipe
      4.80 from 5 votes

      Jiffy Jalapeño Cornbread

      Jalapeño Cornbread is spicy, buttery, and salty. You only need seven ingredients for the recipe including the shortcut of Jiffy corn muffin mix.
      Prep Time5 minutes mins
      Cook Time20 minutes mins
      Total Time25 minutes mins
      Course: Side Dish
      Cuisine: American
      Servings: 8 servings

      Ingredients

      • 1 8.5 oz box Jiffy Corn Muffin Mix
      • ½ teaspoon ground black pepper
      • ½ teaspoon baking powder
      • 1 egg beaten
      • 1 8.25 oz can sweet corn cream style
      • 1 jalapeño minced
      • 2 Tb salted butter

      Instructions

      • Preheat the oven to 400°F.
      • Add the Jiffy mix, black pepper, and baking powder to a mixing bowl and stir to combine.
      • Next add the beaten egg, canned corn, and minced jalapeño. Mix until just combined.
      • Add the butter to a 9" skillet and place the skillet in the preheated oven for 3 minutes or until the butter is melted.*
      • Remove the skillet from the oven and carefully pour the cornbread batter into the pan. Place the skillet back in the oven for 20 minutes.
      • Allow the cornbread to cool for 10 minutes before serving.

      Video

      https://www.tiktok.com/t/ZTR778esP/

      Notes

      * If you don't have a cast iron skillet or something similar, the recipe can also be made in an 8" x 8" baking dish.

      Frequently Asked Questions

      Can I bake the cornbread in something other than a skillet?

      Yes. You can use an 8-inch square baking dish.

      Can I substitute a different brand of cornbread mix?

      I have not tried the recipe with any mix other than Jiffy.

      A slice of Jiffy Jalapeño Cornbread on a grey plate with a green and white striped napkin.

      Butter Beans

      March 5, 2023 by Hailey 1 Comment

      Bowlful of butter beans with a spoonful being lifted out.

      Butter Beans have to be one of the most underrated meals on the planet. In my eyes, they are the epitome of comfort food. Not only are beans delicious, but the recipe is easy, and the ingredients are inexpensive.

      Bowlful of butter beans with a spoonful being lifted out.

      If you’ve never had butter, or lima beans before, you’re in for a treat! The flavor of butter beans is milder than most, and the texture of the cooked beans is oh-so-creamy. When properly cooked, lima beans have a texture that is close to mashed potatoes. They are pillowy soft and silky smooth.

      Butter Beans have been part of my life for as long as I can recall. My mammaw cooked them for my family constantly. She loved making them so much that she would even serve them in the hot summer months. Personally, I cook Butter Beans most often when the weather is cool and crispy, but they are wonderful at any time of year.

      I think Mammaw would love this recipe.

      Ingredients

      The ingredients list for Butter Beans is humble and unintimidating. In today’s wildly expensive grocery landscape, it’s also worth pointing out that the ingredients are CHEAP. The recipe makes anywhere from 8-10 portions and freezes beautifully, so it is a great choice for your stomach AND your wallet.

      To make Butter Beans, you need:

      • Carrots
      • Celery
      • Onion
      • Jalapeño- it doesn’t make the beans spicy if you remove the seeds
      • Ham hock- basically a pig’s ankle that is smoked and cured like bacon; it is absolutely essential to the flavor!
      • Large lima beans
      • Chicken stock- feel free to use homemade, store-bought or bouillon
      • Bay leaves
      • Black pepper
      • Garlic powder
      • Pepper juice- any juice from a jarred pepper like banana or pepperoncini
      Ingredients for butter beans.

      Instructions

      This recipe is about as easy as they come. The most time-intensive part of making Butter Beans is chopping up the vegetables. After that, it is completely set-and-forget as long as you’re using a slow cooker.

      For those of you that are bean experts, you may have noticed that I do not recommend soaking the dried beans overnight. I tried every cooking method (stovetop, slow cooker, and pressure cooking) when recipe testing Butter Beans and experimented with soaked and dried beans for each method.

      The combo that produced the best beans was cooking unsoaked beans in the slow cooker. When soaked, no matter how the beans were cooked, a lot of the beans burst from their skin while cooking which is not what we want.

      To make the beans:

      1. Chop the carrots, celery, onion and jalapeño. Saute for 5-7 minutes.
      2. Add the beans, ham hock, bay, pepper, garlic powder and chicken stock.
      3. Slow cook on high for 7-8 hours or until beans are soft.
      4. Ladle into a bowl and garnish with 1-2 teaspoons pepper juice.
      Vegetables sauteeing for butter beans.

      Variations

      You could go one of two ways with my Butter Beans recipe- extra meaty or vegetarian. The recipe as it’s written has meaty flavors from the chicken stock and ham hock, but no other meat. If you would prefer more protein, add in sliced beef smoked sausage about an hour before the cooking finished is done to heat through.

      Alternatively, if you would like to make the beans vegetarian just replace the chicken stock with vegetable and omit the ham hock. Not using the ham hock will change the flavor of the recipe, so I recommend adding your favorite umami ingredient (something like Trader Joe’s Umami Seasoning) to amp up the savory flavor.

      Equipment

      I make Butter Beans using the slow cook function on my Instapot. A traditional slow cooker or crockpot will also work. If you don’t have a slow cooker of any variety, you can also make the recipe stovetop. Check out the notes section in the recipe below for more details.

      Butter beans being ladled from a black saucepan.

      Storage

      • Serve: Ladle into a bowl while hot and garnish with 1-2 teaspoons of pepper juice.
      • Store: Store in an airtight container in the fridge for up to five days.
      • Freeze: This recipe freezes extremely well. Allow the beans to cool completely before portioning into individual servings for freezing.
      • Reheat: Can be heated directly from frozen or thawed. To thaw, place in the fridge for 24 hours. Use a microwave or stove on low to reheat.

      Top tip

      There are two ingredients in my Butter Beans recipe that take the flavors to extraordinary- the ham hock and the pepper juice. Ham hocks may look somewhat terrifying, but they are the backbone of so many delicious southern slow-cooked dishes. Look for ham hocks in the meat section of the grocery store, typically near sausages.

      Pepper juice as a finisher is something I picked up in my adult life. Mammaw didn’t include a garnish of pepper juice, but it adds the perfect acidic zing to a very earthy and unctuous recipe. It is listed as optional, but don’t skip out!

      Bowlful of butter beans with a spoonful being lifted out.

      There is absolutely nothing better with Butter Beans than cornbread so be sure to checkout my Jiffy Jalapeño Cornbread. A close second would be homemade biscuits like my Buttermilk Biscuits. Crackers are also an option if you want to keep it simple.

      Butter Beans are a part of the fabric of my food history. They are one of my favorite things to eat not only because they’re tasty but also because of the memories they evoke for me. I hope you have a chance to try Butter Beans and feel the comfort of Mammaw’s table.  Let me know what you think in the comments section below.

      https://www.tiktok.com/@cookingandcussingblog/video/7207196509383937326?_r=1&_t=8aP2H3RHrYI
      Bowlful of butter beans with a spoonful being lifted out.
      Print Recipe
      3.67 from 3 votes

      Butter Beans

      Butter beans, or lima beans, are the perfect Southern comfort food. The ingredients are inexpensive, the recipe is simple, and the flavors are delicious!
      Prep Time15 minutes mins
      Cook Time8 hours hrs
      Course: Main Course
      Cuisine: American
      Servings: 8 cups

      Equipment

      • 1 slow cooker or instapot with slow cook function

      Ingredients

      • 1 cup diced carrot
      • 1 cup diced celery
      • 1 cup diced onion
      • ¼ cup finely diced jalapeño seeds removed
      • 2 Tb olive oil
      • 16 oz large lima beans
      • 1 ham hock
      • 2 bay leaves
      • 1 teaspoon garlic powder
      • ½ teaspoon ground black pepper
      • 10-12 cups chicken stock
      • ¼ cup pepper juice* optional garnish

      Instructions

      • Optional: Saute the diced vegetables for 5-7 minutes over medium heat.
      • Add diced veggies along with all of the other ingredients (except for pepper juice) to a slow cooker or Instapot with a slow cooker function. If you don't have either, check out the notes for stovetop instructions. Add enough chicken stock to cover all the ingredients by 2 inches.
      • Set your slow cooker to high and cook the beans for 7-8 hours. Remove the bay leaves before serving. Ladle into a bowl and add 1-2 teaspoon of pepper juice.

      Video

      https://www.tiktok.com/t/ZTRWfocJV/

      Notes

      If you don't have a slow cooker, you can prepare the beans on the stove in a large pot or dutch oven. Once you have added the chicken stock, bring the liquid to a boil. Once boiling, turn the heat down to a simmer and cover with a lid. I like to leave the lid cracked open just a bit to let some steam escape. The beans will take 5-6 hours on the stove but will need to be stirred every 20 minutes to prevent the bottom from burning. 
      *Pepper juice is the brining liquid from any jarred pepper like banana or pepperoncini. 

      Frequently Asked Questions

      I don't have a slow cooker. Can I make the recipe on the stove?

      Yes. Details are listed in the notes section of the recipe.

      Can I add more meat to the recipe?

      Sliced smoked beef sausage or diced ham steak would make good additions. Add to the pot when there is an hour of cooking time left.

      Can I make the recipe vegetarian?

      Yes. Use vegetable stock instead of chicken and omit the ham hock. Use an umami seasoning to add back some savory flavors.

      Chipotle Chicken Avocado Melts

      February 23, 2023 by Hailey Leave a Comment

      Chipotle Chicken Avocado Melt on a grey plate.

      Chipotle Chicken Avocado Melts are for those of us who like a more exciting chicken sandwich. If you’re craving a chicken sandwich that is packed with spice and heat, you’ve found your match.

      The idea for this sandwich came to me when I was brainstorming ways to use my Easy Chipotle Sour Cream Sauce. Truthfully, I had a batch leftover from taking photos that I didn’t want to go to waste. I love chicken sandwiches, so I started there. My Cilantro Chicken Sandwiches recipe has a bomb marinade that pairs perfectly with the flavor of chipotle, so I used it here too.

      Then I started layering on ingredients to complement the flavors of the marinade and sauce. The result of this experiment is the recipe below. Now, in researching to write this post, I realized there is in fact a certain national chain that sells a sandwich by the same name. My Chipotle Chicken Avocado Melts have nothing in common with theirs; mine are better, duh.

      Ingredients

      The ingredient list may look a little long but that’s just because the marinade is absolutely PACKED with flavor. You probably already have most of the spices in your cabinet. For the marinade, you’ll need:

      • Salt
      • Chili powder
      • Coriander
      • Cumin
      • Oregano
      • Cayenne pepper
      • Lime- zest only
      • Oil
      • Fresh cilantro- if you hate it, you can omit
      • Boneless skinless chicken thighs- or breasts if you prefer

      Once the chicken has marinaded, you’ll need a few other ingredients to assemble the sandwich melts.

      • Lime- juice only
      • Red onion
      • Jalapeño
      • Avocado
      • Sliced pepper jack cheese
      • Ciabatta rolls- don’t sub with a soft bun; you want something with a crisp exterior and chewy texture
      • Chipotle Sour Cream Sauce

      Instructions

      The ingredient list for Chipotle Chicken and Avocado Melts may look long, but the recipe is simple to make. To make the sandwiches, you’ll need to:

      1. Make the marinade and add the chicken. Let marinade for an hour.
      2. Pickle the onion and jalapeño in lime juice.
      3. Mash an avocado.
      4. Toast the buns and add the cheese.
      5. Layer the buns with chicken, mashed avocado, pickles onions and jalapeño, and a generous smear of Chipotle Sour Cream Sauce.

      Substitutions

      There are a few ingredients where you can make changes if you’d prefer. First, if you don’t like cilantro, feel to omit it from the marinade. You could also replace it with fresh parsley, but it’s not required. The marinade will still have plenty of flavor from all of the dried spices.

      Next, I use chicken thighs in the recipe because I like the dark meat flavor with the bold marinade, but boneless skinless chicken breasts would work as well. Last, feel free to use whatever sliced cheese you like. Cheddar, Colby jack, or provolone could all be subs for the pepper jack.

      When it comes to the choice of buns, you do NOT want something soft like a hamburger bun. The ciabatta roll brings the perfect crispy exterior and chewy inside that this sandwich needs. If you can’t find ciabatta, a baguette or similar hardy bread would be a good substitute. You could also use sliced sourdough.

      Feeling extra Martha Stewart?? You could make your own ciabatta rolls with this recipe.

      Top tip

      For maximum flavor impact, be sure to let your chicken brown to a dark golden color. The dark crispy edges bring that extra something to the sandwich.

      Chipotle Chicken Avocado Melts will spice up your dinner table! Check out the recipe and let me know what you think in the comments below. If you like this sandwich recipe, don't miss out on my Pizza Burger Sliders or Hawaiian Chicken Sandwiches.

      @cookingandcussingblog

      Chipotle Chicken Avocado Melts are what spicy chicken sandwich dreams are made of. 🐔 💗 🌶️ https://cookingandcussing.com/chipotle-chicken-avocado-melts/ #fyp #foryoupage #chickensandwich #spicychicken #sandwichtiktok

      ♬ Garden - 3scope
      Chipotle Chicken Avocado Melt on a grey plate.
      Print Recipe
      5 from 2 votes

      Chipotle Chicken Avocado Melt

      If you like your chicken sandwiches cheesy, spicy, and packed with flavor, Chipotle Chicken Avocado Melts are for you!
      Prep Time1 hour hr
      Cook Time20 minutes mins
      Total Time1 hour hr 20 minutes mins
      Course: Main Course
      Cuisine: American, Mexican
      Servings: 4 sandwiches

      Ingredients

      Chicken Marinade

      • 1 teaspoon kosher salt
      • 2 teaspoon chili powder
      • ½ tsp coriander
      • ½ teaspoon cumin
      • ½ teaspoon oregano
      • pinch cayenne pepper
      • 1 lime zest only
      • ½ bunch cilantro finely chopped
      • ½ cup canola oil

      Sandwiches

      • 4 boneless skinless chicken thighs or breasts
      • 1 lime juice only
      • ½ red onion thinly sliced
      • 2 jalapeños
      • 1-2 avocado
      • 4 slices pepperjack cheese
      • 4 ciabatta rolls
      • ½ cup Chipotle Sour Cream Sauce (link in notes)

      Instructions

      • Make the marinade by combining all ingredients. Add the chicken thighs and toss to combine. Store in the fridge for 30 minutes to an hour.
      • While chicken marinades, prepare the pickled onions and jalapeños. Cover the thinly sliced onions and jalapeños with the juice of a lime and a pinch of salt. Toss to combine.
      • Once the chicken has marinaded, remove each piece and let the excess marinade shake off before adding to a hot pan over medium-high heat. Cook for 5-7 minutes per side or until cooked through.
      • Preheat the oven to broil. Open each ciabatta roll and place on a baking sheet. Toast the rolls under the broiler for 2 minutes.
      • After toasting, add a piece of cheese to one side and a cooked chicken thigh to the other and return to the broiler for 1 minute or until cheese is melted.
      • Remove the seed from the avocado and roughly smash with a fork.
      • To assemble the sandwiches, top the chicken with a generous serving of smashed avocado, pickled jalapeño and onion, and Chipotle Sour Cream Sauce. Add the top of the roll and enjoy!

      Video

      https://www.tiktok.com/t/ZTRWyYaJC/

      Notes

      Chipotle Sour Cream Sauce

      Frequently Asked Questions

      I hate cilantro. Do I have to use it?

      Nope, feel free to just leave it out or substitute it with fresh parsley.

      I can't find ciabatta rolls. Can I use a normal hamburger bun?

      No. If you can't find ciabatta, you want bread that has a sturdy crust like a baguette or sourdough bread. A hamburger bun will be too soft.

      Air Fryer French Bread Pizza

      February 9, 2023 by Hailey Leave a Comment

      Air fryer french bread pizza sliced into pieces on a dark wooden cutting board

      If you came from a home where TV dinners were on the rotation, you probably enjoyed a French Bread Pizza straight from the box. As much as I enjoyed the nostalgic version, Air Fryer French Bread Pizzas are just as fast to make but way more delicious.

      Air fryer french bread pizza sliced into pieces on a dark wooden cutting board

      Pizza is one of the world’s favorite foods for good reason; it’s addictively delicious and totally customizable. French Bread Pizza is one of America’s many spins on the dish. The pizza crust is replaced by a toasted slice of baguette or French bread. The rest is up to you.

      Ingredients

      Air Fryer French Bread Pizzas can include any type of sauce and toppings you like. I am a sucker for the combination of Italian sausage and greens, so that’s how I’ve written the recipe. Bread is the perfect vessel to stand up to this substantial filling, but if you prefer your pizza as plain cheese or pepperoni, make it that way!

      To make my Air Fryer French Bread Pizza recipe, you only need a few simple ingredients.

      • Baguette- or French bread
      • Pesto-
      • Mayo
      • Italian sausage- sweet or spicy
      • Baby spinach
      • Vinegar- I recommend sherry vinegar but it can be hard to find. Apple cider vinegar works too.
      • Fresh mozzarella pearls- or thin sliced mozzarella
      • Red chili flakes (optional)
      • Balsamic glaze (optional)
      Ingredients for Air Fryer French Bread Pizza

      Instructions

      It’s funny that French bread pizzas are sold prepared in the frozen section when they seriously take less than 10 minutes to assemble. This entire recipe takes about 20 minutes and half of that to cook the ground sausage.

      If you like your dinner extra quick, buy cooked ground sausage which will cut the recipe time in half. Either way, the recipe is simple and the steps are easy to follow.

      1. Cook the ground sausage and spinach with vinegar and red chili flakes. Once slightly cooled, add the mozzarella pearls.
      2. Make the sauce by combining pesto and mayo.
      3. Slice open the bread and remove some of the insides to make room for fillings.
      4. Toast the bread in the air fryer for a minute or two.
      5. Fill each bread boat with sauce then toppings.
      6. Bake for additional 5 minutes and serve.
      Sausage and spinach cooked in a large black pan next to the sausage being combined with mozzarella in a glass bowl.

      Substitutions

      In my recipe, I recommend a baguette instead of “French Bread”. French bread is typically wider than a baguette, and it’s also much softer in texture. Personally, I love the hardy texture of a baguette and the crunch it gives to the toasted pizzas. If you like a softer texture or can’t find a baguette at your grocery store, French bread is a fine substitute.

      Bread for french bread pizza before toasting and after toasting and filling with sauce.

      Also, any kind of mozzarella will work in this recipe. Fresh mozzarella is always my preference for pizza. That’s how you get those delicious cheese pulls that we all love when eating pizza. Shredded mozzarella will work though if that’s what you have.

      I recommended mozzarella pearls in the recipe because tossing them with the other ingredients gives a better distribution of cheese throughout the pizza. I’ve also used thin-sliced fresh mozzarella for my air fryer pizzas and it works well.

      French bread pizza after being filled but before cooking compared to after baking.

      Variations

      There are as many variations of Air Fryer French Bread Pizzas as there is pizza in general. Needless to say, I could write an incredibly long blog post about pizza variations, but I’m not an expert. You are! Everyone has their own favorite pizza combinations. Any and all combinations work so try out as many variations as you like.

      Your freedom of choice is not just for toppings either. My recipe features a pesto-mayo sauce, but traditional marinara, pizza sauce, alfredo sauce, or garlic spread would all be delicious. Pick your sauce and pile on the toppings. You can’t go wrong.

      Air fryer french bread pizza on a dark wooden cutting board

      Equipment

      As the recipe name suggests, Air Fryer French Bread Pizzas do require an air fryer. If you don’t already have one, consider purchasing one if it makes sense for you. Here is a link for the exact one you see me using in the video. I use it almost daily. Think of it like a toaster oven but better.

      If you don’t have or want one, the recipe can also be made using the broiler in your oven. I sort of hate broilers as I always manage to walk away for 15 seconds and burn the sh*t out of whatever I’m making. That may just be me, so I added some notes at the bottom of the recipe on how to adjust the cooking time if using a broiler.

      Storage

      • Serve: The pizzas should be served hot and fresh from the air fryer.
      • Store: If you have leftovers, they can be kept in an airtight container in the fridge for up to 3 days.
      • Freeze: French bread pizzas freeze well. Once fully cooked, let the pizzas cool completely in the fridge before wrapping in plastic wrap and then foil to protect from freezer burn. They can be kept in the freezer for about 2 months.
      • Defrost: Allow the pizzas to thaw in the fridge for 24 hours before reheating.
      • Reheat: Pizzas are best reheated in the air fryer. Use a temperature of 350° and heat for 3-5 minutes.
      Air fryer french bread pizza sliced into pieces on a dark wooden cutting board

      Top tip

      Air Fryer French Bread Pizzas cook quickly. That’s part of their charm and why you’ll come back to this recipe over and over. They can also go from perfectly cooked to overly toasted (or burnt) in a matter of a minute or less.

      Stay close to your air fryer when preparing the recipe and check the pizza a minute before the cooking time is done to be sure your pizza is cooked just right.

      Air fryer french bread pizza sliced into pieces on a dark wooden cutting board

      French bread pizza is a family-friendly quick dinner option, but that doesn’t mean it has to come from the freezer section. Air Fryer French Bread Pizza made with fresh ingredients will have you questioning why you’ve been having pizza delivered this long. Check out the recipe and let me what you think in the comments section below.

      Looking for some other fun pizza dinner options? Check out my Barbecue Chicken Flatbreads or Cantaloupe and Prosciutto Pizza. Both are jam-packed with flavors that will surprise and delight!

      @cookingandcussingblog

      Air Fryer French Bread Pizza is hot and ready to eat in 20 minutes. It’s cheesy, crispy, #pizza deliciousness. https://cookingandcussing.com/air-fryer-french-bread-pizza/ #viral #fyp #foryoupage #airfryerrecipes #airfryerpizza #frenchbreadpizza #quickdinner #superbowlsnacks

      ♬ Low Down - venbee & Dan Fable
      Air fryer french bread pizza sliced into pieces on a dark wooden cutting board
      Print Recipe
      3.67 from 3 votes

      Air Fryer French Bread Pizza

      Homemade French Bread Pizza is super quick and easy when prepared in the air fryer. Air Fryer French Bread Pizzas take 20 minutes to make and will disappear even faster.
      Prep Time12 minutes mins
      Cook Time8 minutes mins
      Total Time20 minutes mins
      Course: Main Course, Snack
      Cuisine: American
      Servings: 4 pizzas

      Equipment

      • 1 Air Fryer

      Ingredients

      • 1 baguette or French bread loaf
      • 1 lb ground Italian sausage
      • 4 cups fresh baby spinach
      • 1 Tb sherry vinegar
      • ¼ teaspoon red chili flakes optional
      • 8 oz mozzarella pearls
      • ¼ cup mayonaisse
      • ¼ cup prepared pesto
      • balsamic glaze optional garnish

      Instructions

      • Brown the ground sausage over medium-high heat for 5-7 minutes or until cooked through.
      • Once cooked, add the spinach and sherry vinegar and mix to combine. Continue to cook until spinach is wilted. Turn off the heat and pour the mixture into a bowl. Set aside to cool.
      • Prepare the baguette by cutting it into two equal pieces first and then split each piece vertically to expose the inside of the loaf. Remove some of the bread from the inside but be careful to keep the exterior intact.
      • After the sausage has cooled for a few minutes, add the red chili flakes and mozzarella pearls. Mix well to combine.
      • Preheat the air fryer. Toast the bread for 1-2 minutes at 400° and remove from the basket.
      • Mix together the mayo and pesto. Generously cover the toasted bread with pesto mayo. Next, spoon on as much filling as desired.
      • Place the pizzas back in the air fryer for 5 minutes at 370°.
      • Optional: drizzle with balsamic glaze before serving.

      Video

      https://www.tiktok.com/t/ZTRGKE1Xk/

      Notes

      If you don't have an air fryer, the recipe can be made using the broiler setting on your oven. To toast the bread, broil on high for 1-2 minutes. Once filled, broil the pizzas for 3-5 minutes but watch them closely as it's easier to burn them under a broiler.

      Frequently Asked Questions

      Is a baguette the same thing as French bread?

      No, but either will work in the recipe. French bread is usually wider and softer than a baguette.

      Can I use different toppings than sausage and spinach?

      Absolutely! You can use whatever sauce or toppings you like.

      Can I make the recipe in the oven instead?

      Yep. Take a look at the notes section of the recipe card for more details.

      Salted Caramel Pudding

      February 5, 2023 by Hailey 1 Comment

      Homemade salted caramel pudding topped with whipped cream and a piece of caramel corn in a mini glass trifle glass.

      Salted Caramel Pudding from scratch is sinfully delicious yet surprisingly easy to make. Homemade salted caramel is combined with fresh milk, cream, and eggs for a heavenly dessert.

      Homemade salted caramel pudding topped with whipped cream and a piece of caramel corn in a mini glass trifle glass.

      Salted caramel is one of my all-time favorite flavors. I’m a fan of any salty-sweet combination, and this recipe absolutely hits the spot. Homemade pudding is a lot easier to make than you might imagine. Compared to the instant variety, homemade pudding has a rich, velvety texture and much more intense flavor.

      Ingredients

      There are so few ingredients required to make Salted Caramel Pudding that you may even have them all in your house right now. To make the recipe, you’ll need:

      • Water
      • Sugar
      • Cream
      • Whole milk
      • Salt
      • Vanilla
      • Egg yolks
      Ingredients for salted caramel pudding.

      Instructions

      If you have not made pudding or custard from scratch, don’t be intimidated by some of the techniques in the recipe that may be new to you. For example, tempering the egg yolks sounds fancy but it just means gradually adding hot liquid to room-temperature yolks while whisking. Sound doable? Of course, it is!

      The steps to make Salted Caramel Pudding are as follows.

      1. Heat the milk and cream in the microwave or on the stovetop. Do not let it come to a boil.
      2. Add the sugar and water to a large pot.
      3. Over low heat and without stirring, allow the sugar to caramelize.
      4. Add the warm milk and cream carefully.
      5. Place the egg yolks into a large bowl. Temper the yolks by slowly adding the warm milk while whisking constantly.
      6. Add the mixture back to the pot. Bring to a boil and boil for 3-4 minutes or until the mixture has thickened to the desired consistency.
      7. Strain and pour into a clean bowl and cover with plastic wrap with the wrap touching the pudding.
      8. Cool for 8+ hours and serve with whipped cream and a crunchy topping.
      Homemade salted caramel pudding topped with whipped cream and a piece of caramel corn in a mini glass trifle glass.

      Variations

      For caramel pudding, variety comes into play with your topping choices. I wouldn’t change up the recipe much, but there are endless ways to top your pudding. Some of my favorites are mini pretzels, chopped chocolate-covered toffee, or caramel popcorn. Salted Caramel Pudding can be topped with whipped cream and:

      • Candy
      • Chips or pretzels
      • Nuts
      • Cookie crumbs
      • Popcorn
      • Chocolate chips

      Top tips

      There are some key details to pay attention to when preparing homemade caramel pudding.

      Making the caramel

      The first is to avoid stirring the water and sugar (or caramel as it cooks). You don’t want to stir it AT ALL. If you do, you risk crystalizing your caramel which will leave you with a grainy texture in the caramel and pudding.

      If you’re having a hard time making caramel, check out this article which shows some helpful hints for avoiding crystallization. Adding corn syrup or honey to the recipe in small quantities would be totally fine.

      Second, make sure to let your caramel get a deep golden brown color before adding the milk. The bitter notes from a nice dark caramel help balance all of the sweetness. You don’t want burnt caramel so keep a close eye on it.

      Also, be sure to use a big pot to make the caramel. You want several inches of space above the caramel because when you add the milk to the hot caramel, it violently boils before coming back to a simmer. If you don’t use a big pot, you will have milk all over your stove.

      Spoonfull of homemade salted caramel pudding being lifted from a mini glass trifle glass.

      Making the pudding

      Next, make sure your egg yolks are at room temperature before tempering. If they are cold, you have a greater chance of having bits of scrambled eggs in your pudding. If that happens, you can strain most of them out but best to avoid that outcome, if possible.

      Last, you need to put the plastic wrap directly in contact with the pudding before chilling. If you don’t, the pudding will develop a skin on top that will need to be scraped off before serving.

      6 mini trifle glasses filled with homemade salted caramel pudding topped with whipped cream and a piece of caramel corn.

      Homemade Salted Caramel Pudding is heavenly all by itself, but it’s fun to dress it up with whipped cream and a little something crunchy. I have included an optional recipe for malted whipped cream. It’s outstanding but any whipped cream – even the kind from a can – works just fine.

      This recipe is a surefire hit with kids and adults alike. If you know someone with a sweet tooth, show them some love with Salted Caramel Pudding. Let me know what you think of the recipe in the comments section below.

      If you love pudding made from scratch, be sure to check out my recipes for Easy Strawberry Trifle with vanilla pudding and Chocolate Delight with chocolate pudding, both made from scratch.

      @cookingandcussingblog

      Salted Caramel Pudding is salty, sweet, smooth and creamy. Need I say more. Live on the blog. https://cookingandcussing.com/salted-caramel-pudding/ #fyp #foryourpage #caramel #homemadecaramel #saltedcaramel #custard #pudding #valentinessweets

      ♬ Storytelling - Adriel
      Homemade salted caramel pudding topped with whipped cream and a piece of caramel corn in a mini glass trifle glass.
      Print Recipe
      5 from 2 votes

      Salted Caramel Pudding

      Salted Caramel Pudding is sweet, salty, smooth, creamy, and easy to make.
      Prep Time5 minutes mins
      Cook Time25 minutes mins
      Course: Dessert
      Cuisine: American
      Servings: 6 servings

      Ingredients

      • ¼ cup water
      • 1 cup granulated white sugar
      • 1 cup whole milk
      • 2 cups heavy cream
      • 1 teaspoon kosher salt
      • 1 teaspoon vanilla extract
      • 4 egg yolks room temperature

      Optional: Malted Whipped Cream

      • 1 cup heavy cream
      • 1 Tb powdered sugar
      • 1 teaspoon malted milk powder
      • ½ teaspoon vanilla extract

      Optional Topping Ideas

      • caramel popcorn
      • mini pretzels
      • chopped toffee

      Instructions

      • Pour the milk and cream into a microwave-safe measuring cup or bowl and heat in one-minute increments until hot. Alternatively, you can heat in a small saucepan on the stove over low heat. You don't want the milk to boil.
      • Add the water and sugar to a large pot. Your pot should have several inches of height. Do not stir the sugar now or anytime while it is cooking. Stirring is the main reason caramel crystallizes.
      • Put the pot over low heat and without stirring, let the sugar dissolve and caramelize until it reaches a deep golden brown. You want a dark color but not burnt caramel so watch it closely.
      • Pour the warm milk and cream into the caramel and stand back because it will violently boil for a brief moment before returning to a simmer. This is why you need a large pot or you will have a large mess.
      • Place the egg yolks, salt, and vanilla in a large heat-safe bowl and have a whisk ready.
      • Once the caramel, milk and cream are well combined, very slowly pour the hot liquid into the egg yolks while rapidly whisking. Don't rush and dump the liquid in too fast or you will have scrambled eggs.
      • Once the egg yolks and caramel mixture are completely combined, pour it all back into the same pot. Place the pot over medium heat and bring to a boil. Boil for 3-4 minutes.
      • Turn the heat off. Place a strainer over a large bowl and pour the hot custard through the strainer to remove any small egg pieces.
      • Once strained, place a piece of plastic wrap directly in contact with the pudding and cover completely. This will prevent a skin from forming on top of the pudding. Place in the fridge for at least eight hours or until cold.
      • Optional: If you're making the Malted Whipped Cream, use a hand mixer to whisk the ingredients together until it forms soft peaks.
      • Optional: Top with whipped cream and something crunchy like caramel popcorn or toffee bits.

      Video

      https://www.tiktok.com/t/ZTRGjynAL/

      Frequently Asked Questions

      Can't I just buy caramel sauce instead of making it from scratch?

      Now, where is the fun in that?! I cannot vouch for how the recipe will turn out without homemade caramel.

      My caramel went grainy. What did I do wrong?

      This happens when you crystallize your caramel. You can't fix it once it's happened. The most common cause is stirring the caramel. If even a single grain of sugar hits the caramel once it's boiling, the caramel will crystallize. Check out my other tips above.

      There are scrambled eggs in my custard. What happened?

      The egg yolks weren't tempered properly. Be sure your egg yolks are at room temperature and when adding the hot mixture to the eggs, do so very slowly while whisking quickly and constantly the entire time. If you have a few tiny pieces of egg, don't fret- that's why the pudding is strained before chilling.

      Jalapeño Popper Wontons

      February 1, 2023 by Hailey 4 Comments

      Jalapeno Popper Wonton split in half to reveal the inside.

      If you love jalapeño poppers, let me introduce you to your new favorite recipe- Jalapeño Popper Wontons. Jalapeño peppers are cut into bite-size pieces and stuffed with a cream cheese filling. Instead of the typical breading, I wrap my poppers in a wonton wrap and fry them until they are crispy perfection!

      Jalapeno Popper Wonton split in half to reveal the inside.

      Jalapeño Popper Wontons bring a whole new level of spice and crunch to your snack game. I came up with this recipe when I was brainstorming for unique Superbowl snack recipes, but please don’t limit it to a football-only treat. This fried, spicy appetizer is perfect for any crowd or occasion.

      Ingredients

      The entire recipe for Jalapeño Popper Wontons is packed with my favorite ingredients. Cream cheese is an ingredient that I never tire of – combined with bacon, chives, and MORE cheese - it’s what dreams are made of. To make the poppers you’ll need:

      • Jalapeno
      • Bacon
      • Pepper jack cheese
      • Cream cheese
      • Chives
      • Black pepper
      • Wonton wraps- usually found in the cold produce area at the store (near bagged salads)
      • Egg
      • Oil
      • Ranch dressing
      The ingredients for jalapeno popper wontons.

      If you’re not drooling just looking at this ingredients list, this may not be the blog for you.

      Instructions

      The most tedious part of making Jalapeño Popper Wontons is the wonton assembly. The rest of the recipe is quick and easy. If you have never made wontons, the process may seem complicated, but it’s easier than you think. This video does a great job of explaining the various way you can fold wontons.

      The jalapeno poppers being stuffed on a dark wooden cutting board.

      All you need to do to make your popper wontons is:

      1. Cut the jalapeño.
      2. Make the cream cheese filling.
      3. Stuff each pepper piece with the filling.
      4. Wrap each pepper piece in a wonton wrap, fold, and seal.
      5. Fry them up!
      Jalapeno popper wontons process shot.

      Substitutions

      Jalapeño Pepper Wontons are meant to be fun, so you can take some creative freedom with the recipe. First off, if you don’t like spicy foods, then mini bell peppers would work as a substitute for jalapeños.

      Cream cheese is a must for this recipe, but you can use any kind of shredded cheese you like. Cheddar, Monterey jack, or even smoked gouda would all be delicious.

      Equipment

      You don’t need any special equipment to make wontons. If you have a deep fryer then by all means use it, but I make my wontons in a frying pan instead. The only difference is that you don’t have to turn the wontons over if you’re deep frying.

      Storage

      • Serve: Jalapeño Popper Wontons should be served hot and fresh from the fryer.
      • Store: Like most fried snacks, wontons will lose their crunch if stored in the fridge. You can reheat them in an air fryer to bring back some texture, but they are never as crisp as they are right after frying.
      • Freeze: You can freeze the stuffed jalapeno pieces and thaw them before making the wontons, but the whole wontons, cooked or not, do not freeze well.
      • Defrost: To thaw the frozen jalapeno poppers, place them in the fridge for 24 hours.
      A black plate of jalapeno popper wontons with a side of ranch.

      Top tip

      Check out this video if you’re worried you can't make wontons. It’s easy and surprisingly fun! The most important thing is to make sure your edges are completely sealed. If your poppers leak while frying, they can be super greasy. The oil will also pop like crazy if that happens which is never fun.

      Also, be sure to only work with one wonton wrap at a time and keep the other wraps in the package and covered with a damp paper towel. Wonton wraps dry out very quickly and then crumble in your hands when you try to fold them.

      Jalapeno Popper Wonton split in half to reveal the inside.

      Jalapeño Popper Wontons are spicy, fried cheese perfection. Don't miss out on this crowd-pleaser! Also, if you like this recipe, be sure to check out my Pimento Cheese Wontons. Let me know what you think of the poppers in the comments section below.

      https://www.tiktok.com/@cookingandcussingblog/video/7194989872917007662?_r=1&_t=8ZV8xfrlmOY
      Jalapeno Popper Wonton split in half to reveal the inside.
      Print Recipe
      4.84 from 6 votes

      Jalapeño Popper Wontons

      Everything you love about a jalapeño popper inside of a crispy fried wonton. Jalapeño Popper Wontons are the spicy snack you don't want to miss.
      Prep Time30 minutes mins
      Cook Time5 minutes mins
      Course: Appetizer
      Cuisine: American
      Servings: 24 wontons

      Ingredients

      • 3 large jalapeños
      • 3 slices cooked bacon
      • ½ cup shredded pepper jack cheese
      • 4 oz cream cheese room temperature
      • 1 Tb chives minced
      • ¼ teaspoon ground black pepper
      • 24 wonton wraps
      • 1 egg
      • oil for frying
      • ranch dressing optional for dipping

      Instructions

      • Remove the stem and cut the jalapeño in half. Remove the seeds and then cut each half into 3-4 even pieces. Each piece should be about 1 inch square.
      • Finely mince the bacon and add to a bowl with the cream cheese. Add the shredded cheese, minced chives, and black pepper and mix well to combine.
      • Fill each jalapeno piece with about 1 tablespoon of filling. The pieces should be overstuffed to make a rounded top.
      • Make an egg wash by beating one egg with 1 tablespoon of water.
      • Remove one wonton wrap from the package at a time and cover the rest with a damp paper towel until ready to fill. Place one stuffed jalapeno piece onto the wrap. Cover all four edges of the wrap with egg wash before folding into a wonton shape. (Check out the video linked in the notes section for tips on wonton folding)
      • Once all the wontons are assembled, preheat a frying pan with an inch of oil to 350°. Once hot, quickly add the wontons, working in batches so you don't overcrowd the pan.
      • Let the wontons cook with the bottom down for 60-90 seconds or until golden brown. Turn the wontons over and let them cook for another 30-60 seconds, moving the wontons around to brown all sides. If you have a deep fryer, you'll need to cook for approximately 2 minutes.
      • Remove the wontons from the oil once cooked and place them on a wire rack over a baking sheet to allow the excess grease to drain. Season with a pinch of salt, if desired.
      • Serve hot with a side of ranch dressing for dipping.

      Video

      https://www.tiktok.com/t/ZTRsb3f2m/

      Notes

      7 Cool Ways to Wrap Wontons

      Frequently Asked Questions

      Do I need a deep fryer to make wontons?

      No. You can pan-fry or deep fry.

      I don't love spicy food. Can I use a different pepper?

      Mini-sweet bell peppers can be used as a substitute.

      Homemade Cranberry Sauce with Grand Marnier

      January 17, 2023 by Hailey Leave a Comment

      Homemade cranberry sauce with grand marnier in an olive green bowl with a gold spoon on top of black and white tablecloth.

      Homemade Cranberry Sauce with Grand Marnier is a twist on the classic recipe that everyone will love. If you’re looking to add some elegance and variety to your holiday spread, try out my version of cranberry sauce from scratch. 

      Homemade cranberry sauce with grand marnier in an olive green bowl with a gold spoon on top of black and white tablecloth.

      Many people are familiar with canned cranberry sauce. You know, the kind that plops out of the can and holds its shape perfectly for hours. To be honest, I don't hate the canned stuff, but making your own is a simple way to jazz up your Thanksgiving.

      If you're not familiar, Grand Marnier is made from cognac and bitter orange-flavored liqueur. The flavors of orange and vanilla complement cranberries perfectly. It also adds tons of flavor without requiring lots of additional ingredients.

      This article will tell you how to make homemade cranberry sauce with just three main ingredients: fresh cranberries, sugar, and cranberry juice. Then, we’ll talk about adding Grand Marnier, the real star of the show.

      Ingredients

      This recipe is super simple to make, and the ingredient list is short and sweet. I just added a small amount of alcohol to give the sauce extra oomph. Other than that, the ingredients are minimal.

      Ingredients for homemade cranberry sauce

      While most cranberry sauce recipes call for water or orange juice, I have found cranberry juice to be the best liquid to use. Using cranberry juice intensifies the cranberry flavor. Shoutout to the Pioneer Woman for teaching me this trick! Be sure to use unsweetened cranberry juice.

      I love to include alcohol in a recipe to add another dimension of flavor. When combined, the natural sweetness of Grand Marnier and the tartness of cranberries make cranberry sauce a whole lot more interesting.

      If you can't find Grand Marnier, Cointreau is the best substitute. This article from A Couple Cooks breaks down all the possible substitutions.

      Make it!

      Making cranberry sauce is a fun and easy way to make your holidays extra special. Plus, this recipe doesn’t require special equipment or much time. You can easily make the recipe ahead of time and keep it stored in the fridge for up to 5 days before you need it.

      One important tip is to use a big cooking pot and a long-handled spoon when making the recipe. Cranberries pop or burst while cooking, so use a pot that is a few inches taller than the cranberry mixture to keep the mess under control. Also, a long spoon helps keep the juice from hitting your hand while stirring.

      Making homemade cranberry sauce is easy: there are three simple steps.

      1. Bring the cranberry juice and sugar to a boil.
      2. Add the fresh cranberries (and any desired flavorings), then boil for 5 minutes, stirring constantly.
      3. Let the sauce cool completely before serving.

      That's it! Making cranberry sauce from scratch is so easy and quick. You'll never go back to buying it from the store. To make sure your sauce tastes its best, let it cool for at least 24 hours after cooking.

      Homemade cranberry sauce with grand marnier in an olive green bowl with a gold spoon on top of black and white tablecloth.

      Variations

      Cranberry sauce is definitely one of my family's favorite dishes to have at Thanksgiving! It adds a special holiday flavor to everything else on the plate. In addition to tasting delicious, this recipe can be adjusted to meet your personal preferences.

      If you don't want to add alcohol, you can add other fun ingredients to your cranberry sauce to make it your own. For any of the variations listed below, add the extra ingredient along with the berries during step 2.

      • Cranberry Sauce with Ginger: add 1 teaspoon of finely minced or grated fresh ginger
      • Cranberry Sauce with Pineapple: add 2 tablespoons pineapple jam
      • Cranberry Sauce with Apple: add ¼ cup grated Granny Smith apple (skin removed)
      • Cranberry Sauce with Jalapeno: add 1-2 tablespoons of finely minced fresh jalapeno
      • Cranberry Sauce with Bourbon: add 1 tablespoon of your favorite bourbon

      Other Thanksgiving Recipes

      In my family, homemade cranberry sauce goes with everything, but the most classic pairing is with dressing. Traditional Southern Cornbread Dressing is one of my most popular Thanksgiving recipes on the blog. The recipe is my mom's, and it is always on our Thanksgiving table.

      Traditional Southern Cornbread Dressing being scooped out of a white baking dish with a wooden sppon.

      If your family likes to celebrate with turkey, my Herb Butter Thanksgiving Turkey is foolproof and pairs beautifully with this cranberry sauce.

      Sourcing Fresh Cranberries

      If you have never made homemade cranberry sauce, you're in for a real treat. Fresh cranberries are typically only available at the store near Thanksgiving, but you can use frozen cranberries if that's all you can find. When buying cranberries, make sure the berries are firm and bright red.

      Homemade cranberry sauce with grand marnier in an olive green bowl with a gold spoon on top of black and white tablecloth.

      Storage

      • Store: Prepared cranberry sauce can be kept in an airtight container in the fridge for up to five days before serving.
      • Freeze: Cranberry sauce freezes well and can be stored for 2 months. Be sure to let the sauce completely cool before freezing.
      • Defrost: Allow the cranberry sauce to thaw in the fridge for approximately two hours before serving.

      There are loads of cranberry sauce recipes, but none compare to this one! It tastes way better than store-bought and only takes 15 minutes to make. Don't miss out on Homemade Cranberry Sauce with Grand Marnier! Let me know what you think of the recipe in the comments section below.

      Homemade cranberry sauce with grand marnier in an olive green bowl with a gold spoon on top of black and white tablecloth.
      Print Recipe
      5 from 2 votes

      Homemade Cranberry Sauce with Grand Marnier

      Homemade cranberry sauce gets an extra flavor punch from Grand Marnier. The tart cranberries with flavors of orange and vanilla make this quick recipe special.
      Cook Time10 minutes mins
      Total Time10 minutes mins
      Course: Side Dish
      Cuisine: American
      Servings: 2 cups

      Ingredients

      • 1 cup unsweetened cranberry juice
      • 1 cup white sugar
      • 12 ounces fresh whole cranberries
      • 1 Tb Grand Marnier

      Instructions

      • Add the cranberry juice and sugar to a large pot over medium-high heat. Bring to a boil.
      • Once boiling, add the fresh cranberries. Boil for 5 minutes, stirring constantly. The berries will pop as they cook, so be careful to keep your hand away.
      • If you want to tame the alcohol flavors, add the Grand Marnier with the cranberries (before cooking). If you want to know that there is booze in the recipe, add the Grand Marnier after the cranberries have cooked.
      • Pour the sauce into a heat-safe container and refrigerate for 24 hours before serving.

      Notes

      I've provided some other flavor ideas and how to make them in the "Variations" section above including:
      • Cranberry Sauce with Ginger,
      • Cranberry Sauce with Pineapple,
      • Cranberry Sauce with Apple,
      • Cranberry Sauce with Jalapeno, and
      • Cranberry Sauce with Bourbon.

      Frequently Asked Questions

      Can I use frozen cranberries instead of fresh?

      Yes, if you can't find fresh, then frozen can be substituted.

      Are there any substitutes for Grand Marnier?

      Cointreau is the spirit most similar in flavor to Grand Marnier.

      No-Bake Chocolate Cheesecake

      July 21, 2022 by Hailey 7 Comments

      Two slices of No-Bake Chocolate Cheesecake on a beige speckled plate.

      No-Bake Chocolate Cheesecake is unbelievably delicious and easy to make. If you’re a chocolate lover, you have to try this recipe. It has all the tang of cheesecake combined with decadent dark chocolate, and as advertised, the filling requires no baking!

      Slice of No-Bake Chocolate Cheesecake on a beige speckled plate.

      For as long as I can remember, my family has made a no-bake cheesecake that everyone calls J.B. Pie after my great grandfather. Apparently, it was his favorite pie. It is still a favorite of everyone generations later.

      When I was old enough to make it myself, I was surprised to find out just how simple the ingredients were. For the original J.B. Pie (AKA no-bake cheesecake), all you need is a graham cracker crust along with a filling made from cream cheese, sweetened condensed milk, lemon, and vanilla.

      I’ve taken that same tried and true recipe and given it a chocolatey twist that you’re going to love! When cream cheese, Oreos, and chocolate are in the mix, you can’t go wrong.

      Ingredients

      To make the recipe, you’ll need to start with an Oreo cookie crust. You need butter and Oreos for the crust. If you don’t like Oreos, we can’t be friends. Kidding! But you can still enjoy this recipe. Check out this post from Bake or Break on how to make a cookie crust from any cookie you like.

      The oreo cookie crust being pressed into the spring form pan with a measuring cup to create a clean edge.

      Once the crust is prepared, you make the cheesecake filling. Be sure your cream cheese is room temperature, and don’t try to shortcut this step! You’ll end up with lumpy cheesecake filling if you do. The ingredients for No-Bake Chocolate Cheesecake filling are:

      • Cream cheese
      • Sweetened condensed milk
      • Sour cream
      • Lemon
      • Vanilla
      • Dark chocolate bar – NOT chocolate chips
      • Cocoa powder
      • Instant espresso or espresso powder
      • Salt
      • Whipping cream
      • Powdered sugar
      Ingreditents for No-Bake Chocolate Cheesecake.

      Instructions

      No-Bake Chocolate Cheesecake is simple to make. It requires several steps to get the creamy filling to the perfect consistency.

      1. Melt the dark chocolate and set it aside to cool.
      2. Whip the cream cheese.
      3. Add the sweetened condensed milk and sour cream.
      4. Add the lemon juice, vanilla, and salt.
      5. Make it chocolatey by adding the cooled melted chocolate, cocoa powder, and espresso.
      6. Make a batch of whipped cream and split it into two portions.
      7. Fold one portion of the whipped cream into the chocolate cheesecake filling.
      8. Pour the pie into the cooled Oreo crust, and top with the reserved whipped cream.
      9. Chill for at least 8 hours until the filling is firm.
      10. Top with chocolate shavings for added pizzaz.
      Split screen showing the first two steps to make the cheesecake filling. First, whip the cream cheese and then combine it with sweetened condensed milk, sour cream, lemon and vanilla.
      Split screen showing steps 3 and 4 in preparing the cheesecake filling. Both sides have a glass bowl. The left shows the the plain cheesecake topped with cocoa powder, melted chocolate, and espresso. The photo on the right shows those ingredients completely combined.
      Split screen showing that last two steps in preparing the cheesecake filling. Both sides have a glass bowl. The left shows the chocolate cheesecake and whipped cream swirled together. The photo on the right shows the chocolate cheesecake and whipped cream totally incorporated.

      Substitutions

      I love the deep, rich flavor that dark chocolate brings to this recipe, and it makes the filling slightly less sweet. If you’re not a fan of dark chocolate, you could use any kind of chocolate you’d like. Semisweet chocolate would be a great substitute. You could also use milk chocolate for a more mellow chocolate flavor.

      Be sure to use a chocolate bar or melting chocolate, NOT chocolate chips. Chocolate chips have stabilizing ingredients that mess with the texture of the filling once it is completely cooled. I have found chocolate bars come in 3.5-4.5-ounce servings. The recipe calls for 4 ounces but +/- half an ounce is fine.

      Equipment

      You will need a stand mixer or hand mixer to make this recipe. You might be able to whisk it by hand, but you’d better have some biceps like Popeye because there is a lot of whipping in this recipe.

      The recipe is prepared in a springform pan. If you don’t have one, you can use this link to purchase one if you’d like. A deep-dish pie pan is also an option.

      Whole no-bake chocolate cheesecake.

      Storage

      • Serve: The assembled cheesecake must be cooled for a minimum of eight hours before serving.
      • Store: No-Bake Chocolate Cheesecake will keep in an airtight container in the fridge for up to 5 days.
      • Freeze: The cheesecake can be frozen in slices or whole. Store in an airtight container for up to 30 days.
      • Defrost: Allow the cheesecake to thaw in the fridge. For a single slice, it will take roughly 24 hours to thaw. For a whole frozen pie, allow 2-3 days.
      Slice of No-Bake Chocolate Cheesecake being removed from the whole pie

      Top tip

      I mentioned it earlier in the ‘Ingredients’ section, but be sure to let your cream cheese fully come to room temperature before you start making your cheesecake. Don’t try to skip or rush this step. Allow a full three hours for the cream cheese to sit at room temperature. If you use even slightly cold cream cheese, the filling will not be smooth- it will have cream cheese lumps.

      My other hot tip for perfect chocolate cheesecake filling is to scrape, scrape, and then scrape the bowl some more. You’ll notice in the recipe that there are several “stop and scrape down the bowl” instructions. If you want a smooth texture and color, be sure to scrape down the bowl every time you stop the mixer. Get the sides and the bottom too so the ingredients are well incorporated.  

      Slice of No-Bake Chocolate Cheesecake on a beige speckled plate.

      RUN, don’t walk, to get the ingredients to make No-Bake Chocolate Cheesecake. It will make your chocolate dessert dreams come true! Let me know how much you love it in the comments below.

      Slice of No-Bake Chocolate Cheesecake on a beige speckled plate.
      Print Recipe
      5 from 9 votes

      No-Bake Chocolate Cheesecake

      Creamy no-bake cheesecake blended with dark chocolate and cocoa is so delicious that you won't believe how easy it is to make! The hardest part is waiting on it to chill.
      Prep Time30 minutes mins
      Cook Time8 minutes mins
      Total Time38 minutes mins
      Course: Dessert
      Cuisine: American
      Servings: 1 pie

      Equipment

      • 1 springform pan 9 or 10-inch

      Ingredients

      Oreo Crust

      • 25 oreo cookies filling removed
      • 5 Tb salted butter melted

      No-Bake Chocolate Cheesecake Filling

      • 4 oz dark chocolate bar
      • 12 oz cream cheese room temperature
      • 1 14 oz can sweetened condensed milk
      • 1 cup sour cream
      • 1 Tb fresh lemon juice
      • 2 teaspoon vanilla extract
      • ¼ teaspoon salt
      • 1 teaspoon instant espresso powder
      • ¼ cup cocoa powder sifted
      • 2 cups heavy whipping cream divided
      • ½ cup powdered sugar

      Instructions

      • To make the crust, crush the oreo cookies to a fine crumb and combine with the melted butter. Use the bottom of a measuring cup to press the crust into the springform pan. Be sure to press the crust up the sides of the pan until it's about 2 inches tall.
      • Bake the crust at 350° for 8 minutes. Set aside to cool.
      • Break the chocolate bar into large pieces and place in a microwave-safe bowl-microwave in 30-second increments, stirring between each. Remove the chocolate from the microwave once melted and set aside to cool.*
      • Put the softened cream cheese in a stand mixer bowl with a whisk attachment. Beat on medium speed for one minute. Stop the mixer and scrape the bowl thoroughly.
      • Whip the cream cheese for another minute on medium speed. Stop the mixer and scrape the bowl again.
      • Turn the mixer back on to low speed and slowly add the sweetened condensed milk. Stop the mixer and scrape the bowl. Turn the mixer on to medium speed and mix until combined. Turn the mixer off and scrape the bowl.
      • Add the sour cream, lemon juice, vanilla and salt. Turn the mixer on to medium speed for 30 seconds. Stop and scrape down the bowl.
      • Add the sifted cocoa powder and cooled melted chocolate. Mix on low until completely combined. One last time, stop the mixer and scrape down the bowl. Let the mixer run for 15 seconds on low.
      • In a mixing bowl, whip the heavy cream until it becomes frothy. Add the powdered sugar and whip until firm peaks develop. Resevre half of the whipped cream for garnish and place it in the fridge.
      • Pour the other half of the whipped cream into the chocolate cheesecake. Gently fold the whipped cream into the cheesecake until just combined.
      • Pour the cheesecake mixture into the cooled cookie crust and top with the reserved whipped cream and optional chocolate shavings. Refrigerate for a minimum of 8 hours, preferably 12 hours.

      Notes

      * If you don't have a microwave, use a double boiler to melt the chocolate. You can make your own double boiler by placing a heat-proof glass bowl over a saucepan of simmering water. 

      Frequently Asked Questions

      Is there a way to bring the cream cheese to room temperature quickly?

      Check out this method from My Baking Addiction.

      Can I use a different kind of chocolate?

      Yes. Semisweet would be my recommendation. You could also use milk chocolate for a mellow flavor.

      Is a store-bought pie crust okay to use?

      The major issue with a store-bought crust is that they tend to be small and shallow. If you want to use a store-bought crust, either half the recipe or plan to make two pies.

      Baked Blueberry Cake Donuts

      June 5, 2022 by Hailey 5 Comments

      3 Baked Blueberry Cake Donuts in a stack on a clear glass plate dusted with powdered sugar. There is bite taken out of the donut on top.

      Baked Blueberry Cake Donuts are light, fluffy, and packed with blueberries. The recipe uses a boxed yellow cake mix for a shortcut, and it also has another surprise ingredient that makes the donuts super moist.

      3 Baked Blueberry Cake Donuts in a stack on a clear glass plate dusted with powdered sugar. There is bite taken out of the donut on top.

      Blueberry Cake Donuts are the perfect way to start your day, and this recipe can be made from start to finish in less than 30 minutes. It is about as simple and easy as donuts can be. It doesn’t require any yeast or rising time like traditional donuts.

      Ingredients

      The ingredients for Blueberry Cake Donuts are inexpensive and easy to find. To make them, you’ll need:

      • Yellow cake mix
      • Vanilla instant pudding- be sure to not get the “Cook and Serve” kind.
      • Cream cheese
      • Oil
      • Eggs
      • Vanilla extract
      • Lemon zest
      • Blueberries- fresh or frozen
      • Powdered sugar
      Ingredients for Blueberry Cake Donuts.

      Instructions

      Making donuts may sound like a scary task if you haven’t done it before, but it’s surprisingly easy. There are just a few simple steps.

      1. Beat the cream cheese until fluffy
      2. Slowly add the oil and eggs.
      3. Mix in the vanilla, lemon zest, pudding, and cake mix until just combined.
      4. Fold in the blueberries and put the batter into a piping bag or plastic storage bag.
      5. Fill each donut cavity ⅔ full and bake for 15 minutes.

      A little dusting of powdered sugar is all Blueberry Cake Donuts need before serving. The flavor and texture will remind you of a moist lemon cake filled with blueberries.

      3 Baked Blueberry Cake Donuts in a stack on a clear glass plate being dusted with powdered sugar.

      Substitutions

      You can take some creative freedom with the type of cake mix you use. I used Duncan Hines Classic Yellow Cake Mix, but plenty of their other flavors would be delicious in this recipe.

      Possible substitutes include:

      • Butter Golden
      • Classic White
      • Lemon Supreme
      • French Vanilla

      I wouldn’t recommend making this recipe with other berries though. Stick to blueberries. Strawberries and raspberries release more liquid during baking than blueberries. Using a different fruit will change the texture of the baked donuts.

      Equipment

      You’ll need a donut pan to make this recipe. I love making baked donuts instead of fried and not for health-conscious reasons. They are just a lot faster and not as messy as their fried friends.

      Once you have a donut pan, you could also make my Pumpkin Cake Baked Donuts or recipes like this one from Amanda’s Cooking.

      Two servings of blueberry cake donuts on glass plates from a white pedestal of donuts.

      Storage

      • Serve: Cool 15 minutes before removing from the donut pan. Dust with powdered sugar.
      • Store: Keep in an airtight container in the fridge for up to three days.
      • Freeze: The donuts freeze well. Cool completely before freezing. Keep in a plastic storage bag and remove as much air as possible from the bag. The donuts can be kept frozen for up to thirty days.
      • Reheat: No need to thaw. You can reheat from frozen. The donuts need 30-60 seconds at 50% power.

      Top tip

      The most important step in the process is not overfilling each donut cavity in the donut pan. I made this mistake a couple of times during testing. I ended up with a donut bottom and a muffin top.

      If you want your donuts to look like donuts, aim for ½ to ⅔ full. This dough will almost double in size when baked, so do not fill each cavity to the top!

      Side by side photos of raw donut batter piped into the donut pan versus the baked donuts in the donut pan.

      You also want to be sure to not overcook the donuts. There is no icing or glaze on my Blueberry Caked Donuts, so you want the donut to be moist like a cake. I look for a light golden-brown color on the bottom side of the donut. If they get too dark, the texture isn’t as fluffy.

      If you love blueberry muffins, you will fall in love with Baked Blueberry Cake Donuts. Get yourself a donut pan, so you can make this recipe for your loved ones. You won’t regret it.

      Let me know what you think of the donuts by leaving a rating below. Feedback is always appreciated!

      3 Baked Blueberry Cake Donuts in a stack on a clear glass plate dusted with powdered sugar.

      HELPFUL EQUIPMENT

      Doughnut Pan

      Donut Pan

      3 Baked Blueberry Cake Donuts in a stack on a clear glass plate dusted with powdered sugar. There is bite taken out of the donut on top.
      3 Baked Blueberry Cake Donuts in a stack on a clear glass plate dusted with powdered sugar. There is bite taken out of the donut on top.
      Print Recipe
      5 from 7 votes

      Baked Blueberry Cake Donuts

      Blueberry Cake Donuts are light, fluffy, and easy to make. Using a boxed cake mix makes this recipe quick and easy.
      Prep Time10 minutes mins
      Cook Time15 minutes mins
      Total Time25 minutes mins
      Course: Breakfast
      Servings: 24 donuts

      Equipment

      • Donut pan Link to purchase

      Ingredients

      • 8 oz cream cheese room temperature
      • ½ cup vegetable oil
      • 4 large eggs room temperature
      • 2 teaspoon vanilla extract
      • 1 Tb lemon zest
      • 1 15-oz box yellow cake mix
      • 1 3.4 oz box instant vanilla pudding
      • 2 cups blueberries fresh or frozen
      • ¼ cup powdered sugar

      Instructions

      • Preheat the oven to 350°F. Prepare a donut pan with cooking spray.
      • Using a stand or hand mixer, whip the cream cheese for 60 seconds. Scrape down the bowl and slowly add the oil with the mixer on. Mix on medium speed until combined.
      • Add eggs to the cream cheese one at a time, making sure each egg is totally combined before adding the next. Stop and scrape down the bowl again.
      • Add the vanilla extract and lemon zest and mix to combine. Next, add the cake mix and pudding powder. MIx on low until just combined. The batter will be very thick.
      • Fold in the blueberries by hand.
      • Using a plastic storage bag or a piping bag, fill each donut pan cavity ⅔ full. Don't fill them to the top! This dough will almost double in size when baked.
      • Bake for 14-15 minutes or until the bottom of the donuts are a light golden brown. Allow the donuts to cool for 15 minutes before removing them from the pan.
      • Dust with powdered sugar before serving.

      Frequently Asked Questions

      Can I use a different flavor of cake mix?

      Sure. I've listed some options in the 'Substitutions' sections above.

      Does the amount or brand of cake mix matter?

      Yes. I used Duncan Hines Perfectly Moist Classic Yellow Cake Mix which comes in a 15.25-ounce box. If you like a different brand that comes in a larger amount, use 2 cups of the mix instead of the whole box.

      Can I make the recipe without a donut pan?

      You can't make donuts without the pan, but you could still make the recipe as a cake. Use a bundt pan and bake for an hour, or a 9" x 13" baking dish and bake for 30-35 minutes. Cooking times are estimated. Check for doneness by inserting a toothpick into the center of the cake.

      What can I do with leftover donuts?

      The donuts freeze surprisingly well and can be reheated straight from frozen. See my notes above for more details. I also made a trifle with my leftovers by serving torn donut pieces with lemon curd, blueberry compote, and whipped cream.

      Creamy Garlic Chicken Pasta

      May 10, 2022 by Hailey 5 Comments

      Large saucepan full of creamy garlic chicken pasta.

      Creamy Garlic Chicken Pasta is a delicious combination of golden browned chicken, shell pasta, and a luscious sauce made from half & half, parmesan, lemon and plenty of garlic. Oh, I almost forgot; there is also a sneaky vegetable that blends right in with the pasta.

      Large saucepan full of creamy garlic chicken pasta.

      Creamy Garlic Chicken Pasta is similar to chicken alfredo but with way more flavor! The ingredients for the two dishes are similar, but there is a lot more garlic in this sauce so it’s the strongest flavor. I also sneak a roasted vegetable into the recipe; which might surprise you.

      Ingredients

      When creating pasta recipes, I always try to include a vegetable that complements the other ingredients. It’s nice to know you’re getting some vegetables with your carbs, and more importantly, it makes this casserole a complete meal without any additional sides.

      For this recipe, I added roasted cauliflower which has a mild flavor that works well with the garlic cream sauce. My family didn’t even know the cauliflower was there the first time I served this dish to them! I’d call that a win if your household has picky eaters. The other ingredients are listed below.

      Close up of medium pasta shells for creamy garlic chicken pasta.
      • Medium pasta shells- Think Velveeta shells. Be sure to get the medium size.
      • Cauliflower- Be sure to trim into bite-size florets or pieces before roasting.
      • Olive oil
      • Garlic salt
      • Black pepper
      • Chicken breast
      • Flour
      • Dry mustard
      • Paprika
      • Butter
      • Garlic
      • Lemon
      • Half & half
      • Parmesan- Grated is easier to blend into the cream sauce but shredded could also work.
      • Parsley- Flat-leaf Italian parsley is the perfect garnish, but not required.
      Ingredients for creamy garlic chicken pasta.

      Instructions

      Creamy Garlic Chicken Pasta is easy to make. The steps are simple, and the only time-intensive part is roasting the cauliflower. You can also roast it in advance to speed up the recipe.

      1. Roast the cauliflower in the oven. Check out Natasha's Kitchen Roasted Cauliflower for more details on how to best roast cauliflower.
      2. Cook the pasta shells
      3. Pan-fry the seasoned, cubed chicken breast.
      4. Make the cream sauce and combine with chicken, pasta and cauliflower.

      All that’s left to do from that point is to garnish each serving with a lemon wedge, a sprinkle of additional parmesan cheese, and finely chopped parsley.

      Substitutions

      There are a few possible substitutions that could be made in the recipe. I tested this recipe with heavy cream, half & half, and whole milk. Half & half offered the velvety smooth texture I wanted from the cream sauce without becoming too thick. You can use heavy cream as a sub, but you’ll need to add some of the pasta cooking water to get the right texture.

      Whole milk could also be a substitute for the half & half. Just plan to let the sauce boil for a few minutes to thicken up before adding the parmesan cheese. You also probably won’t need the pasta water either.

      Chicken thighs would also be a delicious substitute for chicken breasts. Make sure to get the boneless, skinless chicken thighs. You can prepare them just like the chicken breast preparation is outlined in the recipe.

      Golden brown chicken in a large saucepan.

      Variations

      Creamy Garlic Chicken Pasta is easily converted to a vegetarian recipe by omitting the chicken. I would recommend doubling the amount of cauliflower. Also, add the paprika and mustard to the cauliflower seasoning mix in addition to pepper and garlic salt.  

      If you hate cauliflower or shun the idea of vegetables in your creamy pasta, feel free to totally omit the cauliflower completely. I won’t tell your mom that you didn’t eat your vegetables.

      Close up view of creamy garlic chicken pasta being served with a wooden spoon.

      Storage

      • Serve: Serve immediately while hot. If you need to hold for a small amount of time make sure to keep the heat on the lowest possible setting. Also, keep extra reserved pasta water on hand and add to the sauce as needed so it doesn't get too thick.
      • Store: The prepared pasta can be kept in an airtight container in the fridge for up to three days.
      • Freeze: This recipe freezes well. I recommend serving the dish in individual portions before freezing.
      • Defrost: If time allows, the frozen dish can be thawed in the fridge for roughly 24 hours.
      • Reheat: To reheat from frozen, add 1 Tb of water over the dish and loosely cover with parchment or a damp paper towel. Microwave for 4 minutes at 50% power. Stir and return to the microwave uncovered for 30-second increments. If reheating from thawed, proceed directly to full power for 60-second increments.
      Two black bowls filled with Creamy Garlic Chicken Pasta.

      Top tip

      Creamy Garlic Chicken Pasta comes together in less than 30 minutes if you don’t include the cauliflower roasting time. The roasting time is totally hands-off so it’s low effort, but it does take a little time to get the cauliflower browned.

      Feel free to roast the cauliflower ahead to save you time later. Just be sure to let the cauliflower cool completely before storing it in the fridge so it doesn’t steam and become mushy. The roasted cauliflower can be kept for up to three days in an airtight container in the fridge

      Roasted cauliflower on parchment paper.

      Another important tip is to not forget to reserve some of the pasta cooking water. Ladle a couple of cups of liquid from the saucepan and transfer to a heatproof liquid measuring cup before straining the pasta. You can then use this cooking water to thin out your cream sauce to the perfect consistency.

      Large saucepan full of creamy garlic chicken pasta.

      Creamy Garlic Chicken Pasta is the perfect weeknight pasta dish with a sneaky side of vegetables. The recipe also freezes well and makes great leftovers. Give the recipe a try. I’d love to hear what you think in the comments section below.

      If you like this recipe, be sure to check out some of my other favorite Pasta recipes from the blog like Cajun Shrimp and Sausage Pasta.

      Large saucepan full of creamy garlic chicken pasta.
      Print Recipe
      5 from 11 votes

      Creamy Garlic Chicken Pasta

      Creamy Garlic Chicken Pasta is a delicious combination of chicken, pasta, and a luscious sauce made from half & half, parmesan, lemon, and plenty of garlic. There is also a sneaky vegetable in the mix.
      Prep Time15 minutes mins
      Cook Time45 minutes mins
      Course: Main Course
      Cuisine: American
      Servings: 6

      Ingredients

      • 6 oz dry medium pasta shells
      • 3 cups cauliflower florets bite-size pieces
      • 3 Tb olive oil divided
      • 1½ teaspoon garlic salt divided
      • 1½ teaspoon ground black pepper divided
      • 1 pound boneless skinless chicken breasts one-inch pieces
      • ½ cup all-purpose flour
      • 1 teaspoon dry mustard
      • 1 teaspoon paprika
      • 2 Tb butter
      • 6 cloves garlic or 3 Tb minced
      • 1 lemon
      • 2 cups half and half
      • ½ cup grated parmesan plus additional for garnish
      • 1 Tb flat leaf parsley finely chopped, optional

      Instructions

      • Preheat the oven to 375° and prepare a baking sheet with parchment paper.
      • Cut the cauliflower into bite-size pieces. Place on the prepared baking sheet and toss with 2 Tb olive oil, ½ teaspoon black pepper, and ½ teaspoon garlic salt. Bake for 45 minutes, removing from the oven halfway thru the cooking time to toss.
      • Cook pasta according to package instructions. Reserve 1 cup of pasta water and rinse cooked pasta with cold water once it is cooked through to prevent the noodles from sticking together. Set the cooked pasta aside.
      • Mix together the flour, paprika, mustard, 1 teaspoon black pepper, and 1 teaspoon garlic salt. Toss the chicken cubes until covered in the mixture.
      • After tossing the cauliflower halfway through the cook time, put 2 Tb butter and 1 Tb olive oil in a large saucepan and heat over medium-high heat. Shake excess flour from the chicken cubes (a colander is helpful).
      • Once the pan is hot, add the chicken. Let it brown on the first side for about 5 minutes. Stir and cook for another 5-10 minutes until the chicken is golden brown.
      • Add the minced garlic and sauce for two minutes, stirring often. Garlic can burn easily, so keep an eye on it.
      • After two minutes, add the half and half and zest of a lemon. Reserve the lemon to cut into wedges for serving.
      • Reduce the heat to medium and allow the half and half to come to a low boil. Add the parmesan cheese and stir to combine.
      • Add the cooked pasta and roasted cauliflower and mix well to coat all the ingredients. If your sauce is too thick, use the reserved pasta water, adding ¼ cup at a time, to get the desired consistency.
      • Serve with a lemon wedge and garnish with chopped parsley if desired.

      Frequently Asked Questions

      Is this like Chicken Alfredo?

      It's very similar, but the garlic flavor is stronger.

      Can I use milk or cream instead of half & half?

      You can use heavy cream as a sub, but you’ll need to add some of the pasta cooking water to get the right texture. Whole milk can be used, but plan to let the sauce boil for a few minutes to thicken up before adding the parmesan cheese.

      Can I roast the cauliflower ahead of time?

      Yes. It can be roasted and stored in an airtight container in the fridge for up to three days. Be sure to let it cool completely before storing, so it doesn't steam in the fridge.

      Easy Homemade Chocolate Fudge Pop-Tarts

      April 27, 2022 by Hailey 11 Comments

      Chocolate Fudge Pop Tarts on a piece of parchment paper drizzled with chocolate fudge icing.

      Pop-Tarts are a blast from my childhood past, and my Easy Homemade Chocolate Fudge Pop-Tarts are all the decadent deliciousness you remember and more! Store-bought pie crust is the cheat that makes this recipe easy.

      Chocolate Fudge Pop Tarts on a piece of parchment paper drizzled with chocolate fudge icing.

      Homemade Pop-Tarts are slightly more decadent than the cereal aisle variety but are surprisingly easy to make. The recipe uses store-bought pie crust instead of a pastry made from scratch so the entire recipe, including cook time, takes less than an hour and requires no special equipment.

      Store-bought pie dough doesn’t have any sugar since it’s meant for savory or sweet recipes. I sweeten the pie crust up just a little bit by using powdered sugar instead of flour to roll out the dough.

      Ingredients

      Homemade Chocolate Fudge Pop-Tarts require chocolate, duh, and a few other simple items.

      • Semisweet chocolate chips
      • Heavy cream
      • Butter
      • Cocoa powder
      • Vanilla
      • Salt
      • Pie crust- You want the dough that comes rolled up, NOT the kind that is already on a foil pie plate. Check the refrigerated section of the store where biscuit and cookie dough are sold.
      • Powdered sugar
      • Egg
      • Coconut oil- I like coconut oil because it helps the icing set after cooling. This is optional as you can use heavy cream to thin out the filling for the icing.
      Chocolate Fudge Pop-Tart ingredients

      Instructions

      If you don’t like to work with dough, you may not consider this recipe “easy,” but honestly, store-bought pie crust dough is incredibly forgiving. You can reroll it, tear it and piece it back together, or eff it up any other way you please, and the recipe will still come together.

      Pie crust rolled out on a wood surface
      1. Make the chocolate fudge filling. It is like a chocolate ganache thickened with cocoa powder, so making it requires a little heat from the microwave and some stirring.
      2. Roll out the pie dough with powdered sugar.
      3. Cut the dough into rectangles.
      4. Cover half of the dough rectangles with egg wash and chocolate fudge filling and use the remaining dough as a topper. Crimp the edges to seal.
      5. Make the icing by thinning the leftover fudge filling with coconut oil.
      6. Bake, cool, and drizzle with icing.
      Chocolate Fudge Pop-Tarts process shots showing dough being filled and sealed

      Variations

      You could easily make your own favorite Pop-Tart flavor using the store-bought pie crust cheat I use here. Strawberry preserves would make a delicious filling choice. Sally’s Baking Addiction also has an amazing recipe for Frosted Brown Sugar Pop-Tarts; substitute premade pie dough for her pastry from scratch, and the recipe just got a whole lot easier.

      Chocolate Fudge Pop-Tarts after being baked and iced.

      There is also some room for creativity with the chocolate you use in your Easy Homemade Chocolate Fudge Pop-Tarts. Dark chocolate, milk chocolate, or even flavored chocolate would be delicious in this recipe.

      Equipment

      The most complicated step in the recipe is cutting the pie crust into rectangles. I wouldn’t necessarily call a ruler kitchen equipment, but I consistently use a ruler to cut even straight lines. There’s a ruler in my baking drawer that is only used in the kitchen.

      Making the recipe without a microwave

      Not everyone has a microwave in their kitchen, but fear not! You can make the chocolate fudge filling using your stovetop.

      I recommend heating the butter and cream over medium heat until the butter is melted, and the cream just starts to bubble around the edges of the saucepan. Pour the warmed cream over the chocolate chips and add the remaining ingredients.

      Also, if you don’t have a microwave, pour off the ½ cup of fudge filling for the icing immediately after making it. Place it in a small heat-safe glass bowl and add the coconut oil while it’s warm. You may need to reheat the icing to make it the right consistency for drizzling. Set the bowl over a pot of simmering water (like a double boiler) to reheat.

      Chocolate Fudge Pop Tarts on a piece of parchment paper drizzled with chocolate fudge icing.

      Storage

      • Serve: Homemade Pop-Tarts are best served warm and freshly iced.
      • Store: These Pop-Tarts travel well because the coconut oil sets the icing, so they can be stacked. Store them in an airtight container for up to three days.
      • Freeze: Unglazed Pop-Tarts can be frozen. Thaw them before reheating by placing them in the fridge for 24 hours.
      • Reheat- Once thawed, bake at 350 for 10 minutes to reheat. Make a quick icing without any leftover fudge filling by melting 1 Tb of coconut oil with 4 oz of chocolate chips.
      Chocolate Fudge pop-tart cut in half on a gray plate

      Top tips

      Working with dough may seem daunting if you don’t do it often, so let me give you a couple of helpful tips.

      1. Use a sifter to evenly dust your work surface with powdered sugar.
      2. Work with one pie crust roll at a time and leave the other in the fridge until you’re ready for it. Cold dough is easier to work with and less sticky.
      3. To work the round pie crust into a square shape, roll the dough from the center out towards the four corners. You want a 12” x 12” square, so roll the dough out to a square slightly larger than that so you can trim the edges to be straight.
      4. Use a ruler to measure the dough into equal 4” tall by 3” wide pieces. If you achieved the 12” x 12” square, make marks at 3”, 6”, and 9” across, and 4” and 8” down. Check out the image below for a visual reference.
      Drawing of a square with lines as recommended for cutting pop-tart shape

      Easy Homemade Chocolate Fudge Pop-Tarts are a fun project to enjoy with kids, but I promise the adults will like this treat just as much as they do. Try out the recipe and let me know what you think with a rating and comment.

      If you enjoyed this recipe, be sure to check out all of my savory hand pie recipes. Shepherd's Pie Hand Pies and Louisiana Meat Pies are two of the most popular recipes from Cooking and Cussing.

      Chocolate Fudge Pop Tarts on a piece of parchment paper drizzled with chocolate fudge icing.
      Chocolate Fudge Pop Tarts on a piece of parchment paper drizzled with chocolate fudge icing.
      Print Recipe
      5 from 7 votes

      Easy Homemade Chocolate Fudge Pop-Tarts

      Pop-Tarts are a childhood favorite, and Chocolate Fudge is one of the best flavors. Making them at home is easier than you think! Store-bought pie crust makes this recipe a breeze.
      Prep Time20 minutes mins
      Cook Time15 minutes mins
      Course: Dessert
      Cuisine: American
      Servings: 12 Pop-Tarts

      Ingredients

      • 1 cup semisweet chocolate chips
      • ¼ cup heavy cream
      • ¼ cup salted butter
      • 2 Tb cocoa powder
      • 1 teaspoon vanilla extract
      • ⅛ teaspoon kosher salt
      • 2 sheets store-bought pie crust
      • ¼ cup powdered sugar
      • 1 egg
      • 1 teaspoon coconut oil optional

      Instructions

      To make the chocolate fudge filling:

      • Place the chocolate chips, heavy cream, and butter into a microwave-safe dish.
      • Heat the mixture in the microwave for 20 seconds. Remove from the microwave and stir. Heat in 15-second increments, stirring between each, until the chips are slightly melted. The residual heat and stirring will help them melt completely, and you want to be careful not to scorch the chocolate.
      • Add the cocoa powder, salt, and vanilla. Mix to combine.
      • Allow the filling to cool in the freezer for 15 minutes, stirring occassionally. The filling should be slightly thickened and around room temperature before filling the pop tarts.
      • Pour ½ cup of the cooled fudge filling into a small bowl and set aside. This will be used for the icing.

      To make the pop-tarts:

      • Preheat the oven to 400°F. Prepare a baking sheet with parchment paper.
      • Prepare your work surface with a light dusting of sifted powdered sugar. Unwarp the pie crusts and lay flat on surface. Dust the top of the crusts with more sifted powdered sugar.
      • Working from the center of the round crust to the four corners, roll out the dough to form a roughly 12'' x 12'' square. Trim the edges to make the sides as straight as possible.
      • Cut each dough into 12 pieces. The pieces should be 4" tall x 3" wide.
      • Make an egg wash by beating the egg in a small bowl and add 1 teaspoon of water. Whisk until combined.
      • Place 12 of the dough pieces onto the prepared baking sheet. They can be placed close together since the dough won't spread.
      • Brush the entire piece of dough lightly with egg wash. Scoop a heaping tablespoon of cooled chocolate fudge filling into the center of each piece.
      • Place a dough rectangle on top of the filling and lightly press the edges to seal. Once sealed, gently spread the filling to meet the edge of the seal.
      • Use a fork to crimp the edges of each pop tart. Bake for 15 minutes.
      • While the pop tarts bake, prepare the fudge icing. Add the coconut oil* to the reserved fudge filling. Microwave for 15 seconds and stir until the coconut oil is totally combined. If needed, add 15 seconds at a time.
      • Allow the baked pop-tarts to cool for 10 minutes. Use a spoon to drizzle each pop tart with fudge icing. Enjoy right away or allow them to cool to room temperature before storing so the icing can harden.

      Notes

      * If you don't have coconut oil on hand, you can also use a little extra heavy cream to thin out the filling for the icing. It may take closer to a tablespoon of cream to get the right consistency. Also, the icing will not set if you use cream instead of coconut oil. 

      Frequently Asked Questions

      I don't have a microwave. Can I still make the recipe?

      Check out the section above titled, "Making the recipe without a microwave" for specific instructions.

      Can I use homemade pastry instead of store-bought dough?

      Yes. Check out Sally's Baking Addiction recipe for perfect Pop-Tart pastry from scratch.

      Do I have to use semi-sweet chocolate?

      Nope. Milk or dark chocolate would both be delicious in the recipe.

      How do I cut the dough to get equal rectangles?

      Start with a dough that has been trimmed to a 12" x 12" square. Use a ruler to measure the dough into equal 4” tall by 3” wide pieces. If you achieved the 12” x 12” square, make marks at 3”, 6”, and 9” across, and 4” and 8” down. Check out the image below for a visual reference.Drawing of a square with lines as recommended for cutting pop-tart shape

      Chipotle Sour Cream Sauce

      April 12, 2022 by Hailey 8 Comments

      White bowl filled with orange chipotle sour cream sauce for tacos with a spoon stirring the sauce.

      Chipotle Sour Cream Sauce is easy to make while packing a huge punch of flavor. It’s the perfect dip for almost everything including tacos, nachos, grilled meats, and fried snacks. The combination options are almost endless!

      White bowl filled with orange chipotle sour cream sauce for tacos with a spoon stirring the sauce.

      With only six ingredients and five minutes, you can make a delicious sauce from scratch that goes with almost any Latin-flavored dish. I’ve paired this sauce with my Sheet Pan Chicken Fajitas, Braised Salsa Verde Pork Tacos, and Taco Cornbread Pie. It was so tasty with all of them!

      The sauce is a classic combination of lime, sour cream, and chiles. It could have easily been called Chipotle Lime Cream Sauce or Sour Cream Sauce for Tacos too. Whatever you want to call it, it’s yummy.

      Ingredients

      Only six ingredients stand between you and Chipotle Sour Cream Sauce.

      1. Sour Cream
      2. Chipotles in adobo- Chipotles are smoked, dried jalapenos, and adobo is a spicy and tangy mix of tomato, vinegar, garlic, and spices.
      3. Lime- zest and juice
      4. Cumin
      5. Mexican oregano – Regular oregano can be substituted.
      6. Salt
      Ingredients for chipotle sour cream sauce for tacos.

      Instructions

      It feels ridiculous to dedicate a section to instructions for this recipe, but in the spirit of consistency, I’ve included it. All this recipe required is pureeing all the ingredients together in a small food processor. I also like to let the sauce chill for about 30 minutes to allow the flavors to combine.

      If you don’t have a food processor or blender to use, you can also finely mince the chipotles into a paste and stir the ingredients together. The texture may be a bit rougher, but the taste will still be epic.

      Small food processor filled with orange chipotle sour cream sauce for tacos.

      Substitutions

      There are a few different substitutions you can use when you make Chipotle Sour Cream Sauce.

      • Sour cream- You can use light sour cream instead of full fat. I don’t think fat-free sour cream offers the right texture, so I would stick with light. Mexican crema would also work in this recipe; the texture will be a bit looser.
      • Chipotles in adobo- Here is an article with some recommendations for options.
      • Mexican oregano- Check out my Substitutes for Oregano for more details on the difference between Mexican oregano and other varieties. Regular oregano works in this recipe.

      Variations

      You can absolutely play with the flavors in this recipe to suit your taste. If you like a stronger smoky flavor, you can increase the number of chipotles in adobo you add. I’ve doubled the amount before, and the sauce maintains its creamy texture.

      If you want to thin out the sauce and add a little extra acidity, use two limes instead of one. You can also make the texture thinner by adding water, 1 teaspoon at a time.

      Like your food extra spicy? I recommend adding some cayenne pepper to the recipe. You could also add a few dashes of your favorite hot sauce.

      White bowl filled with orange chipotle sour cream sauce for tacos with a spoon in the sauce.

      Equipment

      A small food processor or blender is not required to make the recipe, but it does speed the recipe up a bit. You can definitely make it without any special equipment though. Just finely mince the chipotles into a paste before adding to the other ingredients.

      Storage

      • Serve: The sauce is best served cold. I like to let it sit for 30 minutes in the fridge after mixing it together, but it’s not required.
      • Store: Once prepared, the sauce can be kept for up to one week in an airtight container in the fridge.
      • Freeze: Sour cream doesn’t freeze well. The texture gets weird, so I don’t recommend it.
      White bowl filled with orange chipotle sour cream sauce for tacos with a spoon stirring the sauce.

      I love to keep my fridge full of flavorful, simple condiments like Chipotle Sour Cream Sauce because they take dinner from boring to bomb. It's not just a taco sauce- get adventurous with what you eat it with! Try out this recipe and let me know what you think by leaving a recipe rating below.

      HELPFUL UTENSILS

      Cuisinart Small Food Processor
      A small food processor is one of the most useful kitchen gadgets you can purchase.
      @cookingandcussingblog

      Chipotle Sour Cream Sauce brings smoky, spicy and tangy flavors to anything you want. Recipe is on the blog. #easysauce #fyp #foryoupage #chipotle #sourcream #quickrecipes https://cookingandcussing.com/chipotle-sour-cream-sauce/

      ♬ Golden Field - BLVKSHP
      White bowl filled with orange chipotle sour cream sauce for tacos with a spoon stirring the sauce.
      Print Recipe
      4.80 from 20 votes

      Chipotle Sour Cream Sauce

      Chipotles in adobo and fresh lime juice are the keys to this quick and easy sauce. Chipotle Sour Cream Sauce is delicious on everything from tacos to grilled meats.
      Prep Time5 minutes mins
      Course: Side Dish
      Cuisine: Mexican
      Servings: 1 cup

      Ingredients

      • 1 cup sour cream
      • ¼ cup chipotles in adobo ~3-4 peppers
      • 1 lime juice and zest
      • ¼ teaspoon ground cumin
      • ¼ teaspoon Mexican oregano
      • ¼ teaspoon kosher salt

      Instructions

      • Add all the ingredients to a small food processor or blender. Blend smooth. Serve.

      Video

      https://www.tiktok.com/t/ZTRp2rpB4/

      FREQUENTLY ASKED QUESTIONS

      Can I substitute light or fat-free sour cream?

      Light sour cream will work, but I don't like the texture of fat-free for this recipe.

      Is Mexican oregano different than the spice labeled "Oregano"?

      Yep. My Substitutes for Oregano article has more details on the difference. You can, however, use either in the recipe.

      Can I make the recipe without a food processor or blender?

      Yes! Mince the chipotles in adobo as finely as you can until they resemble a paste then combine with the other ingredients. The texture may be a bit rougher, but the flavor will be the same.

      Donut Bread Pudding

      April 5, 2022 by Hailey 12 Comments

      Scoop of donut bread pudding being drizzled with caramel sauce.

      Donut Bread Pudding is super simple to make and insanely delicious! It only takes a few refrigerator staples and a dozen donuts to create magic in the form of bread pudding.

      Scoop of donut bread pudding covered in caramel sauce.

      If you’re already a fan of bread pudding, welcome to a new stratosphere of bread pudding delight. On the other hand, if you’ve tried bread pudding before and found it heavy in texture and underwhelming in flavor, I’m about to blow your mind.

      Donut bread pudding is the creamiest and lightest bread pudding I have ever tasted. The texture is fluffy in your mouth, while the eggs and cream make it decadent. The flavors of nutmeg and vanilla make you feel warm inside. Donut Bread Pudding is the ultimate comfort food.

      Ingredients

      The ingredients for this recipe are most likely already in your house. Okay, so maybe you don’t always have a dozen donuts in the house, but the rest of the ingredients are staples in my kitchen.

      I have also made this recipe from leftover office donuts. They often get thrown out at the end of the day, but you can turn them into bread pudding instead.

      All of the ingredients for donut bread pudding with labels.
      • Dozen glazed yeast donuts- cake donuts don’t work as well as yeast; they tend to fall apart when combined with the custard, and the finished recipe isn’t as light in texture. Stick with yeast donuts for this recipe. You could be adventurous and use donuts with flavored icing, but I would avoid any kind with filling.
      • Eggs
      • Whole milk
      • Heavy cream
      • Brown sugar
      • Vanilla
      • Salt
      • Nutmeg
      • Caramel Sauce- this is totally optional.

      Instructions

      Bread puddings are easy to make and can be made with a variety of ingredients. I may be partial, but donuts are the best “bread” I’ve ever found for pudding. The big flavor that donuts offer also means you don’t need to do much to make the recipe turn out amazing.

      There are three main steps to making Donut Bread Pudding.

      1. Cut each donut into six equal pieces.
      2. Combine the eggs, milk, cream, brown sugar, salt, vanilla, and nutmeg to create a custard.
      3. Pour the custard over the donuts.
      Donut bread pudding before going into the oven.

      After that, the bread pudding needs to bake, and it will be ready to serve in less than an hour. There is no need for a water bath for baking (if you don’t know what that is, don’t give it another thought- just keep on reading!). This recipe stays very moist with a standard baking process.

      Oval pan filled with donut bread pudding fresh from the oven drizzled with caramel sauce.

      I like to serve my Donut Bread Pudding with a drizzle of caramel sauce, but chocolate sauce would be equally delicious. If you really want to make this dessert over-the-top decadent, you can also top each serving with a scoop of vanilla ice cream.

      Substitutions

      Donut Bread Pudding is so simple that there is not much room for substitutions. A few that come to mind are:

      • Whole milk- 2% milk would be okay in place of whole milk, but if it’s to save calories, remember there is also heavy cream in the recipe. If it’s because you don’t want to commit to a large container of whole milk and you keep 2% in the fridge, I support that substitution.
      • Donuts- Yeast donuts are the only type I would recommend for bread pudding. Cake donuts, while delicious, do not offer the same light, fluffy texture. Cake donuts also tend to fall apart when being mixed with the custard.
      • Brown sugar- You can use white sugar, but the flavor won’t be as complex.
      Oval pan filled with donut bread pudding fresh from the oven drizzled with caramel sauce.

      Variations

      Any of the flavored iced donuts (like chocolate or cherry) would be a fun twist on this recipe. Choose your favorite donut variety and give the recipe a try! I would love to hear about other flavors of Donut Bread Pudding in the comments below.

      A word of advice, though, is to avoid any filled donuts. They may throw off the balance of the liquid ingredients in the custard, leaving you with runny bread pudding.

      Storage

      • Serve: Donut Bread Pudding is best served fresh out of the oven.
      • Store: The dish can be kept in the fridge for up to three days. Reheat before serving.
      • Freeze: Allow the dish to cool completely, then separate it into individual portions. The portions can be kept frozen in an airtight container for up to 30 days.
      • Defrost: Leave the frozen bread puddings in the fridge overnight to thaw.
      • Reheat: Use the microwave on half power. Heat for 2 minutes at 50% and then work in 30-second increments until the bread pudding is warmed through.
      Oval pan filled with donut bread pudding fresh from the oven drizzled with caramel sauce.

      Top tips

      Old, leftover, or stale donuts work best for this recipe. I realize those words do not sound all that delicious, but the donuts really need to be a little bit dried out so that they soak up the custard.

      If your only option is fresh donuts, I recommend cutting them into pieces, placing the pieces on a baking sheet, and baking at 250°F for about 30 minutes to dry them out. Let them cool completely before adding the custard.

      Scoop of donut bread pudding being drizzled with caramel sauce.

      Whether you use Krispy Kreme donuts or a dozen from your favorite local chain, Donut Bread Pudding is sure to be one of your favorite new dessert recipes. Something this easy and delicious can’t be passed up —give it a try. Let me know how it goes with a recipe rating, please.

      Scoop of donut bread pudding covered in caramel sauce.
      Print Recipe
      4.65 from 14 votes

      Donut Bread Pudding

      Donut Bread Pudding combines the flavor of your favorite glazed donut with the creamy texture of bread pudding for an easy-to-make, decadent dessert.
      Prep Time15 minutes mins
      Cook Time45 minutes mins
      Course: Dessert
      Cuisine: American
      Servings: 8

      Ingredients

      • 12 glazed yeast donuts at least one day old*
      • 3 eggs lightly beaten
      • 1 cup whole milk
      • 1¼ cup heavy cream
      • ½ cup brown sugar
      • ½ teaspoon kosher salt
      • ½ teaspoon vanilla extract
      • pinch nutmeg
      • caramel sauce optional

      Instructions

      • Preheat the oven to 350°F. Prepare a 3 quart or deep 8" x 8" baking dish with baking spray.
      • Cut each donut into 6 equal pieces. Place in a the prepared baking dish.
      • In a large liquid measuring cup, combine beaten eggs with the milk, cream, brown sugar, salt, vanilla and nutmeg.
      • Pour the liquid over the donut pieces.
      • Bake for 40-45 minutes. The top should be golden brown.
      • Optional to serve with caramel sauce and ice cream.

      Notes

      * Fresh donuts will not absorb the liquid as well as older donuts. I typically make this recipe with one-day-old donuts, but you could use up to 3-day-old donuts. If you only have fresh donuts, cut them into pieces first, then place them on a baking sheet in a 250°F oven for about 30 minutes to help dry them out. Let the pieces cool completely before adding the custard.

      FREQUENTLY ASKED QUESTIONS

      Can I use cake donuts instead of yeast?

      I do not recommend it. The cake donuts fall apart when combined with the custard, and the cooked bread pudding will be less light and fluffy.

      Can I use donuts with flavored icing instead of glazed?

      Sure, but I don't recommend any filled donuts. Iced donuts, like cherry or chocolate iced, will work in the recipe.

      Can I use fresh donuts instead of old ones?

      Yes, but see my tip in the recipe notes above to dry out the donuts.

      Oven-Fried French Onion Pork Chops with Lipton Soup Mix

      March 15, 2022 by Hailey 10 Comments

      Close up of French Onion Pork Chops served over mashed potatoes.

      The flavors of French onion dip, crispy potato chips, and classic breaded fried pork chops combine to create your new favorite comfort food, Oven-Fried French Onion Pork Chops with Lipton Soup Mix. The best part is that the recipe only takes 30 minutes from start to finish.

      French Onion Pork Chops sitting on a bed of mashed potatoes covered in a creamy sauce.

      There are some other French Onion Pork Chops out there, but almost all of them are smothered-style that is reminiscent of French onion soup. I took a different route to French onion flavor for my recipe and used one of my favorite party snacks as inspiration.

      French Onion Dip with potato chips is one of my favorite snacks during sporting events. The creamy dip flavored with onions and Worcestershire sauce is the perfect match for salty potato chips.

      I needed a good excuse to eat the flavors of French onion dip on a regular weeknight, so I set out to create a recipe that was quick and easy. These oven-fried pork chops breaded in potato chips, yea that’s right I said potato chips, will become a regular in your weeknight meals.

      Ingredients

      The ingredients for this recipe are simple and inexpensive. There are two key ingredients: potato chips and Lipton Onion Soup Mix. Potato chips make these pork chops one of a kind. The Lipton mix is the secret to a quick and flavorful sauce.

      Ingredients for French Onion Pork Chops.
      • Pork chops- The recipe calls for boneless center cut loin chops, but any pork cut that is less than one-inch thick will work.
      • Flour
      • Black pepper
      • Kettle potato chips- I highly recommend kettle-style potato chips as they make the best crunchy breading. I chose the salt and pepper flavor but plain would also work.
      • Eggs
      • Sour cream- Full or reduced fat sour cream works, but I don’t recommend fat free.
      • Heavy cream
      • Beef stock
      • Lipton onion soup mix- This is the key to a quick sauce. You can use other brands but be sure to buy the DRY mix. You are not looking for French Onion Soup. Buy it on the spice aisle.
      • Worcestershire sauce- Most onion soup mixes have dried Worcestershire in the mix, but I like to amplify that flavor.
      • Chives

      Instructions

      The process for making Oven-Fried French Onion Pork Chops with Lipton Soup Mix is quick and easy. There are 3 major steps.

      1. Bread the pork chops.
      2. Bake the pork chops.
      3. Make the sauce.

      Breading the pork chops is a traditional three-step breading process. The first step is to dredge the chops in flour. Then they go into an egg wash before being coated with crushed potato chips.

      Breading process for French Onion Pork Chops

      I like to bake the breaded chops on a wire rack on top of a sheet tray. The extra airflow around the pork chops allows them to get crispy in the oven. It’s also important to flip the chops over halfway through the baking time.

      Sheet pan of French Onion Pork Chops before baking.
      Pork chops before baking.
      Sheet pan of French Onion Pork Chops after baking.
      Pork chops after baking.

      The sauce for the recipe is so simple to make too. It is best to start with the sour cream and slowly add the heavy cream while whisking constantly. Then I add the beef stock to the mix, again slowly and whisking constantly. This ensures the sauce is silky smooth.

      Once the sour cream, cream, and stock have been combined, I add the remaining ingredients. The sauce then just needs to be brought to a boil before serving.

      Substitutions/Variations

      If you aren’t a fan of pork chops, this recipe would also be delicious with boneless skinless chicken breasts. The recipe could also be converted to vegetarian by substituting portabella mushrooms in place of the pork chops.

      Equipment

      French Onion Pork Chops do not require any special equipment. I recommend baking the pork chops on a wire rack set on top of a sheet pan, but if you don’t have one, you can still make the recipe. The first time I tested the recipe, I baked it on a parchment-lined sheet pan, and it turned out great.

      Platter of French Onion Pork Chops.

      Storage

      Serve: There are so many options for what to serve with French Onion chops. Mashed Potatoes are an obvious choice. Breaded pork chops and rice are also a delicious pairing. Check out my Perfect Basmati Rice recipe for an easy, fail-proof rice cooking method. I also love egg noodles with this recipe.

      Store: Like any breaded and “fried” item, the pork chops are best served fresh from the oven. The pork can be safely stored for up to three days in an airtight container in the fridge.

      Freeze: This recipe does not freeze well as the breading will become soggy.

      Reheat: The best way to reheat the pork chops is in the oven to bring back some of its original crunch. I recommend taking the chops out of the fridge while the oven preheats so they aren’t ice cold when they go in. Reheat at 350 for about ten minutes.

      Two plates with French Onion Pork Chops served over mashed potatoes.

      Top tip

      1. Be sure to crush your potato chips pieces into a fine crumb. If the crumbs are too big, it will be harder to make them stick to the pork chops. A food processor is helpful to get the right consistency quickly, but you can also put the chips in a plastic storage bag and crush them with a rolling pin.
      2. When creating the sauce, take the time slowly incorporate the sour cream and heavy cream first and then the beef stock. By thinning the sour cream first with heavy cream, you avoid any sour cream clumps in the sauce. If you try to add the beef stock to the sour cream first, you’re more likely to get clumps.
      Close up of French Onion Pork Chops served over mashed potatoes.

      French Onion Pork Chops with Lipton Soup Mix are the perfect quick and easy weeknight meal that everyone will love. Try the recipe out and give it a rating if you enjoy it!

      Close up of French Onion Pork Chops served over mashed potatoes.
      Print Recipe
      5 from 8 votes

      Oven-Fried French Onion Pork Chops with Lipton Soup Mix

      French Onions Pork Chops combine the flavors of french onion dip, crispy potato chips, and breaded pork chops into a 30-minute dinner that everyone will love.
      Prep Time10 minutes mins
      Cook Time20 minutes mins
      Total Time30 minutes mins
      Course: Main Course
      Cuisine: American
      Servings: 4

      Ingredients

      • 1 lb thin-cut boneless pork loin chops or 4 pork chops
      • 1 cup all purpose flour
      • 1½ teaspoon ground black pepper divided
      • 4 cup salt and pepper kettle chips
      • 2 eggs
      • ½ cup sour cream
      • 1 cup heavy cream
      • 1 cup beef stock
      • 1 oz onion soup and dip mix
      • 1 teaspoon worcestershire sauce
      • 2 Tb minced chives

      Instructions

      • Preheat the oven to 450°F. Prepare a sheet pan with a wire rack. Lightly grease the rack with baking spray.
      • Prepare a breading station for the pork chops.
      • Combine the flour and 1 teaspoon of black pepper in a plastic storage bag.
      • Beat the eggs with 1 Tb of water in a small mixing bowl.
      • Crunch the potato chips into fine crumbs and place on a plate.
      • Coat each pork chops first in flour, shaking off any excess, and then in the egg wash. Shake off any excess egg before dredging each pork chop in chips, pressing down lightly to make sure the pork is totally covered.
      • Place the breaded pork chops onto the prepared wire rack. Cook in the preheated oven for 20 minutes. After 10 minutes, turn each pork chop over and cook for another 10 minutes.
      • While the pork chops bake, make the sauce. Start by placing sour cream into a small saucepan. Slowly add the heavy cream, whisking constantly. This will ensure a smooth sauce.
      • Add the beef stock, onion dip mix, Worcestershire, and ½ black pepper to the sour cream and turn the heat onto medium-high. Bring the sauce to a boil stirring often.
      • Boil the sauce for 5 minutes, stirring constantly, and then reduce the heat to low until ready to serve.
      • Serve each pork chop with a generous serving of French Onion sauce and garnish with minced chives.
      What's the best way to crush the potato chips?

      I used a food processor which is the fastest method. You can also put the chips in a plastic storage bag and use a rolling pin to crush the chips.

      What should I serve with French Onion Pork Chops?

      Mashed potatoes, white rice or egg noodles.

      Do I have to use the Lipton brand of onion soup mix?

      No, any brand will work. Just make sure it is the dry soup mix, not soup.

      Quick Cilantro Lime Sauce with Garlic

      March 5, 2022 by Hailey 11 Comments

      Glass jar filled with light green Cilantro Lime Sauce with Garlic sauce.

      Quick Cilantro Lime Sauce with Garlic is super easy to make and delicious on just about anything. If you’re searching for a creamy, garlicky dressing that can be made in less than five minutes, you’ve found it!

      Glass jar filled with light green Cilantro Lime Sauce with Garlic sauce.

      Cilantro Lime Sauce is a perfect pairing for tacos. It is fantastic on Braised Salsa Verde Pork Tacos or with Sheet Pan Chicken Fajitas. But that’s not all it’s good for.

      The delicious dipping sauce that comes with yucca fries inspired this recipe. If you haven’t had yucca fries, think thick-cut French fries.

      Accordingly, you cannot go wrong in pairing this sauce with any sort of fried delight. From French fries to fried fish, this creamy concoction is the perfect match.

      Ingredients

      The ingredients for this quick recipe are simple.

      • Mayonnaise – if you are a mayo hater, then you can substitute Mexican crema or sour cream.
      • Garlic – Either whole cloves or the store-bought minced garlic will work just fine.
      • Cilantro – Parsley is a possible substitute.
      • Jalapeno – Add a serrano pepper for increased spiciness or leave it out if you don’t like the heat.
      • Cumin
      • Allspice – This is the secret flavor ingredient for the sauce!
      • Oregano- I use Mexican Oregano for this recipe, but regular oregano works too. Check out my Substitutes for Oregano for more information on the difference between the two types.
      • Salt
      • Lime
      ingredients for Cilantro Lime Sauce with Garlic.

      Instructions

      You won’t need to take any notes for this recipe because it’s as simple as 1, 2, 3…

      1. Prepare ingredients.
      2. Place in a food processor and puree.
      3. Stuff your face with deliciousness.

      Substitutions

      First, if you are not a fan of cilantro then I’m a little surprised you have found your way to this post. You can however create a bright and flavorful sauce without the cilantro. I would recommend fresh flat-leaf Italian parsley as a replacement.

      Also, if you hate mayo and would like to make a Cilantro Lime Sauce without mayonnaise then you can use Mexican crema or sour cream as a substitute. Mexican crema is available in the dairy section of the store, or you can make your own. Isabel Eats has a simple and delicious recipe for homemade crema.

      Variations

      Vegan and vegetarian eaters can also enjoy this recipe. All you need to do is replace the mayo with vegan mayonnaise. The flavor of the sauce will stay the same, but the texture may be slightly different.

      Cilantro Lime Sauce being pureed in a food processor.

      Equipment

      A food processor is very handy in creating a smooth and creamy Cilantro Lime Sauce with Garlic. It’s not totally essential if you are okay with the texture of the sauce being a bit chunkier. The flavor would still be yummy.

      If you don’t have a food processor, I recommend making a garlic paste using this technique. Then use a sharp knife and mince the jalapeno and cilantro as finely as you can before combining them with the other ingredients.

      Storage

      • Serve: Allow the prepared sauce to chill in the fridge for at least 30 minutes before serving so all the flavors blend.
      • Store: The prepared sauce can be kept in an airtight container in the fridge for up to five days.
      • Freeze: The recipe does not freeze well.

      Top tip

      The garlic needs to be thoroughly combined into the sauce. That’s because the recipe uses raw garlic. Raw garlic has more of a bite or spiciness than cooked garlic, so you don’t want to bite into a big chunk in the sauce.

      If your garlic cloves are on the bigger side, it will help the process if you chop the cloves into smaller pieces. Be sure to let the sauce puree for long enough in the food processor that there are no garlic pieces floating in the sauce.

      If you’re making the sauce without a food processor, see the technique link above in the “Equipment” section.

      Glass jar filled with light green Cilantro Lime Sauce with Garlic sauce on a yellow napkin.

      Quick Cilantro Lime Sauce with Garlic is the perfect creamy condiment for almost anything. Try it on tacos, nachos, grilled meats, French fries, and more! Let me know what you think by rating the recipe.

      @cookingandcussingblog

      Quick Cilantro Lime Sauce with Garlic And introducing ME on video. 😳😳 Find the complete recipe on the blog. https://cookingandcussing.com/quick-cilantro-lime-sauce-with-garlic/

      ♬ original sound - CookingandCussing
      Glass jar filled with light green Cilantro Lime Sauce with Garlic sauce.
      Print Recipe
      5 from 9 votes

      Quick Cilantro Lime Sauce with Garlic

      Cilantro Lime Sauce with Garlic is a Cuban-inspired sauce that is good on just about anything! The sauce is creamy, tangy, and garlicky and can be made in less than 5 minutes!
      Prep Time5 minutes mins
      Total Time5 minutes mins
      Course: Side Dish
      Cuisine: Mexican
      Servings: 1 cup

      Equipment

      • 1 Food processor

      Ingredients

      • 1 cup mayonaisse
      • 2 garlic cloves peeled
      • ¼ cilantro leaves well-packed
      • ½ jalapeno seeded, deveined, and coarsely chopped
      • 1 teaspoon cumin
      • ⅛ teaspoon allspice
      • ¼ teaspoon dried Mexican oregano* or plain oregano
      • ⅛ teaspoon salt
      • juice of ½ lime about 2 Tb

      Instructions

      • Place mayo in a small food processor.
      • Add remaining ingredients and puree until smooth.
      • Allow the sauce to chill for at least 30 minutes before serving.

      Video

      https://www.tiktok.com/t/ZTRpYThtD/

      Notes

      If you don't have Mexican Oregano, standard oregano will work just fine. 
      I don't have a food processor. Can I still make the recipe?

      Yes, but the texture may be a bit more chunky. Also, be sure to make the garlic into a paste using this technique so it can be easily incorporated.

      Can the recipe be made vegan/vegetarian?

      Yes, you just need to substitute vegan mayo for regular.

      Can the sauce be made without mayonnaise?

      Yes. I recommend Mexican crema or sour cream as a replacement.

      Is cilantro required in the recipe?

      If you hate cilantro, fresh Italian flat-leaf parsley can be used as a substitute.

      Spicy Honey Mustard Dipping Sauce

      February 22, 2022 by Hailey 13 Comments

      Bright yellow honey mustard dressing with flecks of red cayenne pepper in a small glass jar.

      Spicy Honey Mustard Dipping Sauce is the perfect combination of sweet, tang and spice! It’s delicious with chicken strips, fries, raw veggies, and so much more. The recipe is also as easy as it gets.

      Bright yellow honey mustard dressing with flecks of red cayenne pepper in a small glass jar.

      You seriously won’t believe how easy it is to make your own homemade honey mustard. This recipe is the right consistency for dipping, but you could easily thin it out with vinegar or water for a quick salad dressing.

      Honey mustard is hands-down my favorite condiment of all time. I’ve been making my own for so long and am so glad to share this recipe with all of you!

      [feast_advanced_jump_to]

      Ingredients

      All you need to make your own Spicy Honey Mustard are six simple ingredients. I bet you already have all of them in your pantry or fridge right now.

      Ingredients for spicy honey mustard dipping sauce.
      • Yellow mustard- something like French’s yellow mustard.
      • Mayo
      • Honey
      • Vinegar- white wine or rice wine vinegar are my usual choices, but any kind will work.
      • Cayenne pepper
      • Salt

      See the recipe card for quantities.

      Instructions

      It won’t take long to summarize how easy this recipe truly is.

      1. Put everything in a bowl.
      2. Mix that shit up.
      3. DONE!
      Bright yellow honey mustard dressing in a glass bowl being stirred by a yellow spatula.

      The only other step is to let the prepared sauce sit in the fridge for at least 30 minutes before serving. This allows all of the flavors to blend together.

      Substitutions/Variations

      Given how simple this recipe is, there are only a few substitutions and variations to offer.

      • Mustard- Dijon instead of yellow mustard will make a Honey Dijon Dipping Sauce.
      • Mayo- Use vegan mayo to make the recipe vegetarian and vegan-friendly.
      • Vinegar- Double the vinegar and add water as needed to make the consistency more like a salad dressing.
      • Cayenne- Use your favorite hot sauce or red pepper flakes instead of cayenne pepper. Omit the cayenne pepper for a straight-up, not spicy Honey Mustard,

      Equipment

      All you need to make this recipe is a bowl and a spoon. A small whisk is nice but not required.

      Storage

      Spicy Honey Mustard can be kept in an airtight container in the fridge for up to two weeks. Be sure to stir the sauce well after removing from the fridge.

      Even if the ingredients were all at room temperature when the dipping sauce was made, be sure to store it in the fridge after it’s prepared. Mayo and mustard should both be refrigerated after opening.

      Top tip

      Homemade dressings and dips are always better when they have a chance to chill before serving. The extra time allows the flavors to blend. The more aggressive flavors, like mustard in this recipe, tone down and allow the more subtle ones to shine.

      Point is, let your Honey Mustard chill for at least 30 minutes after mixing.

      Bright yellow honey mustard dressing with flecks of red cayenne pepper in a small glass jar.

      Serving suggestions

      You can't go wrong with fried chicken and honey mustard. My Corn Flake Chicken Strips would be the perfect dish to serve along with honey mustard.

      If you're looking for something a little more unique, my Cilantro Chicken Sandwiches and Tots would be fire (AKA delicious) with this dipping sauce.

      Spicy Honey Mustard Dipping Sauce is addictive, delicious, and easy to make. Once you make your own homemade sauce, you’ll never buy it again. Let me know what you think of this super simple dip.

      Bright yellow honey mustard dressing with flecks of red cayenne pepper in a small glass jar.
      Print Recipe
      4.72 from 14 votes

      Spicy Honey Mustard Dipping Sauce

      With six simple ingredients and less than five minutes, you can make homemade Spicy Honey Mustard Dipping Sauce. It's the perfect dip for chicken strips, fries, or veggies!
      Prep Time5 minutes mins
      Course: Side Dish
      Cuisine: American
      Servings: 1 cup

      Ingredients

      • ½ cup mayonaisse
      • 6 Tb yellow mustard
      • 2 Tb honey
      • 1 Tb white wine vinegar
      • ¼ - ½ teaspoon ground cayenne pepper
      • ⅛ teaspoon salt

      Instructions

      • Mix all ingredients together. Chill for a minimum 30 minutes before serving.

      FREQUENTLY ASKED QUESTIONS

      Can the recipe be made vegan?

      Yes, just substitute vegan mayo for regular and the recipe is vegan-friendly.

      I don't have cayenne pepper. Can I use something else to make it spicy?

      Your favorite hot sauce or red pepper flakes would both work as a substitute for cayenne.

      Is white wine vinegar the only kind I can use?

      No. Rice wine vinegar or any other mild, light-colored vinegar will work.

      Best Substitutes for Oregano

      February 6, 2022 by Hailey Leave a Comment

      green oregano leaves in a wooden spoon.

      Finding the best substitute for oregano depends on what dish you're creating. Let's discuss the best options.

      green oregano leaves in a wooden spoon.
      Sesame oil had a golden brown color and nutty flavor

      The flavor of oregano is piney with a slight bitterness. The fresh form has a very pungent flavor, while the dried variety is more mellow. Dried is the most often used. If you prefer to use fresh, be sure to use half the amount of dried oregano called for in the recipe.

      The recipes that include oregano are almost limitless. It's a common ingredient in pizza, Mexican food, taco seasoning, chili, chimichurri sauce, and more. Mediterranean is the most commonly used variety, while other recipes specifically call for Mexican.

      Fun fact, Mexican oregano is not related to Mediterranean. Most oregano on store shelves is the Mediterranean variety although the label may not specify. On the other hand, it will be labeled as Mexican if it is that kind.

      fresh oregano growing.

      The flavor of Mexican oregano is milder and has a citrus note. Isabel Eats has a great article if you're interested in learning more about the differences in Mexican versus Mediterranean.

      Mexican oregano can be used as a substitute. It's not included in the list below because I have a hunch that if you had it in your pantry, you wouldn't have gone searching for a substitute on the internet.

      If you’re looking for a good replacement for oregano, you have several options.

      [feast_advanced_jump_to]

      1) Thyme

      Fresh or dried thyme works nicely as a substitute for oregano. Thyme is a versatile herb that blends in easily to almost any recipe. Fresh thyme is also commonly available at the grocery store.

      fresh thyme leaves on the stem sitting on top of pieces of newspaper.

      2) Basil

      If you're making an Italian recipe, I recommend fresh or dried basil as the substitute. Basil and oregano are both members of the mint family, so their flavors are similar. Basil has a sweeter flavor, while oregano is more woodsy.

      basil leaves growing.

      3) Italian Seasoning

      Italian herb mixes are most commonly made up of marjoram, basil, rosemary, thyme, oregano, and sage, so using it just means you'll add a bit more herbaceous flavor to your recipe. In most cases, dried Italian seasoning is very versatile and mild in flavor making it a good substitute for oregano.

      three wooden spoons filled with dried herbs.

      4) Sage

      Oregano has a strong earthy flavor that is like pine and lemons. Of all of the herbs listed here, sage most closely resembles that earthy flavor. Keep in mind that sage has a very bold flavor. I only recommend it as a substitute in a recipe that can hold up to it's assertive taste. I prefer dried for a sub as it's not quite as intense as fresh.

      fresh sage leaves on a rustic wood board.

      TIP: Fresh sage is particularly pungent when compared to dried oregano. Be sure to only use half of the amount called for in the recipe if you substitute fresh sage.

      5) Rosemary

      Rosemary is a common ingredient alongside oregano in Italian seasoning. It shares the same flavors of lemon and pine, but rosemary packs a big punch. Fresh rosemary is very strong in flavor. For this reason, dried rosemary is the better substitute.

      bright green fresh rosemary.

      More delicious recipes using oregano

      There are oodles of recipes on the blog that include oregano. Tex-Mex recipes like Mexican Chicken Lasagna and Creamy Avocado Sauce include it. You can also find it in some Italian recipes like Italian Meatloaf.

      If you don’t have oregano on hand, you can still make these recipes using any of the recommended substitutes.

      Raising Cane's Sauce

      January 24, 2022 by Hailey 15 Comments

      chicken strip being dipped into glass jar of cane's sauce.

      Raising Cane's Sauce is what makes their fried chicken stand out from all the rest. The irresistible combination of ketchup, mayonnaise and spices is no longer a secret! You can make your own at home.

      chicken strip being dipped into glass jar of cane's sauce.

      Raising Cane's Chicken has quickly become an institution in the South. Keep in mind, there are lots of options for fried chicken in the southern United States. The quickest way to stand out in the fast-food fried chicken space is a delicious sauce, and this one can't be beat!

      In fact, I like this copycat recipe so much that I featured it previously on my Corn Flake Chicken Strips post. It would also make a delightful dip for Louisiana Meat Pies. Fun fact, Raising Cane's also started in Louisiana.

      So what does it taste like? Some compare it to Fry Sauce or Comeback Sauce, but I think the flavor of this dupe recipe is unique. It takes like a blend of garlic, pepper, ketchup, and magic.

      [feast_advanced_jump_to]

      Ingredients

      Six simple ingredients are all it takes to mix up your own batch of Cane's sauce. Seriously, this recipe is as easy as it gets!

      ingredients needed for Cane's sauce.
      • Ketchup- Whataburger ketchup can't be beat, but any brand will work.
      • Mayo- we love Duke's at my house but any brand will work.
      • Paprika- stay away from smoked paprika for this recipe unless you want a smoky version (see Variations below).
      • Pepper- I prefer coarse ground pepper for this recipe so you can see the flecks of pepper in the sauce.
      • Garlic Salt
      • Worcestershire Sauce

      See recipe card for quantities.

      Instructions

      Grab a pen and paper because you may need to write all of this down. I'm kidding! You dump everything in a bowl and stir it up. That's it!

      cane's sauce in a glass container with a spoon.

      Hint: The most important step in the recipe is to let the Cane's sauce chill before serving. I like to let the sauce sit overnight. The minimum time I recommend is an hour. Chill time allows all the flavors to mix together.

      Substitutions

      The only possible substitution I can offer for this recipe is for the garlic salt. Garlic powder can be used in its place, but be sure to also add a pinch of salt as well.

      Variations

      Just like any good dipping sauce, the most important thing is that YOU like the taste. Start with the base recipe provided but feel free to jazz it up any way you like. Here are a few suggestions.

      • Spicy - add a few dashes of your favorite hot sauce
      • Vegan - substitute vegan mayo
      • Smoky - substitute smoked paprika for regular paprika

      Storage

      How long can you keep Raising Cane's sauce? The better question is will you be able to keep any. Around my house, the answer is definitely no.

      Be sure to store the sauce in an airtight container in the fridge. If stored properly, the sauce can be kept for up to 30 days.

      Top tip

      I know this advice will be difficult to follow, but do yourself a favor and let the sauce sit undisturbed for at least an hour before serving. The flavor gets better with time!

      If you're looking for a good copycat recipe for Cane's chicken fingers, check out this one. Honestly though, I think frozen breaded tenders taste almost as good as homemade when smothered in this delicious sauce.

      chicken strip being dipped into glass jar of cane's sauce.
      Print Recipe
      4.32 from 29 votes

      Raising Cane's Sauce (Copycat)

      Raising Cane's secret sauce is the perfect blend of mayo, ketchup, and spices. This copycat recipe tells you exactly what is in the signature sauce, so you can make it at home.
      Prep Time2 minutes mins
      Chill time1 hour hr
      Total Time1 hour hr 2 minutes mins
      Servings: 1 cup

      Ingredients

      • ½ cup mayonnaise
      • ¼ cup ketchup
      • ½ teaspoon paprika
      • ½ teaspoon garlic salt
      • 1 teaspoon coarse ground black pepper
      • ½ teaspoon worcestershire sauce

      Instructions

      • Combine all ingredients and stir well. Allow the prepared sauce to sit for a minimum of one hour before serving.

      Creamy Avocado Sauce for Tacos

      January 17, 2022 by Hailey Leave a Comment

      green avocado sauce for tacos in a white star-shaped bowl on a festive napkin.

      You have found the BEST Creamy Avocado Sauce for Tacos and so much more. It even makes an amazing salad dressing for taco salads. The recipe is quick, easy, and crazy delicious! Add a jalapeno to the recipe for a little extra kick.

      green avocado sauce for tacos in a white star-shaped bowl on a festive napkin.

      I'm a firm believer that a sauce can make or break a dish. In fact, an awesome dip can take an ordinary meal from the freezer to extra special deliciousness in no time. Creamy Avocado Sauce is just that kind of condiment. With a few ingredients and spices, you have a velvety smooth green sauce that is excellent on just about anything.

      Sheet Pan Chicken Fajitas and Braised Salsa Verde Pork Tacos would both be amazing smothered in this Mexican-style green sauce.

      [feast_advanced_jump_to]

      Ingredients

      The ingredients in this recipe are simple and easy to find. I added a few spices to the mix to add depth of flavor, but it would be just as good without them. Except for salt, you definitely need the salt.

      ingredients for creamy avocado sauce on a wooden cutting board.
      • Avocado- ripe avocadoes are a must! You want them to be soft but not mushy.
      • Cilantro- if you hate cilantro, you can omit and rely only on the green onion for flavor.
      • Green Onions
      • Fresh Lime- don't forget to zest the lime before juicing. The zest is where all the flavor lives.
      • Chive and Onion Cream Cheese- unflavored cream cheese can be substituted.
      • Sour Cream- Mexican crema can be substituted, but you may need less water
      • Cumin
      • Oregano- Mexican or mediterranean works. Mexican is usually labeled as "Mexican oregano" while what you find labeled as "Oregano" is typically a Mediterranean style.
      • Salt and pepper

      See recipe card for quantities.

      Tip: If you like your sauce spicy, add a jalapeno to the recipe for a spicy and creamy green sauce.

      Instructions

      To make Creamy Avocado Sauce, there are three simple steps. It's so quick and easy.

      First, place all the ingredients into your food processor or blender.

      creamy avocado sauce ingredients in a food processor bowl.

      Puree the ingredients until smooth and add water to reach the right consistency. The final step is to taste the sauce and add salt as needed. I usually add a pinch or two.

      avocado sauce ingredients in the food processor after being pureed smooth

      Hint: The sauce benefits from a little chill time after preparation. It's not required, but letting the prepared sauce sit in the fridge for 30 minutes to an hour before eating lets all the flavors blend together for a more balanced taste.

      Substitutions

      Because the recipe only has a small number of ingredients, any substitutions will change the flavor profile. Here are a few substitutions that will work.

      • Cilantro- flat leaf italian parsley can be substituted so the sauce keeps it's bright green color.
      • Lime- lemon can be substituted.
      • Sour Cream- Mexican crema or plain Greek yogurt can be used instead.
      • Onion and Chive Cream Cheese- unflavored cream cheese works just as well.

      The recipe can also be converted to dairy-free by substituting dairy-free alternatives for sour cream and cream cheese. I have used almond milk substitutes with good results.

      Some Mexican-style green sauces use mayo, but I like to make my green sauce without mayonaisse so it can used over hot dishes without melting. Remember, mayo is fat so it will melt when put on something warm.

      spoonful of creamy avocado sauce being spooned from a white bowl.

      Equipment

      A food processor or blender is needed to make this recipe. You could make it without any equipment, but the texture will be chunky instead of creamy.

      A food processor is one of the best kitchen investments you can make if you don't already have one. Even a smaller model works for simple jobs like making this recipe. I've linked to both options below.

      • Cuisinart 4-Cup Food Processor
      • Cuisinart 11-Cup Food Processor

      Storage

      Creamy Avocado Sauce should be kept in the fridge in an airtight container. I like to use a mason jar personally, but a well-sealed plastic container will work too. The sauce is best eaten in 3 days.

      Hot Tip

      Be sure you have ripe avocadoes for this recipe. I don't know about you, but I never find ripe ones when I make a trip to the store. Try to plan ahead for this recipe so you can ensure your avocadoes are perfect!

      Need a little help picking the perfect avocado? Check out this article for some helpful hints.

      green avocado sauce for tacos in a white star-shaped bowl on a festive napkin.
      Print Recipe
      4.22 from 19 votes

      Creamy Avocado Sauce for Tacos

      A quick and easy green sauce that includes something unique. It's not just sour cream and avocado that make this sauce super smooth and creamy. Add it to tacos, quesadillas or any other Mexican dish.
      Prep Time5 minutes mins
      Total Time5 minutes mins
      Servings: 2 cups

      Ingredients

      • 1 large avocado or 1½ small avocadoes
      • ¼ C sour cream
      • ¼ C chive and onion cream cheese
      • Half bunch cilantro
      • 4 green onions green part only
      • 1 lime zest and juice
      • ¼ teaspoon cumin
      • ¼ teaspoon oregano
      • ¼ teaspoon ground black pepper
      • salt to taste
      • ¼ C water

      Instructions

      • Add all ingredients except salt and water to a food processor or blender. Puree until smooth. Turn off the machine and scrape down the sides and bottom.
      • Add water and blend until smooth. If you'd like the sauce to be thinner, as more water 1 Tb at a time until the desired consistency is reached.
      • Taste and add salt as desired.

      Frequently Asked Questions

      Will my avocado sauce turn brown?

      Nope, the addition of lime keeps the avocado sauce from turning brown. Be sure to keep it in an airtight container too.

      Can I make this recipe dairy-free?

      Sure. Substitute the sour cream and cream cheese with dairy-free alternatives.

      How can I make the sauce spicy?

      Add 1 seeded jalapeno (cut into large pieces) to the recipe for additional heat. Alternatively, you could add a few dashes of your favorite hot sauce.

      How long will the sauce stay fresh?

      The sauce can be kept for up to five days, I think the flavor is best when eaten within 3 days.

      Best Substitutes for Italian Seasoning

      January 5, 2022 by Hailey Leave a Comment

      three wooden spoons filled with dried herbs.

      To pick out the best substitute for Italian seasoning, let’s take a closer look at what ingredients are included. I bet you can’t guess what the first ingredient is in most grocery store brands.

      three wooden spoons filled with dried herbs.
      Sesame oil had a golden brown color and nutty flavor

      McCormick’s Italian Seasoning is a combination of marjoram, basil, rosemary, thyme, oregano, and sage. That’s right, marjoram is the first ingredient. Before doing my research for this post, I would have guessed basil or oregano would be the primary ingredient given they are both common in Italian cooking.

      If you’re looking for a good replacement for Italian seasoning blend, you have several options.

      [feast_advanced_jump_to]

      1) DIY Italian seasoning

      Creating your own spice blend may not be your first idea, but it’s simple to make and inexpensive if you have the ingredients available in your pantry. Check out this recipe from a Couple Cooks.

      This recipe omits the marjoram you see in store-bought brands because, honestly, it’s a filler more than a flavor. If you have four out of five of the herbs called for in this recipe, I’d say go for it!

      dried herbs being scooped with a silver cup.

      2) Equal parts dried oregano, thyme and basil

      Yes, I realize that this suggestion is only slightly different than the DIY recipe above, but I often use this combination if a recipe calls for Italian Seasoning. The combination of these three specific flavors brings the right herbaceous notes to any Italian recipe.

      thyme leaves growing.

      3) Fresh basil

      This is the first herb that comes to mind when I think of Italian herb blends. Basil has a sweet and savory flavor that is the perfect complement to Italian cooking. It’s a good replacement choice when you’re making a recipe that would be considered Italian or if you’re making a lighter dish like a fresh tomato salad.

      basil leaves growing.

      Basil has flavors of anise and mint as well as a peppery finish. The flavor is strong without being overly aggressive. In fact, I prefer fresh basil over dried because the dried lacks flavor in my opinion. Fresh also has a scrumptious aroma that will make any recipe smell amazing.

      4) Fresh or dried oregano

      Oregano has a strong earthy flavor that is like pine and lemons. It can also be bitter in taste. Oregano benefits from being combined with basil and thyme to tame down the assertive flavors, but you can use it alone if it’s all you have.

      fresh oregano growing.

      TIP: Fresh oregano is particularly pungent when compared to dried Italian herb seasoning. Be sure to only use half of the amount called for in the recipe if you substitute fresh oregano.

      5) Herbes de Provence

      Traditionally made from a blend of rosemary, thyme, savory, marjoram and oregano, this mixture tastes quite like an Italian herb blend. The primary difference is that Herbes de Provence lacks basil. If you have this classic French herb mix and dried basil, put the two together and you’re very close to the same flavor as Italian seasoning.

      bright green herbs and light purple lavender in a small white dish.

      More delicious recipes using Italian seasoning

      I use Italian seasoning in all kinds of recipes, not just Italian ones. I love the subtle earthy flavor it brings to any dish. You can find it in simple recipes like my Easy Homemade Pizza Dough. I also include it in comfort foods like my Chicken Pot Pie Crostata.

      If you don’t have Italian seasoning on hand, you can still make these recipes using any of the recommended substitutes.

      TIP: Don't try to use Italian dressing as a replacement. Please, just don't.

      Best Substitutes for Sesame Oil

      December 31, 2021 by Hailey Leave a Comment

      small bowl of sesame oil with spoon sitting on top of toasted sesame seeds.

      Whether you’re making fried rice or teriyaki, sesame oil is one of the most common ingredients in a variety of Asian foods. If you don’t have any, there are several replacements that will work. Here are the best substitutes for sesame oil.

      Fun fact, sesame seeds boast the highest oil content of any seed in the world! It seems wild that such a tiny seed can pack a flavor punch, but it certainly does. Most recipes call for toasted sesame oil which is light brown in color.

      small bowl of sesame oil with spoon sitting on top of toasted sesame seeds.
      Sesame oil had a golden brown color and nutty flavor

      If a recipe calls for untoasted sesame oil, other high heat oils like grapeseed or coconut will work well. On the other hand, the toasted variety contributes flavor to a recipe. If you choose to leave it out completely, the recipe may lack flavor.

      Instead, use one of the substitutions below.

      [feast_advanced_jump_to]

      1) DIY sesame oil

      You’ve probably never thought of making your own sesame oil, but it’s surprisingly easy. Check out this post on Wikihow to learn more about how to make your own from scratch.

      toasted sesame seeds in a small wooden bowl.

      2) Peanut or walnut oil

      If you’re making a stir-fry or fried rice (like my Vegetarian Fried Rice with Roasted Broccoli) where sesame oil is used not only as a flavor but also the cooking fat, then you’ll need a good oil substitute. While peanut and walnut oil do not have the exact same flavor profile, they do have a nutty taste that is more flavorful than olive or canola oil.

      walnut oil being poured from a spoon into a small glass bowl.

      Both also have a high smoke point or in simpler terms, you can use them over high heat. If you’re missing the flavor of sesame in your dish, you could also add one of the following substitutes for more sesame flavor.

      3) Tahini

      Sesame is the primary flavor in tahini because it’s made from toasted sesame seeds. The seeds are hulled and pureed with oil and flavorings until smooth. The texture is like a paste, so the texture is unlike sesame oil.

      bowl of tahini and bowl of sesame oil sitting side by side.

      TIP: To use tahini in place as a substitute, I recommend thinning it out with water first so that it blends more smoothly into your recipe. The texture should be like heavy cream, so not too thick or too thin.

      4) Toasted sesame seeds

      If your recipe could benefit from a little added crunch, toasted sesame seeds can make a perfect replacement. Check out this article from A Couple Cooks that gives two different methods of toasting sesame seeds.

      close up of toasted sesame seeds.

      5) Everything bagel seasoning

      This replacement may seem like it’s completely off-base, but who doesn’t love everything bagel seasoning honestly?! It has sesame seeds to provide a bit of the nutty flavor that sesame oil usually contributes.

      overhead close up of bread covered in everything bagel seasoning.

      The seasoning mix also contains garlic, onion, poppy seeds, and salt. Garlic and onion are welcome in almost any savory recipe I make. The poppy seeds aren’t very strong in flavor.

      TIP: Because the seasoning mix has salt, be sure to omit salt from the recipe, taste after adding the seasoning, and then decide how much salt should be added before serving.

      More delicious recipes using sesame oil

      • Pork and Mushroom Meatballs
      • Sesame Chicken
      • Garlic Sesame Noodles

      Best Substitutes for Fresh Tarragon

      December 29, 2021 by Hailey 1 Comment

      fresh tarragon leaves on a dark wooden board.

      Fresh tarragon is a leafy herb with the flavor of anise or fennel and is commonly used in French cooking. It is mild in flavor but has a unique taste that can be hard to replicate. The best substitutes for fresh tarragon are outlined below.

      If you come across Tarragon in a recipe and can’t find any at the store, don’t let that stop you. This article gives a few different suggestions for what to use if you don’t have fresh tarragon.

      fresh tarragon leaves on a dark wooden board.
      Fresh tarragon has a mild anise flavor and delicate leaves

      Let’s start with what exactly does tarragon taste like. Tarragon is commonly compared to fennel or anise. If you’re not familiar with either of those ingredients, the next closest comparison is licorice, but the flavor is more subtle than the candy.

      Tarragon is used in French recipes including classic béarnaise sauce. Béarnaise is made of clarified butter emulsified in egg yolks and vinegar then seasoned with herbs, traditionally tarragon. Tarragon is also found in chicken salad where it gives a slightly sweet and herbaceous flavor to the dish.

      Below are a few suggestions of what to use if you don’t have Tarragon.

      [feast_advanced_jump_to]

      1) Dried tarragon

      The simplest substitution for fresh tarragon is dried. It can be found on the spice aisle. Keep in mind that dried spices always pack a bigger punch than fresh. The flavor intensifies as the herb loses moisture, so I typically use half of the recommended fresh amount if substituting dried.

      white spoon filled with dried herb leaves

      2) Fennel fronds

      The fresh herb that is most similar in taste to tarragon comes from fennel, a bulb vegetable with delicate leafy fronds. Both the root and the fronds are edible. I recommend using the fronds roughly chopped in place of fresh tarragon when possible.

      close up of fennel bulb with white bottom and bright green leafy top

      If you’re looking for a simple recipe to use the leftover bulb, check out this one from Love and Lemons.

      3) Fennel seeds

      If fresh fennel bulbs are not available, fennel seeds are available on the spice aisle at the grocery store. Fennel seeds are one of the predominant flavors in most Italian sausages, so it’s one you may recognize. I use them in my Italian Meatloaf recipe to provide an authentic flavor.

      close up of fennel seeds pouring out of a glass container

      To use fennel seeds as a substitute for fresh tarragon, I recommend grinding them to a powder or purchasing fennel powder if available.

      4) Fresh basil

      The flavor profile of fresh basil is not identical to tarragon, but they are similar enough to make basil a solid substitute. Basil offers the same subtle sweetness of tarragon with a more peppery bite. Flavor notes for basil often refer to anise much like that of tarragon.

      bright green basil leaves close up

      I like to use basil in place of tarragon in chicken salad recipes like this one. I would not recommend dried basil as a substitute though. It is too pungent and peppery to work in place of tarragon.

      5) Fresh or dried thyme

      Fresh thyme is available at the grocery store at any time of year. It is relatively inexpensive and versatile. Thyme’s flavor profile is not identical to tarragon, but it would complement many of the recipes that commonly feature tarragon.

      fresh thyme leaves on the stem sitting on top of pieces of newspaper

      The flavor of thyme is a bit woodsier and less sweet than that of tarragon. It also has citrus notes, so keep that in mind if you choose this as your substitute.

      TIP: Dried thyme can be used as a substitute if fresh is not available.

      More delicious recipes using fresh tarragon

      • Tarragon Glazed Carrots
      • Creamy Tarragon Chicken

      BBQ Chicken Flatbread

      June 10, 2021 by Hailey Leave a Comment

      BBQ Chicken Flatbread being cut into four equal pieces

      BBQ Chicken Flatbread is a quick and easy dinner recipe that everyone at your table with devour. The recipe uses naan as pizza crust and rotisserie chicken as a shortcut, so it can be prepared in less than 30 minutes easily! The flavors of barbecue with accents of lime, jalapeno and onion make the perfect summer bite.

      BBQ chicken flatbread cut into four equal pieces

      What is BBQ Chicken Flatbread?

      I like to think of flatbread as pizza minus the sauce and with a more bread-like crust. Flatbreads are a great shareable snack, but they also make a unique dinner. It’s kind of like a personal pizza, and who doesn’t love that?!

      BBQ Chicken Flatbread consists of simple ingredients that are big on flavor with very little prep.

      BBQ Chicken Flatbread ingredients
      • Fresh corn on the cob adds a nice layer of texture and freshness to the flatbread. I like to char the corn under the broiler for added flavor! If you can’t find fresh corn, I would go ahead and skip this ingredient. Frozen and canned don’t work well in this recipe.
      • Rotisserie chicken keeps this recipe quick and easy. You can also roast your own boneless skinless chicken breasts if you prefer white meat only. This Gimme Some Oven recipe would work well. Simply remove the skin and pull the chicken away from the bone before tossing it in barbecue sauce.
      • Barbecue sauce is totally a matter of personal preference, so I hesitate to recommend a specific brand. We like all kinds of different brands and often venture out to try new ones at my house. That being said, Stubb’s is always a good choice in my opinion.
      • Jalapeno, lime, cilantro, and red onion bring brightness and acidity to the flatbreads. If you don’t like any of these particular garnishes, feel free to omit them, but they each add a special flavor to the recipe.
      • Naan is one of my favorite ways to start an easy pizza or flatbread recipe. It’s always available at the grocery store and provides a crisp base without the added work of messing with dough. I like to toast the naan with a little olive oil and garlic salt before topping it with the chicken.
      • Shredded mozzarella gives the flatbreads those bites with ooey-gooey cheese pulls that we all love.
      • Ranch dressing for dipping is totally optional. It’s particularly good though if you piled your flatbread high with spicy pickled jalapenos.

      Helpful Tools

      A mandoline is super helpful when you’re thin-slicing produce. For this recipe, I like slicing the jalapenos and red onion both really thin, so the flavors all meld together on the flatbread. A mandoline is not required, but they are inexpensive and help speed up prep significantly.

      BBQ Chicken Flatbread Process shot

      What to do with leftovers

      If you end up with leftover flatbreads, they can be reheated in the oven or in a toaster oven. I would recommend reheating before adding any pickled jalapenos or cilantro. Reheat at 350 degrees for about ten minutes or until warmed through. Once heated, then top with pickled jalapeno and chopped cilantro before serving.

      BBQ Chicken Flatbread being cut into four equal pieces

      BBQ Chicken Flatbread combines everything you love about BBQ Chicken Pizza and makes it into a super fast and easy weeknight dinner. I can't wait to hear what you think of this recipe!

      close up of piece of BBQ Chicken Flatbread

      HELPFUL UTENSILS

      green mandoline

      Mandoline-speed up your prep with this handy tool!

      two slices of bbq chicken flatbread on a speckled off white plate with a side of ranch dressing
      BBQ chicken flatbread cut into four equal pieces
      Print Recipe
      4 from 3 votes

      BBQ Chicken Flatbread

      BBQ Chicken Flatbread is a quick and easy recipe that is bright, fresh and delicious!
      Prep Time15 minutes mins
      Cook Time15 minutes mins
      Course: Main Course, Snack
      Cuisine: American
      Servings: 4 naan flatbreads

      Ingredients

      • 1 fresh corn cob
      • ½ rotisserie chicken skin removed and pulled
      • ¾ C barbecue divided
      • 1 jalapeno
      • 1 lime
      • ¼ C fresh cilantro
      • 1 small red onion
      • 4 pieces naan
      • 2 Tb olive oil
      • ½ teaspoon garlic salt
      • 2 C shredded mozzarella
      • ranch dressing for dipping

      Instructions

      • Turn the broiler on high. Peel and shuck the corn cob. Place on a small baking sheet covered with foil for easy cleanup. Drizzle with 1 tb of olive oil and smear to coat all the kernels. Place the corn close to the broiler and cook for 10-15 minutes, turning frequently. You're looking for a nice black char. Once charred, remove from the oven and set aside to cool.
      • Preheat oven to 400 degrees. Prepare two baking sheets with nonstick foil or parchment paper for easy cleanup.
      • Combine the rotisserie chicken with ½ C of barbecue sauce and mix to thoroughly combine. Thinly slice the jalapeno and place in a small bowl. Squeeze the fresh lime over the jalapenos and toss to combine. Set aside.
      • Thinly slice the red onion. A mandoline is really helpful for thinly slicing the jalapeno and red onion. I have linked to one above if you're interested in purchasing an inexpensive one.
      • Remove the corn from the cob using a sharp knife. I like doing this over a clean dish towel as it helps kernels from bouncing all over the place.
      • Roughly chop the cilantro.
      • Remove naan from the packaging. Place on the prepared baking sheet. Using a pastry brush, spread an even layer of oil across each piece of naan. Lightly sprinkle ⅛ teaspoon of garlic salt on each piece of naan. Place in the oven for 5 minutes or until starting to toast around the edges.
      • Remove from the oven. Top each naan with a quarter of the pulled chicken and ½ C shredded mozzarella. Add a quarter of the charred corn kernels and as much sliced red onion as desired.
      • Bake for 10-12 minutes or until cheese is just starting to brown around the edges. Remove from the oven and slice each naan into four pieces. Top each piece with desired pickled jalapeno and fresh cilantro. Serve with a side of ranch dressing.

      FREQUENTLY ASKED QUESTIONS

      I don't like dark meat chicken. Do I have to use rotisserie chicken?

      Using rotisserie chicken speeds up the recipe, but isn't required. You can also find white meat pre-cooked chicken at the store if you have a brand you know and trust or roast boneless skinless chicken breasts in the oven to use.

      What kind of barbecue sauce do you use?

      Stubb's is a brand we buy often, but any brand you like will work.

      Corn is out of season. Can I use frozen or canned?

      I would omit corn from the recipe if fresh isn't available.

      Easy Homemade Pizza Dough

      May 19, 2021 by Hailey Leave a Comment

      two uncooked pizza dough balls on a wooden cutting board

      Once you learn to make Easy Homemade Pizza Dough, you will wonder why you ever depended on the delivery man for hot, fresh pizza. As advertised, this pizza dough is so easy to make and uses ingredients that are pantry staples. The crust turns out with the perfect amount of chew and crisp edges.

      two uncooked pizza dough balls on a wooden cutting board

      A stand mixer is helpful for making the dough, but it’s not required… more on that below. Don’t let the lack of special equipment stop you from making pizza at home. Once you start making dough from scratch, you’ll realize how easy pizza is to make!

      What is pizza dough made of?

      The ingredients in pizza dough are all pantry staples, but they are all important to the recipe.

      ingredients for easy homemade pizza dough

      The temperature of the water matters.

      You need to use warm water so that the yeast dissolves properly. If the water is too hot, it will actually kill the yeast and the dough won’t rise at all. I like to use tap hot water. A good rule of thumb is that if the water is too hot to touch, it’s too hot for yeast.

      All-purpose flour makes a delicious pizza crust.

      All of you die hard double-zero flour people- come at me. For the rest of you who are wondering if double-zero is an action movie you missed, don’t worry about it!

      Double zero flour is what a lot of recipes call for. It does give the crust a distinct chew, but honestly, I am not a fan of recipes that require a different type of flour. We always have all-purpose in the pantry, so I created a recipe that only requires that.

      Instant yeast speeds up the recipe time.

      Instant yeast is also sold by Fleischmann’s at Rapid Rise yeast. The difference between instant yeast and active dry yeast is that instant yeast comes already activated- meaning you can mix it straight into other ingredients and it will rise.

      Active dry yeast must first be activated in water for a few minutes before adding flour and other ingredients. If you botch this step, your dough may never rise which is quite disappointing. Instant never fails in that way.

      From my experience, active dry yeast also rises more slowly than instant yeast does. Using instant yeast is a time saver during both the prep and rise times and helps keep the recipe fail-proof.

      Is a stand mixer necessary to make pizza dough from scratch?

      I’m not going to lie. A stand mixer certainly makes dough from scratch easier. If you’re interested in one, I have linked to one below. That being said, I know it is a significant investment and takes up a lot of counter space. You can definitely still make pizza dough at home if you don’t have a mixer.

      aqua Kitchenaid Artisan stand mixer

      To make the dough without a mixer, you will need to work the dough for the final 2-3 minutes by hand. As soon as the dough comes together after adding the olive oil, turn the dough out onto a lightly floured work surface. Gently knead the dough for the remaining two minutes until the dough feels elastic and smooth in texture.

      Here is a great tutorial video if you’re just learning to knead dough by hand.

      Where to let dough rise

      Dough should be left to rise in a warm place but not hot. Yeast is sensitive and much like hot water can kill your yeast, too hot of temperatures when rising is not good for the dough. During the summer, room temperature is sufficiently warm enough, but during the winter I like to use my dryer. I learned this tip from another blogger, and I love it!

      First, make sure your dryer is empty. Turn the dryer on for 5 minutes on medium heat with nothing inside. Stop the dryer after five minutes and place the bowl containing the dough inside and quickly close the door. Don’t turn the dryer back on! Let the dough rise in the dryer with the door closed (no peaking) for 45 minutes.

      When is the pizza dough ready?

      When the dough has doubled in size, the dough is ready for pizza toppings. I like to use a bowl that is double the size of the unrisen dough ball. That way, you know the dough is ready when the dough fills the bowl.

      pizza dough process shots showing dough before and after rising

      Pro tip: Spray the side of the plastic wrap that will be touching the dough with a bit of baking spray before placing on top of the bowl. You can see what happens in my image above when the dough sticks to the plastic wrap. Not a big deal, but it’s easily avoided with this extra step.

      How long will the dough last

      Pizza dough can be kept in the fridge for up to 48 hours. Just place the bowl sealed with plastic wrap in the fridge. The dough will rise some in the fridge but not fully. Plan to let the dough rest at room temperature for an hour before baking.

      two uncooked pizza dough balls on a wooden cutting board

      Can pizza dough be frozen?

      When freezing pizza dough, you will want to let the dough rise first. After the dough has risen, form into the desired size crust and freeze. The crust will need to thaw in the fridge overnight and then come to room temperature before baking.

      I promise that once you start making homemade pizza, delivery pizza will be a thing of the past. Homemade pizza is almost a weekly occurrence at our house because it is that simple and delicious.

      piece of pepperoni pizza

      If you’re looking for a new pizza to try, be sure to check out my Prosciutto and Arugula Pizza with Cantaloupe. It’s like no pizza you’ve had before!

      two uncooked pizza dough balls on a wooden cutting board
      Print Recipe
      4 from 4 votes

      Easy Homemade Pizza Dough

      Easy Homemade Pizza Dough is quick and you probably already have all of the ingredients in your pantry right now. The crust is chewy with a crisp edge- perfect for homemade pizza!
      Prep Time5 minutes mins
      Rise Time45 minutes mins
      Course: Main Course
      Cuisine: American, Italian
      Servings: 2 12" crusts*

      Ingredients

      • ⅞ C warm water approx. 110 degrees
      • 1 packet instant yeast or 2¼ tsp
      • 1 tsp white sugar
      • 1 teaspoon kosher salt
      • 2 C all-purpose flour
      • 1 Tb olive oil
      • ⅓ teaspoon Italian seasoning optional
      • baking spray

      Instructions

      • Add the water, yeast, and sugar to a stand mixer bowl fitted with a dough hook attachment. See details above on how to make if you don't have a stand mixer. Mix on medium to combine.
      • Turn of the mixer and add flour, salt, and Italian seasoning. Mix on low until the dough starts to come together. If the dough looks dry after a full minute on low, add more water 1 Tb at a time until the dough comes together.
      • A dough that is slightly sticky is favorably to a dry dough. If the dough is dry, the crust will be tough. It's okay if the dough is slightly sticky to the touch. It will become less sticky after rising.
      • Work the dough on low speed for 2 minutes before drizzling the olive oil around the edge of the bowl with the mixer on. Continue to work for another 30 seconds. Turn the mixer off.
      • Prepare a large clean mixing bowl with baking spray so that the dough doesn't stick after rising. Remove the dough from the stand mixer bowl, gently forming into a ball shape, and place into the prepared clean bowl. Cover the bowl tightly with plastic wrap.
      • Allow the dough to rise for 45 minutes to an hour in a warm (not hot) place until it has doubled in size.
      • If making two 12-inch pizzas, be sure to split the dough into two equal portions before placing on baking sheets.
      • Prepare your pan or pizza stone with a spritz of baking spray before placing dough out onto the pan. Press down the dough gently with your hands to knock the air our and then stretch the dough from the center outwards to fill the pan.
      • Using a fork, prick holes in the center area of the dough where the toppings will be placed to prevent the crust from bubbling up. Top with sauce and desired toppings.
      • Bake at 425° for 15-18 minutes depending on the amount of toppings and desired doneness.

      Notes

      * This recipe will make one sheet pan size pizza or two 12-inch round pizzas.

      Hawaiian Chicken Sandwich

      May 12, 2021 by Hailey 10 Comments

      hawaiian chicken sandwich on a grey plate with barbecue sauce drips

      Hawaiian Chicken Sandwiches are packed with sweet, savory, and salty flavors. They are irresistible! Teriyaki marinated chicken breasts are first grilled to perfection. Next, the cooked chicken is topped with crisp bacon, sweet pineapple, melted swiss cheese, and barbecue sauce for a BBQ chicken sandwich like none other!

      Two hawaiian chicken sandwiches on a wooden cutting board

      Who said grilled chicken sandwiches are boring? Whoever did, they clearly have never tried my Hawaiian Chicken Sandwiches- no one would ever describe these sandwiches as boring! Even better, they are surprisingly easy to make.

      What is a Hawaiian Chicken Sandwich?

      The combination of teriyaki chicken and pineapple is what makes this chicken sandwich a Hawaiian one. You could also use a Hawaiian-style bun for serving if you want to up the Hawaiian vibes, but it’s not essential. However, the pineapple is totally necessary. Without it, this is just a BBQ chicken sandwich.

      ingredients for hawaiian chicken sandwich with labels

      Can I make the recipe ahead of time?

      I don’t recommend making the chicken breast ahead of time; they can dry out pretty easily. Instead, you can prepare a couple of the sandwich toppings ahead of time so that assembly is faster at dinner time. The items that can be done ahead of time are:

      • Caramelize the onions- Check out my Caramelized Onions post for more details on this process.
      • Fry the bacon- The bacon can be reheated while the cheese melts in the oven. You can fry it up to 3 days ahead of time. Once fried and drained, place in an airtight container in the fridge until ready to use.

      The rest of the recipe is quick and easy to put together. If you knock out preparing the caramelized onions and bacon ahead of time, assembling the sandwiches takes no time at all.

      Hawaiian chicken process shots with chicken marinating and then cooked

      I don’t like to marinate the chicken ahead of time. Teriyaki has a lot of salt, and if left on the chicken too long, the meat can get a strange texture. Leave marinating for the day of, and limit the marinating time to one hour max.

      What brand of teriyaki marinade to use?

      Kikkoman is my preferred brand of teriyaki marinade but feel free to substitute with any store-bought variety you like. If you prefer to make your own, I’m a fan of Cookie and Kate’s recipe.

      hawaiian chicken process shots of topping the chicken breast with pineapple, cheese and bacon

      Fresh versus Canned Pineapple

      For this application, I think canned pineapple rings are perfect. I love the flavor of fresh pineapple and would never discourage you from using it. Canned pineapple stored in 100% juice is a great choice for a quick and simple weeknight dinner.

      hawaiian chicken process shots of assembling the sandwiches

      Want to learn how to prepare a whole pineapple? Check out this post from Eat This, Not That.

      How to store Hawaiian Chicken Sandwiches

      Enjoy these sandwiches hot and fresh! If you have leftovers, you can store the chicken breasts topped with bacon and cheese in an airtight container for up to three days. Always assemble the sandwiches just before eating.

      Hawaiian chicken sandwiches on a wooden cutting board

      Hawaiian Chicken Sandwiches will make you forget about that god-awful fast-food grilled chicken sandwich you choked down one time. In fact, this recipe is so easy and finger-lickin' good that you'll never want another plain chicken sandwich again. Let me know what you think in the comments section below.

      hawaiian chicken sandwich on a grey plate with barbecue sauce drips
      hawaiian chicken sandwich on a grey plate with barbecue sauce drips
      Print Recipe
      4.63 from 8 votes

      Hawaiian Chicken Sandwich

      Teriyaki marinated chicken topped with pineapple, cheese, and bacon makes for mouth-watering grilled chicken sandwiches. Hawaiian Chicken Sandwiches are sweet, salty, and satisfying!
      Prep Time10 minutes mins
      Cook Time20 minutes mins
      Course: Main Course
      Cuisine: American
      Servings: 4 sandwiches

      Ingredients

      • 4 boneless skinless chicken breasts
      • 1 lime
      • 1 C teriyaki marinade
      • 8 slices bacon cooked crisp
      • 1 C caramelized onions*
      • ½ teaspoon kosher salt
      • ½ teaspoon ground black pepper
      • 2 Tb oil
      • 4 pineapple slices**
      • 4 slices swiss cheese
      • 4 brioche buns
      • 4 pieces green leaf lettuce
      • 1-2 roma tomato
      • ½ C barbecue sauce

      Instructions

      • Place chicken breasts into a gallon-size plastic storage bag. Top with teriyaki marinade. Zest the lime and add zest to chicken. Seal the plastic bag and place in a bowl. Put in the fridge for 30 minutes to an hour.
      • Cook bacon to desired crispness. Drain well after cooking and set aside. Slice tomato into ¼-inch slices. Warm the buns for 5 minutes in a 350° oven if you like your buns toasted.
      • Preheat the oven to broil on high. Prepare a baking sheet with nonstick foil or parchment paper for easy cleanup.
      • Once the chicken has marinated, remove it from the liquid and place on a cutting board. Pat dry. Season with salt and pepper evenly. Preheat a large saute pan over medium high heat. Add the oil and once hot, add the seasoned chicken.
      • Cook for 4-5 minutes per side or until completely cooked through. For extra thick chicken breasts, you may need to add another 2 minutes of cooking time per side.
      • Once the chicken breasts are cooked through, remove them to the prepared baking sheet. Top each chicken breast first with a slice of pineapple then top the pineapple with a slice of swiss cheese. Place the sheet pan under the hot broiler for 2-4 minutes or until the swiss cheese is bubbly hot.
      • Remove the chicken from the oven. To assemble the sandwich, coat both sides of the bun with barbecue sauce. Add a piece of lettuce to the bottom bun, top with chicken, two pieces of bacon, ¼ C caramelized onions, sliced tomato, and the top bun.

      Notes

      * Check out my Caramelized Onions post for more details on how to make them yourself. Thinly sliced red onion can be substituted.
      ** I use canned pineapple that is packaged in 100% juice. Fresh can be substituted as well.

      FREQUENTLY ASKED QUESTIONS

      Do I have to caramelize onions?

      Thinly sliced red onions can be substituted.

      What brand of teriyaki sauce do you recommend?

      I use Kikkoman, but any brand will work.

      Can fresh pineapple be substituted for canned?

      Absolutely.

      Caramelized Onions

      May 3, 2021 by Hailey Leave a Comment

      Caramelized onions being scooped from the pan with a wooden spoon

      Caramelized onions are a must-have recipe in your arsenal. Onions have plenty of natural sugar, so with a little butter and heat, magic happens. The onions turn a beautiful caramel color, and the flavor intensifies and becomes sweeter. They are fantastic on any burger or sandwich and can be the foundation for all kinds of sauces and dips.

      caramelized onions in a saute pan with a wooden spoon

      The texture of properly caramelized onions is like a good jam- silky but still with some texture. The flavor is sweet and rich with a hint of salt. Once you’ve mastered the technique to prepare them, you’ll be putting them on everything!

      People swoon over the decadent flavor of caramelized onions. They think that making them is somewhat cloaked in mystery. Let me dispel that notion for you here and now. They are actually easy to make- they just take 4 ingredients plus patience.

      ingredients for caramelized onions

      Tip and Tricks for Caramelizing Onions

      • It takes a lot of onions to make caramelized onions. You may be surprised to learn that a pound and a half of raw onions only cook down to about a cup of caramelized.
      • White or yellow onions work best for this recipe. Any sweet variety (typically labeled as sweet onions at the store) is a great choice for caramelizing. Avoid red onions.
      • Use a large pan or pot for caramelizing onions. If you crown the onions in the pan, they will steam which makes any browning almost impossible. Make sure your onions have plenty of surface area to spread out while cooking.
      Process shot of caramelized onions
      • The biggest mistake you can make when caramelizing onions is to rush the process. The highest heat setting I use in this recipe is medium and that’s only to help the onions soften early in the process. Properly caramelizing onions take time; there is no way to avoid it. If you try to crank up the heat, you will end up with burnt edges and a bitter flavor that overshadows the subtle sweetness you’re after.
      • Do not leave your onions unattended. Stir them regularly but not too much. The onions need to be left alone so that they can brown properly, but the browning should be very gentle. So gentle that you’re stirring the onions before they start to get too brown. I aim to stir the onions about once every 45 seconds during the process.
      • You do not need any sugar to caramelize onions. End of story.
      Caramelized onions being scooped from the pan with a wooden spoon
      • I love butter. The flavor that it gives to caramelized onions is essential. I add a bit of olive oil because butter does have the tendency to burn. Olive oil helps keep the smoking temperature (or the temperature where things start to turn black) higher meaning no black onions.
      • Salting caramelized onions is like the icing on the cake. They must have salt but don’t make the mistake of salting the onions too early. Instead, salt them at the very end of the recipe. Salt makes the onions release moisture which can slow down the caramelization.
      Caramelized onions being scooped from the pan with a wooden spoon

      Recipes Ideas

      You’ll find there are so many different ways to use caramelized onions. These are some of my favorite recipes with caramelized onions.

      • Onion Burger Mini Meatloaf
      • Cilantro Chicken Sandwiches
      • Sweet Potato, Apple and Kale Galette

      I also love a good homemade onion dip like Brown Eyed Baker's recipe.

      Proper Storage

      Caramelized onions will keep for up to 5 days in an airtight container in the fridge. The fat will separate from the onions, but a quick reheat in the microwave or on low on the stove combined with a bit of stirring will revive the texture.

      closeup of caramelized onions
      Caramelized onions being scooped from the pan with a wooden spoon
      Print Recipe
      5 from 1 vote

      Caramelized Onions

      Caramelized onions are the perfect topping for any burger or sandwich or as a starter for a creamy sauce. Anyway you use them, they are sweet, silky and delicious.
      Prep Time5 minutes mins
      Cook Time30 minutes mins
      Course: Main Course
      Cuisine: American
      Servings: 1 cup

      Ingredients

      • 1 ½ pounds onions 4 small or 2 large
      • 3 Tb butter
      • 2 Tb olive oil
      • ½ teaspoon kosher salt

      Instructions

      • Cut the ends off the onion, split it in half and peel. Thinly slice.
      • Heat butter and olive oil in a medium saute pan over medium-high heat. Once hot, add the sliced onion. Cook for 5 minutes, stirring often.
      • Once the onions start to brown, turn the heat down to medium-low. Cook for another 10 minutes, stirring often.
      • Once the onions are totally softened and golden, turn the heat down to low. Cook for an additional 15 minutes until the edges are beginning to darken and the texture becomes jam-like.
      • Season with ½ teaspoon of salt or to taste.

      Notes

      Caramelized onions can be stored airtight container in the fridge for up to 5 days. The oil will separate from the onions when chilled. Once reheated, stir well and the mixture will come back together. 

      Vegetarian Fried Rice with Roasted Broccoli

      April 5, 2021 by Hailey Leave a Comment

      Saute pan filled with bright green broccoli florets, grated carrots, sliced green onions and fried rice

      Vegetarian Fried Rice is a quick and easy dinner recipe that can be the main course or a side dish. Either way, it is delicious and a breeze to put together. Eggs and rice are two of the humblest ingredients out there, and the perfect foundation for any weeknight dinner.

      Two black plates filled with bright green broccoli florets, grated carrots, sliced green onions and fried rice

      I am in no way claiming to be the fried rice expert. There are a ton of recipe out there for fried rice… seriously, a shit ton of them. I am, however, a practiced home cook with a specialization in non-boring dinner (hence the blog’s tagline).

      This recipe is approachable- the ingredients are simple and easy to find. It is also super flavorful and offers something unique to your weeknight dinner routine. With just a few ingredients and less than 30 minutes, you can make homemade Vegetarian Fried Rice that is comforting, healthful and tasty!

      Tips and tricks for making Vegetarian Fried Rice

      ingredients for vegetarian fried Rice
      • Roast the broccoli before stir-frying.
        • Yes, I know this is an extra step and it does add a little bit of time to the recipe, but it makes a big difference in the flavor of the fried rice. I didn’t even like broccoli until I had it roasted. The charred edges offer a bitter note to the flavor of broccoli that makes it taste WAY better than the steamed variety. You can use the microwave-in-the-bag broccoli if you’re in a time pinch, but I would argue that roasting only adds ten minutes.
      bright green roasted broccoli with charred edges on a parchment lined baking sheet after roasting in the oven
      • Cut the ingredient into small, consistently sized pieces.
        • There is nothing worse than watching your perfectly fried rice overcook so that your vegetables are tender. You want to make sure your vegetables are small enough to cook quickly and all cut the same size so they cook at the same rate. That’s why I choose to grate my carrots instead of finely dicing. The cuts are consistent, and the carrots are thin enough to cook in a few short minutes.
      Grated carrots in a saute pan with green onions and two eggs, a bowl of cooked white rice and a bowl of green roasted broccoli on the side
      • Cold rice is the most important part of the Vegetarian Fried Rice equation.
        • If you’ve ever tried to make fried rice with steaming hot rice, you already know what a flop it is. Allowing the rice to become completely COLD (notice I didn’t say room temperature or cool- it needs to be cold like your refrigerator) ensures your fried rice granules get golden crisp edges when stir-frying. Leftover rice is perfect for fried rice or make it the night before. Check out my Perfect Basmati Rice recipe if you want fool-proof rice every time.
      rice and and grated carrots in a saute pan being fried with two eggs cracked into a small bowl and a bowl of green roasted broccoli on the side
      • Fresh veggies and eggs are key.
        • When the ingredient list is short and simple, it’s so important to make sure your ingredients are fresh and of high quality. With less than ten ingredients in Vegetarian Fried Rice, there is nowhere for crappy vegetables to hide. Fresh, quality eggs are also key to fried rice. Believe it or not, when eggs are high quality they have tons of flavor. That flavor is the backbone of fried rice.
      Saute pan filled with bright green broccoli florets, grated carrots, sliced green onions and fried rice
      • Get your pan hot and have your ingredients ready before you get started.
        • Everything about fried rice happens fast. That’s what makes it the perfect weeknight dinner recipe. You want to have all of your ingredients chopped/grated/prepared before you start to heat up the pan. Once it’s hot, the next steps in the recipe come rapid-fire!

      Ponzu versus soy sauce

      Ponzu is a close relative of soy sauce with a bright, citrus flavor that is the perfect addition to Vegetarian Fried Rice. It is less salty than soy sauce and milder in flavor so that it’s not as overpowering as soy can be. Feel free to substitute soy for ponzu if you prefer or don’t have any ponzu on hand, but take it easy on the salt.

      Saute pan filled with bright green broccoli florets, grated carrots, sliced green onions and fried rice with ponzu sauce being drizzled in

      Vegetarian Fried Rice is a recipe you will return to regularly and not just because it’s incredibly easy to make. This recipe is delicious and versatile. You can make it spicier with the addition of chili sauce, crunchier by adding peanut or cashews, or more protein-packed by including chicken, shrimp, or tofu. The options are limitless.

      Saute pan filled with bright green broccoli florets, grated carrots, sliced green onions and fried rice

      Give this recipe a try, and let me know how it goes in the comments section below.

      Saute pan filled with bright green broccoli florets, grated carrots, sliced green onions and fried rice with a spoon scooping out a heap
      Saute pan filled with bright green broccoli florets, grated carrots, sliced green onions and fried rice
      Print Recipe
      4.34 from 3 votes

      Vegetarian Fried Rice

      Quick, easy and satisfying- Vegetarian Fried Rice is full of flavor and nutrition. This is fast food you can feel food about.
      Prep Time10 minutes mins
      Cook Time20 minutes mins
      Total Time30 minutes mins
      Course: Main Course, Side Dish
      Cuisine: American, Chinese
      Servings: 3

      Ingredients

      • 1 large broccoli crown
      • 3 green onions
      • ½ cup grated carrots
      • 2 cloves garlic minced
      • 2 Tb oil divided
      • 2 cups prepared rice cold
      • ½ teaspoon sesame oil
      • 2 eggs
      • 2 Tb ponzu sauce

      Instructions

      • Preheat the oven to 400 degrees. Cut the broccoli into small bite-size pieces. Toss lightly in 1 Tb oil and a pinch of salt and pepper. Pour onto a sheet pan prepared with parchment paper or foil for easy cleanup. Roast for 10-12 minutes.
      • Finely dice the green onions, grate the carrot and mince the garlic. Scramble the eggs in a small bowl. Add 1 Tb oil plus sesame oil to a large saute pan over med-high heat.
      • Once the pan is hot, add the white and light green portion of the green onions to the pan. Reserve the green portion for garnish. Add the grated carrot and saute for 2 minutes.
      • Add the minced garlic and saute for one more minute. Add the rice to the pan. Cook for 5-6 minutes, stirring occasionally but not too often.
      • Once the rice has formed crisp edges, clear a space in the center of the hot pan and add the egg. Leave it alone for 20 seconds before stirring into combine.
      • Add the broccoli to the pan and stir to combine. Once the broccoli is warmed through (~1 minute), add the ponzu sauce and mix. Spread the rice out into an even layer and leave alone for about 2 minutes or until a caramel crust forms.
      • Serve with an optional additional splash of ponzu

      FREQUENTLY ASKED QUESTIONS

      Does my rice have to be made ahead of time?

      Cold rice is key to good fried rice. If you start with fresh warm rice, you will end up with super sticky fried rice. The rice has to be chilled, so I recommend making it the day before. 3-4 hours in the fridge is the minimum I recommend.

      What is ponzu sauce?

      Ponzu is a close relative of soy sauce with a bright, citrus flavor. Soy sauce can be used instead, but start with half the recommended amount. Soy is saltier and more intense in flavor.

      Cajun Shrimp and Sausage Pasta

      February 21, 2021 by Hailey Leave a Comment

      Large black saute pan filled with Cajun Shrimp Pasta with rotini pasta, andouille sausage rounds, bright red tomatoes and bell peppers and sliced green onions

      Cajun Shrimp and Sausage Pasta is creamy, delicious comfort food that can be on the table in less than 30 minutes. This quick pasta dish is perfect for a weeknight dinner. Andouille sausage and cream cheese add spice and tang to the dish- no one will believe how quick and simple the recipe is.

      Large black saute pan filled with Cajun Shrimp Pasta with rotini pasta, andouille sausage rounds, bright red tomatoes and bell peppers and sliced green onions

      The base of Cajun Shrimp and Sausage Pasta is andouille sausage and a mixture of vegetables known as the Holy Trinity. The mixture is the backbone for so many different Cajun and Creole dishes.

      Diced green bell pepper, onions and celery are all you need to transport yourself to the bayous of Louisiana. A little andouille doesn’t hurt either. Don’t try to substitute a red bell pepper either.

      ingredients for easy cajun shrimp pasta

      I typically choose red bell peppers, but the unique flavor of a green bell pepper is important to the Holy Trinity. For this recipe, I used green onions instead of the more standard white onion. That’s purely for convenience since the green tops are the perfect garnish.

      Cajun Shrimp and Sausage Pasta comes together with humble ingredients and a half hour. It will blow your mind with how tasty it is!

      What is Andouille sausage?

      Andouille sausage is a spicy pork sausage that is commonly associated with cuisine in Louisiana. It has a slightly drier texture than typical beef sausages, but it is still rich and flavorful. Spruce Eats has a great article about it if you’re interested in learning more.

      Large black saute pan willed with cooking andouille sausage rounds with a bowl of marinated shrimp and sliced green onions on the side

      Andouille can be found in most grocery stores, but if you’re having trouble finding it, the closest substitute flavor-wise is chorizo. Be warned though, you will want to drain some of the fat off if you’re using chorizo.

      Sauteed shrimp and andouille sauage with green onions surrounded by small bowl of cream cheese and a strainer of cooked pasta

      Are frozen shrimp okay to use?

      Absolutely. I’m in a landlocked state, so frozen seafood is pretty much the standard. Being born and raised on the Gulf Coast, I was previously a snob about frozen seafood, but there is great frozen product out there for those of us that don’t wake up by the ocean.

      Large black saute pan filled with Cajun Shrimp Pasta with rotini pasta, andouille sausage rounds, bright red tomatoes and bell peppers and sliced green onions

      My favorite blackening seasoning

      I love Chef Paul Blackened Redfish Magic Seasoning. It’s the perfect balance of flavors without being too spicy or salty. Unfortunately, I’ve never seen it at a grocery store, but you can order through Amazon by following this link.

      Large black saute pan filled with Cajun Shrimp Pasta with rotini pasta, andouille sausage rounds, bright red tomatoes and bell peppers and sliced green onions

      There are plenty of blackening seasonings at your local grocery store. Feel free to try anyone that you like but taste a little bit of it before adding to the recipe. If it’s salty, omit the salt from the recipe.

      Can the recipe be made in advance?

      Definitely, but there are a couple of things to keep in mind. First, reserve all of the garnishes and add them just before serving. That will include the roma tomato, parsley, green onion tops, lemon and parmesan.

      Background of Cajun Shrimp Pasta being scooped with a dark wooden spoon

      Also, the pasta will soak up the sauce the longer that it sits. I would recommend upping the amount of pasta water to 1 cup if you plan to refrigerate the pasta before serving. The sauce will look thin, but once it sits and then reheats, it will be perfect.

      The pasta can be stored in the fridge in an airtight container for up to three days. Reheat with a quick zap in the microwave and then garnish and toss to combine.

      Two white bowls filled with Cajun Shrimp Pasta with rotini pasta, andouille sausage rounds, bright red tomatoes and bell peppers and sliced green onions

      Cajun Shrimp and Sausage Pasta should definitely make it into your weeknight dinner rotation. You won’t regret it! If you like this recipe, be sure to check out my version of Shrimp and Grits- it's one of my favorites on the blog!

      Large black saute pan filled with Cajun Shrimp Pasta with rotini pasta, andouille sausage rounds, bright red tomatoes and bell peppers and sliced green onions
      Print Recipe
      3.60 from 5 votes

      Cajun Shrimp and Sausage Pasta

      Cajun Shrimp and Sausage Pasta is comfort food packed with flavor. Andouille sausage, shrimp and tons of veggies finished in a cream sauce that is fast and delicious.
      Prep Time10 minutes mins
      Cook Time15 minutes mins
      Course: Main Course
      Cuisine: American
      Servings: 4 servings

      Ingredients

      • 8 oz rotini
      • 2 Tb olive oil
      • 1 Tb butter
      • 6 oz andouille sausage
      • 3 green onions
      • 1 green bell pepper
      • 2 celery stalks
      • 1 lb large peeled and deveined shrimp 16-20 size
      • 1 Tb blackening seasoning*
      • 1 teaspoon minced garlic
      • 1 Tb tomato paste
      • ½ C cream
      • 4 oz cream cheese
      • ½ C pasta water
      • 1 teaspoon Italian seasoning
      • ½ teaspoon kosher salt
      • black pepper to taste
      • 1 roma tomato
      • Italian flat leaf parsley
      • 1 lemon
      • shredded parmesan

      Instructions

      • Cook pasta according to package instructions. Reserve ½-cup pasta water for the sauce.
      • Cut the green onions into ¼-piece, reserving the green tops for garnish. Dice the bell pepper and celery into ¼-inch pieces.
      • Place olive oil and butter in a large skillet over medium-high heat. Slice the andouille sausage into ¼-inch thick rounds. Once the oil is hot, add the sausage. Cook for 2-3 minutes, stirring often.
      • Once the sausage is browned, add the diced pepper, celery, and white portion of green onions to the pan. Cook for another 2 minutes or until veggies are softened.
      • While the veggies cook, toss the shrimp in blackening seasoning. Once the veggies are soft, add the shrimp and stir to combine. After one minute, turn the shrimp over and cook for another 1-2 minutes.
      • Turn the heat down to medium and add the garlic and tomato paste. Stir to combine and cook for another one minute.
      • Add cream, cream cheese, pasta water, Italian seasoning, salt and pepper. Stir continuously until the cream cheese is totally melted and the sauce is smooth.
      • Dice the tomato into ¼-inch pieces. Finely mince roughly one tablespoon of parsley. Garnish with diced tomato, minced parsley and reserved green onions. Serve with a dusting of grated parmesan and a lemon wedge.

      Notes

      * Be sure to taste your blackening seasoning to see how salty it is. I use Paul Prudhomme's blackening seasoning which is less salty than others I've tried. If you're blackening seasoning is on the salty side, omit the ½ teaspoon of salt from the recipe.

      FREQUENTLY ASKED QUESTIONS

      Are frozen shrimp okay to use?

      Yes, they are totally acceptable. Just be sure to completely thaw before using.

      Can the recipe be made in advance?

      Yes. Increase the amount of pasta water in the recipe to 1 cup. Reserve the garnishes (roma tomato, parsley, green onion tops, lemon and parmesan) and add just before serving. The prepared recipe (less garnish) can be kept in an airtight container in the fridge for up to 3 days.

      Chocolate Peanut Butter Bars

      February 14, 2021 by Hailey 4 Comments

      Three Chocolate Peanut Butter Bar squares on a small white plate- the squares are made up of a base layer of peanut butter cookie, topped with smooth peanut butter filling and topped with a shiny chocolate ganache and flakes of sea salt

      Chocolate Peanut Butter Bars are the magical marriage of peanut butter cookies, creamy peanut butter filling, and rich chocolate ganache topped with a sprinkle flaky sea salt. Chocolate and peanut butter is a classic flavor pairing that never gets old. This recipe celebrates those two flavors with the added benefit of a cookie crust and the perfect salty finish.

      Chocolate Peanut Butter Bars made up of a base layer of peanut butter cookie, topped with smooth peanut butter filling and topped with a shiny chocolate ganache and flakes of sea salt being plated onto two white small plates

      This recipe is almost no-bake. Only the crust must be baked. The filling and the chocolate topping are both quick and easy to prepare. Not to say the crust is hard to make. It’s super simple to put together.

      Chocolate Peanut Butter Bars are a breeze to make and heavenly delicious. The entire recipe contains less than 10 ingredients and can easily be assembled in an hour or less. You don’t need any fancy equipment or ingredients either. Basically, you have no excuse to not try these amazing cookie bars!

      Chocolate Peanut Butter Bars made up of a base layer of peanut butter cookie, topped with smooth peanut butter filling and topped with a shiny chocolate ganache and flakes of sea salt being

      Ingredients for Chocolate Peanut Butter Bars

      If you’re thinking a recipe with three layers sounds complicated, you’re totally wrong! This recipe only requires eight ingredients- most of which you probably have in your pantry right now. To make Chocolate Peanut Butter Bars you’ll need-

      1. Peanut Butter- There is peanut butter in both the cookie crust and the peanut butter filling to make sure Chocolate Peanut Butter Bars has tons of delicious peanut butter flavor.
      2. Butter- Melted butter gives the cookie crust it’s rich flavor and is the base for the filling which is pretty much peanut butter buttercream.
      3. Brown Sugar- I like the addition of brown sugar to the cookie crust. It adds a nice caramel flavor to the crust and gives added chewy texture.
      4. Powdered Sugar- The peanut butter filling uses powdered sugar as sweetener to ensure the filling stays nice and light.
      5. All-Purpose Flour
      6. Vanilla Extract
      7. Kosher Salt
      8. Semi-Sweet Chocolate Chips
      9. Sea Salt- I love Fleur de Sel as a finishing salt for both sweet and savory recipes. It is super light and flaky compared to normal kosher salt. It also has a delicate taste that doesn’t overpower the other flavors.
      Chocolate Peanut Butter Bars made up of a base layer of peanut butter cookie, topped with smooth peanut butter filling and topped with a shiny chocolate ganache and flakes of sea salt cut into twelve squares on a piece of parchment paper

      Creamy versus crunchy peanut butter

      The choice of creamy versus crunchy peanut butter is totally up to you. Peanut butter is in both the cookie crust and the filling, and you can use creamy or crunchy in both or mix it up by making one with crunchy and one with creamy.

      Crunchy peanut butter will add a nice texture to the recipe, but the bars may not cut quite as smoothly. The peanut butter filling is smooth and creamy when made with creamy peanut butter but also gets some added peanut flavor from crunchy. Basically, you can’t go wrong with either.

      Chocolate Peanut Butter Bars made up of a base layer of peanut butter cookie, topped with smooth peanut butter filling and topped with a shiny chocolate ganache and flakes of sea salt being plated onto two white small plates

      The images in this post are of bars made with creamy peanut butter.

      Can the cookie crust be made in advance?

      Absolutely! If you want to make the cookie crust on the same day but hours before filling it, you can keep the crust at room temperature until you’re ready. If you want to make the crust days in advance, store the crust in the fridge covered in plastic wrap. The crust will keep in the fridge for up to three days before filling.

      How long do Chocolate Peanut Butter Bars last?

      Not very long in my experience, but that’s because they get devoured! They will stay fresh for up to one week when stored in an airtight container in the fridge.

      Chocolate Peanut Butter Bars made up of a base layer of peanut butter cookie, topped with smooth peanut butter filling and topped with a shiny chocolate ganache and flakes of sea salt being plated onto two white small plates

      Should the bars be served cold?

      I mention this in my tips below- the bars cut best when completely cold. That being said, I think they are best served cool but not ice cold. For the best results, let the bars chill completely before cutting, but let the bars set out at room temperature for 15-20 minutes before serving. Store in the fridge when not serving.

      Three Chocolate Peanut Butter Bar squares on a small white plate- the squares are made up of a base layer of peanut butter cookie, topped with smooth peanut butter filling and topped with a shiny chocolate ganache and flakes of sea salt

      Tips for making Chocolate Peanut Butter Bars

      • Line the pan with parchment paper going both directions if you want to make the bars easy to remove from the pan.
      • Spray your measuring cup with a little bit of nonstick baking spray before measuring your peanut butter so it will fall right out of the measuring cup.
      • Be sure to sift your powdered sugar before blending the butter and peanut butter for the filling to make sure it turns out smooth.
      • If you don’t have a microwave, you can also melt the chocolate chips and butter in a double boiler on the stovetop. If you don’t have a double boiler, you can set a heat-safe glass bowl over a saucepan of simmering water- just be sure the bottom of the bowl isn’t touching the water.
      • Be sure the crust is totally cool before adding the filling and that the chocolate is totally cool before pouring over the filling. The filling is primarily made up of butter. If the crust or chocolate are too hot, you risk melting the filling.
      • To get nice clean cuts, make sure you let Chocolate Peanut Butter Bars chill completely. The recipe recommends a minimum of two hours of chilling, but I would say four hours is safer if you want perfect cuts. If the bars are even slightly less than cold, you risk smashing the peanut butter filling when slicing. A sharp knife is also key.
      Three Chocolate Peanut Butter Bar squares on a small white plate- the squares are made up of a base layer of peanut butter cookie, topped with smooth peanut butter filling and topped with a shiny chocolate ganache and flakes of sea salt

      Other recipes to check out

      If you're looking for other easy, no-bake chocolate recipes, don't miss my Thin Mint No-Bake Chocolate Cheesecake. If peanut butter is what you're craving, my Peanut Butter and Honey Cookies are another delicious recipe you have to try.

      Chocolate Peanut Butter Bars are not to be missed! Give this recipe a try and let me know how it goes.

      Chocolate Peanut Butter Bars made up of a base layer of peanut butter cookie, topped with smooth peanut butter filling and topped with a shiny chocolate ganache and flakes of sea salt being plated onto two white small plates
      Print Recipe
      5 from 1 vote

      Chocolate Peanut Butter Bars

      Chocolate Peanut Butter Bars combine peanut butter cookies with the flavors of Reese's peanut butter cups in an easy, almost no-bake recipe
      Prep Time10 minutes mins
      Cook Time15 minutes mins
      Course: Dessert
      Cuisine: American
      Servings: 15 cookie bars

      Ingredients

      Cookie Crust

      • ½ C butter melted
      • ¼ C peanut butter crunchy or creamy
      • 2 Tb brown sugar
      • 1.5 C all purpose flour
      • ½ teaspoon kosher salt

      Peanut Butter Filling

      • ¾ C butter room temperature
      • ¾ C peanut butter crunchy or creamy
      • 1 C powdered sugar sift
      • ½ teaspoon kosher salt
      • 2 teaspoon vanilla extract

      Chocolate Topping

      • 1 C semi-sweet chocolate chips
      • 6 Tb butter room temperature

      Flaky Sea Salt*

      Instructions

      To make the crust

      • Preheat the oven to 350 degrees. Prepare a 9" x 13" baking pan with nonstick spray.
      • Combine all ingredients in a small mixing bowl. Spread the dough out in the prepared baking dish using your hands to form an even smooth layer. Bake for 15-18 minutes or until golden brown around the edges.
      • Let the crust cool completely before topping with the peanut butter filling.

      To make the filling

      • Place all the ingredients into a mixing bowl and whip with a hand mixer or whisk until smooth, creamy and slightly aerated.

      To make the topping

      • Place the chocolate chips and butter in a microwave-safe bowl. Microwave in for 30 seconds, stir, and then microwave in 15-second increments, stirring between each one. Microwave until the butter and chocolate are totally combined and the texture is smooth.
      • Allow the chocolate to cool to room temperature before pouring over filling.

      To assemble the bars

      • Top the pre-baked and cooled crust with the peanut butter topping. Spread evenly over the crust. Once the topping is cooled, pour over the filling and spread into an even layer. Finish with a healthy sprinkling of sea salt.
      • Cover the baking dish with plastic wrap. Chill the bars for at least two hours before cutting with a sharp knife. Store in the fridge for up to a week.

      Notes

      *Fleur de Sel is my favorite finishing salt for sweets, but any light and flaky sea salt will work. You can use kosher salt, but go easy with the amount as the flavor is much stronger than delicate salts like Fleur de Sel.

      FREQUENTLY ASKED QUESTIONS

      Can I bake the cookie crust ahead of time?

      Yes. It can be kept at room temperature for up to 12 hours or stored in the fridge for up to 3 days.

      Which peanut butter do you recommend: crunchy or creamy?

      This comes down to personal preference, but I like creamy in this recipe so the bars cut super smooth.

      Can I use kosher salt for finishing?

      Yes, but use it sparingly. Flaky sea salt like fleur de sel and Maldon sea salt have a more delicate flavor than kosher salt, so you can use more without the saltiness being overpowering. If using kosher salt, I recommend a vary light sprinkle.

      Pimento Cream Cheese Wontons

      February 7, 2021 by Hailey 2 Comments

      Golden brown rectangular pimento cheese wontons on small black plate and a cooling rack with a side of bright red thai sweet chili dipping sauce
      Golden brown rectangular pimento cheese wontons on small black plate and a cooling rack with a side of bright red thai sweet chili dipping sauce

      Pimento Cream Cheese Wontons a new twist on the beloved classic of fried cheese. Thin and crispy wonton wrappers are the perfect vessel for pimento cheese blended with cream cheese. The filling is super creamy and downright addictive. Served with a side of sweet Thai chili sauce, these fried cheese snacks pack serious flavor punch.

      Best Ever Pimento Cheese is one of my favorite recipes on the blog. Lately, I’ve been on a mission to discover new and interesting ways to use up leftovers from the recipe. My BFF and stepsister made the amazing suggestion of stuffing wonton wrappers with leftover pimento cheese, similar to cream cheese wontons you often find in Chinese restaurants.

      When I started testing the recipe, I used only Best Ever Pimento Cheese as the stuffing for my wontons. After frying, the filling wasn’t ooey-gooey enough. I revamped the filling to consist of 50/50 pimento cheese and cream cheese. The result is perfection!

      ingredients for pimento cheese wontons

      The outside layer of fried wonton wrappers is perfectly crunchy while still being light. The filling is cheesy and creamy spiked with the added tang of cream cheese and flavor of roasted red bell peppers. Together, they make for fried cheese magic!

      Where to find wonton wrappers at the grocery store

      Wonton wrappers are actually quite common at the grocery store these days. Typically, they are found near the produce section in the refrigerated area.

      Wonton making doesn’t require any special equipment

      If you’ve never made wontons before, you may be thinking Pimento Cream Cheese Wontons is not the recipe for you but fear not! They are simple to make and do not require any special equipment. Your fingers are the only tool you need.

      Single wonton wrapper on a dark wooden cutting board being filled with pimento cheese and the edges being covered with water using a paint brush

      Is store-bought pimento cheese acceptable in the recipe?

      Best Ever Pimento Cheese is, as advertised, the best pimento cheese I’ve ever tasted. That being said, if you’re in a hurry and want to try this recipe with store-bought pimento cheese, the technique would definitely still work.

      Tips for working with wonton wrappers

      Working with wonton wrappers is so fun and easy! You can stuff them with almost anything you desire. I’ve even used them to make homemade ravioli (blasphemy to true Italians I’m certain).

      The only thing you need to remember when work with wonton wrappers is that they dry out really quickly.

      When I say REALLY quickly, I mean it happens fast, and the wrappers are ruined once dried out. To prevent that from happening, you just need to make sure you keep them covered with a damp cloth in between batches.

      Two hands pinching a single pimento cheese wonton closed

      I usually stuff and seal four wontons at a time and keep the other wrappers in the package and covered with a damp cloth as a I work. Only once I’m ready for four more wrappers do I then uncover the package and take four more out.

      When it comes to wonton folding, I am no expert. Truth be told, I tried a few different fancier folds when making Pimento Cream Cheese Wontons, but every time they leaked in while frying or cracker while folding.

      The most important step in this recipe is making sure your wontons are properly sealed around the edges. It is essential that you completely seal the wonton wrappers around the filling. If not, the filling will spill out during frying and oil will leak into the wontons which makes for very soggy and greasy wontons.

      Single pimento cheese wonton fully assembled but uncooked on a dark wooden cutting board

      If you’ve made wontons before or want to try out some of the fancier folding techniques, don’t let me stand in your way! Check out this video if you’re interested in learning more about different authentic wonton folding techniques (the folding starts about 2 minutes into the video).

      I keep it super simple with this rectangle fold because the seal never failed me. I can also stuff the wonton end-to-end with filling when using the rectangle fold. If it means more cheesy filling, that's a good enough reason for me to forego a cooler looking fold technique.

      Golden brown rectangular pimento cheese wontons on a cooling rack

      Can Pimento Cream Cheese Wontons be made ahead of time?

      This is a hard no. Like most fried items, Pimento Cream Cheese Wontons are best when fresh from the fryer. That is particularly true for these tasty snacks because the filling is moist and the wonton wrappers are delicate. After about 30 minutes, the wontons start to lose their crunch.

      Golden brown rectangular pimento cheese wontons on small black plate and a cooling rack with a side of bright red thai sweet chili dipping sauce

      What to serve with Pimento Cream Cheese Wontons

      I like to serve the wontons with a side of sweet Thai chili sauce. You can find this condiment in the Asian specialty section of the grocery store. If you don’t like any heat, sweet and sour sauce would also be a good choice.

      Closeup of inside of pimento cheese wonton showing the gooey melted pimento cheese filling

      Pimento Cream Cheese Wontons are the perfect party snack. Whether you’re gathered around a TV for the big game or celebrating one’s of life’s moments, Pimento Cream Cheese Wontons are the dish your guests will be talking about long after the party is over.

      HELPFUL UTENSILS

      red digital meat thermometer

      Digital Thermometer- Increase your frying confidence and be sure you have the right oil temperature every time with a digital thermometer.

      Golden brown rectangular pimento cheese wontons on small black plate and a cooling rack with a side of bright red thai sweet chili dipping sauce
      Print Recipe
      5 from 1 vote

      Pimento Cream Cheese Wontons

      Fried cheese in a whole new way! Homemade pimento cheese mixed with cream cheese, wrapped in wonton wrappers, and fried until golden brown and perfectly crisp.
      Prep Time30 minutes mins
      Cook Time20 minutes mins
      Course: Snack
      Cuisine: American
      Servings: 48 wontons

      Ingredients

      • 48 wonton wrappers
      • 1 C Best Ever Pimento Cheese*
      • 8 oz cream cheese room temperature
      • water
      • kosher salt to taste
      • vegetable oil for frying
      • sweet Thai chili sauce for dipping

      Instructions

      • Using a hand or stand mixer, mix the pimento cheese and cream cheese until completely combined. Line two baking sheets with foil and top with wire racks.
      • Lightly dampen a kitchen towel and remove wonton wrappers from the fridge. Open the package and immediately cover with the damp kitchen towel. Keep the wonton wrappers covered whenever you're not working with them or they will dry out and become brittle. Fill a small bowl with water.
      • Take 4 wonton wrappers out of the package at a time. Fill each wonton wrapper with 1 heaping tablespoon of pimento cheese mixture. Using a piping bag or a plastic storage bag with the corner cut off to fill each wonton wrapper is helpful but not necessary.
      • Using your finger or a small clean paintbrush, brush all four edges of the wrapper with water. Seal the edges by pinching the two sides together using whatever shape you desire. I like to keep it simple with rectangles, but if you've got skills, use them! The most important thing is that the edges are sealed so if you're a novice, use the shape I've shown here.
      • Set the completed wontons aside at room temperature and continue until all of the pimento cheese mixture has been used up. Fill a large saute pan with about 1 inch of oil. Heat oil to 325 degrees over medium heat. If you don't have a thermometer, test the oil with a wonton wrapper. The wrapper should rise to the top and sizzle right away but not brown too quickly.
      • Fry the wontons in bathes for roughly 2 minutes, moving often and watching closely. Don't overcrowd the pan or the wontons will steam and become soggy. Remove from fryer once golden brown, place on the prepared wire rack, and immediately season with a pinch of salt to taste.
      • Serve immediately. Like any fried cheese, these taste best when they are hot and fresh.

      Notes

      * Best Ever Pimento Cheese recipe can be found here.

      FREQUENTLY ASKED QUESTIONS

      Can I use store-bought pimento cheese?

      Yes, but Best Ever Pimento Cheese is amazing and worth the effort.

      Where do I find wonton wrappers?

      They are found at most grocery stores in the cold section of the produce area.

      Can the wontons be made in advance and kept warm in the oven?

      No. Pimento Cream Cheese Wontons are best fresh from the fryer.

      Homemade Cheez-Its Crackers

      January 31, 2021 by Hailey 2 Comments

      Bright orange square crackers with a single hole in the middle spilling out of a bright blue bowl

      Cheez-Its have been one of America’s favorite snacks for legit 100 years. I honestly didn’t know that fun fact until I started doing a little research for this blog post. Anything that has been celebrated that long has to be delicious but making them from home may have never crossed your mind…UNTIL NOW! My Homemade Cheez-Its Crackers are surprisingly simple to make and even more delicious that the store-bought variety.

      Bright orange square crackers with a single hole in the middle spilling out of a bright blue bowl

      In fact, they are made with 3 ingredients: flour, water, and Best Ever Pimento Cheese.

      ingredients for homemade pimento cheez its crackers

      That’s right…these crackers are made using pimento cheese. Most homemade crackers are made with a mixture of cheese, butter, and flour. Given that Best Ever Pimento Cheese is a mixture of cheese and mayo, a close relative to butter, I decided to nix the butter and try my own recipe instead.

      The recipe for Homemade Cheez-Its is the result of an experiment late on Friday night (there may have been a couple of glasses of wine involved) that went WAY better than I expected. I was trying to dream up surprising ways to use up the leftovers from a batch of Best Ever Pimento Cheese. Pimento Cheese Shortbread Crackers was a recipe I had clipped from Southern Living years ago but have never tried.

      Instead of following the recipe that looked more complicated than I was willing to commit to at that moment, I thought to myself, “I wonder what would happen if I combine Best Ever Pimento Cheese and flour?”

      Pimento cheese and flour combined in a food processor to resemble crumbs
      Pimento cheese, flour and water combined in a food processor until a dough ball forms

      Magic is what happened! The combination created scrumptious, crispy, cheesy crackers that are reminiscent of the classic Cheez-It but have a more delicate texture and taste that you can only get from homemade crackers.

      How difficult are Homemade Cheez-Its to make?

      Making crackers from scratch is easier than you might think. It only requires a little patience. The dough from this recipe is surprisingly easy to work with too. It’s not sticky at all and can be rolled out several times without losing any quality.

      homemade cheez it dough rolled out and cut into perfect squares with a whole being poked in each one

      There are a few tools that make the job easier. I have included links to purchase these items in the “Helpful Utensils” section below as well.

      The dough is best made in a food processor. That’s not to say that you can’t make it without one, but I would say a pastry blender would be your best second bet. Another helpful tool is a bench scraper. I am obsessed with this little gadget for any and all pastry tasks. It makes moving and working with delicate dough a breeze.

      A ruler and a pizza wheel are also handy when cutting the crackers into cute little squares but a knife and any straight edge will also work.

      Is Best Ever Pimento Cheese required or is store-bought pimento cheese acceptable?

      The difference in quality and taste between Best Ever Pimento Cheese and store-bought is significant. I call it Best Ever for a reason, right? That being said, I wouldn’t stop you from trying the recipe with store-bought if that gets you to try it, but I did not test the recipe with any other pimento cheese.

      Uncooked bright orange dough cut into squares and laid on white parchment paper

      I cannot attest to how the cracker may turn out though since I only tested the recipe with my own pimento cheese. Let me know if you try the recipe with store-bought and have success.

      How long will Homemade Cheez-Its stay crisp?

      If stored in an airtight container, the crackers will stay fresh for up to a week. I promise you, however, that they won’t be around that long. I had to restrain my family from eating them for seven days so I could see how long they stayed crisp.

      What to do if your Cheez-Its don’t seem crisp enough?

      You can always add a little more baking time, but you can’t fix burnt crackers. If you taste your first cracker and they still seem soft, you can put them back in the oven. Just watch them closely after the first 90 seconds to make sure they don’t burn. You’re looking for crackers that have a light and crispy texture.

      Bright orange square crackers with a single hole in the middle spilling out of a bright blue bowl

      Homemade Cheez-It Crackers are a surefire snacking success. Everyone will love the taste and texture of these little treats, and they will be so impressed that you made them yourself! Little do they know how easy they were to make. Check out the recipe and let me know how it goes in the comments section.

      HELPFUL UTENSILS

      Cuisinart Large Food Processor

      Cuisinart 11-Cup Food Processor

      Making dough is so fast and easy with a food processor, and that's just one of its many uses.

      metal bench scraper

      Bench Scraper

      I never roll out any type of pastry without my bench scraper near by.

      Bright orange square crackers with a single hole in the middle spilling out of a bright blue bowl
      Print Recipe
      5 from 1 vote

      Homemade Cheez-Its

      Crispy, light crackers that taste just like store-bought Cheez-Its but with the added flavor of pimento cheese
      Prep Time45 minutes mins
      Cook Time9 minutes mins
      Course: Snack
      Cuisine: American
      Servings: 200 1-inch crackers

      Ingredients

      • 1 C Best Ever Pimento Cheese*
      • 1 C all-purpose flour
      • 2-3 Tb cold water
      • kosher salt to taste

      Instructions

      • Preheat the oven to 375. Prepare two baking sheets with parchment paper.
      • Add the pimento cheese to a food processor. Pulse twice to break down the peppers and cheese to a fine mince. If you don't have one, you can use a pastry blender, food mill, ricer, or even a fork if you're persistent enough.
      • Add the flour and pulse until the mixture resembles pea-size crumbs. Slowly add the cold water and pulse until the mixture comes together. Start with two tablespoons and add 1 teaspoon at a time after that as needed. The dough should come together to form a ball but it should not be sticky.
      • Separate the dough into two discs and wrap each with plastic wrap. Chill the dough until very cold or at least four hours. The dough can also be made in advance and kept refrigerated for up to three days before preparing.
      • To prepare the crackers, dust your work surface generously with flour. Remove one disc from the fridge at a time. Sprinkle additional flour on top of the top and the rolling pin.
      • Roll the dough out until it is paper thin (less than ⅛ inch), rotating the dough occasionally to ensure it doesn't stick. You can also add additional flour as necessary. The thinner you roll out the dough, the more crisp your crackers will be.
      • Cut the dough into 1-inch square pieces. Use a toothpick or wooden skewer, poke a hole in the middle of each cracker. You can also quickly prick each cracker with a fork.
      • Using a bench scraper or offset spatula, carefully remove the crackers from the work surface and place on the prepared baking sheets. Leave at least half an inch around all sides between crackers to ensure they crisp and don't steam in the oven. Sprinkle each cracker with a couple of grains of salt.
      • Bake in batches for 8-12 minutes or until the crackers are browned around the edges. There is a fine line between perfectly baked and burnt. Good news though…if you take the crackers out of the oven too soon, you can always bake them a bit longer once you realize they haven't reach peak crispness. You cannot, however, un-bake them if you burn them.
      • Start at 8 minutes and then stay close to the oven, checking them every minute. I remove the pan from the oven at minute 8 or 9 and remove the crackers that are browned from the pan and place them on a cooling rack. I put the pan back in the oven with the crackers that need a little more time.
      • You're looking for the cracker to be totally dried out. The best way to check them is to drop the cracker onto a plate from 2-inches above. It should sound like a potato chip, light and crispy, and bounce on the plate a bit.
      • Allow the crackers to cool completely before serving. The crackers can be stored in an airtight container for up to a week.

      Notes

      * Best Ever Pimento Cheese recipe can be found here.

      FREQUENTLY ASKED QUESTIONS

      Do I have to use Best Ever Pimento Cheese or will store-bought work?

      I only tested the recipe with Best Ever Pimento Cheese, so I cannot say for sure the recipe will turn out the same with store-bought.

      Can I make this recipe without a food processor?

      Yes, but a pastry blender like the one pictured below would be helpful.metal pastry blender

      How long will the crackers keep?

      The crackers will stay crisp for up to a week if stored in an airtight container.

      Pimento Cheeseburger Hand Pies

      January 10, 2021 by Hailey Leave a Comment

      pimento cheeseburger hand pies in a basket lined with a blue and white towel with one split in two to show to gooey pimento cheese filling inside
      pimento cheeseburger hand pies in a basket lined with a blue and white towel with one split in two to show to gooey pimento cheese filling inside

      Pimento Cheeseburger Hand Pies are a combination of some of my favorite foods- Best Ever Pimento Cheese, burgers, and Pillsbury Crescent Dough. What could possibly go wrong with a mashup of those classic flavors?!

      Layers of soft, flaky Crescent Dough are filled with a ground beef mixture. This is no ordinary beef mixture. It includes all the flavors of a classic cheeseburger- white onions, ketchup, yellow mustard, and dill relish. These flavors meld together with the ground beef for a cheeseburger in paradise experience minus the bun.

      What makes these hand pies crazy delicious is the use of one of my favorite recipes on the blog- Best Ever Pimento Cheese.

      Check out the post for more details. Just know the recipe includes cream and Boursin cheese and is f*cking incredible.

      ingredients for pimento cheeseburger hand pies

      Do I have to use Best Ever Pimento Cheese or can I buy premade?

      Per my note above, Best Ever Pimento Cheese is no ordinary pimento cheese. It’s way more delicious than anything you can buy in the store. If you’re in a pinch and desperate to make the recipe quickly, then feel free to purchase it from the store.

      Can the filling for Pimento Cheeseburger Hand Pies be made ahead of time?

      Absolutely! The filling can be prepared up to 3 days in advance and kept in an airtight container in the fridge. You want the filling to be totally cooled when you fill the hand pies, so it’s a great idea to make it ahead of time.

      pimento cheeseburger hand pie filling process shot 1
      pimento cheeseburger hand pie filling process shot 2
      pimento cheeseburger hand pie filling process shot 3

      What is a Crescent Dough Sheet?

      In the same section of the store that carries Crescent Rolls, you can now find Crescent Dough Sheets. They are the same size but not perforated. Purchasing the dough sheet makes this recipe really quick and easy. If you can’t find it, Crescent Roll Dough will also work.

      four uncooked pimento cheeseburger hand pies before sealing the edges sitting on a wooden cutting board

      You’ll just need to pinch the seams closed before cutting the squares. Check out my Louisiana Meat Pies for some images of how that works.

      Four uncooked pimento cheeseburger hand pies sitting on a white piece of parchment paper

      What to serve with Pimento Cheeseburger Hand Pies?

      Hand Pies make a delicious snack as a stand-alone treat. They can be served with any dipping sauce you like or are great without any. Anything from fry sauce (a mixture of equal parts ketchup and mayo) to barbecue sauce would make a tasty dipping sauce.

      Four pimento cheeseburger hand pies fresh from the oven sitting on a white piece of parchment paper

      Pimento Cheeseburger Hand Pies also make a fun dinner idea. Pair them with some frozen fries prepared in the air fryer or baked in the oven for a dinner your tribe will beg for again and again.

      pimento cheeseburger hand pies in a basket lined with a blue and white towel with a side of french fries

      HELPFUL UTENSILS

      black and red plastic ground meat chopper utensil

      Ground Meat Chopper

      This little gadget is the thing you never knew you needed until you had it, and then you’ll find yourself using it all the time! Breaking up ground meat while cooking is quick and simple with this chopper.

      metal bench scraper

      Bench Scraper

      Anytime you’re working with dough, a bench scraper is your best friend. If you’re like me and have hot hands, a bench scraper makes handling dough so much easier and less messy.

      pimento cheeseburger hand pies in a basket lined with a blue and white towel with one split in two to show to gooey pimento cheese filling inside
      pimento cheeseburger hand pies in a basket lined with a blue and white towel with one split in two to show to gooey pimento cheese filling inside
      Print Recipe
      4.50 from 2 votes

      Pimento Cheeseburger Hand Pies

      Crescent roll dough filled with a mixture that has all the classic cheeseburger flavors and the added kick of pimento cheese
      Prep Time45 minutes mins
      Cook Time15 minutes mins
      Course: Main Course
      Cuisine: American
      Servings: 8 hand pies

      Ingredients

      • ½ C Best Ever Pimento Cheese*
      • 1 Tb olive oil
      • ½ lb ground beef 93/7 or lean
      • ½ white onion finely diced
      • 1 teaspoon minced garlic
      • ⅓ teaspoon Worcestershire sauce
      • 1 Tb yellow mustard
      • 2 Tb ketchup
      • 2-3 Tb dill relish
      • ½ teaspoon salt
      • ¼ teaspoon ground black pepper
      • 2 crescent roll dough sheets
      • 4 slices deluxe American cheese quartered
      • 1 egg
      • ¼ C all-purpose flour

      Instructions

      • Preheat oven to 375 degrees. Prepare two baking sheets with parchment paper.
      • Add 1 Tb of oil to a medium nonstick saute pan and turn the stove on to medium heat. Once hot, add the minced onion and cook for one minute.
      • Add the ground beef. Break up the meat into fine crumbles using a ground meat chopper or wooden spoon. Cook for 5-7 minutes or until browned.
      • Add the minced garlic and cook one more minute. Remove the pan from the heat.
      • Add the Worcestershire, mustard, ketchup, relish, salt, and pepper to the meat and mix to combine. Set aside to cool. If you're short on time, you can spread the meat out on a sheet pan or plate and place it in the fridge to speed up the cooldown.
      • Crack an egg into a small bowl and add one tablespoon of water. Whisk to combine and set aside.
      • Once the filling has cooled, lightly flour your work surface. Unroll one crescent roll dough sheet at a time. Lightly flour the top of the dough and roll out gently to create an even rectangular shape. Cut the dough into four even rectangles.
      • Lay two quarter of slices of American cheese on one side of the dough, top with two heaping tablespoons of cooled filling and one tablespoon of pimento cheese. Brush all four edges of each dough piece with egg wash. See above for a picture.
      • Seal the hand pies by folding half the dough over the top of the other. Use a fork to crimp the edges. Brush the top of the pies with egg wash and sprinkle with salt and pepper.
      • Repeat this process with the second dough sheet. Place the prepared pies on parchment-lined baking sheets. Bake for about 15 minutes or until golden brown. Let cool for at least 5 minutes before serving.

      Notes

      * Best Ever Pimento Cheese is one of my favorite recipes on the blog and worth the effort to make from scratch.

      FREQUENTLY ASKED QUESTIONS

      Do I have to make pimento cheese or can I buy it premade?

      Best Ever Pimento Cheese is way more delicious than anything you can buy in the store. It's also really easy to make. You can use store-bought, but do yourself a favor and try the damn recipe.

      Can the ground beef mixture be prepared in advance?

      Yes, up to three days in advance. Store it in an air-tight container in the fridge.

      I can't find Crescent Dough Sheets. What should I use?

      Crescent Dough Sheets are the same size as Crescent Roll Dough; it's just not perforated. You can use Crescent Roll Dough if you can't find the Sheets. Just pinch the perforated seams closed before cutting into rectangles.

      Easy Chicken Curry Pot Pie

      December 24, 2020 by Hailey 2 Comments

      Chicken curry pot pie in a white baking dish featuring a golden brown lattice puff pastry topping
      Chicken curry pot pie dished out onto a white plate featuring a golden brown lattice puff pastry topping

      Easy Chicken Curry Pot Pie combines flaky puff pastry with creamy curried chicken for a surprising twist on a classic comfort food recipe. The filling for the pot pie is the exact same recipe as my Easy Chicken Curry, but instead of serving it with rice, I top it with a golden-brown puff pastry crust!

      If Indian food isn't something you or your family have experienced before, this is the perfect recipe to try out! The chicken curry is mild and creamy, and the pot pie format gives familiarity to something that might not be all that familiar to you.

      What is Chicken Curry?

      Simply put, Chicken Curry is just chicken that has been seasoned with curry powder and cooked in a tomato-based or creamy sauce. Chicken Curry is the Westerners version of Chicken Tikka Masala, Chicken Korma, or my personal favorite, Butter Chicken.

      prepared red chicken curry in a large black round skillet

      My Easy Chicken Curry recipe is a combination of my favorite parts of these different recipes, compressed down into an easy-to-make format that is approachable and delicious!

      What kind of curry powder to use?

      You could write a novel about curry powder, but I’ll leave that to the experts. Curry powder, in short, is a delectable combination of sweet and earthy spices. It typically includes cumin, turmeric, coriander, mustard, and some combination of sweet spices like clove and cinnamon.

      Curry powder is basically the gringo cousin of Garam Masala, a more traditional Indian spice, although their flavor profiles are very similar. I find Garam Masala to be more pungent in flavor and slightly less sweet. Either would work for this recipe, but my personal favorite curry to use is Vadouvan.

      small white dish filled with orange curry powder with a silver spoon next to a bag of curry powder

      Vadouvan curry (pronounced vah-doo-vahn) is a French style curry that includes aromatics like garlic, shallot and onion. We like it so much at my house that we buy it in bulk, but I also love Jansal Valley brand that can be purchased from Amazon.

      You should try a variety of brands and styles of curry powder to find which one suits your taste best. Hell, I’ve even used plain ole’ McCormick’s brand curry powder for years, so that’s a perfectly good choice.

      Chicken curry pot pie in a white baking dish featuring a golden brown lattice puff pastry topping

      Is Chicken Curry hard to make?

      Not at all! Once you get the base recipe down, you’ll love playing with the levels of sweet and heat or trying out new spices to include like coriander or cardamom. The ingredients for this recipe are all easy to find and inexpensive. To make my Easy Chicken Curry recipe you’ll need:

      • onion
      • potato
      • ginger
      • garlic
      • boneless skinless chicken breast
      • curry powder
      • coconut milk
      • tomato paste
      • canned tomatoes
      • brown sugar
      • ground cinnamon
      ingredients for chicken curry pot pie

      As advertised, the chicken curry filling is so easy to make. Don’t be intimidated if you’ve never made Indian food at home. It is super simple to develop big flavors without fancy ingredients. I also use store-bought puff pastry in this recipe (duh, right?!) so assembling the Pot Pie takes no time at all.

      Close up of puff pastry used for lattice topping on the pot pie

      Can you make the chicken curry filling ahead of time?

      Absolutely. Easy Chicken Curry can be made up to three days in advance and kept in an airtight container in the fridge. It’s not required, but making the filling ahead of time will also make assembling the Chicken Curry Pot Pie super fast.

      If you have any other questions about the ingredients or techniques in this recipe, please leave a comment below, and I’ll get back to you ASAP.

      Do I have to lattice my puff pastry on top of the Chicken Curry Pot Pie?

      No way! It is actually pretty fun and simple (check out this Crazy for Crust post with step-by-step instructions and pictures) to create your own lattice. You can also just put one sheet of puff pastry on top and call it done.

      Easy Chicken Curry Pot Pie lattice process shot

      I like the lattice mostly because the sauce bubbles up through the lattice while baking giving the puff pastry a gorgeous color.

      Chicken curry pot pie dished out onto a white plate featuring a golden brown lattice puff pastry topping

      One bite of my Easy Chicken Curry Pot Pie, and you’ll wonder why it took you this long to combine curry and puff pastry. Let me know what you think in the comments sections below.

      Chicken curry pot pie dished out onto a white plate featuring a golden brown lattice puff pastry topping
      Chicken curry pot pie dished out onto a white plate featuring a golden brown lattice puff pastry topping
      Print Recipe
      4.50 from 2 votes

      Easy Chicken Curry Pot Pie

      Quick and simple chicken curry topped with puff pastry for a whole new twist on the flavors of Indian takeout.
      Prep Time20 minutes mins
      Cook Time50 minutes mins
      Course: Main Course
      Cuisine: American, Indian
      Servings: 4 servings

      Ingredients

      • 1 yellow onion
      • 1 small russet potato
      • 1 Tb fresh ginger*
      • 1 clove garlic
      • 1 lb boneless skinless chicken breasts
      • 1 teaspoon kosher salt
      • ½ teaspoon ground black pepper
      • ¼ C good quality curry powder
      • 14 oz can unsweetened coconut milk
      • 1 Tb tomato paste
      • 14.5 oz can petite diced tomatoes
      • 1 Tb brown sugar
      • ¼ teaspoon ground cinnamon
      • ¼ teaspoon cayenne pepper optional
      • 2 Tb olive oil
      • 1 17 oz package frozen puff pastry thawed
      • 1 egg
      • 2 Tb cilantro chopped, optional

      Instructions

      • Preheat the oven to 400 degrees. Prepare a 2-3 quart casserole dish with baking spray.
      • Peeling the potato is optional and up to personal preference. Dice the onion and potato into a quarter-inch dice. Make sure to chop the potato into small pieces or it won't cook through.
      • Finely mince the garlic clove and grate the fresh ginger.
      • Heat a large nonstick saute pan or wok with 2 Tb of olive oil over med-high heat. Drop in onions, ginger and garlic and let saute for 2-3 minutes or until softened.
      • Dice the chicken breast into 1-inch chunks and add to the sauteed onions. Add the diced potatoes. Season with salt and pepper and stir to combine. Leave undisturbed for 3 minutes. Stir and cook for another 2 minutes or until there is no pink left.
      • Add the curry powder. Stir to combine and cook for another 2 minutes. Add the tomato paste, diced tomato, brown sugar, cinnamon and coconut milk and mix well. Add the cayenne now if you like your curry on the spicy side.
      • Bring mixture to a low boil and lower heat to medium. Cook for 5 minutes, stirring often, and then reduce heat to low. Simmer for another 3 to 5 minutes until sauce reaches desired thickness and potatoes are fork-tender.
      • Pour chicken curry into a 2-3 quart casserole dish and set aside. Remove thawed puff pastry from the fridge just before you're ready to work with it. Crack the egg into a small bowl. Add 1 teaspoon of water and whisk to combine.
      • Forming a lattice from the puff pastry is optional. You can also cut the puff pastry into one piece to fit your dish instead. Brush lightly with egg wash before cooking.
      • If you'd like to create a lattice. place the thawed puff pastry on a lightly floured work surface. Using a pizza wheel or a sharp knife and a straight edge, cut the puff pastry into strips. To create a lattice, lay one set of strips horizontally equally spaced apart, then unfold every other strip and lay your first perpendicular strip down. Fold the strips back over the perpendicular strip, unfold the opposite set of parallel strips, lay a second perpendicular strip down, and repeat until you have a lattice. I have one photo above for reference or check out the Crazy for Crust blog post linked in the notes for more step-by-step images. Once completed, brush with egg wash.
      • Bake the pot pie for 30-40 minutes or until the puff pastry is golden brown. Garnish with chopped cilantro if desired.

      Notes

      Crazy for Crust Step-by-Step Lattice 

      FREQUENTLY ASKED QUESTIONS

      What kind of curry powder should I use?

      I prefer Vadouvan curry (pronounced vah-doo-vahn) which is a French style curry that includes aromatics like garlic, shallot and onion, but any curry powder will work.

      Do I have to lattice my puff pastry crust?

      No. You can also just put on big sheet of puff pastry on top, brush it with egg wash, and bake.

      About Hank

      December 18, 2020 by Hailey Leave a Comment

      Red corgi puppy with snow flakes on his nose
      Small light brown corgi puppy on the lawn

      Hello world! My name is Hank, and I am from Oklahoma where I live with my paw-rents, Hailey and Chris. I just joined the family in 2020, but I settled in quickly. Mom and Dad have been spending more time at home lately due to something called Covid, so we’ve become fast friends. Mom asked me to put together a list of ten things you should know about me. Check them out below.

      1. I walk like I’ve been sneaking whiskey sips all day. My paw-rents like to say I have drunk legs. Sometimes my stumpers get away from me when I’m running zoomies or climbing stairs, but I just shake it off and keep going!

      2. Zoomies are a daily activity at our house. All it takes it a staring contest across the room with my big brother Gus, and before you know it, we are off to the races! Gus and I love to run in circles around all the furniture every night before bed. Speaking of my big bro…

      3. I am absolutely crazy about my brother Gus. You can read all About Gus on his own post, but he is so much fun! Whatever Gus has, I want a piece of it. Whatever Gus is doing, I have to be involved in. I am basically his shadow!

      Black tri colored corgi sleep with sable corgi puppy

      4. My momma and I have a lot in common when it comes to chatting- we have a lot to say! Whether I am excited, upset, or bored, I like to let everyone know about it.

      5. I never give up! Whether it is a game of tug ‘o war or wrestling in the yard, I never let big brother win just because he’s bigger. My mom says I’m persistent- not sure what that big word means.

      6. My paw-rents have all kinds of silly nicknames for me, and I answer them all because I am such a good boy. Stanky Hanky, Hankster, Hankster Prankster, Hanky Panky and Drunky are just a few, but they all come from love!

      7. Corgis are known for our silly sploots, and I am a professional. I love to sleep in the full four-paw sploot when I’m really tired.

      small brown corgi puppy laying on couch

      8. One of my favorite places to hang out in the house is the laundry room. Why you might ask? Because that hot box you guys call a dryer is so cool! There is always fun shit falling out of there like socks and dryer sheets. I love to swoop them up with my mouth and go running through the house so no one can catch me!

      9. When I’m not looking for trouble, I love to snuggle. I can’t get enough of being close to my people, so much so that if I decide I want your attention, no matter what you’re doing, I’ll pounce on your chest and lay down right on your shoulder. My mom says I’m like a parrot, but I don’t get it.

      Small brown corgi puppy looking into camera

      My mom said she wanted to add a little tidbit about me, so I left the last spot for her. Hope to see all you guys on the blog. You can find more updates about me on Instagram. My hashtag is #okchankypanky, or better yet you can follow my mom @cookingandcussingblog.

      small brown corgi with sunlight beaming behind him

      10. Hank is such a sweet boy. He has a certain sass and love of mischief that makes him the perfect addition to our home. You never know what to expect from Hank. He is always making me smile and laugh, even when he’s being a turd. Hank was just what we needed in 2020. He completed our family.

      Easy Strawberry Trifle

      July 26, 2020 by Hailey Leave a Comment

      Clear round glass dish filled with layers of angel food cake, bright red strawberries, pale yellow vanilla pudding and white whipped cream topped with three whole strawberries on a clear glass pedestal with a pink and white napkin and four antique silver spoons
      Clear round glass dish filled with layers of angel food cake, bright red strawberries, pale yellow vanilla pudding and white whipped cream topped with three whole strawberries on a clear glass pedestal with a pink and white napkin and a brown wooden spoon

      Easy Strawberry Trifle is a layered dessert made up of light-as-air angel food cake, creamy homemade vanilla pudding, fresh strawberries, and fluffy whipped cream. There is nothing more delightful in the summer than strawberries and cream, and this recipe highlights those flavors beautifully. Strawberry Trifle is also an easy way to provide dessert to a large group so it’s perfect for summer entertaining.

      Strawberry Trifle is more informally called Strawberry Junk in my family. In fact, there is another post that you find if Google search Strawberry Junk that is my original version of this post. You would be one of the five people that has actually searched for Strawberry Junk though which has put that post in the dark corners of the internet where no one goes.

      Instead of revising the old post as I have done with a lot of my early content, I decided to create an entirely new post titled “Strawberry Trifle” so that I can share this recipe with a far larger audience. In order to really grab the attention of people looking for trifle, the post does in fact have to be titled Strawberry Trifle.

      So as to avoid any further confusion, I will refer to this recipe only as Strawberry Trifle instead of the calling it Junk, but I have to tell you that it hurts my heart a little.

      What is a trifle?

      Trifle is defined as “a cold dessert of sponge cake and fruit covered with layers of custard, jelly, and cream.” You just read that in a British accent, right? It sounds distinctly British to me, but Americans have also adopted trifles as one of our signature desserts.

      I love the idea of layering flavors. It’s a concept I use often in savory food, so the idea of layering sweets just makes sense. Strawberry Trifle consists of four layers, from bottom to top:

      1. Angel food cake
      2. Strawberries
      3. Vanilla Pudding
      4. Whipped Cream
      Clear round glass dish filled with layers of angel food cake, bright red strawberries, pale yellow vanilla pudding and white whipped cream topped with three whole strawberries on a clear glass pedestal

      That’s it! Strawberry Trifle is a wonderfully simple dessert, but that’s why everyone loves it. Making a couple of the layers from scratch takes a little extra time but really amps up the flavor of the finished trifle. If you’re making everything from scratch, your ingredient list is still quite small. You’ll need:

      • Angel Food Cake (mix or prepared)
      • Strawberries
      • Lemon
      • Whole Milk
      • Sugar
      • Cornstarch
      • Eggs
      • Vanilla extract
      • Salt
      • Butter
      • Heavy Cream
      • Powdered Sugar
      ingredients for Easy Strawberry Trifle

      Do I have to make all of the layers from scratch for Strawberry Trifle?

      There’s a lot to unravel in that question so let’s take them one at a time. In the end, the choice is totally up to you. I grew up eating this recipe with store-bought angel food cake, Jello instant pudding and Cool Whip, and I loved every damned second of it. If that’s the path you take, no judgement…in fact, I’d love to hear about what you did and how the recipe turned out.

      Should I make or buy Angel Food Cake?

      Store-bought angel food cake or a box mix as I have used in this recipe is totally acceptable. I have tried angel food cake from scratch for this recipe, and it makes no difference compared to store-bought or cake made from a mix. On top of that, making angel food cake from scratch requires a shit ton of eggs and is far more time consuming than necessary.

      To make an angel food cake at home, you need an angel food cake pan. The pan is unique from a normal cake pan in that it has feet on it that allow the cake to cool upside down. If the cake doesn’t cool upside down, it will deflate and be tough.

      brown and white angel food cake on a wooden cutting board being cut into one inch pieces by a silver serrated knife

      If you don’t have an angel food cake pan at home, I recommend just buying the cake from the bakery section at your grocery store. My mom always purchased angel food cake so I see nothing wrong with that option.

      Why you should make the pudding from scratch

      If you only have the will to make one of the layers from scratch for my Strawberry Trifle, please make it the pudding. Angel food cake and whipped cream can both be bought at a decent quality premade, but I personally think homemade pudding is way better than the instant variety. It’s also not hard to make despite what the folks at Jello might light you might think.

      Making the pudding from scratch takes about 10-15 minutes and only requires a few ingredients. You’ll need:

      • Whole milk
      • Cornstarch
      • Eggs
      • Vanilla extract
      • Butter
      • Salt
      ingredients for vanilla custard

      Tips for making pudding from scratch

      The most important step to making pudding or any custard from scratch is tempering the eggs which is a fancy way of saying to slowly heat the eggs. If you dump all the hot milk into the egg yolks, you’ll get a texture that resembles milk mixed with scramble eggs (or a little like vomit if I’m keeping it 100).

      Instead, just be patient, add the warm milk slowly while constantly whisking, and you won’t have any problem.

      pale yellow vanilla pudding in a saucepan after reaching the desired consistency with a white spatula stirring

      It can be tempting to substitute low-fat milk in this recipe, but don’t do it!

      Most of us keep 2% or skim milk in the fridge more regularly than whole these days, but the pudding will not have the right texture if you try to skimp on the fat. They sell whole milk in 2C packages too, so there won’t be any waste after making the recipe.

      Trust me, get whole milk or just skip straight to instant pudding. There are some good quality options out there like Ghiradelli if you want an upgrade from mom’s good ol’ Jello pudding.

      Also, be sure to press your plastic wrap all the way to the surface of the pudding before storing in the fridge. If not, a skin will form across the top of the pudding.

      overhead view of pale yellow vanilla pudding in a clear glass mixing bowl with plastic wrap pressed all the way to the surface of the pudding

      Do I also have to make the whipped cream from scratch?

      This question is really a matter of personal preference. My mom’s original recipe uses Cool Whip, which wouldn’t be my first choice but it is still hers to this day (no matter how processed it is). If you’re a whipped cream from a can type of family, don’t let me stand in your way.

      For me, whipped cream from scratch is so easy; it doesn’t even really require a recipe, so I choose to make it from scratch. If you’re never tried making it, give it a try.

      But is it really Easy Strawberry Trifle?

      Strawberry Trifle is as easy as you want to make it. After the pudding is made, the remaining steps consist of tearing the angel food cake into roughly 1-inch pieces, slicing the strawberries and soaking in a bit of sugar and lemon, and lastly, whipping heavy cream into a heavenly fluff. That’s all there is to it.

      red strawberry pieces in a clear glass mixing bowl with small bits of green basil

      How long does the Strawberry Trifle need to sit before serving?

      The trifle needs to sit for a while after it’s prepared before serving to allow the angel food cake to soak up all the delicious macerated strawberry juice. The angel food cake should be soaked but not so wet that it disintegrates.

      Ideally, Easy Strawberry Trifle should set in the fridge for about 8 hours before serving.

      You can rush it to only four hours safely but nothing less than that.

      overhead view of brown and white angel food cake pieces in a round clear glass trifle fish as the first layer of Strawberry Trifle
      overhead view of clear round glass container filled with pale yellow vanilla pudding as the third layer in strawberry trifle
      overhead view of red strawberry pieces layered over angel food cake as the second layer in strawberry trifle
      overhead look at clear round class container filled with smooth white whipped cream as the last layer of strawberry trifle

      Can you make Strawberry Trifle with frozen strawberries?

      Sure, but be sure they are totally thawed and drain off an extra liquid before adding the sugar and lemon. You may also want to increase the sugar added to the strawberries a bit (maybe to ¼ cup).

      This recipe was made with fresh strawberries in the summer, so they really don’t need much sugar. If you’re using out of season strawberries or frozen, just be sure to taste the strawberry mixture to get it as sweet as you like.

      What does it mean to “hull” the strawberries?

      In the recipe, I say to hull the strawberries it simply means to fully remove the stem of the strawberry. Below the leafy green stem of a strawberry is the hull or what resembles the core of the strawberry. I like to remove it because it is tough and sour.

      close up of strawberries on a clear cutting board with one strawberry demonstrating how to hill a strawberry

      If a strawberry is perfectly ripe, the hull can be quite small. Like many of us know though, not every strawberry in the container is ripe when you get it from the store. You can totally skip this step if it seems like overkill, but it helps to ensure your strawberries don’t have any unexpected sour flavors.

      Do I have to include fresh basil?

      Nope, this is totally optional. I love to grow fresh basil during the summer. Strawberries and basil are a beautiful flavor combination, so it adds a little something to the dish. That being said, your Strawberry Trifle will be equally delicious with or without basil.

      What dish should I serve Strawberry Trifle in?

      You can prepare the recipe in a trifle like I have, but if you don’t have one, no problem! My mom usually made this recipe in a large Tupperware, so please know that nothing fancy is required. A 9x13 pan also works perfectly.

      Clear round glass dish filled with layers of angel food cake, bright red strawberries, pale yellow vanilla pudding and white whipped cream topped with three whole strawberries on a clear glass pedestal with a pink and white napkin and a brown wooden spoon

      I hope you and your family enjoy a heaping scoop of Strawberry Trifle as much as we always so. Let me know how it goes in the comments section below!

      Also, be sure to check out my Chocolate Cheesecake Trifle recipe if you dig this layered dessert!

      Clear round glass dish filled with layers of angel food cake, bright red strawberries, pale yellow vanilla pudding and white whipped cream topped with three whole strawberries on a clear glass pedestal with a pink and white napkin and a brown wooden spoon
      Print Recipe
      5 from 1 vote

      Easy Strawberry Trifle

      Layers of angel food cake, strawberries soaked in lemon and basil, homemade vanilla pudding and whipped cream combine to make an easy trifle that is delicious
      Prep Time20 minutes mins
      Chill Time5 hours hrs
      Course: Dessert
      Cuisine: American
      Servings: 8 servings

      Ingredients

      • 1 angel food cake

      Strawberries

      • 2 lbs strawberries
      • 1 lemon
      • 2 Tb granulated sugar

      Vanilla Pudding

      • 2 C whole milk
      • ½ C granulated sugar
      • 4 teaspoon cornstarch
      • 3 egg yolks
      • 2 teaspoon vanilla extract
      • ¼ teaspoon salt
      • 2 Tb butter

      Whipped Cream

      • 2 C heavy whipping cream
      • ½ C powdered sugar
      • 1 tsp vanilla extract

      Instructions

      To make vanilla pudding

      • Whisk together ½ C milk, cornstarch, egg yolks, and salt in a bowl. Set aside. with remaining milk and cornstarch.
      • Bring remaining 1½ milk and ½ C sugar to simmer over medium heat. When bubbles just start to form around the outer edge, remove from heat and pour slowly into the milk/egg mixture whisking constantly.
      • Immediately pour the mixture back into the same saucepan. While stirring constantly, bring the mixture to a low boil for 5 minutes. Remove from the heat once thickened and add vanilla and butter.
      • Pour the pudding into a bowl to cool. Place plastic wrap over the top and press the wrap down so that it is in contact with the pudding. This will prevent a skin from forming on the pudding.
      • Allow the pudding to cool completely before building the trifle. It takes 1-2 hours in the fridge or you can kickstart the process by putting the pudding in the freezer for 30 minutes before moving to the fridge for another 30 minutes.

      To sweeten strawberries

      • Remove stem, hull and quarter strawberries. Place in a large bowl and add the juice of one lemon and sugar. Toss gently to combine.

      To make whipped cream

      • Pour cold heavy cream into a large mixing. Using a hand mixer or a stand mixer, whip the cream starting on medium speed and increase to high speed once the cream has thickened slightly.
      • After 1 minute, turn the mixer off and add powdered sugar and vanilla. Turn mixer back on low first to blend in sugar and then increase speed to high until cream forms stiff peaks.

      To assemble Strawberry Junk

      • Tear or cut the angel good cake into one-inch pieces. Place chunks on the bottom of a large trifle dish or a 9x13 baking pan.
      • Top angel food cake evenly first with the strawberries and accumulated syrup. Next spread the cooled vanilla pudding across the strawberries and last, top with whipped cream.
      • Place in the fridge to chill for at least 4 hours before serving.

      Frequently Asked Questions

      What is a trifle?

      A cold dessert of sponge cake and fruit covered with layers of custard, jelly, and cream.

      What is angel food cake?

      A light and fluffy white cake with a spongy texture from the use of large amounts of egg whites for leavening. It is low fat and only slightly sweet.

      Can I use instant pudding?

      Yes, but I encourage you to try making pudding from scratch.

      Can I use frozen strawberries?

      Yes, but be sure they are totally thawed before using and add more sugar to taste since frozen strawberries aren't as sweet as fresh.

      How long does the trifle need to sit before eating?

      At least 4 hours but preferably 8.

      Perfect Basmati Rice

      July 12, 2020 by Hailey 9 Comments

      Silver spoon scooping white rice from a black bowl.

      Perfect Basmati Rice is a recipe you’ll use repeatedly, and that is coming from someone who used to see rice as a sworn enemy in the kitchen. Hi, my name is Hailey, and I USED TO suck at making rice. Notice that is past tense because I have now mastered a fool-proof way to make fluffy rice, every single time.

      Silver spoon scooping white rice from a black bowl.

      If you too feel like your rice never turns out like the rice of your dreams, you’ve come to the right place. My rice was always more like porridge before I started using this technique. It had that gloopy, oatmeal texture that makes you wish you had made pasta or potatoes instead.

      I would try following the recipe on the package, which was apparently complete shit, just like the rice it produced. It was so frustrating! I decided it was finally time to crack the code.

      Ingredients

      You won’t need a pen and pepper to remember these ingredients.

      • Basmati rice: I have only tested this recipe with basmati rice, but it will work with any long-grain rice.
      • Salt
      • Water (not pictured): You can use chicken, beef, vegetable, or seafood broth in place of water.
      Ingredients for perfect basmati rice.

      Instructions

      The trick to Perfect Basmati Rice is all in the technique. I’ve made this recipe with generic and branded basmati. It doesn’t make a difference. You just need to follow a few important steps.

      1) Rinsing the rice is key

      The first step to Perfect Basmati Rice is rinsing. You absolutely cannot skip this step. As you rinse the rice, you’ll see how cloudy the water becomes. That is all the excess starch you’re rinsing off that previously would take your rice from fluffy to porridge. Rinse and you’re halfway to fluffy rice.

      a white bowl filled with rice soaking in water and a hand filled with rice grains from the bowl

      2) Soaking is a close second

      Rinsing is the biggest game-changer in making rice when you compare it to package instructions, but soaking rice is the secret to the quick cook time. After you’ve thoroughly rinsed the rice, let it soak in cold water for 30 minutes to start softening up the grains in preparation for a speedy cook time.

      3) Remember the 2:3 Ratio

      No matter what the package says, stick with the 2 parts rice to 3 parts liquid ratio for cooking, and you will never have soggy rice again. In my experience, the package usually calls for more liquid and no soak time which makes for mushy rice.

      4) Pick a pot with plenty of room

      A pot that barely fits your rice and water definitely won’t hold the cooked rice and it’s certain to boil over on the stove. I try to choose a pot that allows for 3-4 inches of empty space above the rice and water.

      5) Wait for the water to boil

      Most rice package instructions say to add the water and rice to a pot and then bring to a boil together. I have found that adding the rice once the water is boiling like you would when cooking pasta, helps ensure your rice is fluffy and light.

      6) Let the rice cool on a sheet pan

      This may seem somewhat wacky, but I promise it’s the secret to perfect rice. Once the rice has steamed in the lidded pot with the heat off, pour it onto a sheet pan. Spread the rice out and let it cool for a few minutes before serving. This allows the rice to dry out and not overcook in its own steam. It’s an extra step, yes, but it’s so simple and helps ensure your rice isn’t sticky.

      Full screen of cooked white rice.

      Variations

      My favorite variation of Perfect Basmati Rice is Spanish-style. All you need to add is a packet of Sazon Con Azafran to your cooking liquid, and you’re on your way to classic orange Spanish rice. You can also sauté some tomato, onion, and jalapeno before adding the cooking liquid for an extra kick.

      package of Sazon Con Azafran seasoning with three packets of seasoning taken out of the box
      large decorative blue and white bowl with orange rice and a wooden spoon

      Storage

      • Serve: Allow the rice to cool on the sheet pan for at least five minutes before serving.
      • Store: Rice can dry out pretty quickly in the fridge. Store in an airtight container for up to three days. Once it's older than 3 days, it’s perfect for fried rice. Check out my Vegetarian Fried Rice!
      • Freeze: I am not a fan of frozen rice. I don’t recommend trying to freeze this recipe.
      • Reheat: If you’re using a microwave to reheat leftover rice, I recommend adding a single ice cube on top of the rice and covering it with a damp paper towel before microwaving. This helps steam the rice to keep it moist. Remove any remaining ice before serving.

      Perfect Basmati Rice is the backdrop to so many recipes, but two of my favorites are Meatloaf Meatballs and Rice and Easy Spanish Chicken and Rice. Be sure to check both out.

      Cooking rice shouldn’t be complicated, but a few extra steps make a big difference. Try this Perfect Basmati rice recipe and let me know what you think in the comments section below.

      Silver spoon scooping white rice from a black bowl.
      @cookingandcussingblog

      My recipe for Perfect Basmati Rice is foolproof and that’s coming from someone who always f*cked it up when using the package instructions. cookingandcussing.com/perfect-basmati-rice/ #rice #easysidedish #makeitright #easydinnerideas

      ♬ Lazy Sunday - Official Sound Studio
      Silver spoon scooping white rice from a black bowl.
      Print Recipe
      5 from 7 votes

      Perfect Basmati Rice

      A completely foolproof method to delicious, fluffy basmati rice every time. Rinsing and soaking the rice before cooking are just a couple of keys to the rice of your dreams.
      Prep Time30 minutes mins
      Cook Time15 minutes mins
      Course: Side Dish
      Cuisine: American
      Servings: 4 cups

      Ingredients

      • 2 C basmati rice
      • 3 C cooking liquid*
      • 1 teaspoon kosher salt

      Instructions

      • Add rice to a small bowl and add enough water to cover completely. Stir and pour off water, being careful to not pour the rice out. Repeat 3 times. Add water for the fourth time, and let the rice soak for 30 minutes.
      • Once the rice has soaked, drain off the excess water in a fine strainer and run water over the rice to rinse.
      • Bring cooking liquid and salt to a boil in a large saucepan over high heat. Once boiling, add rice. Stir to combine. Bring back to a boil.
      • Turn heat down to low and cover. Cook for 6 minutes or until liquid is completely absorbed. Don't be afraid to open the lid and move the rice with a spoon to check for excess liquid.
      • Turn the heat off and leave the lid on the saucepan for 5 minutes.
      • After 5 minutes, pour the rice onto a sheet pan and spread into an even layer. Allow the rice to cool for 5 more minutes before serving.

      Video

      https://www.tiktok.com/t/ZTRp2UyaE/

      Notes

      *Water, broth or any other liquid with a similar consistency; go easy on the salt if you're using broth or choose reduced sodium broth.

      Frequently Asked Questions

      Do I have to use basmati rice?

      Any long-grain rice will work.

      The package of rice says to use more/less liquid than this recipe. Which do I follow?

      No matter what the package says, stick with the 2 parts rice to 3 parts liquid ratio, but be sure to soak the rice first as instructed.

      Fruity Pebble Coconut Shrimp

      April 26, 2020 by Hailey Leave a Comment

      Cooked shrimp crusted in coconut and crushed fruity pebbles
      two pieces of colorful cereal crusted shrimp on a black board

      Fruity Pebble Coconut Shrimp is a super festive party snack fit for any occasion, but also, who says you can’t have your cereal for dinner?! Tell that rule follower deep inside who is screaming out, “No way!” to pipe down and follow me to the dark side. Paired with a simple salad or green veggie, Fruity Pebble Coconut Shrimp is the dinner your family is dreaming about.

      uncooked shrimp scattered on a white cutting board
      uncooked tail on shrimp on a white cutting board
      side view of an uncooked deveined shrimp on a cutting board

      A fun spin on coconut shrimp has been on my agenda for quite some time. I’ve tried a few different recipes out, but nothing really felt special enough to mess with the classic.

      Alas, Fruity Pebbles come into the picture, and they are, without a doubt, special enough to warrant their own recipe as the fried seafood coating you never knew you needed.

      The coating for the shrimp is made up of equal parts Fruity Pebbles cereal, shredded sweetened coconut, and panko breadcrumbs. The panko brings the right crunch to the party while also ensuring the recipe has the proper balance of savory flavors.

      The Fruity Pebbles really don’t give a strong, fruity taste to the shrimp. Instead, they provide a splash of color and texture to the recipe along with a sweet, citrusy aroma that lets you know they are there. Not like you could miss the rainbow of colors anyways, but you get my drift.

      Making these shrimp is really easy as well. The first time I made them, my seven-year-old niece was my helper, and she LOVED making the recipe. The only prep work is getting the shrimp ready for breading, and you can always ask the fishmonger at the counter to help you out.

      cereal coated cooked shrimp on a black board with a jar of orange dipping sauce

      I like to buy the easy-peel shrimp so you have a head start, but if that’s cost-prohibitive then feel free to buy the shell-on version. Be sure to thoroughly devein the shrimp, even if you buy the easy-peel variety.

      They usually leave the very end of the poop trail (sorry, that’s what it is) behind even when they say they’re deveined. It’s good practice to slice the back of the shrimp all the way to the tail and, using the tip of the knife, be sure to remove all the black insides you see.

      I also butterfly the shrimp for more surface area for all the Fruity Pebble glory. Here is a link to a helpful video if you’ve never cleaned or butterflied your own shrimp.

      I recommend leaving the tails on for your Fruity Pebble Coconut Shrimp, so you have a handle for easy dipping. Be sure not to leave any of the shell on though, just the tail. This is totally optional though if you prefer to buy your shrimp completely peeled and ready to use.

      Once the shrimp are prepared, there is a standard 3-part breading process that ensures the coating adheres to the shrimp.

      shrimp in a metal bowl covered with flour and black pepper
      a white bowl filled with coconut flakes and multicolored cereal bits
      uncooked tail-on shrimp crusted in crushed multicolored cereal on a white platter

      The process starts with tossing the shrimp in corn starch, then coating them in evaporated milk and last tossing them in the Fruity Pebble and coconut breading.

      There are two ways you can accomplish the last step of applying the breading:

      1. Pour the breading into a large shallow bowl and press the shrimp into breading one at a time
      2. Pour the breading into a gallon-size plastic bag and toss the shrimp in batches

      The first method is definitely the messier option, but you can also ensure really thorough coating of each shrimp. It’s also the eco-friendlier option if you prefer to avoid disposable goods like plastic bags.

      If you go with the first method, only use half of the breading at a time. If you pour all the breading in at once, by the time you get to your last few shrimp, the breading will be too wet to stick to the shrimp.

      The second option is quicker and cleaner. It is also the recommended strategy if you are having the little ones help. Add 6-8 shrimp at a time to the bag to avoid overcrowding. Be sure to still apply some pressure to press the coating into the shrimp after tossing.

      A quick fry is all that is left for delicious Fruity Pebble Coconut Shrimp. If you have an air fryer, this recipe would definitely work, but you may not get as much color as you do with traditional frying.

      If you’re tired of the usual dinner fare or are looking for a fun appetizer to share, Fruity Pebble Coconut Shrimp are a must-try!

      two pieces of colorful cereal crusted shrimp on a black board
      Print Recipe
      5 from 2 votes

      Fruity Pebble Coconut Shrimp

      Coconut Shrimp with the volume turned way up! Fruity Pebbles make the breading extra colorful and give just the right citrus flavor. Paired with a sweet and spicy dipping sauce, Fruity Pebble Coconut Shrimp are a fun party snack or family dinner.
      Prep Time20 minutes mins
      Cook Time10 minutes mins
      Course: Appetizer, Main Course, Snack
      Cuisine: American
      Servings: 20 shrimp (approx)

      Ingredients

      Shrimp

      • 1 lb shrimp easy peel, 16-20 size*
      • 1 C Fruity Pebble cereal
      • 1 C panko breadcrumbs
      • 1 C shredded sweetened coconut
      • ½ teaspoon salt
      • ¼ teaspoon pepper
      • ¼ C corn starch
      • 0.5 oz can evaporated milk
      • Vegetable oil

      Sauce

      • ½ C apricot preserves
      • 2 Tb low sodium soy sauce
      • 1 Tb rice vinegar
      • 1 teaspoon sriracha hot sauce

      Instructions

      • To make the dipping sauce, combine all of the ingredients and whisk well to combine. Set aside until shrimp are ready.
      • To prepare the shrimp, remove the entire shell for the each shrimp, leaving the tail on. Devein each shrimp thoroughly. Last, butterfly the shrimp by slicing all the way down the back of the shrimp so that the two sides lay flat. Check out this video for a visual how-to.
      • To prepare the breading, crush the cereal until it resembles coarse crumbs (don't completely crush into dust). Then add the panko and coconut and mix to combine. Set aside.
      • Bread the shrimp by setting a 3-step station. First, toss the prepared shrimp with corn starch, salt and pepper in a mixing bowl. Next, set up the next two stations by pouring the evaporated milk into a small bowl, and then adding the breading to a large shallow bowl or a gallon size plastic bag (see my notes above on more details on the two methods).
      • After coating the shrimp in corn starch, dip each shrimp twice, one at a time, into the evaporated milk. Allow the excess milk to drip off before adding the breading. Coat each shrimp thoroughly in breading, pressing the crumbs into the shrimp.
      • Once all the shrimp are breaded and ready, place a large pan over medium heat. Pour enough vegetable oil into the pan for about 1-inch depth. To check if the oil is hot, add a few crumbs from the breading to the oil. If they rise to the top immediately and start to sizzle, you're ready to fry. If they turn black, remove the pan from the heat for 30 seconds and test again.
      • These shrimp cook quickly! I find there are three sides to cook since we are pan frying, the bottom of the shrimp and the two sides. Cook each side for 30-60 seconds, depending on the size of your shrimp. Keep an eye on them. The coconut and Fruity Pebbles can burn quickly if left too long.
      • Once the shrimp are golden brown and cooked through, remove to a wire rack or paper towels on a baking sheet to allow the excess oil to shake off. Serve with dipping sauce.

      Notes

      * 16-20 size simply means there are approximately 16-20 shrimp per pound. They are typically labeled as such, but if you can't find them, you're looking for medium-sized shrimp. I like the easy peel, but you can also buy them with the shell fully intact. I like to leave the tail on so completely peeled aren't my favorite for this recipe, but if you're adverse to the idea of peeling them yourself, they will work.

      Easy Sausage Goulash

      April 12, 2020 by Hailey 2 Comments

      an oval shaped blue casserole dish filled with an orange and red pasta casserole
      a pasta, squash, corn, and red pepper casserole in a blue baking dish with a serving of the casserole in a bowl to the side

      Easy Sausage Goulash is one of those classic, crowd-pleasing, simple-to-make recipes you’ll return to over and over again. I know there is such a thing as real Hungarian goulash, but full disclosure, this recipe has almost nothing in common with it. If, on the other hand, you’re on the hunt for a simple and satisfying dinner for your family, you’ve found what you’re looking for!

      I love this recipe for a lot of different reasons. First, it’s comfort food 101.

      When Italian sausage, pasta, marinara and cheese come together, it’s pretty much a f*cking guarantee that you’ll have dinner time success.

      • fresh cooked elbow macaroni pasta in a metal mixing bowl with a wooden spoon
      • elbow macaroni tossed with browned ground sausage, zucchini, corn, onion, and red bell pepper in a metal mixing bowl

      Second, everything for this recipe (except the pasta) is cooked together in one big skillet. I built the recipe so that you can gradually add all of the meat and veg into one big skillet and end up with perfectly cooked everything and only one dirty pan.

      Finally, this recipe is an amazing make-ahead supper. You can put together Easy Sausage Goulash and let it sit, covered, in the fridge for up to 3 days before baking. Fresh from the oven, your hungry troops will never know that all the hard work was done days beforehand.

      It’s also worth nothing that this recipe makes at least 8 large servings, which in my house mean delicious leftovers. If you’re not a leftover person (I’m sorry for your plight), then feel free to cut the recipe in half for a meal for 4. In the current times though (hello Coronavirus, you mofo), leftovers are most appreciated.

      There are plenty of different versions of this recipe out there. It’s often made with ground beef and called Hamburger Goulash. My stepmom used to make a Hamburger Goulash that I always scarfed down. I liked it enough that I still like to make it for my family.

      two cobs of corn, a zucchini squash, a red bell pepper, and a yellow onion on a wooden board

      My stepsister and I somehow got on the topic of Goulash one day, and she shared how she had upgraded her mom’s recipe. You know I love a good upgrade on a classic recipe, so I was all ears. This Easy Sausage Goulash recipe is based on her suggestions, and trust me when I say, it’s so damn good!

      Instead of hamburger meat, the recipe calls for Italian Sausage. I think this is probably the most important switch up of all.​

      Italian Sausage brings so much more flavor to the sauce and takes Easy Goulash from somewhat bland to BA-BAM! 

      ​There is also a healthy dose of Italian seasoning, honey and Worcestershire that add that special something to the recipe. These little flavor additions make a store-bought marinara sauce taste like homemade.

      Also, if you’re in need of a veggie drawer cleanout, you’ll love this recipe. Onions, garlic and corn are required for Easy Sausage Goulash, but I will say that this recipe is versatile enough to be tasty with whole slew of other vegetables.

      an oval shaped blue casserole dish filled with an orange and red pasta casserole

      Red bell peppers and zucchini are two of my favorites to include, hence why they made the final recipe. But I’ve made goulash with mushrooms, yellow squash, green bell peppers, etc. and it’s always delicious!

      Easy Sausage Goulash is simple, family-friendly comfort food at it’s best. Give this tasty recipe a try and let me know what you think.

      a pasta, squash, corn, and red pepper casserole in a blue baking dish with a serving of the casserole in a bowl to the side
      Print Recipe
      3.67 from 3 votes

      Easy Sausage Goulash

      Easy to make and totally delicious, Easy Sausage Goulash is family-friendly comfort food. This recipe is a great make-ahead meal and can also easily feed a crowd. It's also a great way to clean out your veggie drawer!
      Prep Time20 minutes mins
      Cook Time30 minutes mins
      Course: Main Course
      Cuisine: American
      Servings: 8 servings

      Ingredients

      • ½ lb elbow macaroni
      • 1 Tb olive oil
      • 1 onion
      • 1 lb ground Italian sausage
      • 2 cloves garlic minced
      • 1 red bell pepper
      • 2 corn on the cob*
      • 1 zucchini
      • 1 14.5 oz can fire-roasted diced tomatoes
      • 1 C marinara sauce
      • ½ C beef stock
      • 2 bay leaves
      • 2 teaspoon Italian seasoning
      • 1.5 teaspoon salt
      • 1 teaspoon black pepper
      • 1 T honey
      • 1 teaspoon Worcestershire
      • 1 C shredded cheddar

      Instructions

      • Preheat the oven to 400 degrees.
      • Bring a large pot of water to a boil. Add 2 Tb of salt to the water before adding pasta. Cook the macaroni to package instructions. Once cooked, add to a large mixing bowl.
      • While the macaroni cooks, peel and dice the onion into ½-inch pieces. Add 1 Tb of oil to a large nonstick skillet and heat over medium heat. Once the pan is hot, add the diced onion and cook for 2 minutes or until softened.
      • Add the sausage and break-up the meat into bite-size pieces. I've linked to a ground meat chopper above that is the perfect gadget for the job! Cook the meat until browned on all sides, stirring occasionally, or 4-5 minutes.
      • While the meat browns, remove the core from the bell pepper, cut into ½-inch strips and then dice. Remove the ends from the zucchini, split in half vertically and cut into ¼-inch thick half-moons. Remove the kernels from the corn cob.
      • Once the meat is browned, add minced garlic, bell pepper and zucchini. Cook until the veggies soften and the zucchini gets slightly brown around the edges. This should take 3-5 minutes depending on the size of your pan.
      • Last, add the corn. For fresh corn, you need about 1 more minute of cook time. For frozen, cook for two additional minutes.
      • Add the cooked meat and veggies to a large mixing bowl with the pasta. Add all of the remaining ingredients except the shredded cheese and mix together thoroughly.
      • Spray a 9" x 13" dish with baking spray and pour the goulash into the pan. Top with shredded cheese and bake for 30 minutes. Let it cool for at least 5 minutes before serving.
      • *You can use 1 C of frozen corn as a substitute if fresh isn't available or in season.

      Louisiana Meat Pies

      February 2, 2020 by Hailey 9 Comments

      Close up of Louisiana Meat Pie on a parchment lined baking sheet.

      Louisiana Meat Pies made with flaky crescent roll dough filled with a rich and meaty filling. These easy and quick pies are perfect football food but also make a standout weeknight dinner when paired with a simple salad.

      Close up of Louisiana Meat Pie on a parchment lined baking sheet.

      Louisiana Meat Pies are easy as could be and make the perfect potluck dish for any type of gathering, particularly one that includes sports. Prepared Crescent Roll dough makes this meat pie recipe quick and simple, but it also lends a wonderful buttery, flaky texture to the meat pies. Young or old, even the pickiest eaters will love Louisiana Meat Pies.

      One amazing summer of my life was spent in Louisiana. I lived in New Orleans for two months and worked in the French Quarter. My less than rigorous intern workload meant I was off by 3 pm every day (god…I miss my twenties) and spent most of my free time eating and drinking my way through the city.

      Still to this day, I’m inspired by the flavors of Louisiana. These Meat Pies are one such example of how the inspiration stays with me to this day.

      What is a meat pie?

      Meat pies are nothing more than a hand pie filled with meat. I just love a good hand pie…IE a pie that you can easily hold in your hand. Hand pies can be found in both savory and sweet form, and one such savory hand pie is a meat pie. The English commonly call them pasties (not to be confused with the nipple covers).

      Louisiana Meat Pies on a parchment lined baking sheet

      Ingredients

      Louisiana Meat Pies contain a mixture of cooked ground beef and pork. The original meat pie recipe is pure and simple, and I didn’t want to mess that up in my spin-off. Green onions and garlic along with a splash of Worcestershire sauce are the backbones for the pies’ savory filling.

      The ingredients include:

      • Ground pork
      • Ground beef- I like to use 80/20 (or chuck) for this recipe.
      • Green onions
      • Garlic
      • Salt and Pepper
      • All-purpose flour
      • Worcestershire sauce
      • Beef stock
      • Egg
      • Crescent Roll Dough
      ingredients needed to make louisiana meat pies..

      TIP: Pillsbury has a Crescent Roll Dough Sheet that makes this recipe even easier. If you can’t find it, no big deal. The process shots I’ve included show how I pinch the seams of the perforated dough to make it one solid sheet.

      crescent dough on a grey concrete surface showing hands pinch the seams of the dough together to make one piece of dough

      Instructions

      There are three steps to this recipe: making the filling, assembling the meat pies, and baking. The filling for my Louisiana Meat Pies is lightning-fast to make. It can also be made in advance (see my “Top Tip below). Assembling the pies is also quick and easy because crescent roll dough is very forgiving.

      cooked Louisiana Meat Pie filling in a black round saute pan with a silver handle

      The primary difference in my recipe versus others is the use of crescent roll dough. I tried this recipe with pie crust as I use in my Shepherd’s Hand Pies, but the pies were too dry. My goal was to achieve the moist crust that you get from deep frying but from the oven. Crescent roll dough does just that!

      collage of course steps to assemble meat pies: cut dough, fill with met, fold over dough and seal.

      It is buttery and rich just like fried pies but requires a fraction of the effort. Not only is it completely fail-proof, but Crescent Roll dough is also delicious! If you prefer to make your dough from scratch, check out this recipe from Baking a Moment for homemade crescent roll dough.

      Substitutions

      The ingredients in this recipe are so simple that it doesn’t leave a lot of room for substitutions. A few that come to mind are:

      • 100% ground pork OR beef- instead of the 50/50 mix
      • White or red onions- instead of green onions
      • Water or chicken stock- instead of beef stock
      Louisiana Meat Pies on a parchment lined baking sheet with a spatula lifting one pie from the pan

      The recipe could also be converted to vegetarian by replacing the ground meat with a plant-based alternative like Beyond or Impossible. Be sure to also use vegetable stock or water as a substitute for beef stock.

      Equipment

      You won’t need any kind of special equipment to make Louisiana Meat Pies. In fact, they are so easy to make, the recipe is perfect to cook with little ones who have an interest in the kitchen. Meat pies are super tasty no matter what they look like.

      Storage

      The pies are best eaten warm soon after baking. The crust will absorb the liquid from the filling if left in the fridge for long making the filling dry and the dough wet. That’s not what we want.

      Louisiana Meat Pies on a black cooling rack with side of horseradish cream sauce

      Alternatively, the cooked pies can be frozen whole after cooling and kept for up to 3 months in an airtight container. To reheat, allow the pies to thaw first and then reheat in a 250-degree oven until warmed through.

      Serving Suggestions

      If you’re serving Louisiana Meat Pies as party food, then all you need is a good dipping sauce. My recipe includes a horseradish dipping sauce that I love with ground beef, but you’re welcome to choose any dipping sauce that tickles your taste buds. Russian dressing or fry sauce would both also pair well.

      horseradish cream sauce being whisked together in glass bowl

      I love to make my Louisiana Meat Pie recipe for dinner though. They are the perfect way to mix up the normal dinner routine. Paired with a simple green salad, they make a beautiful weeknight dinner.

      Top tip

      Make your meat filling in advance! Hot filling will make assembling the meat pies a nightmare. Because it has plenty of fat in it, the dough can get sticky and just turn into a general pain in the ass if the filling is warm. It’s so easy if the filling is properly cooled.

      close up of Louisiana Meat Pie with a bite taken out of it

      I like to make the filling at least an hour before I’m assembling the meat pies. If you’re short on time, you can also spread the filling out on a sheet pan and let it cool in the fridge for about 30 minutes before assembling the pies.

      The filling can be stored in the fridge for up to three days before assembling.

      More Savory Pie Inspiration

      Looking for some other unique savory pies to check out? Here are a few of my favorites.

      • Pimento Cheeseburger Hand Pies
      • Shepherd's Pie Hand Pies
      • Chicken Pot Pie Crostata
      • Sweet Potato, Apple and Kale Galette

      Try out this recipe or any of the others in the Savory Pies category, and let me know how it goes. I’d love to hear what you think.

      Helpful Utensils

      black and red plastic ground meat chopper utensil

      Ground Meat Chopper

      This little gadget is the thing you never knew you needed until you had it, and then you'll find yourself using it all the time! Breaking up ground meat while cooking is quick and simple with this chopper

      metal bench scraper

      Bench Scraper

      Anytime you're working with dough, a bench scraper is your best friend. If you're like me and have hot hands, a bench scraper makes handling dough so much easier and less messy.

      Close up of Louisiana Meat Pie on a parchment lined baking sheet.
      Print Recipe
      4.53 from 19 votes

      Louisiana Meat Pies

      Savory hand pies made with flaky crescent roll dough filled with a rich and meaty filling. These easy and quick pies are perfect football food but also make a standout weeknight dinner when paired with a simple salad.
      Prep Time15 minutes mins
      Cook Time30 minutes mins
      Cool time30 minutes mins
      Total Time1 hour hr 15 minutes mins
      Course: Appetizer, Main Course, Snack
      Cuisine: American
      Servings: 12 pies

      Ingredients

      Meat Pies

      • 1 teaspoon olive oil
      • ½ lb ground beef 80/20 or chuck
      • ½ lb ground pork
      • 4 green onions
      • 2 cloves garlic minced
      • ½ teaspoon salt
      • ¼ teaspoon ground black pepper
      • 1 heaping Tb flour
      • 1 teaspoon Worcestershire
      • ½ C beef stock
      • 2 tubes crescent roll dough preferably the non-perforated kind
      • 1 egg

      Horseradish Dipping Sauce

      • ¼ C sour cream
      • ¼ C mayo
      • 1-3 Tb creamy horseradish more or less as desired
      • juice half lemon
      • 2 dashes Worcestershire
      • pinch salt and black pepper

      Instructions

      • Heat a large nonstick skillet over medium high heat. Add oil and once hot, add the ground beef and pork.
      • Cook the meat for about 10 minutes until browned. Break up the meat while it's cooking until the texture is small crumbles. Cut the green onions into ¼-inch pieces, including the white portion of the onion.
      • Once the meat is browned and cooked through, add garlic, green onions, salt and pepper. Cook for another 3 minutes. Add flour, stir well to combine and cook for 2 minutes. Last, add Worcestershire and beef stock.
      • Reduce the heat to medium-low and let the mixture simmer for 1-2 minutes, stirring often until the sauce is thick. The sauce should coat all of the meat.
      • Cool the filling completely before filling the hand pies. You can make the filling in advance or spread out the filling on a sheet pan and place in the fridge for 30 minutes. Once the filling is cooled, preheat the oven to 375 degrees.
      • Remove the crescent dough from the can and place on a lightly floured surface. If using the preforated dough, pinch together the seams using your two index fingers, being careful not to tear the dough. Once you've pinched all the seams, sprinkle a light dusting of flour on top of the dough and lightly roll over the dough to flatten and seal your pinched seams.
      • Crack one egg into a small bowl and whisk in 1 teaspoon of cold water. Set aside with a pastry brush for assembling the pies.
      • Lightly flour the top of your crescent roll dough and roll out to a roughly 6" x 9" rectangle. If you want perfect squares, trim the edges to be straight, and then cut the dough into six 3-inch squares.
      • Place 3 Tb of filling in one corner of each square. Using a pastry brush, lightly coat all four edges of the square with egg wash. Fold the corner opposite of the filling over the top until the edges meet to form a triangle shape. Carefully press down the edges with your fingers.
      • Carefully remove the hand pie from your work surface and place it on a baking sheet prepared with parchment paper. Use a fork to seal the edges completely.
      • Bake for 12 to 15 minutes or until golden brown. Crescent roll dough browns quickly so keep an eye on them. The filling is totally cooked so you're just trying to bake the dough.
      • To make the sauce, combine all of the ingredients in a small mixing bowl and chill until ready to serve.
      • Once cooked, cool for a couple of minutes before serving with horseradish cream sauce.

      Frequently Asked Questions

      Do I have to wait for the filling to cool before stuffing the hand pies?

      Yes! Crescent roll dough will become awful to work with if the filling is hot. I like to make the filling ahead of time, but that's not required.

      Can I make the pies in advance and reheat to serve?

      The pies are best served fresh. If you have leftovers that you don't want to throw out, you can freeze the pies once they are cooled and store them for up to 3 months in an airtight container. When you're ready to reheat, allow the pies to thaw before warming in a 250-degree oven.

      Can this recipe be made vegetarian?

      Yes! In fact, someone left a comment on Pinterest about how good they turned out using a plant-based ground meat alternative, so that's a good option. Be sure to also substitute the beef stock or water.

      • 1
      • 2
      • 3
      • Next Page »

      Rate This Recipe

      Your vote:


      A rating is required
      A name is required
      An email is required