Cooking and Cussing

menu icon
go to homepage
search icon
Homepage link
  • Recipe Index
    • Bloglovin
    • Facebook
    • Instagram
    • Pinterest
  • ×
    Home

    Mushroom Tacos with Pecan Arugula Salsa

    January 26, 2020 by Hailey Leave a Comment

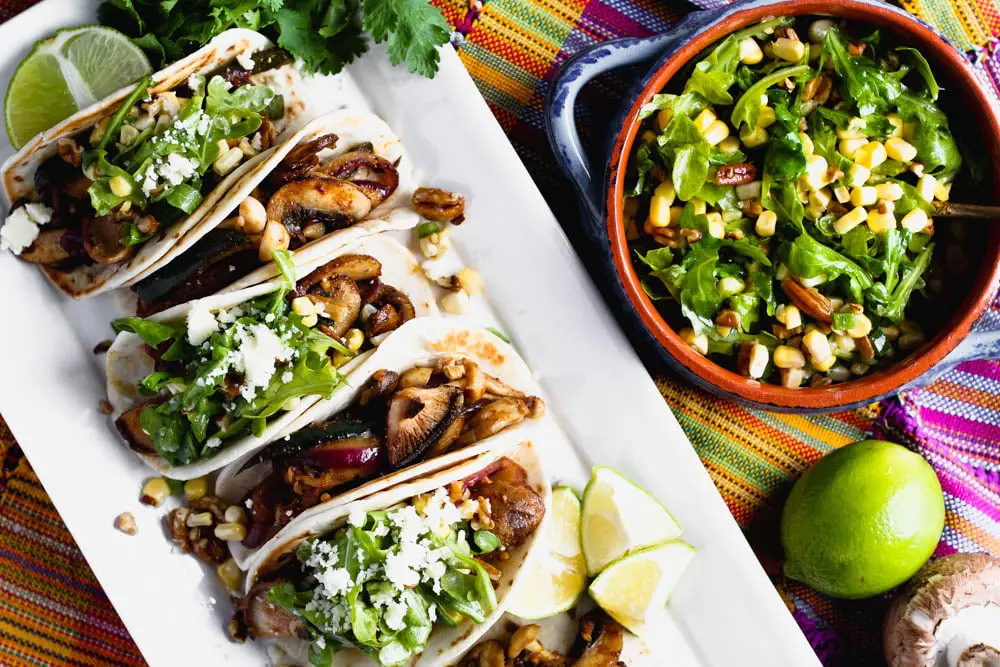
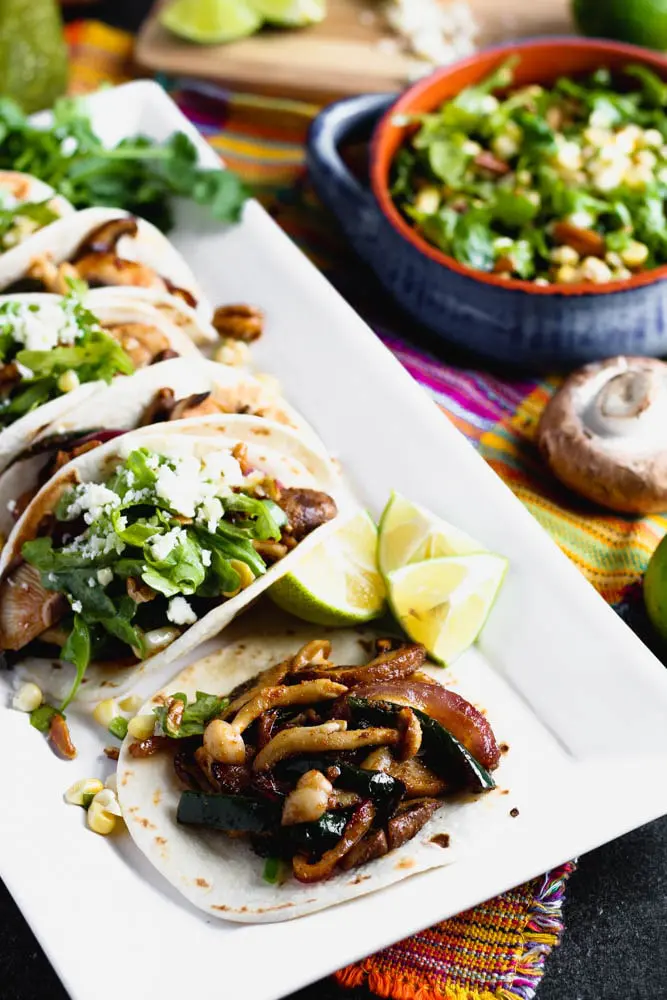
    tacos filled with mushrooms and vegetables on a white platter with lime wedges
    A platter of tacos garnished with arugula and corn salad beside a bowl of the same salad

    Mushroom Tacos with Pecan Arugula Salsa are heavy in the flavor department but light enough that you feel damn good after eating them. Hell, you could even go back for seconds on these tacos without any garnish of guilt. These tacos are exactly the kind of food we’ve been chowing down on during my Cooking and Cussing hiatus as of late.

    In the words of the great Elton, “The bitch is back!” I feel like it’s been FOREVER since I’ve had the chance to put up a new blog post, and my creative soul has seriously DYING to get back at it! For those of you who are on my email list, you sort of know the story here, so feel free to skip to paragraph 4 or endure the next one if you please.
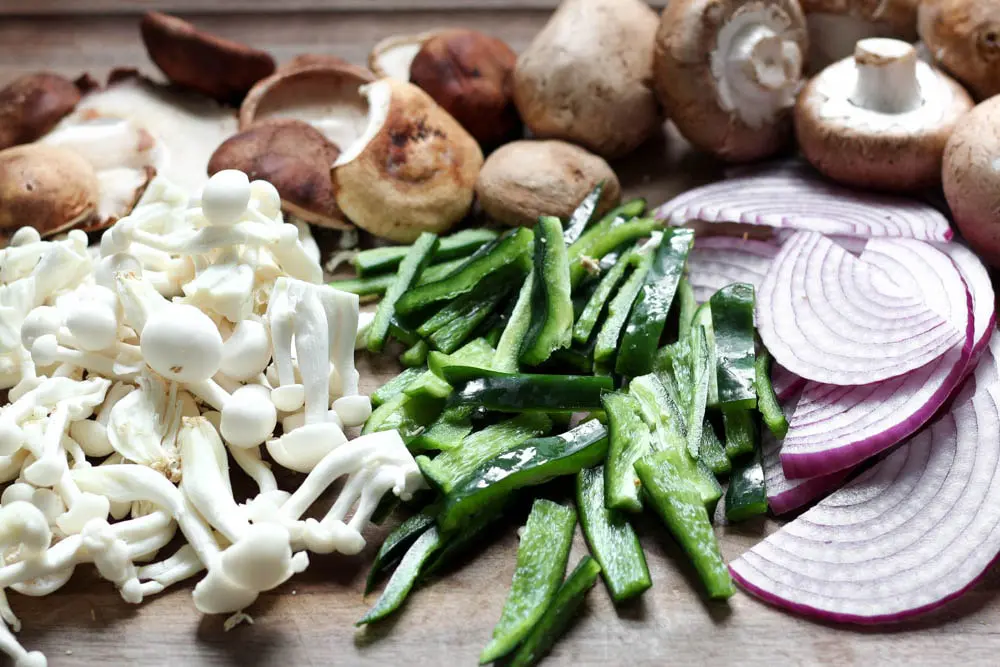
    uncooked brown and white mushrooms aside piles of sliced green pepper and sliced red onion

    The gist is, my family and I were in the process of selling our old house and moving into our new spot during the already busy holiday season leaving little to no time for my beloved blog, but now that we are settled in, I am so ready to get back to cooking and cussing my ass off! Phew…that sentence was exhausting.

    I’ve actually tested, written, and photographed quite a few recipes while Cooking and Cussing has been in autopilot, but it has been crazy difficult to find time to write a post and get it up on the blog. It’s so damn hard to give yourself permission to be still and think when you’ve got a bajillion things to accomplish!

    With that in mind, almost all the recipes I worked on recently are simple, easy and comforting. During times of stress, I could easily stuff my piehole with a steady diet of cheese, carbs, and fried everything, but I know what my body really needs is all the veggies!​

    Mushroom Tacos are the perfect way to incorporate the classic soul-satisfying vessel of a taco with all the nutrients your body craves.

    tacos filled with mushrooms and sauteed vegetables on a white platter

    The filling for these tacos combines the earthy, nutty flavors of mushrooms with the smoky notes from the poblano, chipotle, cumin and coriander for a taco experience unlike any other. I fell in love with mushrooms once I had them really well browned and have been hooked ever since. Mushrooms are sort of like a good steak…they aren’t shit without a beautiful hard sear on the outside.

    Those crispy browned mushroom edges are the perfect balance to the fresh, acidic taste of the Pecan Arugula Salsa. The recipe for this salsa was inspired by Cooking Light, but it was paired with a protein if memory serves me. I have always wanted to incorporate it into a taco.

    The idea of putting it on a vegetarian taco was born from the notion that pecans already offer the fatty richness that protein usually brings to a taco.
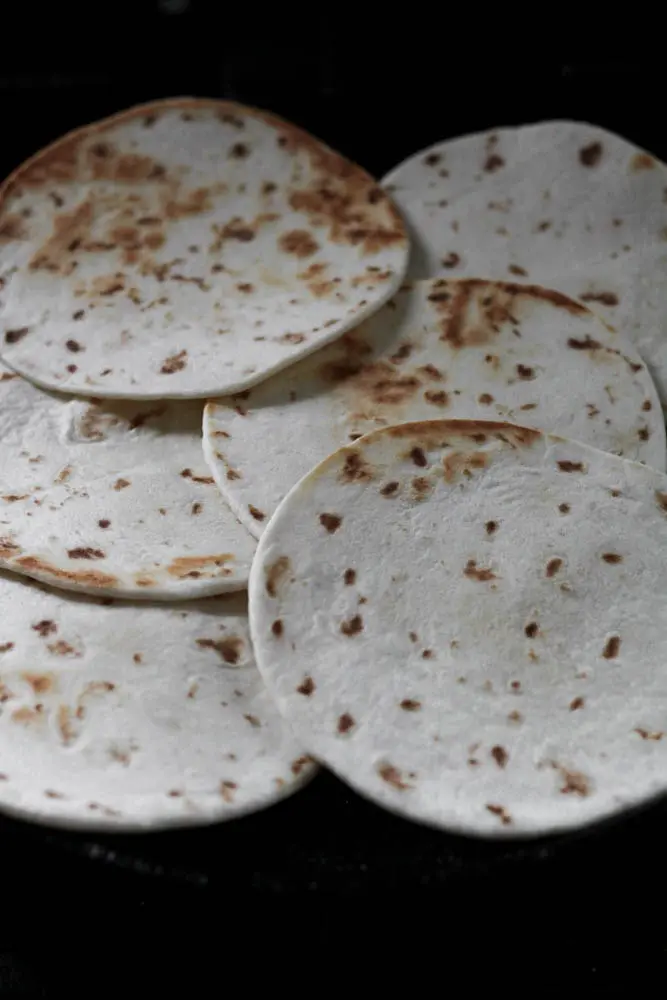
    browned flour tortillas overlapping on a black surface

    Not only are Mushroom Tacos super f*cking tasty, they can also be made at lighting speed.

    If you’ve got a spare set of hands in the kitchen (cue kids who like to cook), you can easily put these tacos on the table in less than 20 minutes. Riding solo? It’s still a 30-minute meal.
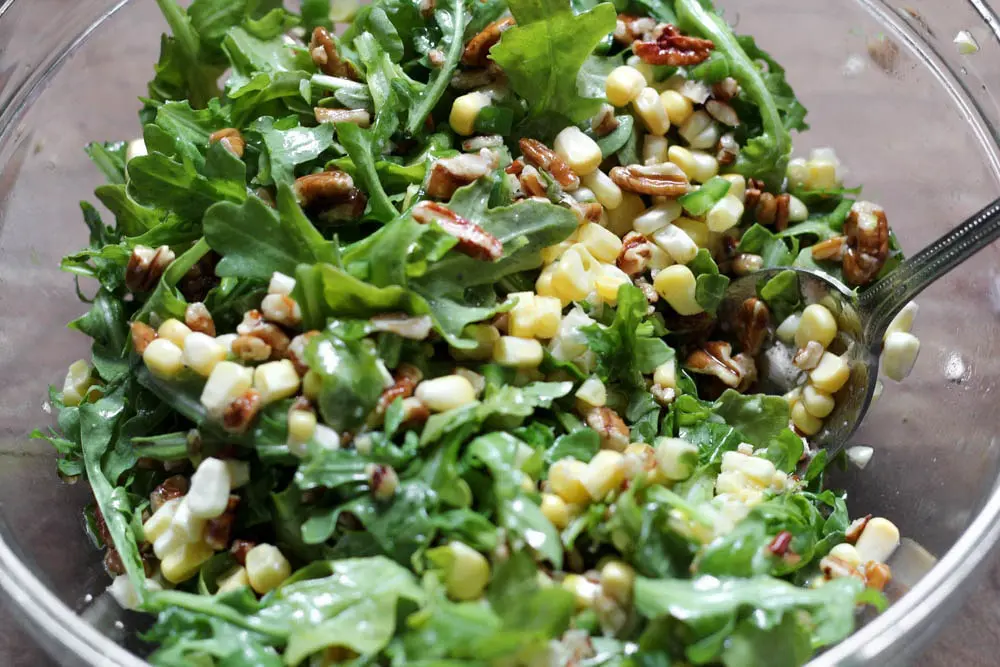
    A clear glass bowl filled with a mixture of arugula, brown tree nuts, and yellow corn

    Meatless Monday, Mushroom Monday, Manic Monday…whatever day of the week or your reason for foregoing the meat today, you won’t miss a thing if Mushroom Tacos with Pecan Arugula Salsa are on your table. Be sure to let me know how it goes in the comment section below too!

    tacos filled with mushrooms and vegetables on a white platter with lime wedges
    A platter of tacos garnished with arugula and corn salad beside a bowl of the same salad
    Print Recipe
    5 from 4 votes

    Mushroom Tacos with Pecan Arugula Salsa

    Easy and healthy tacos filled with mushrooms, peppers and onions all topped with fresh salsa from pecans and arugula. This quick recipe is a perfect meatless weeknight dinner or a vegetarian option for entertaining.
    Prep Time15 minutes mins
    Cook Time15 minutes mins
    Course: Main Course
    Cuisine: American, Mexican
    Servings: 12 small tacos

    Ingredients

    Pecan Salsa

    • 1 C chopped pecans
    • 2 jalapenos
    • 1 lime zest and juice
    • ½ teaspoon salt
    • 6 Tb olive oil
    • 1 C arugula
    • 2 ears fresh corn*

    Mushroom Filling

    • 2 Tb olive oil
    • 1 onion
    • 1 poblano
    • 1 lb mushrooms**
    • 1 clove garlic
    • 1 teaspoon chipotle chili powder
    • ½ teaspoon coriander
    • ½ teaspoon cumin
    • ½ teaspoon onion powder
    • ½ teaspoon garlic powder
    • ½ teaspoon salt
    • black pepper to taste

    Tacos

    • 12 4.5- inch tortillas flour or corn
    • lime
    • cotija cheese

    Instructions

    To make salsa

    • Split the jalapeno in half vertically and remove seeds (if you like it extra spicy, feel free to keep the seeds). Slice the halves into thin strips and then mince. Add to a small mixing bowl with the chopped pecans.
    • Zest the lime and then juice, adding both to the bowl along with the salt and olive oil. Mix to combine.
    • Roughly chop the arugula. If using fresh corn, shuck the cobs then cut the kernels off. I like to do this on a dish towel. It helps the kernels from bouncing all over the place.
    • Add the chopped arugula and corn kernels to the other ingredients and mix well to combine. Set aside while you prepare the mushrooms. This is not the kind of salsa you can make ahead. You'll want to eat this fresh as the arugula will start to get squiggly if left in the lime too long.

    To make filling

    • Preheat a large nonstick saute pan over medium high heat and add 1 Tb of olive oil. Thinly slice the onion. Remove the seeds and stem from the poblano and slice in to thin strips.
    • Add the onions and poblano to the hot pan and saute for 6-7 minutes, stirring occasionally, until the veggies are soft and brown around the edges. Pour the cooked veggies into a bowl and set aside.
    • While the onions and pepper cook, wipe the mushrooms of any apparent dirt using a lightly damp paper towel. Remove the stem (if it's woody like in a portabella, baby portabella- also called cremini mushrooms- or button mushroom) and slice into ¼-inch slices. If you're using a delicate mushroom like beech, one of my favorites, feel free to leave them whole.
    • Add the remaining tablespoon of oil to the pan (no need to clean it). Once the oil is hot, add the sliced mushrooms. Spread them around evenly and then leave them alone (NO STIRRING) for at least two minutes or until the mushrooms develop a nice golden brown color. That color is where all the great mushroom flavor lives so don't be afraid to brown them well!
    • Once browned on one side, stir the mushrooms well. As the other side begins to brown, mince the garlic clove and add it along with all of the seasonings. After the second side has browned for a couple of minutes, mix all the seasoning and garlic through the mushrooms.
    • Last, add the cooked veggies back to the mushrooms and allow it all to cook together for another 2-3 minutes until the garlic has browned and the onion and pepper are hot.

    To assemble tacos

    • Heat the tortillas on a flat grill pan or a cast iron skillet over medium high heat until hot and lightly toasted, usually about one minute per side.
    • If you're using corn tortillas, I usually lay down a base of 2 tortillas or for flour just one. Fill the tortilla with a generous portion of mushroom filling. Top with a heaping spoonful of Pecan salsa and crumbled cotija cheese. Serve with a lime wedge.
    Notes

    * If fresh corn is not in season (IE: if it's not warm outside), don't waste your time or money on it. For a substitute, I prefer frozen corn but canned also works. If using frozen, be sure to thaw and drain before adding to the salsa. If you're using canned, rinse the corn well in a strainer and drain before adding.
    ** Any kind of mushroom will work for this recipe. Feel free to be adventurous and try a shroom you've never had before, particularly if you live in an area where wild mushrooms are regularly available. I used 8 ounces baby portabellas and 8 ounces of beech mushrooms which can both be found at a standard grocery store.

    Cranberry, Apple and Pear Bars

    November 5, 2019 by Hailey Leave a Comment

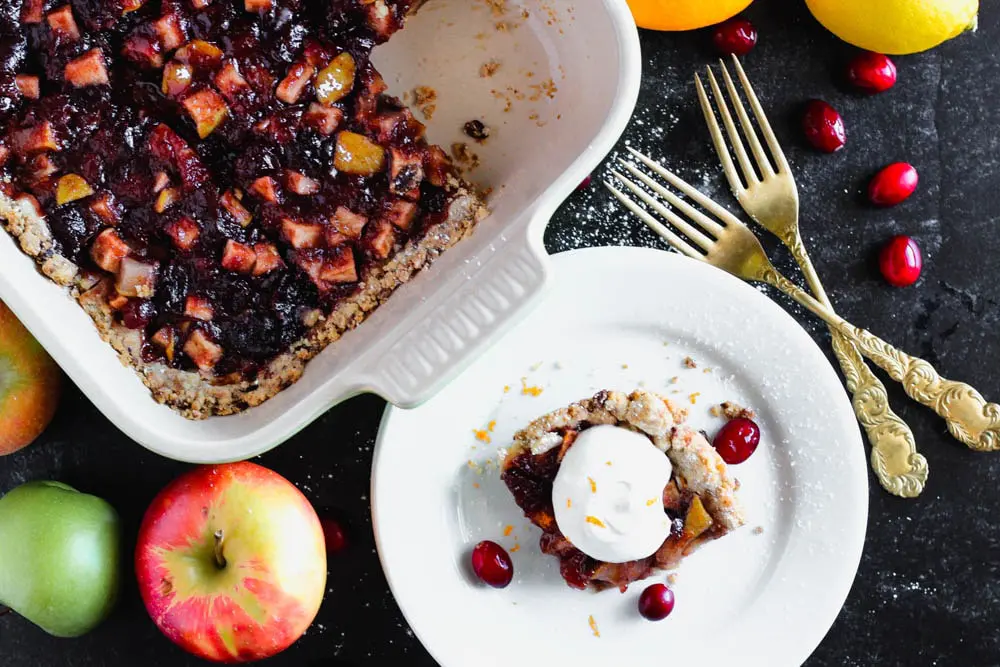
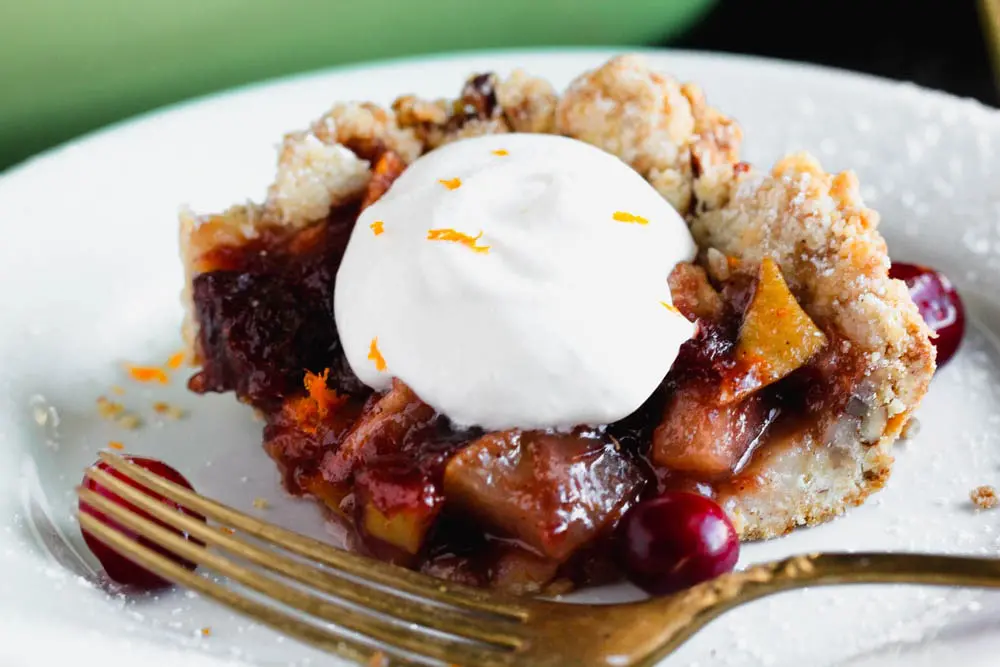
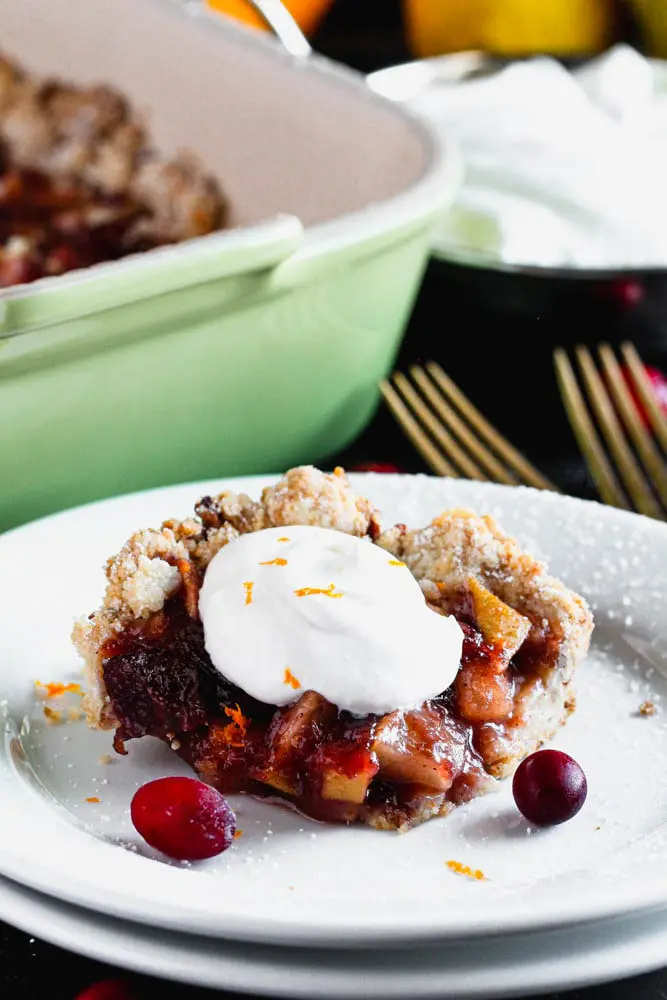
    Close up photo of a square piece Cranberry, Apple and Pear Bars with a dollop of whipped cream on a white plate with a green baking dish in the background
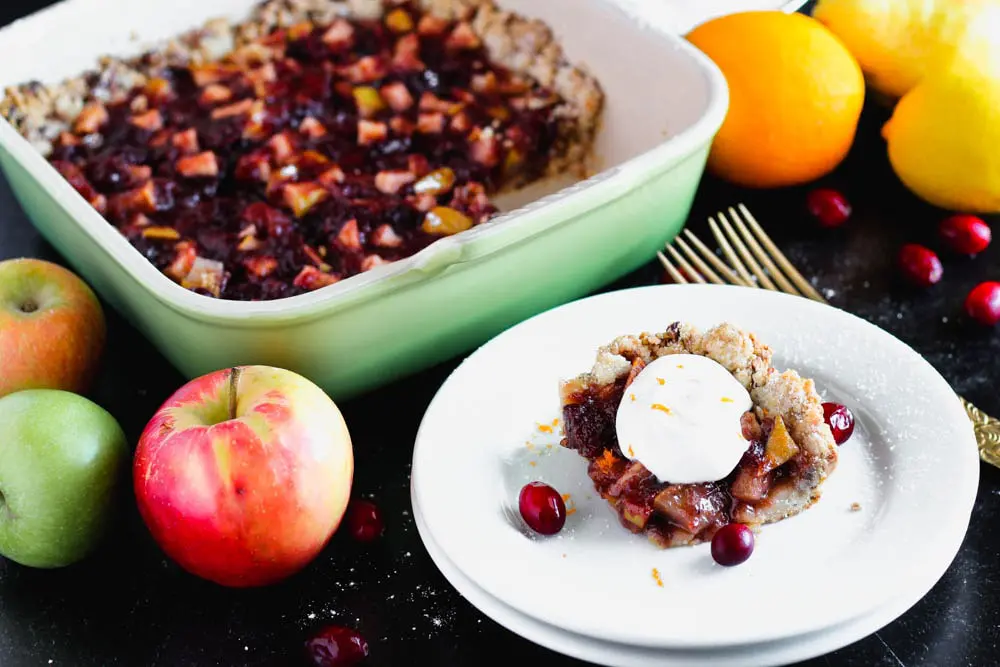
    a square piece of Cranberry, Apple and Pear bars on a small round white plate with the remaining bars in a green baking dish in the background and pears, apples, and oranges scattered around

    If you’re looking at a can of cranberry sauce post-Thanksgiving and thinking “what in the f*ck am I going to do with this now?”, I’ve got you covered. Cranberry, Apple and Pear Bars are mouthful of fall flavor that will help clear out some of those Thanksgiving leftovers cluttering up your kitchen after the big pachanga.

    Now, if you’re already exhausted from cooking for your friends and family, fear not! This recipe can be made in a flash. For the filling, you can throw all of the ingredients into one bowl in no particular order, mix them up, and you’re on your way to cranberry wishes and shortbread dreams.

    a square piece of Cranberry, Apple and Pear bars on a small round white plate with the remaining bars in a green baking dish in the background and pears, apples, and oranges scattered around

    Does your family have canned cranberry sauce as part of their holiday spread? If not, this is a great reason to finally try it out because, seriously, it’s so good!

    Even if you can’t get down with the idea of adding a sweet jelly to your savory Thanksgiving plate, I have no doubt the combination of tart cranberry sauce and sweet apples and pears will make perfect sense to your palate.

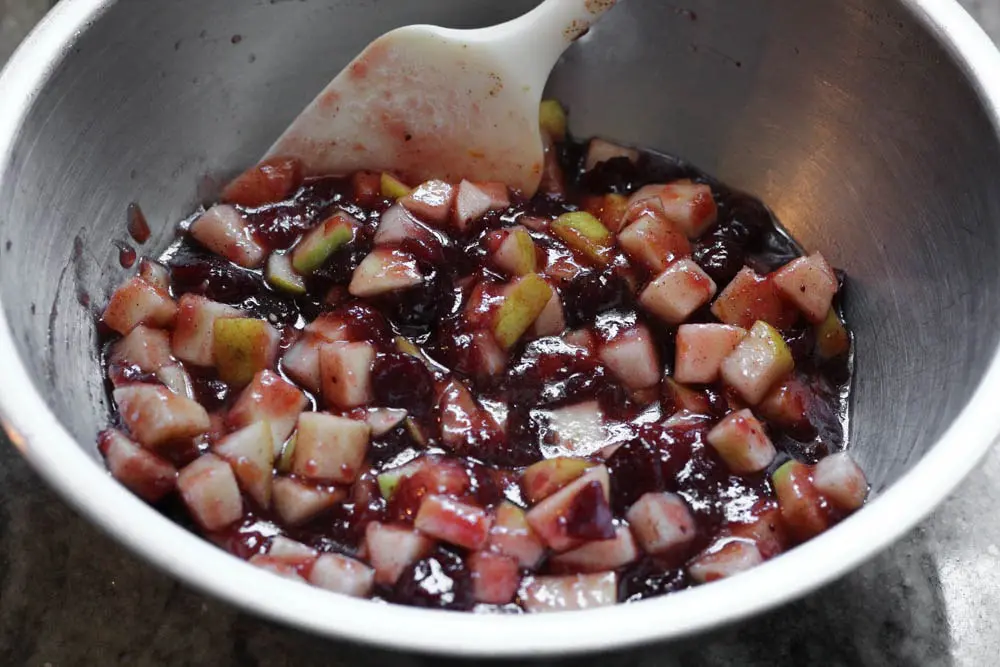
    closeup of filling for Cranberry, Apple and Pear Bars being mixed in a stainless steel mixing bowl

    We are cranberry-sauce-crazy in my family. For years, someone would always try to make homemade cranberry sauce only for it to passed up by almost everyone in the family (some polite guest would take some to be kind).

    We all just wanted the good ol’ canned stuff, the kind where you have to can-open both ends to push it out. That glorious “SLURP” noise as it falls of the can (similar to the noise Spam makes as it slides out of the container) means that Thanksgiving has truly begun. ? We don’t even try to disguise the can shape, just slice and serve!

    I admire your tenacity if you have never eaten cranberry sauce and made it through the previous paragraph with your interest in trying this recipe still intact because I did absolutely nothing to sell you on the idea.

    Honestly, if you like cranberry juice, you will love cranberry sauce. It has a wonderfully tart and sweet flavor that pairs beautifully with maple syrup and spices like ginger, Chinese five spice, and orange. I feel all warm and fuzzy inside just thinking about it!

    My first try at this recipe was really simple and included no other fruit besides the cranberries. It needed more freshness and acidity, so I introduced apples and pears. The combination was scrumptious! Granny Smith Apples add just the right amount of acidity and ripe Bartlett Pears have a subtle sweetness that rounds the taste of these Cranberry Bars out perfectly.

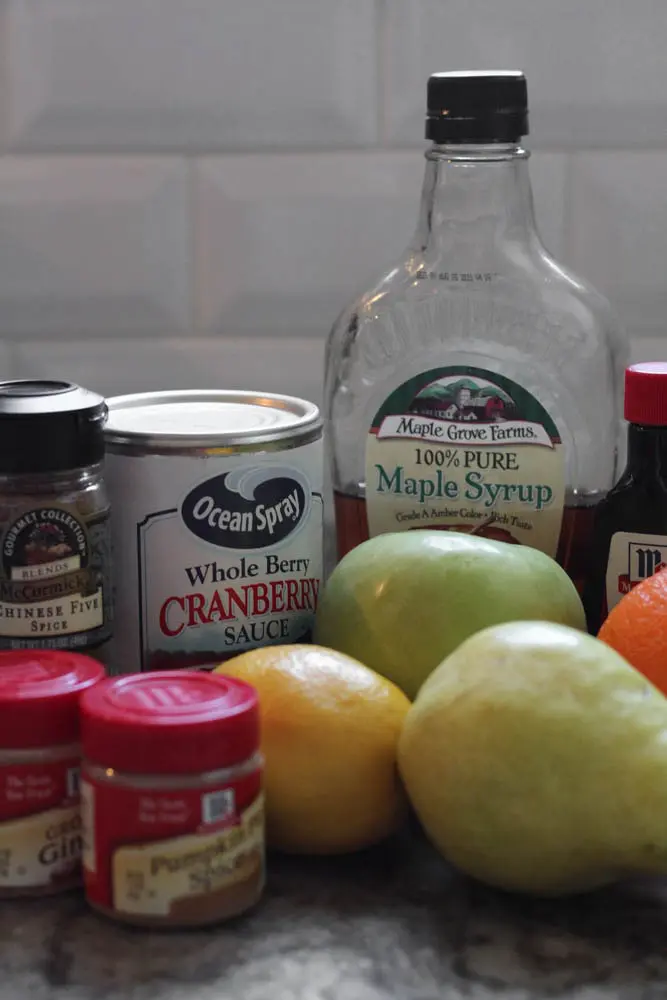
    the ingredients required for Cranberry, Apple and Pear Bars which include chinese five spice, ground ginger, pumpkin pie spice, canned cranberry sauce, maple syrup, vanilla extract, lemon, orange, pear and apple

    I use whole berry cranberry sauce in my recipe because that’s typically my jam on Thanksgiving, but you could certainly use the smooth consistency variety if that’s what you have around. The pears and apples provide the texture that holds the Cranberry Bars together anyways.

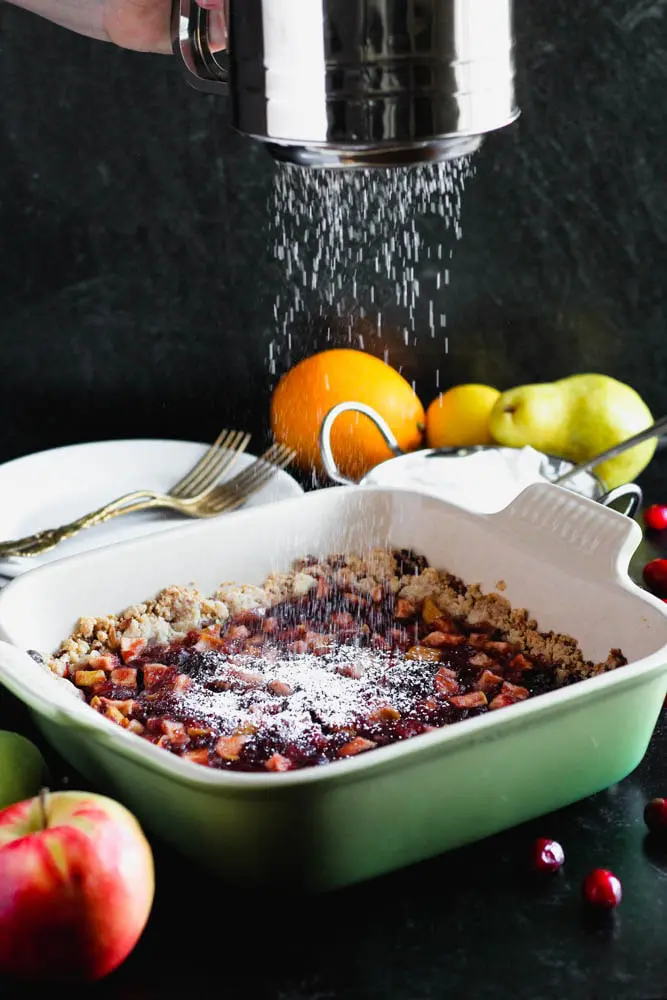
    powdered sugar being sifted over the top of uncut pan of cranberry, apple and pear bars in a green baking dish with an apple in the foreground and an orange, pear and lemon in the background

    Also, I know pears can be a tricky thing to find ripe sometimes. I always have to let them sit on my counter for about a week before they no long have the texture of a pet rock.

    This recipe works perfectly with both fresh or canned pears so if you can’t find ripe fresh ones, definitely use canned. I like the canned kind that is stored in 100% juice. 

    Close up photo of a square piece Cranberry, Apple and Pear Bars with a dollop of whipped cream on a white plate with a green baking dish in the background

    I didn’t talk much about the crust in this recipe because it’s so dang simple, there isn’t much to cover. I use the same base recipe as you can find on my Chocolate Junk post which is just an easy shortbread crust that your press into the pan, no rolling required. It’s not a very sweet crust either which ensures the filling is the star of the show.

    Close up photo of a square piece Cranberry, Apple and Pear Bars with a dollop of whipped cream on a white plate with a green baking dish in the background

    Whether you’re looking for the perfect way to use up Thanksgiving leftovers or just want a treat that features all the bounty of fall, Cranberry, Apple and Pear Bars are the recipe you’ve been looking for. I like to serve these bars with a dollop of fresh whipped cream. Vanilla ice cream would also be a delicious topping.

    Try out this easy dessert and let me know what you think!

    a square piece of Cranberry, Apple and Pear bars on a small round white plate with the remaining bars in a green baking dish in the background and pears, apples, and oranges scattered around
    Print Recipe
    5 from 1 vote

    Cranberry, Apple and Pear Bars

    Leftover cranberry sauce from Thanksgiving is transformed into an easy-to-make fruity dessert featuring some of the best flavors of fall. Maple syrup, pumpkin pie spice, ginger, and five-spice powder bring new life to traditional fruit filling. Served on a shortbread crust and topped with whipped cream, this recipe is simple but decadent
    Prep Time35 minutes mins
    Cook Time45 minutes mins
    Course: Dessert
    Cuisine: American
    Servings: 9 servings

    Ingredients

    Crust

    • ½ C butter melted
    • 2 Tb white sugar
    • ½ teaspoon pumpkin pie spice
    • 1.5 C all-purpose flour
    • ½ teaspoon kosher salt
    • ½ C pecans finely chopped

    Filling

    • 1 14 oz can whole berry cranberry sauce
    • 1 bartlett pear
    • 1 granny smith apple
    • ½ lemon
    • ½ orange
    • ¼ C maple syrup
    • ½ teaspoon Chinese five-spice
    • ½ teaspoon pumpkin pie spice
    • ½ teaspoon kosher salt
    • ¼ teaspoon ground ginger
    • ½ teaspoon vanilla extract

    Whipped Cream (optional)

    • 1 C heavy cream
    • ⅓ C powdered sugar
    • 1 teaspoon vanilla extract
    • pinch kosher salt

    Instructions

    To make the crust

    • Preheat the oven to 375 degrees. Prepare an 8-inch by 8-inch pan with baking spray.
    • Combine the melted butter, sugar and pumpkin pie spice with a fork. Add the flour and salt and mix until large crumbs start to form. Last, add the pecans and mix until evenly distributed.
    • Pour the mixture into the prepared pan. Press the dough into an even layer using your fingers. I like to use a technique where I work from the center of the pan out toward the edges, keeping the crust an even thickness. The dough will go only about halfway up the sides of the pan. Press firmly where the two sides of the pan meet so it's not too thick in the corners.
    • Place the crust in the freezer for 15 minutes to prevent it from shrinking when baking. After 15 minutes in the freeze, immediately place in the oven and partially bake the crust for 15 minutes before filling.

    To make the filling

    • Zest the orange half and reserve in a large mixing bowl. Zest and juice the lemon half and add to the orange zest. Peel the apple and cut into a half-inch dice. Also, dice the pear into half-inch pieces but no need to peel.
    • Add the diced apple and pear and all of the remaining ingredients to the bowl with the citrus zest and mix until well combined.
    • Once the crust has baked for 15 minutes, pour the filling in and place it back in the oven. Don't worry if the crust is still hot when you add the filling.
    • Bake for 45-50 minutes at 375 degrees. The filling will be set but still with a wiggle to it. The edges should be browned but not burnt.

    To make whipped cream

    • Place the cold heavy cream into a medium mixing bowl. Using a hand mixer or stand mixer, whip on high for 60 seconds. Turn the mixer off and add the remaining ingredients.
    • Turn the mixer back on and whip on high until the cream is stiff. Turn the speed down to medium-high when the texture starts to thicken to prevent the cream from becoming butter. Stop as soon as you can easily hold a dollop on your finger or a spoon.

    Pumpkin Cake Baked Donuts

    October 22, 2019 by Hailey Leave a Comment

    Close up shot of pumpkin donuts with a heavy layer of cream cheese glaze on a antique bronze tray with more donuts before icing on a cooling rack in the background
    Close up shot of pumpkin donuts with a heavy layer of cream cheese glaze on a cooling rack with more donuts before icing and apples in the background

    Pumpkin Cake Baked Donuts are so much more than that, but when I tried to include all the deliciousness nestled inside these baked treats in the title, I ended up with a novel for a name.

    If you’re familiar with Morning Glory Muffins, then the lengthy list of mix-ins for these crave-worthy donuts won’t be all that mystifying. I found in my keyword research though that very few have heard of a Morning Glory Muffin, so I abandoned that in the title.

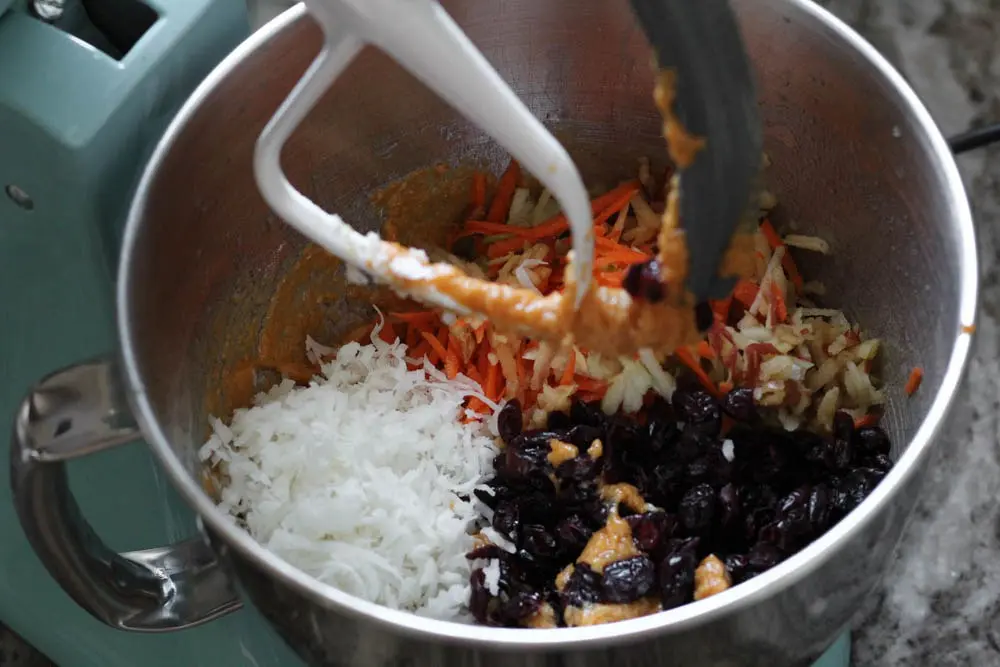
    a look into the stand mixer bowl before stirring all of the mix-ins into the batter
    a look into the mixing bowl once the donut batter is total mixed with all of the ingredients

    Morning Glory Muffins typically included coconut, shredded carrots, nuts and dried fruit. For my Pumpkin Cake Baked Donuts, I went for all the add-ins I could reasonably include which means these donuts include:

    • Shredded apple,
    • Shredded carrot,
    • Shredded, sweetened coconut,
    • Dried cranberries, and
    • Chopped pecans
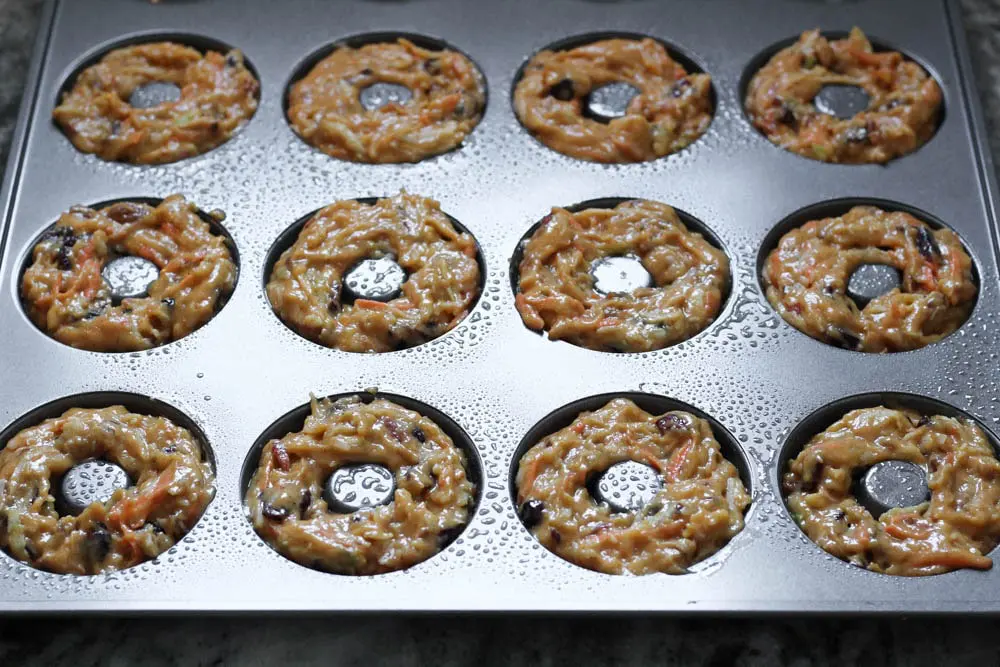
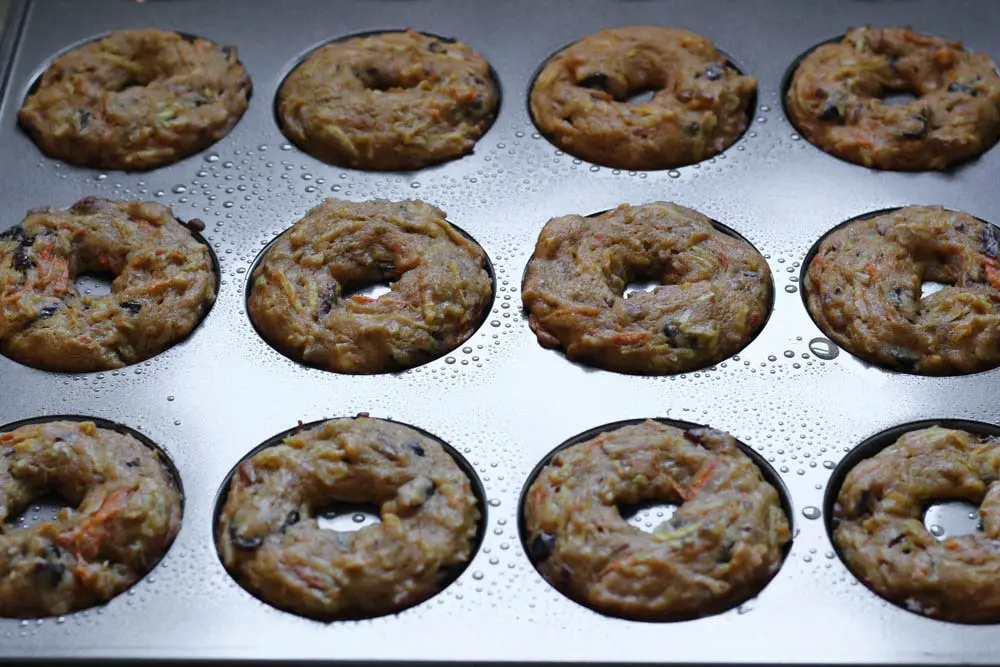
    donut batter in the donut pan before baking
    baked pumpkin donuts in the donut pan right after being removed from the oven

    Now, you might be thinking, “WOAH LADY, that’s a lot of shit in my donuts,” but I promise you, all these flavors and texture work beautifully together. 

    In my humble opinion, pumpkin can be a little bland if left on its own. It’s why we all drown pumpkin pie in whipped cream everything Thanksgiving. Wait, is that just me? ? But when you add the acidity of apple, the earthiness of carrot, the sweetness from coconut and craisins, and last, the bite from pecans, then you’ve got an autumn treat that is truly memorable!

    I finish off my Pumpkin Cake Baked Donuts with the only reasonable pairing for a pumpkin treat, cream cheese, of course.

    My cream cheese glaze is slightly thicker than your standard donut glaze but not thick enough to be considered an icing. The slightly thicker texture of the glaze ensures you for damn sure taste cream cheese when you take a bite, but I kept the glaze thin enough that you can still hand dip the donuts just like a proper donut glaze. Basically, it’s the best of both worlds.

    Super close photo of pumpkin donuts on a cooling rack before being glazed with cream cheese glaze

    These donuts have been through quite a few rounds of testing which means there have been way more donuts around my house than is reasonable for any family. I’m always taking treats to wherever I’m headed next, just to get them out of the house, and this time it meant delivering some fresh Pumpkin Cake Baked Donuts to my niece’s soccer game.

    Close up shot of pumpkin donuts with a heavy layer of cream cheese glaze on a antique bronze tray with more donuts before icing on a cooling rack in the background

    I bore you with those details only to mention that one of the other soccer moms came up to me with a mouth full of Pumpkin Donuts and proudly proclaimed, “These are fucking amazing!”

    There is no better reaction to a Cooking and Cussing recipe than that my friends.

    If you’ve been on the fence about purchasing a donut pan, put this on your Christmas list for sure! It makes baking donuts at home so easy that you’ll never be venturing out for the heavy fried variety early on a weekend morning again!

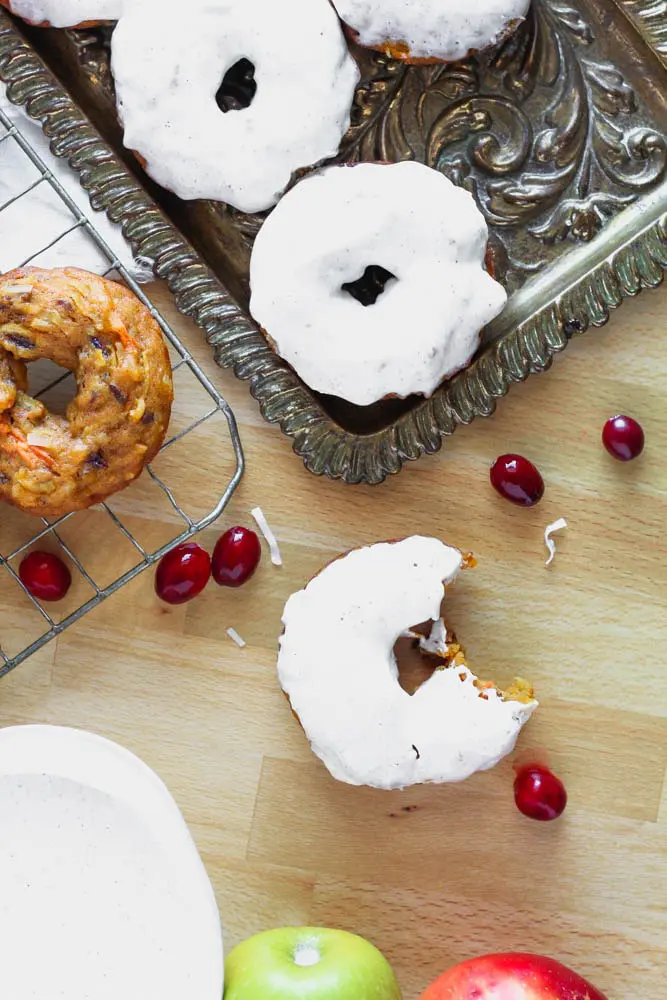
    Overhead photo of table that includes a bronze antique tray with glazed pumpkin donuts, a cooling rack with unglazed donuts and one donut with a bite taken out of it

    Try out this Pumpkin Cake Baked Donut recipe, and you’ll see just what I mean. I can’t wait to hear what y’all think of this one!

    Helpful Utensils

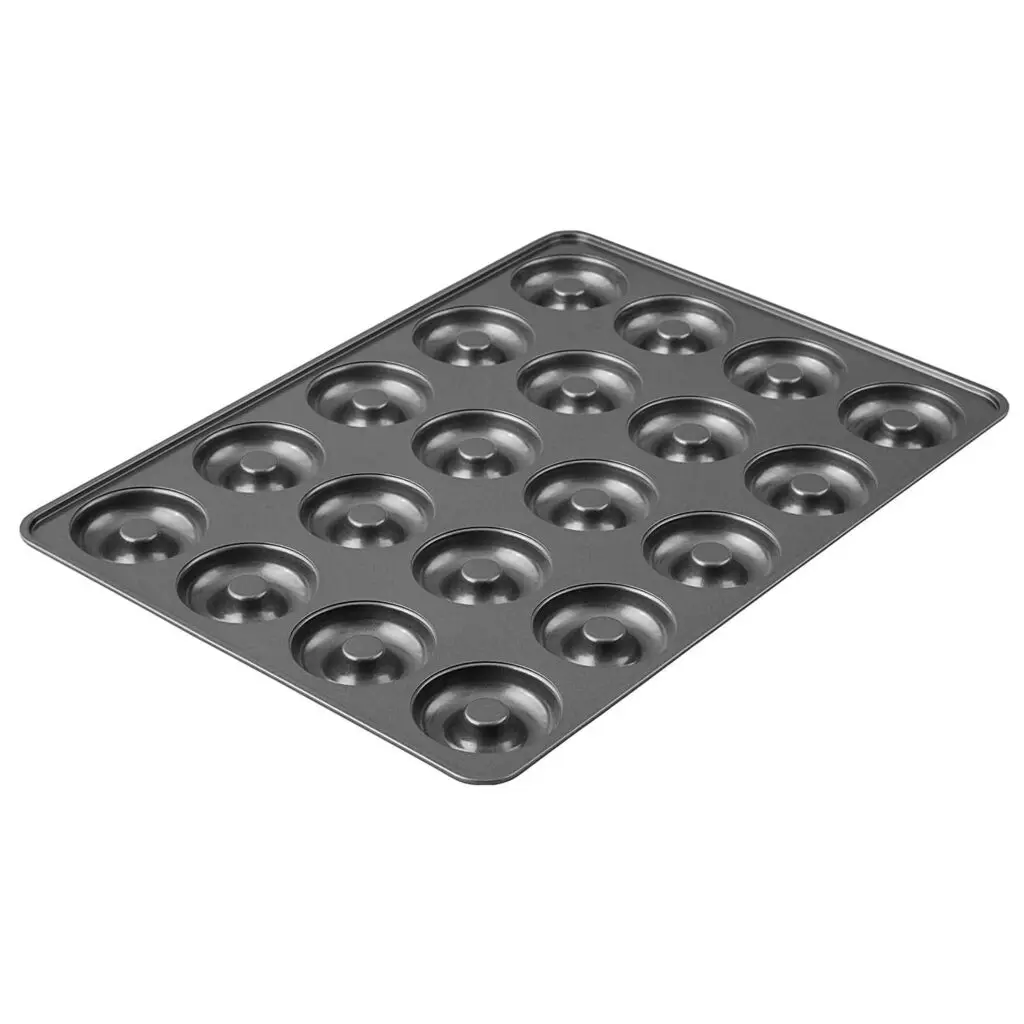
    Doughnut Pan

    Donut Pan

    I never knew how badly I needed this pan until I bought one. You will love it too!

    Close up shot of pumpkin donuts with a heavy layer of cream cheese glaze on a cooling rack with more donuts before icing and apples in the background
    Print Recipe
    5 from 1 vote

    Pumpkin Cake Baked Donuts

    Fall flavors are on display in this easy baked breakfast treat. Pumpkin Cake Donuts laced with shredded carrot and apple along with dried cranberries, coconut, and pecans before being smothered in a scrumptious cream cheese glaze. Sort of like a Morning Glory Muffin but better!
    Prep Time20 minutes mins
    Cook Time20 minutes mins
    Course: Breakfast, brunch, Snack
    Cuisine: American
    Servings: 24 Muffins

    Ingredients

    Donuts

    • 2 ¼ C all purpose flour
    • 1 ½ teaspoon baking powder
    • 1 teaspoon baking soda
    • 1 teaspoon kosher salt
    • 2 teaspoon pumpkin pie spice
    • 1 ½ C white sugar
    • 1 15 oz can pumpkin puree
    • 2 eggs
    • 1 ½ C vegetable oil
    • 2 teaspoon vanilla extract
    • 1 C grated carrot
    • 2 honeycrisp apples grated or about 1 ½ C
    • 1 C chopped pecans
    • 1 C sweetened coconut
    • 1 ½ C dried cranberries

    Glaze

    • 8 oz cream cheese room temperature
    • ½ C powdered sugar
    • ¼ teaspoon pumpkin pie spice
    • ¼ teaspoon kosher salt
    • 1 teaspoon vanilla extract
    • ¼ C milk plus more if needed

    Instructions

    To make the donuts

    • Preheat oven to 375 degrees. Grease a donut pan with baking spray. If you don't have a donut pan, I've included a link to purchase one above.
    • Combine the dry ingredients through the sugar in a large mixing bowl or stand mixer bowl. Mix the ingredients with a paddle attachment on medium-low until well combined.
    • Turn off the mixture and add the pumpkin, eggs, oil, and vanilla. Turn the mixer back onto medium speed for about one minute or until all of the wet ingredients are mixed into the dry. Turn the mixer off and scrape down the sides and bottom of the bowl with a spatula.
    • Peel the apple and carrots. Using a box grater, grate the apple and carrots. Add grated carrot, grated apple, pecans, coconut, and cranberries to the batter. Mix on low until just combined. Scrape down the bowl one last time and give the batter one final mix by hand to make sure the add-ins are evenly dispersed.
    • Put the donut batter into a piping back fitted with a one-inch tip or into a gallon-size plastic store bag. Cut the corner off the plastic bag for a 1-inch opening.
    • Pipe enough batter into each donut place to reach the top. Bake for 17-20 minutes or until firm to the touch and just starting to brown around the edges.
    • Remove from the oven and let cool for 10 minutes in the pan. Remove carefully from the donut pan and place on a cooling rack to cool completely before glazing.

    To make the glaze

    • Using a hand mixer, whip the cream cheese on high speed for 30 seconds. Turn off the mixer and add the powdered sugar, pumpkin pie spice, salt, and vanilla. Turn the mixer back on and whip on high speed for one minute. Turn the mixer to low and slowly add milk, 1 Tb at a time, until the desired consistency is reached.
    • Turn the mixer off and scrape down the sides and bottom of the bowel. Mix on high speed for another 30 seconds or until no lumps remain.
    • The glaze can be made ahead of time and kept in the fridge for up to a week before using it. Just set out at room temperature for about an hour before glazing your donuts.

    To glaze the donuts

    • Pick up each donut with one finger in the middle hole and one on the edge. Dip the top of the donut in the cream cheese glaze until about half of the donut is submerged. Give the donuts a couple of small turns back and forth to make sure the glaze gets in all crevices and then lift the donut from the glaze. Allow the excess to fall off naturally before turning over and placing the donut back on the cooling rack.
    • Eat immediately or store in an airtight container for up to 3 days.

    Lemon Yogurt Cake with Honey Caramel and Figs

    October 7, 2019 by Hailey 1 Comment

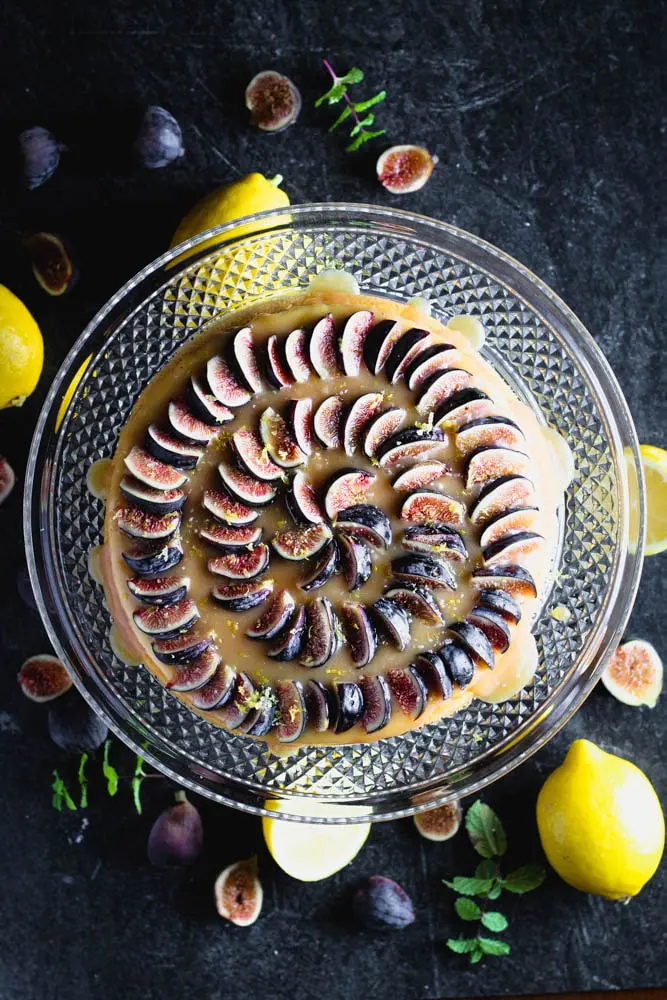
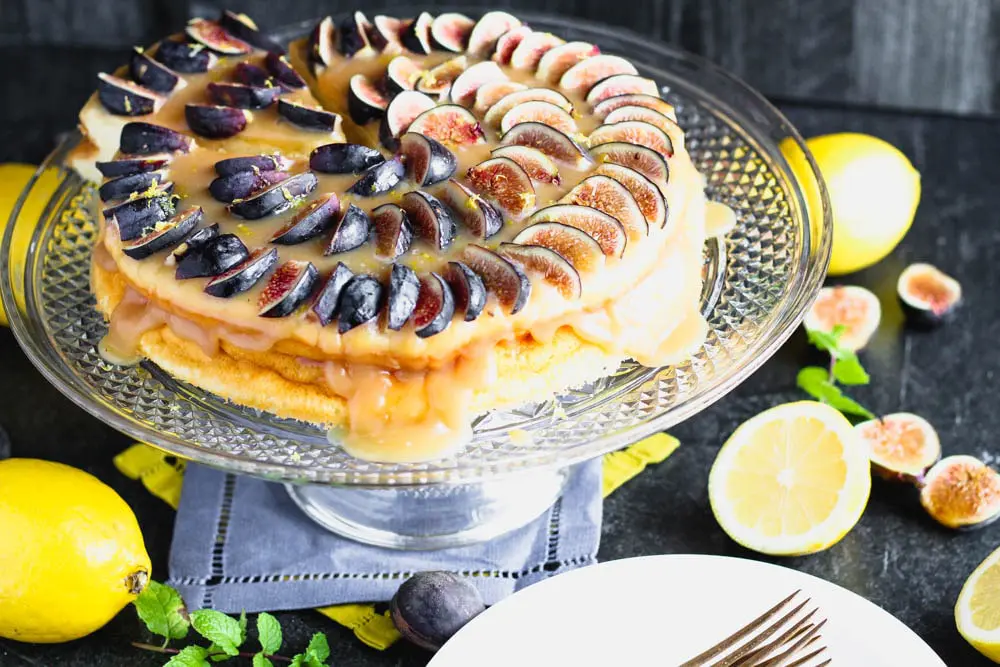
    Closeup photo of a slice of lemon yogurt cake topped with honey caramel and quartered figs on a white plate with a crystal cake pedestal with the yogurt cake in the background along with lemons and figs
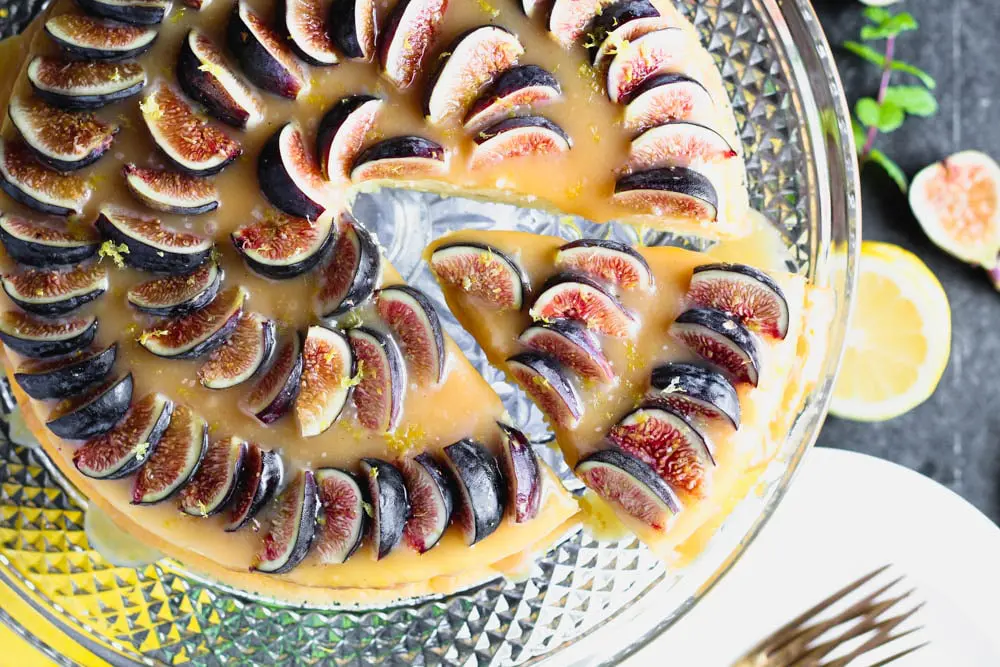
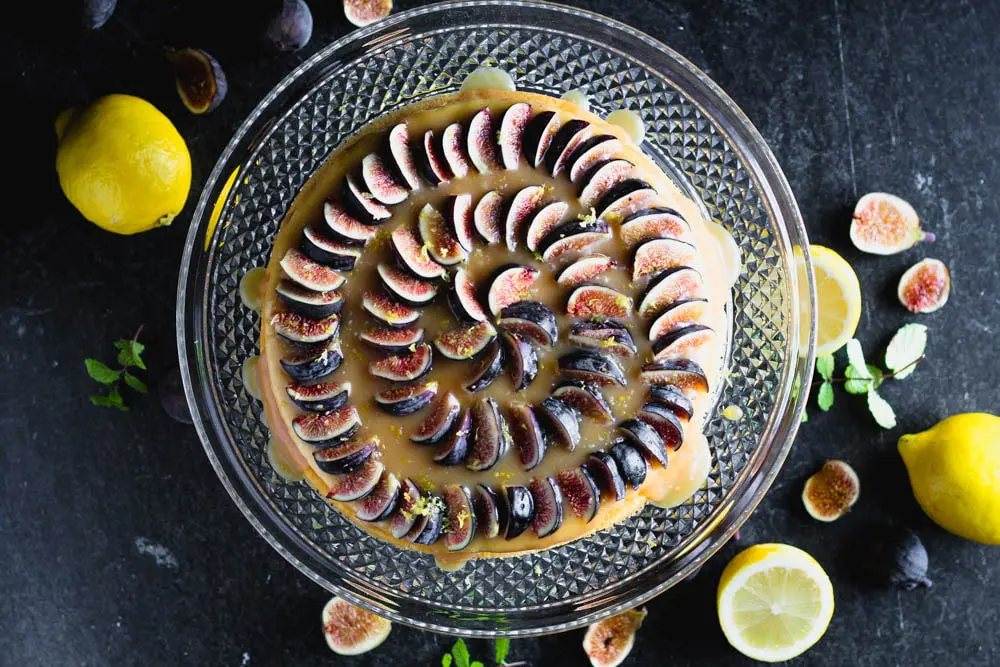
    closeup overhead shot of lemon yogurt cake topped with honey caramel and quartered figs on a crystal cake pedestal with one slice being removed

    The first time I walk into the grocery store and see figs, I know there is hope yet…the end of summer is near! Fall is my favorite season of all, and figs are always one of the first fruits of this amazing time of year for cooking and baking. My Lemon Yogurt Cake with Honey Caramel and Figs was born out of the need for the most delicious vessel possible to transport figs to my mouth.

    overhead shot of lemon yogurt cake topped with honey caramel and quartered figs on a crystal cake pedestal with lemons and figs in the background

    Figs make me think of all the flavors of the Mediterranean. Their exotic, jammy flavor and texture pair perfectly with tangy yogurt and lemon. Figs are not overly sweet so I also like the idea of combining them with a velvety smooth caramel. This Yogurt Cake recipe takes all of those ideas and combines them into one light but decadent dessert.

    The star of the recipe in photos is definitely the gorgeous sliced figs, but the Lemon Yogurt Cake that acts as a base for all of the other accoutrements is the taste you’ll crave.

    Yogurt Cake could best be described as a super light, crustless cheesecake.

    Compared to cheesecake, Lemon Yogurt Cake feels less decadent but still o-so-satisfying. Eggs supply the richness to this recipe instead of cream cheese, while Greek yogurt gives the tang we all expect. I also made sure this recipe packed a serious lemon punch by doubling my initial recipe’s use of the zest of only one lemon.

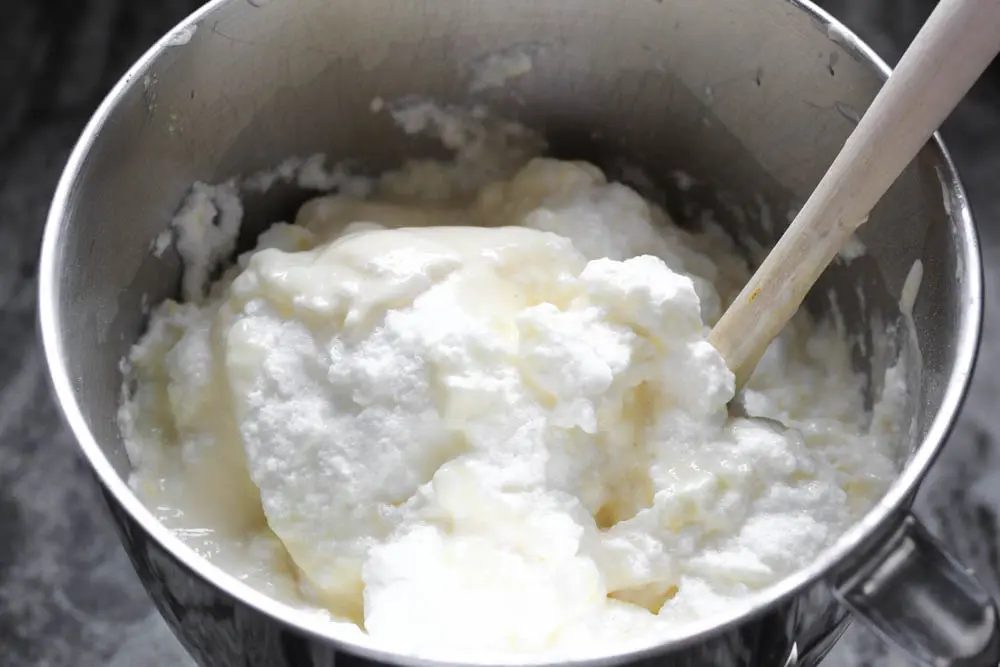
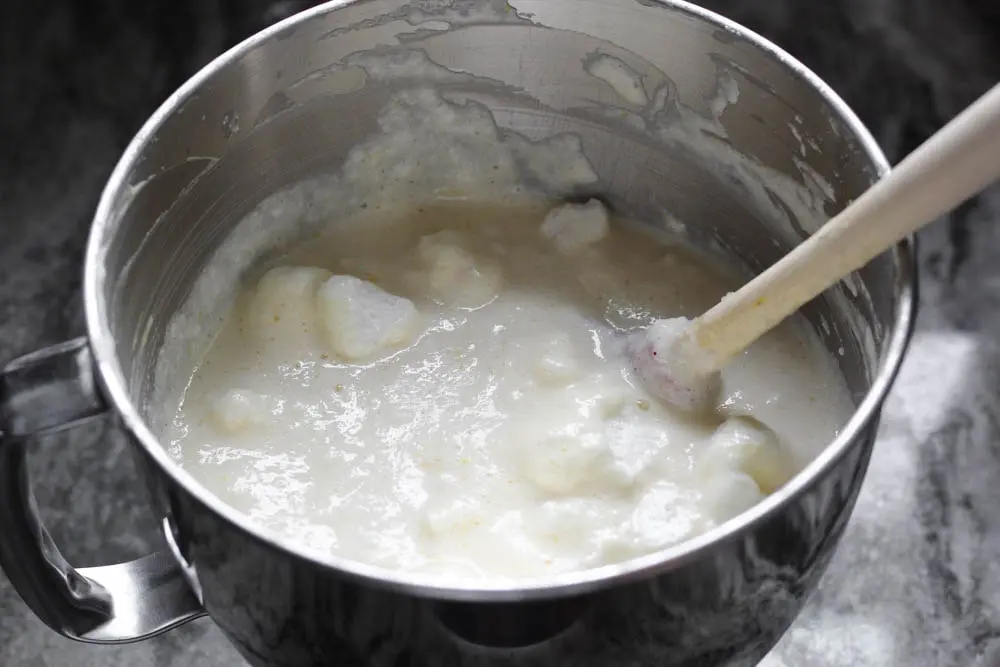
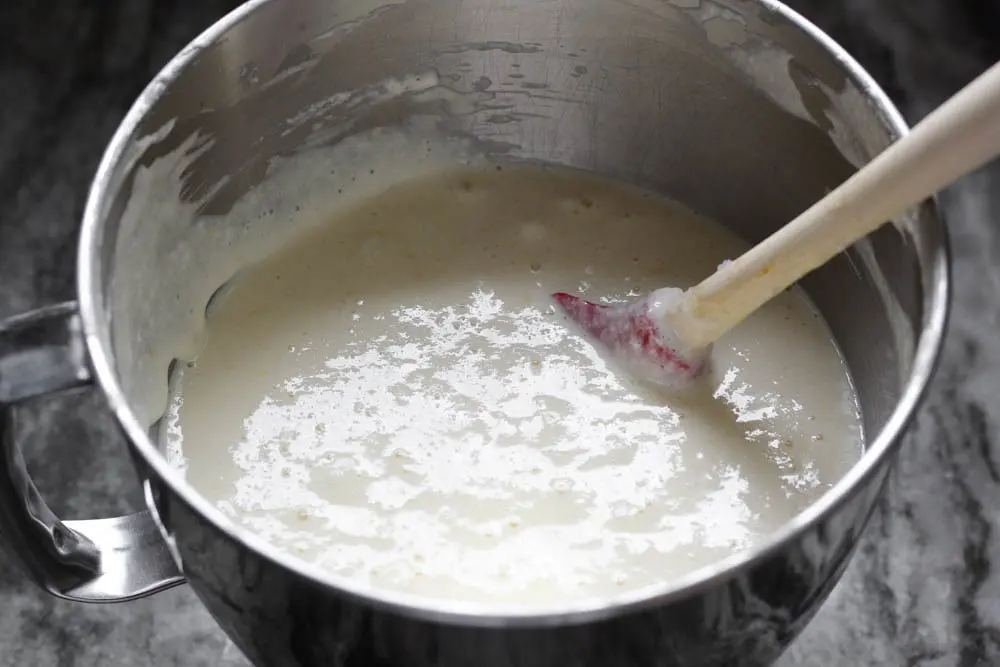
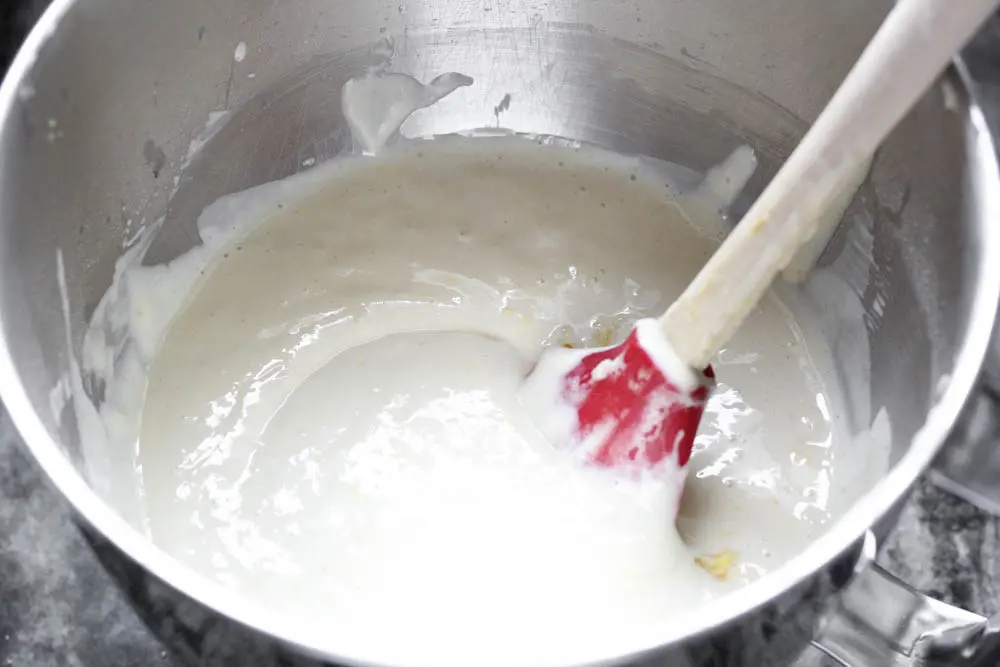
    The only step in this recipe that takes any real effort is folding the beaten egg whites into the yogurt. It just takes times so don’t say “fuck it” and start stirring the hell out of it to make the lumps go away. I promise, if you keep folding, you’ll get to a smooth result eventually. The series of images below shows you the progression you can expect.

    • closeup shot of lemon yogurt cake in a stainless steel stand mixer bowl with the egg whites just added to the batter
    • closeup shot of lemon yogurt cake in a stainless steel stand mixer bowl with the egg whites halfway folded in
    • closeup shot of lemon yogurt cake in a stainless steel stand mixer bowl with the egg whites almost completely folded in
    • closeup shot of lemon yogurt cake in a stainless steel stand mixer bowl with the egg whites completely folded in

    Initially, I just dressed the Lemon Yogurt Cake with fresh figs. Although it was beautiful, it lacked the sweetness I personally like in my desserts. It needed a sauce to tie it all together. I returned to my initial thought process of Mediterranean flavors and thought that honey was just what this recipe needed.

    But a straight honey drizzle seemed too clunky for this stunner of a dish. Caramel on the other hand is sexy as fuck and right in line with the look I was going for. I started playing around with different ratios of sugar, both white and brown, to honey to get just the right caramel consistency with plenty of honey flavor, and the recipe below was the final output.

    It’s sooo damn good. I could put this Honey Caramel on anything, and it would be divine.

    closeup overhead shot of lemon yogurt cake topped with honey caramel and quartered figs on a crystal cake pedestal with one slice being removed

    If I didn’t have to clean up after the mess, I might even want to just soak in a tub full of it and garnish myself with lemon zest and a sprinkle of salt, just like I finish off my slices of Lemon Yogurt Cake. ?

    Now, if I lost you at my first mention of figs, fear not. I also tried this exact recipe with fresh blueberries, and it was equally delicious with the Yogurt Cake and Honey Caramel. Really any kind of fresh fruit you fancy would be delightful with this cake. Feel free to choose whatever seasonally appropriate fruit that looks good at the market.

    overhead shot of lemon yogurt cake topped with honey caramel and quartered figs on a crystal cake pedestal with lemons and figs in the background

    I love this recipe for entertaining because it seems so glamorous when in fact it’s a breeze to make. The stand mixer does all of the heavy lifting, and the ingredient list is made up of items you likely already have in your fridge.
    If you want to make this recipe in advance, just plan to dress it with the caramel and fresh fruit just before serving. If you cover the cake in caramel and then leave it to sit, the caramel can get grainy from the moisture in the cake. Instead, you can also make the caramel up to a week ahead of time and store it in an airtight container in the fridge.
    When you’re ready to serve, let the caramel sit out at room temperature for a couple of hours to allow to become a pourable consistency. If it’s still too thick, try microwaving in a microwave-safe container in 10 second increments, stirring in between, until the caramel is easy to pour but not too warm.

    Closeup photo of a slice of lemon yogurt cake topped with honey caramel and quartered figs on a white plate with a crystal cake pedestal with the yogurt cake in the background along with lemons and figs

    After dressing each slice with caramel and fruit, I like to finish the plating with a little bit of extra lemon zest and a sprinkle of salt. Caramel always needs a final touch of salt in my opinion and the extra zest brightens up the fruit for a perfect bite.
    Lemon Yogurt Cake with Honey Caramel and Figs is the best way to kick off the fall season. Try this recipe with your favorite fruit, and let me know how it goes.
    Helpful Utensils

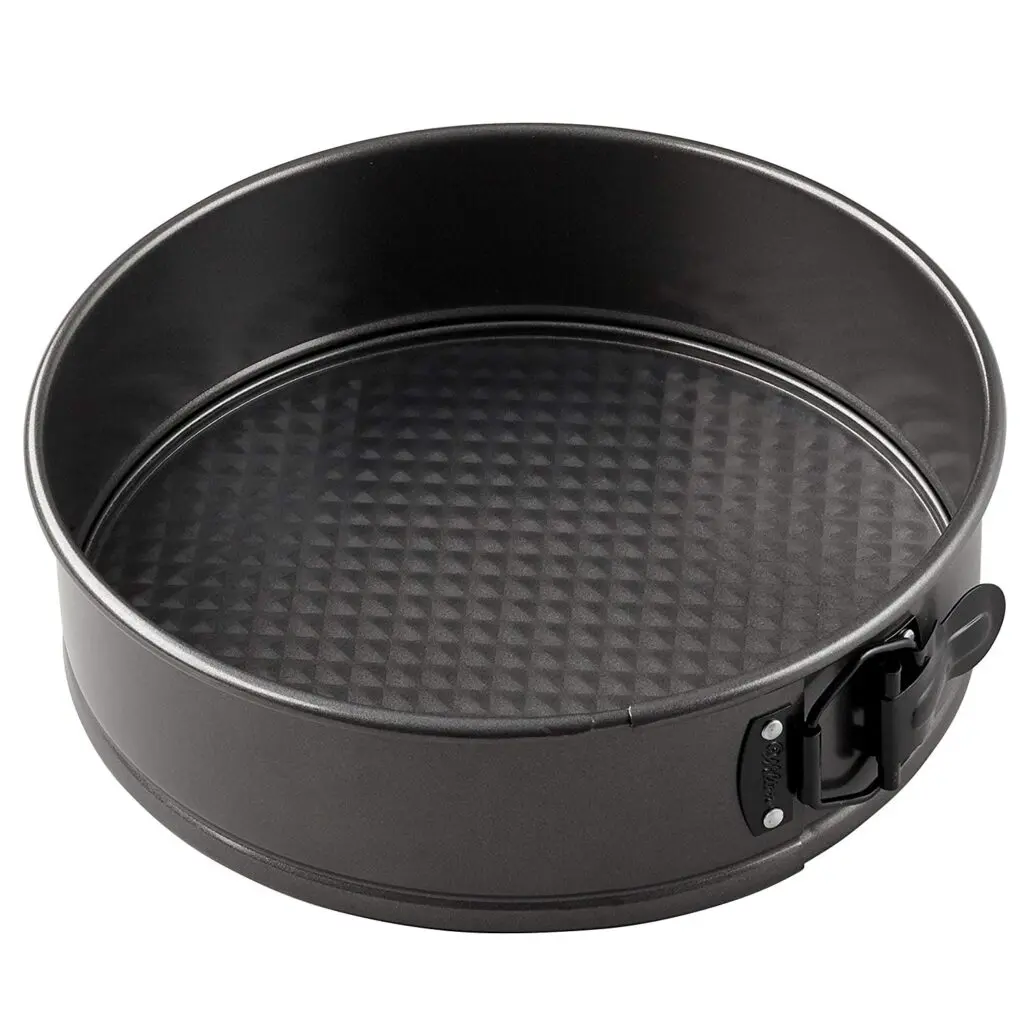
    dark finished 9-inch springform pan

    9-inch Springform Pan

    An essential for baking cheesecakes, tarts, and delicate desserts like this Lemon Yogurt Cake.

    aqua Kitchenaid Artisan stand mixer

    Kitchen Aid Stand Mixer

    You'll never, ever regret this purchase. It's a cook's best friend and essential for baking!

    emon yogurt cake topped with honey caramel and quartered figs on a crystal cake pedestal with lemons and figs in the background
    Closeup photo of a slice of lemon yogurt cake topped with honey caramel and quartered figs on a white plate with a crystal cake pedestal with the yogurt cake in the background along with lemons and figs
    Print Recipe
    5 from 1 vote

    Lemon Yogurt Cake with Honey Caramel and Figs

    Yogurt cake is best described as an incredibly light, crustless cheesecake. The texture is light and fluffy but the taste is still rich and creamy. Topped with homemade honey caramel and fresh fruit, this easy dessert recipe is beautiful for entertaining but simple enough for a family dinner.
    Prep Time20 minutes mins
    Cook Time1 hour hr
    Course: Dessert
    Cuisine: American, Mediterranean
    Servings: 8

    Ingredients

    Lemon Yogurt Cake

    • 6 eggs separated
    • ¾ C sugar
    • 2 and ½ C nonfat Greek yogurt strained
    • 2 lemons
    • ½ teaspoon kosher salt
    • 1 teaspoon vanilla extract
    • ½ C flour sifted
    • 1 teaspoon baking powder

    Honey Caramel

    • ½ C honey
    • ½ C brown sugar
    • ½ C white sugar
    • ½ teaspoon kosher salt
    • 1 C heavy cream
    • 1 teaspoon vanilla
    • ⅛ teaspoon fresh nutmeg*
    • fresh figs or other fruit**

    Instructions

    To make the cake

    • Preheat the oven to 350 degrees. Place the yogurt in a fine strainer and set the strainer over a bowl to catch the liquid that runs off. Let the yogurt sit for about 10 minutes as you prepare the other ingredients.
      greek yogurt sitting next to the greek yogurt straining in a fine strainer over a small mixing bowl to catch the extra liquid
    • Start by separating eggs. Place the egg yolks in a stand mixer bowl with a whisk attachment. Place the eggs whites in a small mixing bowl. Using a hand mixer or whisk, beat the egg whites until they reach stiff peaks. Add the sugar to the egg yolks.
    • Turn the stand mixer on to medium speed and whisk the egg yolks and sugar until thick and pale in color. Be sure the scrape down the sides and bottom of the bowl halfway through the process.
      closeup of beaten egg yolks and sugar dripping off a whisk attachment to demonstrate the thickness after whipping for 5 minutes or once the yolks reach ribbon stage
    • Once the egg yolks have reached the ribbon stage, turn the mixer off. Scrape down the sides and bottom of the bowl again. Zest both lemons, reserving 1-2 teaspoon of zest for garnish. Add the strained yogurt, salt, vanilla and the zest of both lemons and the juice of one to the yolks. Turn the mixer back on to medium speed until well combined.
    • Last, add the sifted flour and baking powder, and mix on low until just combined. Scrape the sides and the bottom of the bowl one more time before adding the beaten egg whites.
    • Gently fold the egg whites into the mix until there are no lumps remaining. This will take a few minutes, but don't give up on folding. You want to keep as much air in the mix as possible so resist the urge to stir. Keep folding until the mixture is smooth!
    • Once smooth, pour the batter into a 9-inch springform pan (I've linked to one above for purchase if you don't already have this cheesecake essential in your kitchen). Place in the oven to bake for 50 to 60 minutes or until the edges are just lightly golden and the middle is still a little wiggly.
    • Remove from the oven once cooked and let cool at room temperature until completely cooled. Place in the fridge for at least 4 hours or preferably 8 hours until cold.
    • To serve, slice the cake into 8 slices. Top each slice with a healthy pour of honey caramel, fresh fruit (if you're using figs, just wash and quarter them, and you're ready to go), and a sprinkle of kosher salt and lemon zest.

    To make the caramel

    • Place the honey, brown sugar, white sugar and salt in a medium saucepan. You want enough room for the cream to bubble up so don't choose too small of a pan. Turn the heat onto medium. Let the sugars cook until completely dissolved and the mixture just starts to bubble.
    • Being careful, add the heavy cream. The mixture will bubble up vigorously and then settle down. Continue to cook over medium heat until the consistency is thick enough to coat a spoon or about 5 more minutes.
    • Turn off the heat and add the vanilla and nutmeg. Pour into a heat-proof, airtight container and allow it to cool to room temperature. This caramel will keep in the fridge for a few weeks, but it won't last that long.

    Notes

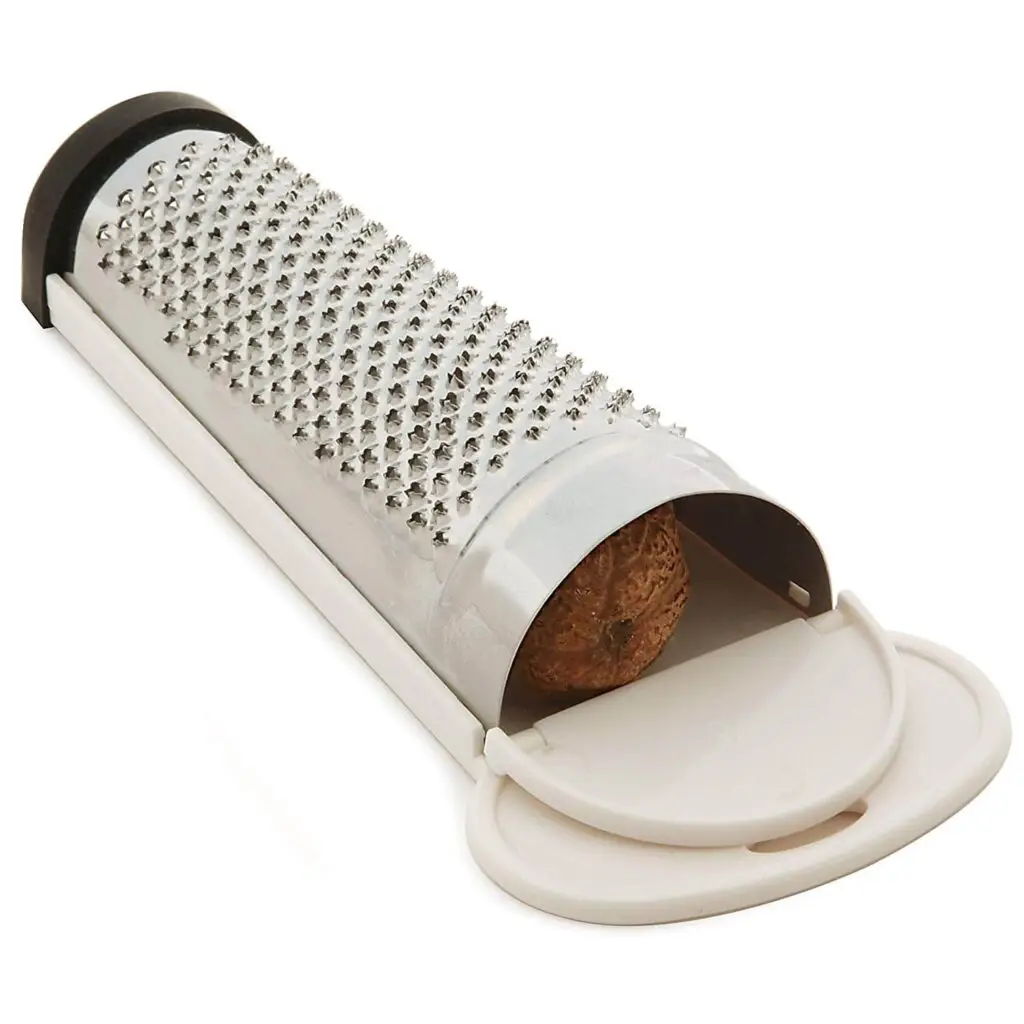
    * Fresh nutmeg is purchased whole and then ground using a microplane. It has a more subtle flavor than the nutmeg you buy already ground. If you're using ground, use it very sparingly as it can be strong.
    ** If figs aren't your thing or aren't in season, any fruit you like would work. Some of my other favorites are blueberries, raspberries, or peaches.

    Crispy Chicken and Broccoli Salad

    September 22, 2019 by Hailey 1 Comment

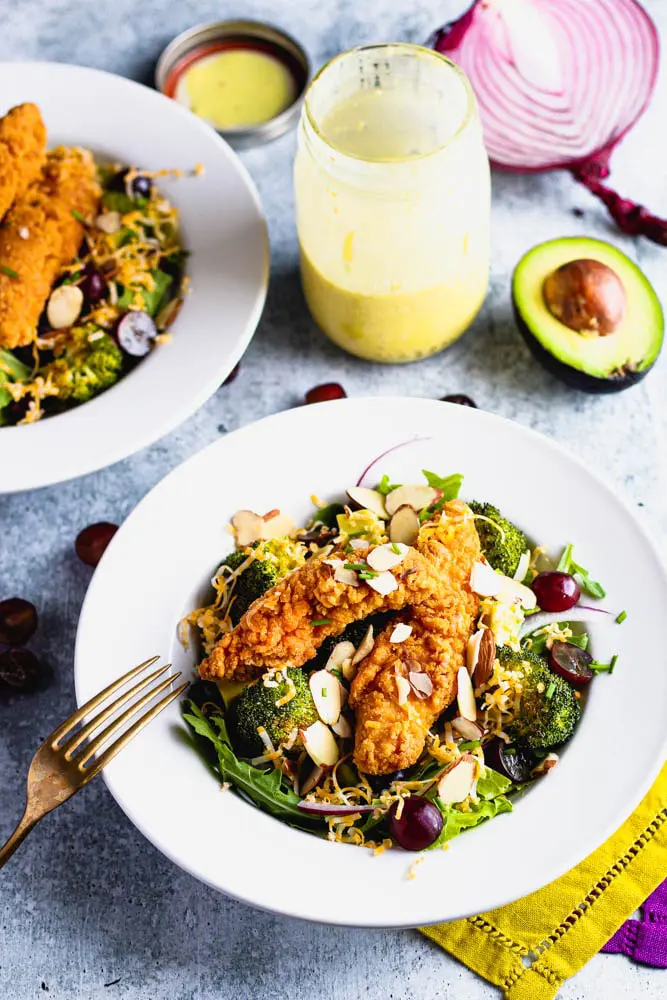
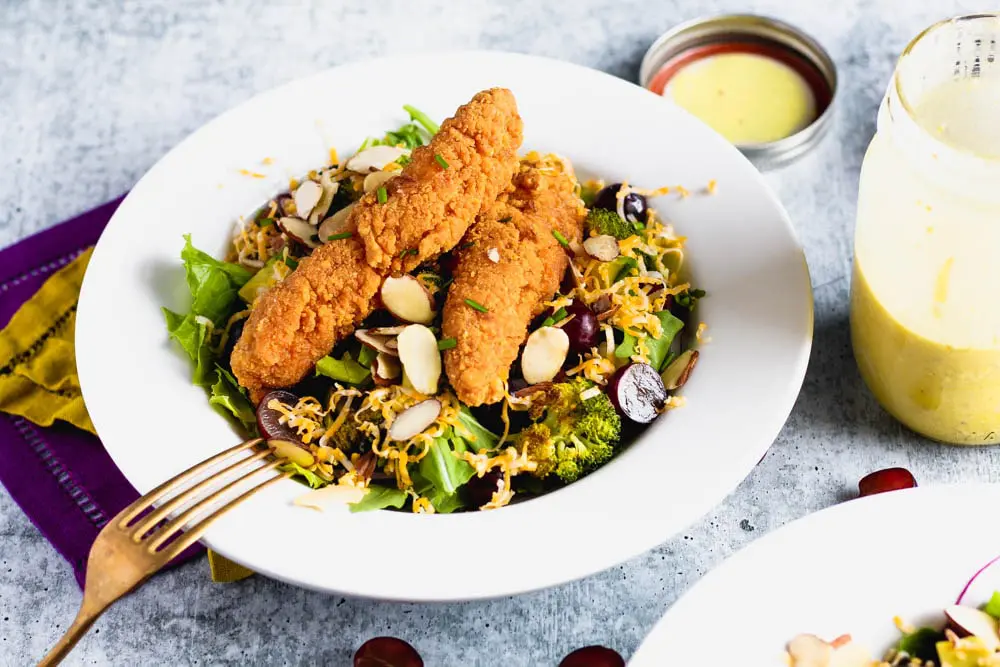
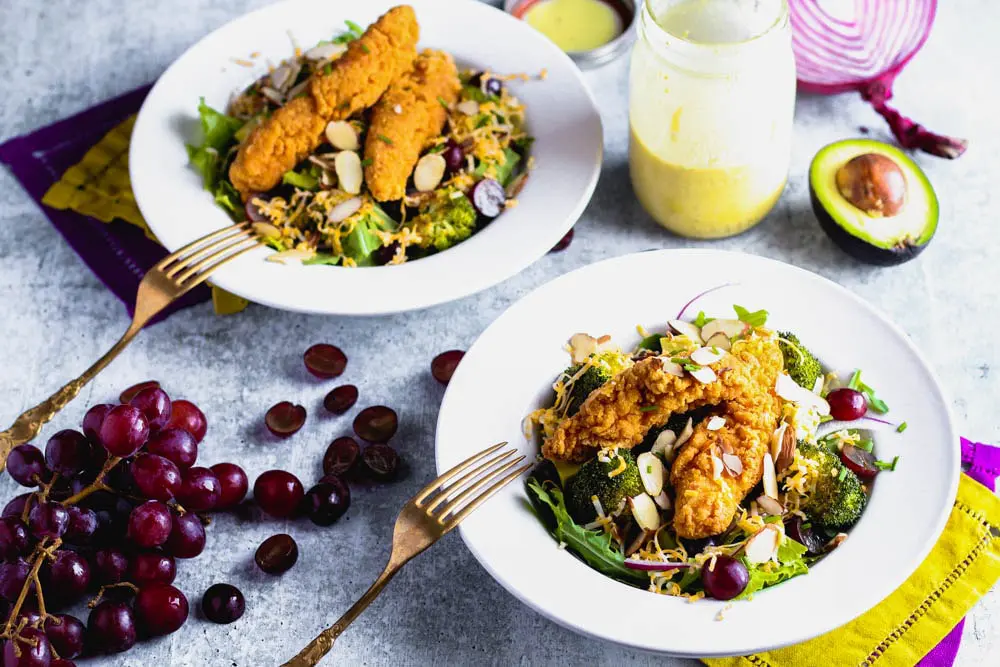
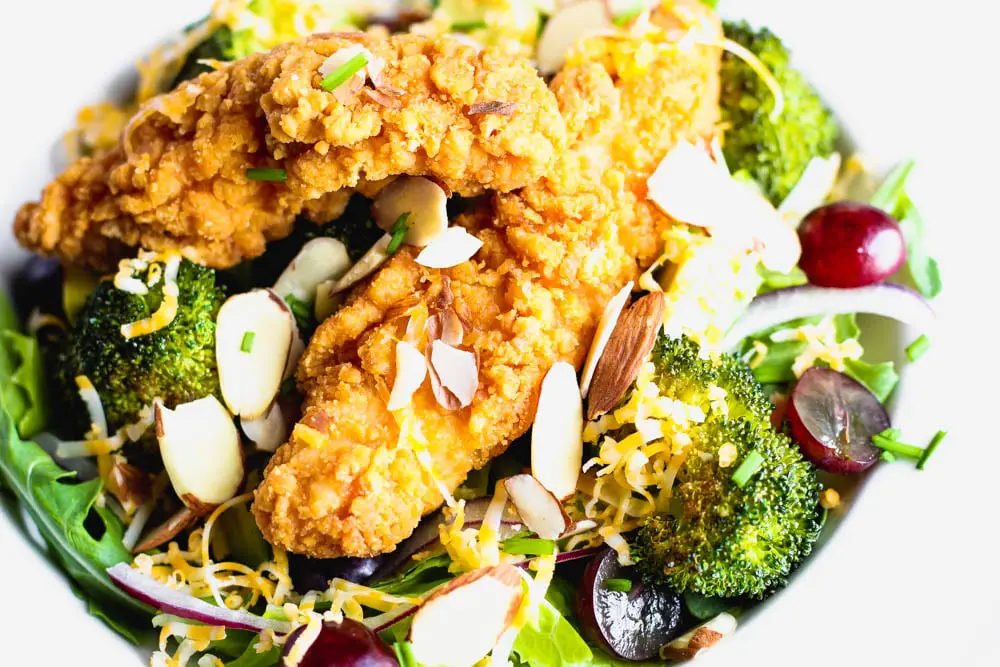
    Bowl of salad topped with roasted broccoli, sliced grapes and almonds and shredded cheese with a side of honey mustard
    Bowl of salad topped with roasted broccoli, sliced grapes and almonds and shredded cheese with a side of honey mustard

    Crispy Chicken is easily one of my favorite things on the planet so matter what brand or style, but I also try to make sure my diet is balanced with plenty of fresh fruits and veggies. My Crispy Chicken and Broccoli Salad is a recipe with both decadence and sustenance.

    Two bowls of salad topped with roasted broccoli, sliced grapes and almonds and shredded cheese with a side of honey mustard

    Roasted broccoli and chicken are a very common dinner choice, at least around my house, but I wanted to spice up this classic dinner fare. I’m also always looking for ways to mix up my salad game and eat more of it at home. I came across this recipe in an old Cooking Light magazine (RIP, you were one of my favorites) and have been making different versions of it ever since.

    Let’s break down the ingredients in this super fast and simple salad. First, crispy chicken…if you read this and thought you were going to have to fry or even bread your own chicken, you were wrong.

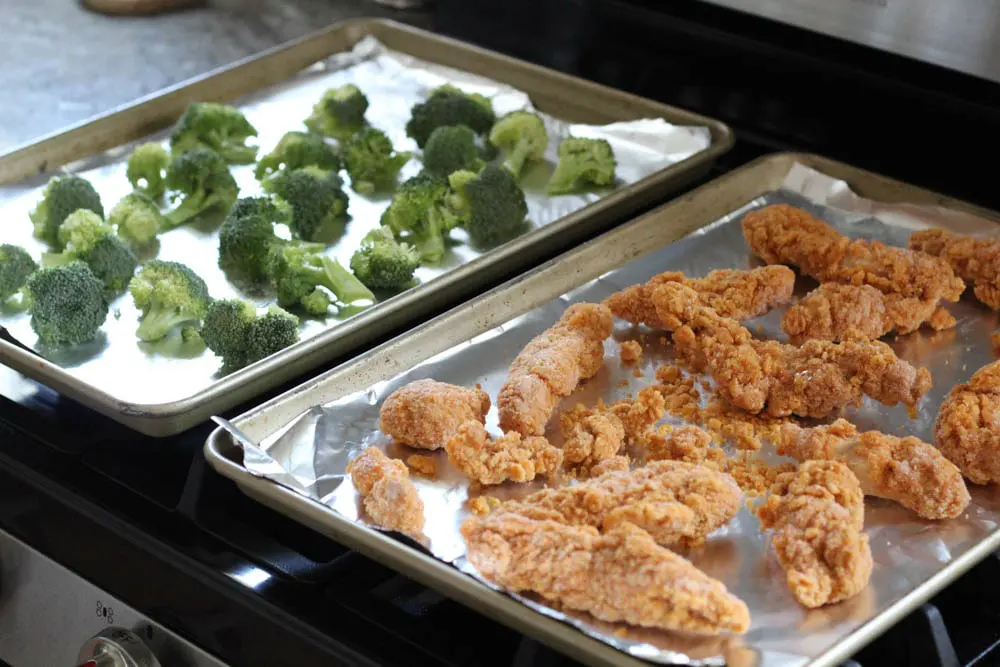
    • A sheet pan of frozen chicken strips and a second sheet pan of raw broccoli sitting on top of stove
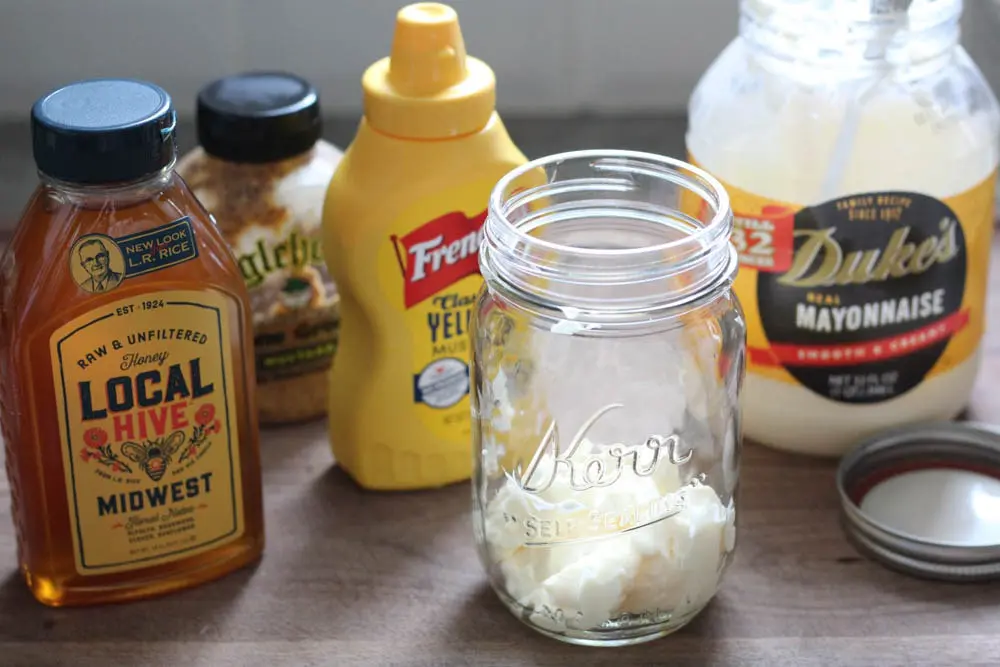
    • ingredients for a homemade honey mustard dressing including honey, mustard, and mayonaisse

    Instead, I use a shortcut of frozen chicken strips or nuggets in this recipe. 

    There are so many quality options out there or inexpensive ones if that’s more your focus when planning your weekly dinners. Either will work just fine, just pick out a brand you like. If you feel strongly about avoiding processed foods, then I would recommend making my Corn Flake, Almond and Sesame Chicken Strips for your salad.

    But if you’re always in need of a little extra time in your day, go with the frozen chicken strips and keep it moving. Roasted broccoli is another game changer for this salad. I think the secret is pretty much out at this point, but roasted broccoli totally kicks steamed broccoli’s ass, every time!

    Roasting broccoli adds a whole new layer of complexity to the flavor and ensures the broccoli maintains some of its crispness after cooking too. I’m not a fan of super soft veggies, especially not in a salad where I think everything should add some texture to the dish.

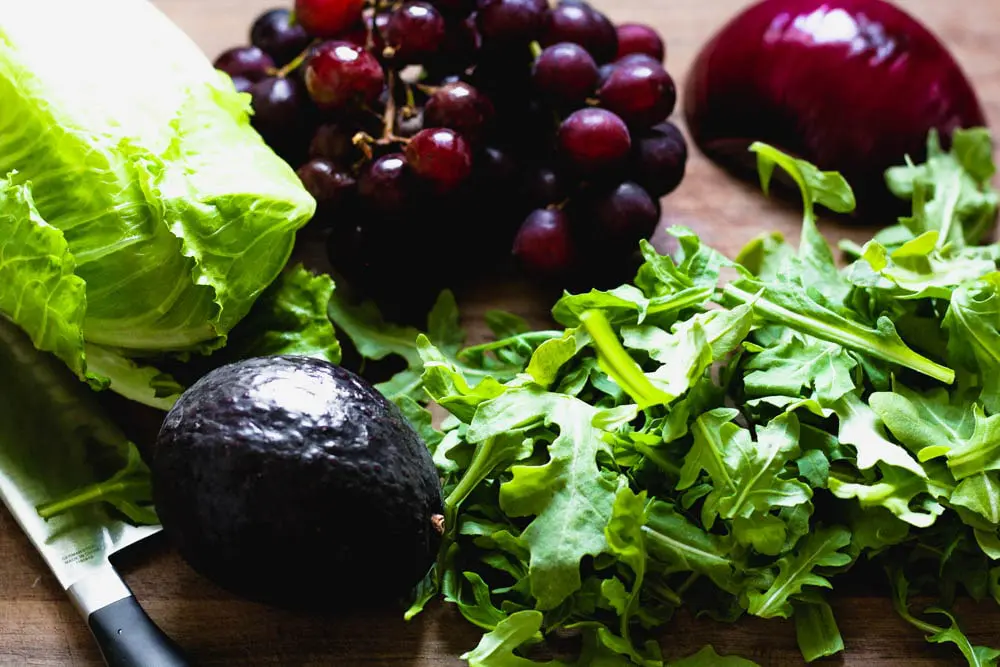
    Raw salad ingredients before preparing including romaine lettuce, grapes, a whole avocado, arugula and half a red onion

    A homemade dressing can also go a long way to upping your salad game. 

    Bowl of salad topped with roasted broccoli, sliced grapes and almonds and shredded cheese with a side of honey mustard

    I top my Crispy Chicken and Broccoli Salad with a homemade honey mustard dressing. My honey mustard has plenty of vinegar which means plenty of tang and a nice pourable consistency.

    You can also control the balance of honey to mustard when you make your own dressing. I don’t like mine too sweet so I use one tablespoon of honey, but you should taste it after adding one tablespoon and decide your preference. If you want more sweetness or honey flavor, add another tablespoon…no judgment. It’s your damn dressing!

    Close shot of bowl of salad topped with roasted broccoli, sliced grapes and almonds and shredded cheese

    Everyone knows that the toppings on a salad are what really make it, and this recipe is no exception. Instead of croutons (which I f*cking love btw), I went with a healthier contributor of crunch with sliced almonds. The grapes also add a nice pop of texture… not exactly a crunch but you get my drift.

    Diced avocado and shredded cheddar cheese give the salad the creamy, rich notes any good salad needs. I actually thought that bacon would be pretty dang tasty in this recipe too, but I showed some restraint in my addition of fatty goodness here. ?

    Crispy Chicken and Broccoli Salad is a regular in my dinner rotation for several reasons. First, it’s a really easy and fast weeknight dinner option. Second, crispy chicken is the best, period. If you don’t agree, well, I’m sad for you. Last, it’s a dinner you can really feel good about eating! Try this recipe out with your family, and you’ll see just what I mean!

    Bowl of salad topped with roasted broccoli, sliced grapes and almonds and shredded cheese with a side of honey mustard
    Print Recipe
    4.43 from 7 votes

    Crispy Chicken and Broccoli Salad

    Store-bought chicken strips and humble roasted broccoli are combined with a homemade honey mustard dressing and a delicious mix of sweet and crunchy garnishes to create an easy-to-make and delicious salad. This salad makes a fast weeknight dinner and is perfect for lunch meal prep
    Prep Time15 minutes mins
    Cook Time20 minutes mins
    Course: Main Course, Salad
    Cuisine: American
    Servings: 4

    Ingredients

    Dressing

    • ¼ C mayo
    • 2 Tb yellow mustard
    • 1 Tb stone ground or Dijon mustard
    • 1-2 Tb honey
    • 2-3 Tb apple cider vinegar
    • 2 Tb olive oil
    • pinch salt
    • pinch black pepper

    Salad

    • 1 bag frozen chicken nuggets or strips
    • 1 lb broccoli crowns
    • 2 Tb olive oil
    • 1 romaine lettuce heart
    • 2 C arugula
    • ½ red onion
    • 1 avocado
    • 1 C red seedless grapes
    • ¼ C shredded cheddar
    • ¼ C sliced almonds
    • chives optional

    Instructions

    • Preheat oven to the temperature called for on your chicken strips. For mine, it was 400 degrees. Line two baking sheets with nonstick foil for easy cleanup.
    • Place the chicken strips on one baking sheet. Trim the broccoli from the stems and cut into bite-size pieces. Place the broccoli on the other baking sheet and coat in 2 Tb olive oil and a sprinkle of salt and pepper. Cook the chicken according to package instructions.
    • Below are cooking times for the broccoli to accommodate the common temperatures most frozen chicken products will require. Turn both the chicken and the broccoli over halfway through the cooking time.
      - 350 degrees- 30 minutes
      - 375 degrees- 25 minutes
      - 400 degrees- 20 minutes
      - 425 degrees- 15 minutes
    • While the chicken and broccoli cook, prepare the other salad ingredients and make the dressing. Cut the romaine lettuce into bite-size pieces and combine with the arugula. Thinly slice the red onion. Cut the avocado in half and remove the seed. Dice the avocado and remove from the skin. Remove the grapes from the stem and slice in half. Thinly slice the chives.
    • To make the dressing, whisk together the ingredients in a small mixing bowl. Start with 1 Tb honey and 2 Tb of apple cider vinegar, mix ingredients, and taste the dressing. If you like more acidity or sweetness, adjust the amount of honey or vinegar as needed.
    • To serve, start with a bed of romaine and arugula. Add the red onions and sliced grapes. Place the chicken strips on top and top with avocado, cheese, almonds, and chives. Serve with honey mustard dressing.

    Onion Burger Mini Meatloaf

    September 8, 2019 by Hailey 2 Comments

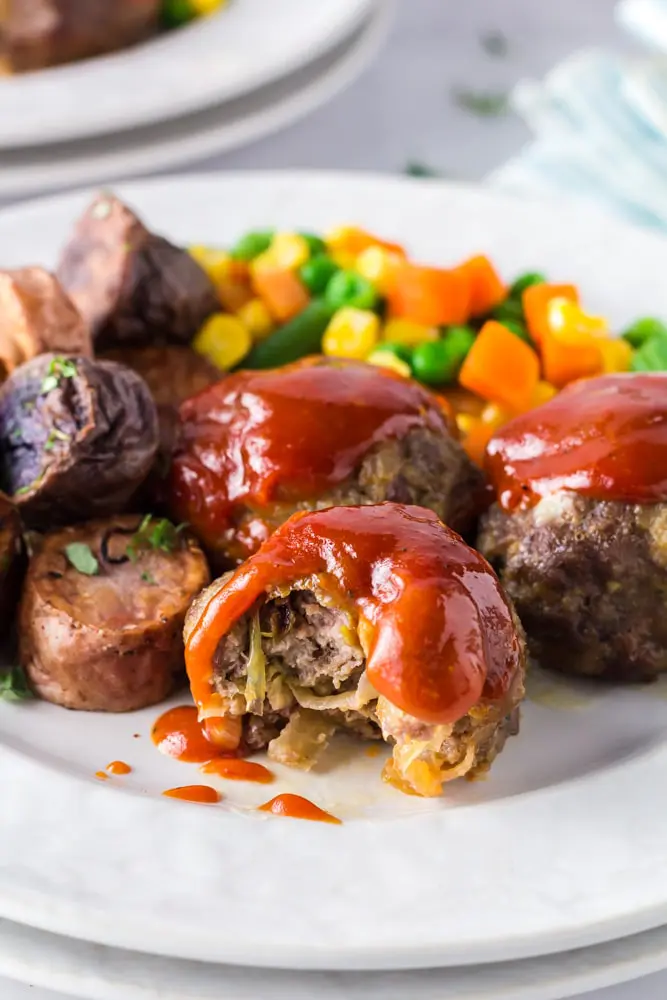
    Onion Burger Mini Meatloaf covered in a bright red sauce on a white plate with a bite taken out of it
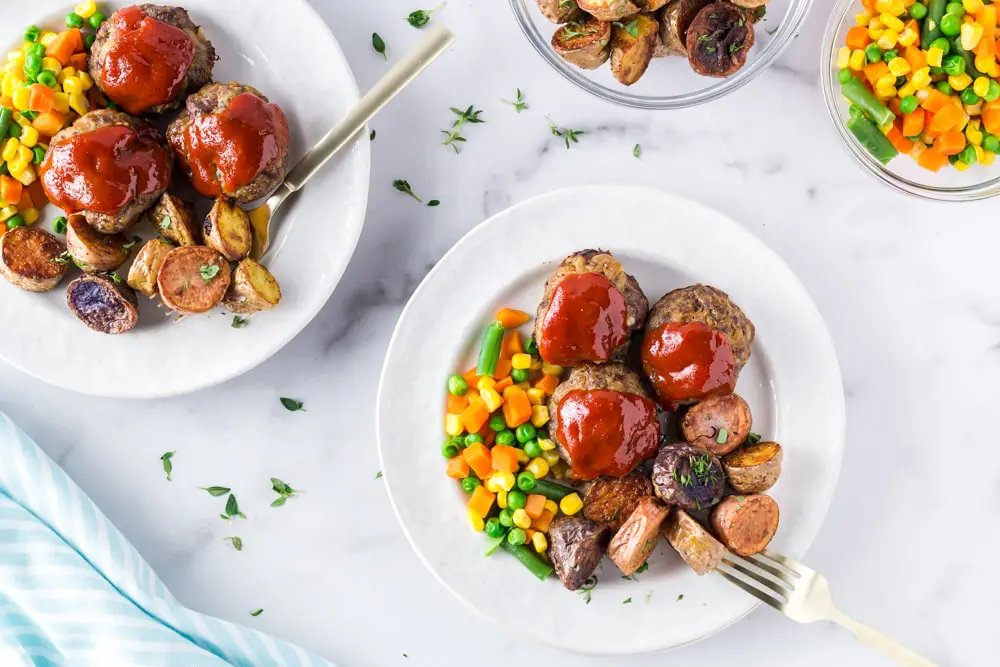
    Two plates of Onion Burger Mini Meatloaf covered in a bright red sauce with carrots, pea, and green beans on the side

    Onion Burgers and Meatloaf are two all-American classics that are adored by every Oklahoman and are also delicious. Being that I’m an Okie by marriage and education (GOOOOO SOONERS!), my love for these two dishes is strong so I decided to do a little mashup I like to call Onion Burger Mini Meatloaf.

    Now, meatloaf may be centuries old with roots to dishes like scrapple, but Onion Burgers really are a child of Oklahoma. If you’d like the full scoop, check out this article by the Hungry Travelers that covers the history of Onion Burgers.

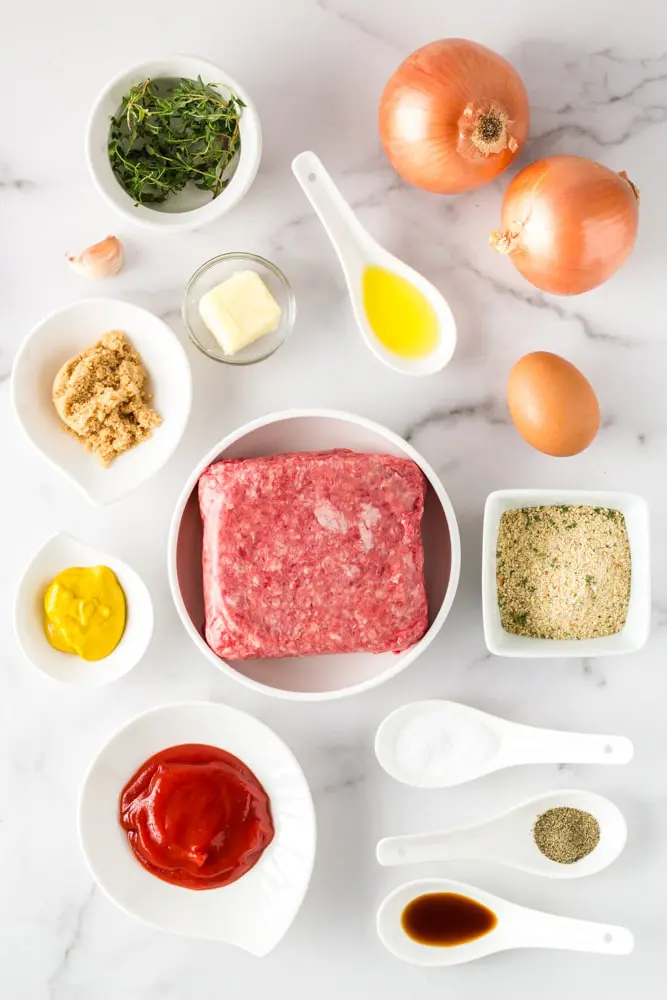
    ingredients for onion burger mini meatloaf

    The gist is that Onion Burgers were first made in El Reno, Oklahoma on the now famous Route 66 at a place called the Hamburger Inn. The cook there piled half an onion on top of a burger patty, pressed them together, and the Onion Burger was born.

    If you’ve never had an Onion Burger, then let me fill you in on what makes them so damn tasty. The mixture of the hearty flavors of ground beef and the sweet onion marmalade that forms after plenty of caramelization can’t be beaten. You might be thinking, “So it’s just a burger with caramelized onions?”

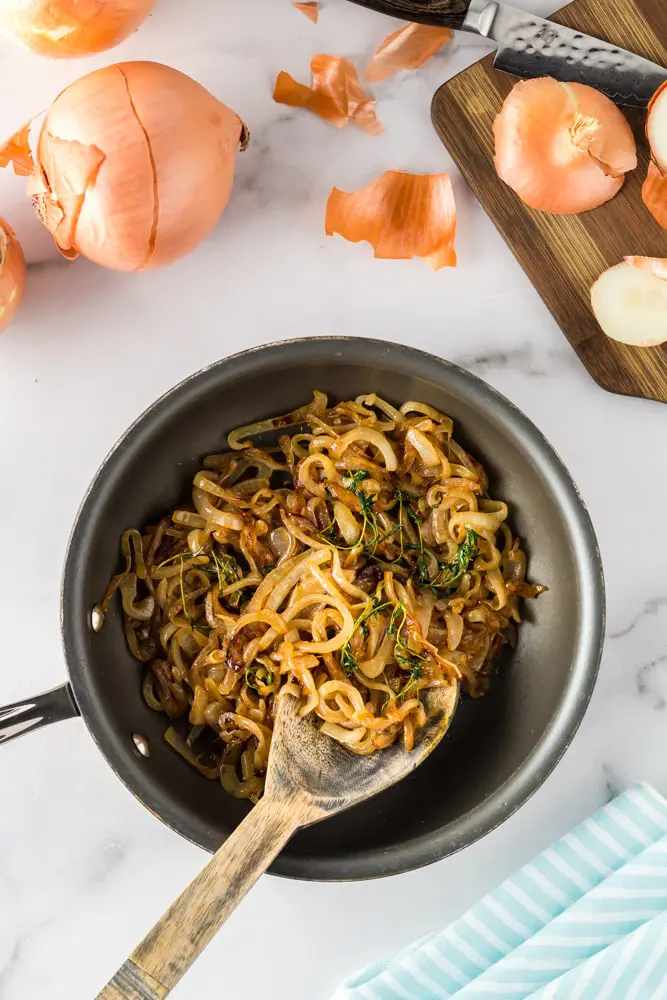
    golden caramelized onions in a black saute pan with thyme sprigs

    Sort of, but not quite. It’s the quantity of onions to burger that really makes an Onion Burger, and I’ve kept that ratio when making my Onion Burger Mini Meatloaf recipe. It’s not all that unusual to find diced veggies, including diced onions, in a meatloaf recipe along with maybe peppers or celery.

    My Onion Burger Mini Meatloaf is PACKED with onions.

    If you’re starting to get worried about the onion-fire-breathing dragon you might become after enjoying this recipe, fret no more! There are 2 onions in the meatloaf recipe, but I wouldn’t dream of including them in the raw. If I did, this meatloaf might bring a tear to your eye.

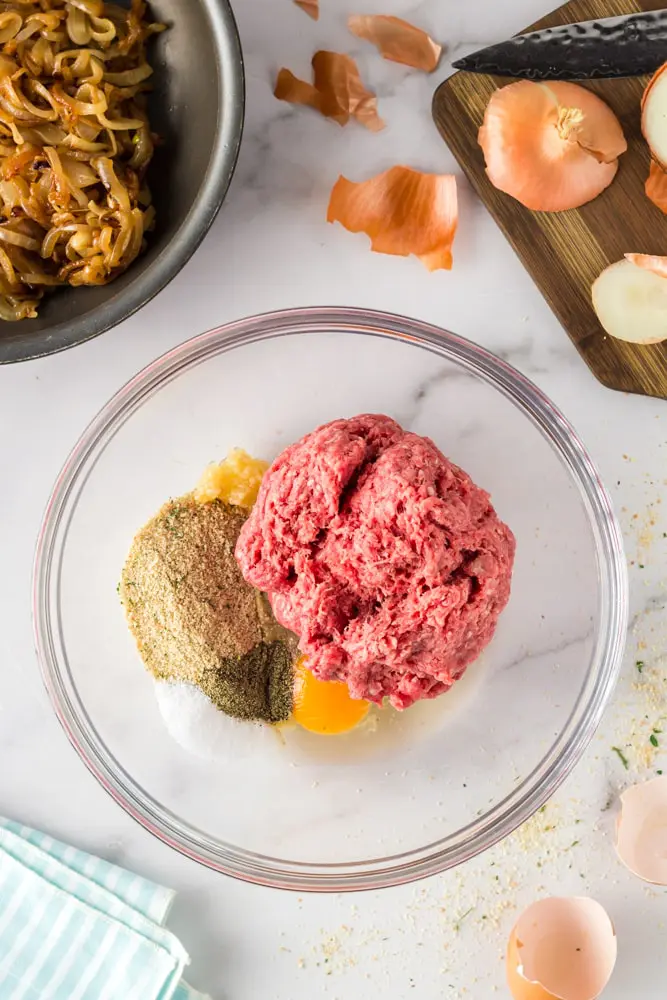
    clear glass mixing bowl with meatloaf mixture ingredients expect the caramelized onions that are on the side

    Instead, I cook the onions down for about 30 minutes, first over medium heat to start the browning process and later turning the heat to low for a final caramelization process. This is when the onions go from your standard sautéed onions to buttery, sweet, jam-like onions.

    This process ensures that the Onion Burger Mini Meatloaf has all the qualities you love about caramelized onions and none of the traits you hate about raw onions. The addition of caramelized onions to the meatloaf also makes for a super moist meatloaf!

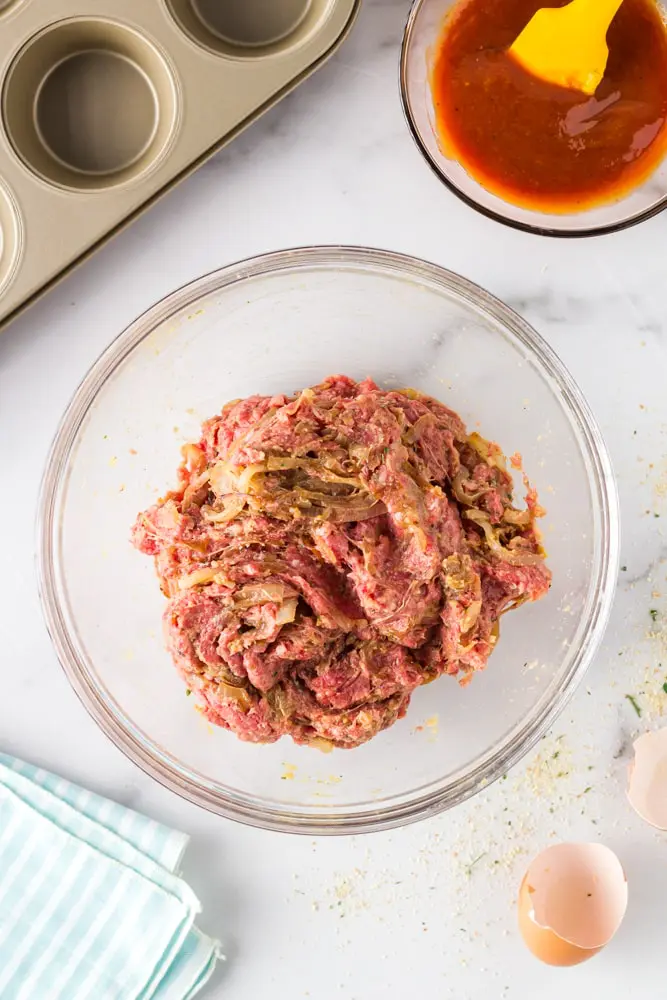
    clear glass mixing bowl filled with raw onion burger meatloaf mixture

    I really love the traditional ketchup-based sauce that is usually served over meatloaf, so I tend to stay pretty close to the original no matter what kind of meatloaf recipe I’m dreaming up. For my Onion Burger Mini Meatloaf, I spiced up the sauce with another classic burger condiment, mustard. A healthy dose of yellow mustard gives the sauce just the right added zip.

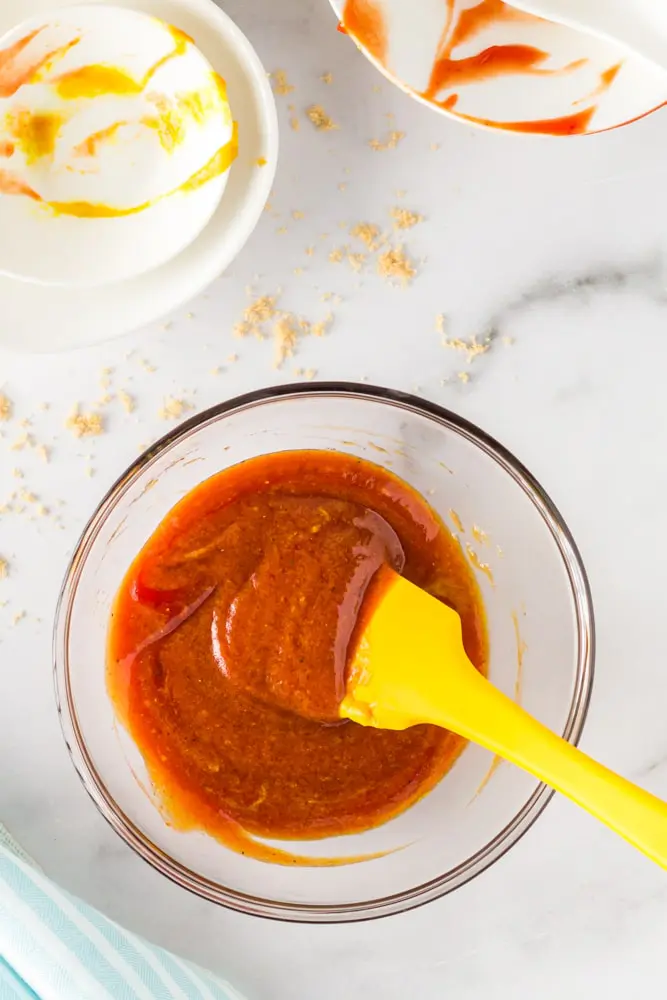
    Bright red meatloaf sauce in a small glass mixing bowl

    Your options for side dishes that would pair well are pretty much endless. I made the recipe with herbed roasted potatoes and green beans when I tested it on my nieces. At home, we had them with baked sweet potato fries and a salad.

    Tips for making Onion Burger Mini Meatloaf

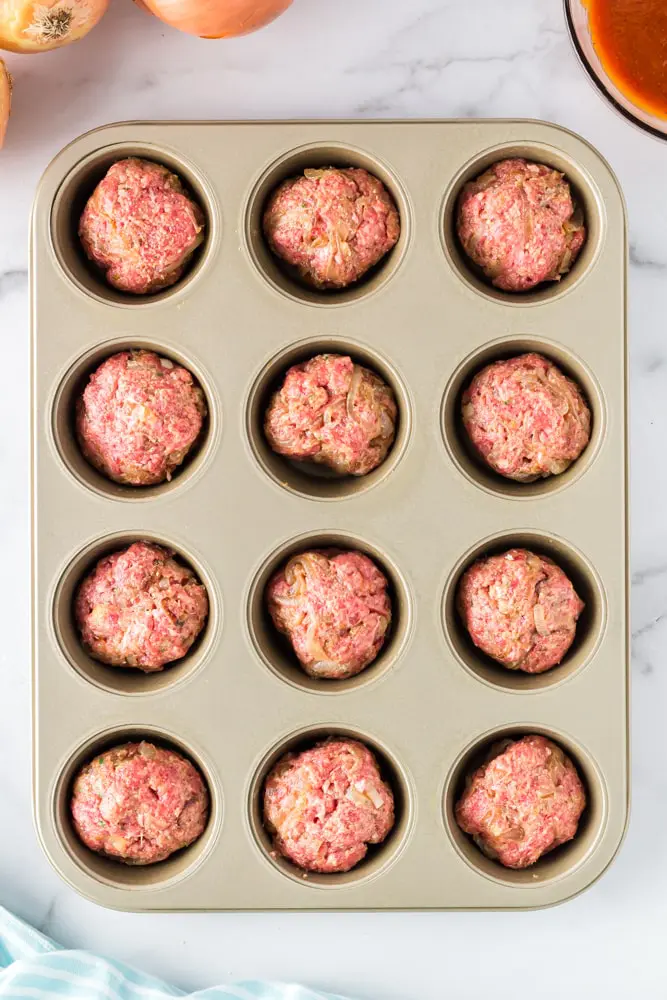
    muffin pan filled with twelve unbaked onion burger mini meatloaf
    1. Take the time to caramelize your onions correctly. Don’t rush the process and burn the onions. That bitter flavor is not the most pleasant in a burger.
    2. Make sure you let the caramelized onions cool thoroughly before mixing them into the meatloaf mixture.
    3. Mix the onions well throughout the meatloaf mixture. You want every meatloaf to have plenty of caramelized onion flavor. The best tool for meatloaf mixing is your hands. Try gloves if you’re squeamish about touching raw meat.
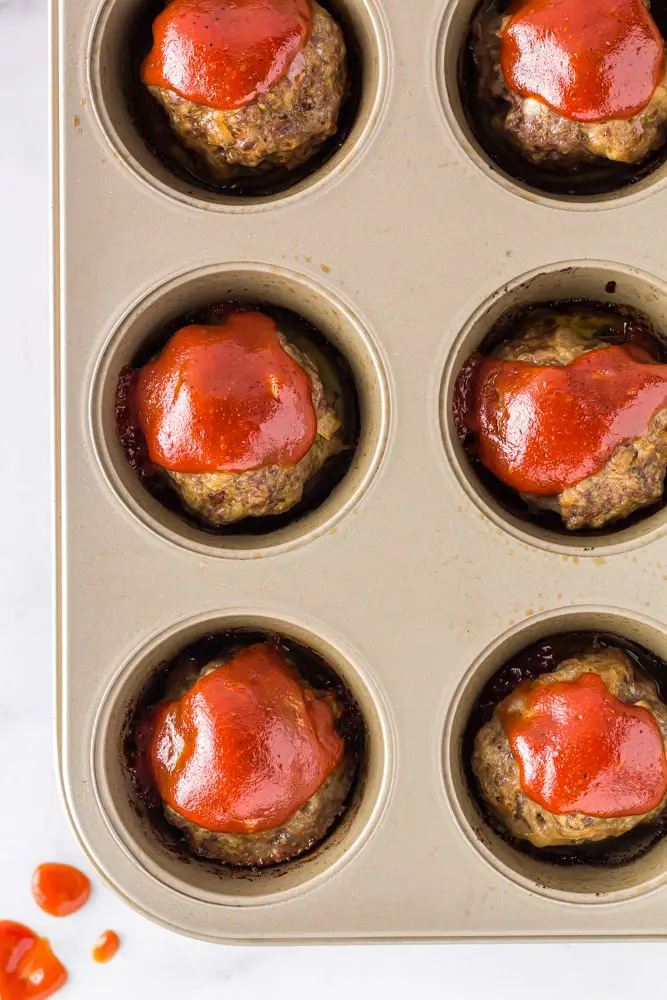
    muffin pan filled with baked onion burger mini meatloaf topped with bright red sauce

    Can the recipe be made ahead?

    Caramelizing the onions is the only part of this recipe that takes any time. If you want to speed the recipe, try cooking the onions ahead of time. They will keep well in an air-tight container in the fridge for up to 5 days. You could also mix up the meatloaf; the mix will hold in the fridge for up to 3 days.

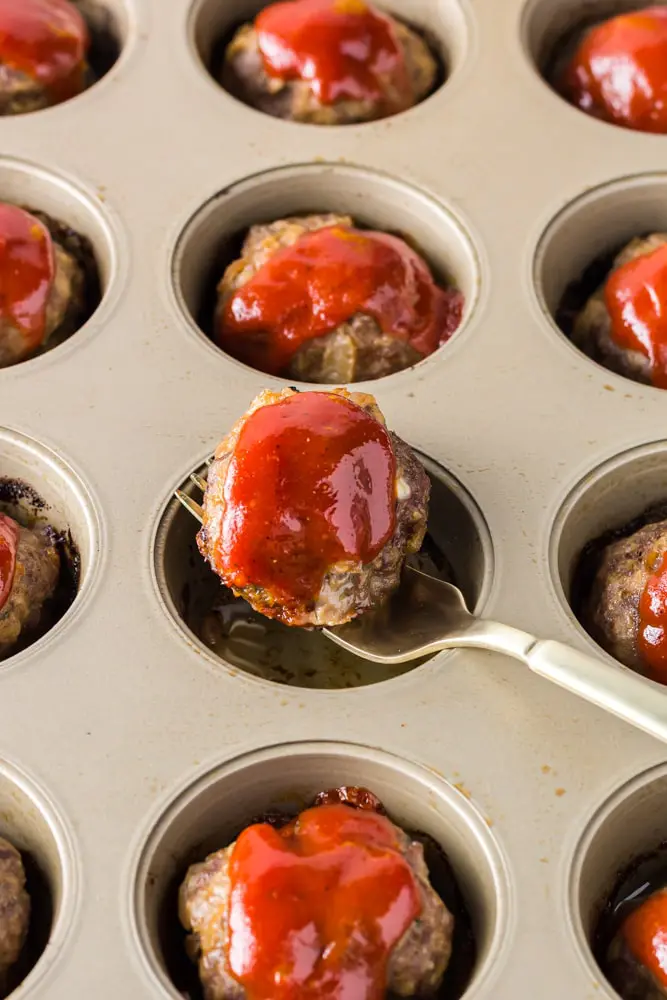
    Onion Burger Mini Meatloaf covered in bright red sauce being lifted out with a fork

    This recipe is a sure-fire family favorite that is easy and quick to make. Give the recipe a try and let me know what you think.

    Onion Burger Mini Meatloaf covered in a bright red sauce on a white plate with a bite taken out of it
    Two plates of Onion Burger Mini Meatloaf covered in a bright red sauce with carrots, pea, and green beans on the side
    Print Recipe
    5 from 1 vote

    Onion Burger Mini Meatloaf

    Sweet caramelized onions are combined with ground beef before baking for a moist, delicious meatloaf I call Onion Burger Mini Meatloaf. This recipe is cheap to make and kid-friendly too.
    Prep Time10 minutes mins
    Cook Time47 minutes mins
    Course: Main Course
    Cuisine: American
    Servings: 12 mini meatloaf

    Ingredients

    Meatloaf

    • 2 sweet onions
    • 2 Tb butter
    • 1 Tb olive oil
    • 3 sprigs thyme
    • 1 teaspoon salt
    • ½ teaspoon black pepper
    • 1 lb 85/15 ground beef
    • 1 teaspoon minced garlic
    • 1 egg
    • ¼ C Italian seasoned breadcrumbs

    Sauce

    • ¼ C ketchup
    • 1 Tb yellow mustard
    • 1 Tb brown sugar
    • 1 dash of Worcestershire
    • black pepper to taste

    Instructions

    • Caramelize the onions using the technique outlined in my Caramelized Onions post. Add thyme sprigs whole to the onions while cooking.
    • Once caramelized, remove the thyme sprigs and pour the onions out evenly on a plate. Put the plate in the fridge for about 10 minutes or until no longer hot to the touch.
    • Preheat the oven to 400 degrees and spray a muffin pan liberally with baking spray.
    • While the onions cook, prepare the sauce. Add the ketchup, mustard, brown sugar, Worcestershire and black pepper to a small mixing bowl. Mix well to combine and set aside.
    • Place the ground beef, egg, breadcrumbs, salt, pepper, and garlic into a large mixing bowl. Once the onions are cool to the touch, add them to the bowl and mix all the ingredients until well combined.
    • Divide the mixture into 12 even balls and place in each spot in the muffin pan. Press down gently, Bake for 12 minutes.
    • Remove from the oven and top with 1 heaping teaspoon of sauce for each meatloaf. Reserve the remaining sauce for dipping. Place the meatloaf back in the oven for 5 minutes or until the sauce is warm.

    FREQUENTLY ASKED QUESTIONS

    Can the onions be cooked ahead of time?

    Yes. They will keep in an air tight container in the fridge for up to five days.

    What should I serve with Onion Burger Mini Meatloaf?

    Potatoes and meatloaf are always good friends, so I think my Boursin Butter Potato Stacks would be delicious with this recipe. Add a green salad or steamed veggie and dinner is served.

    Seven Layer Dip

    August 25, 2019 by Hailey 9 Comments

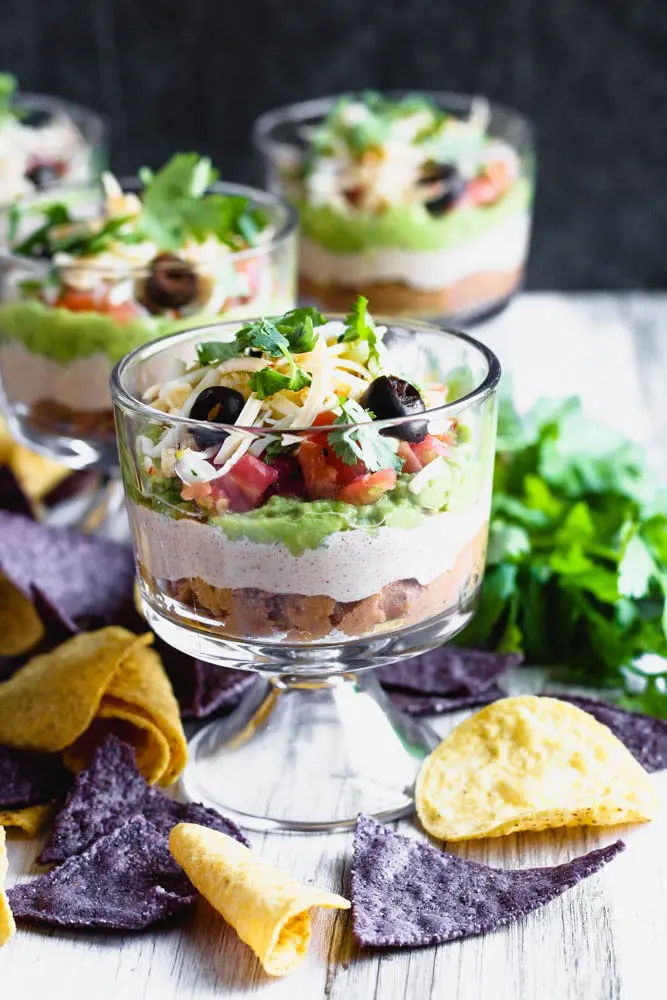
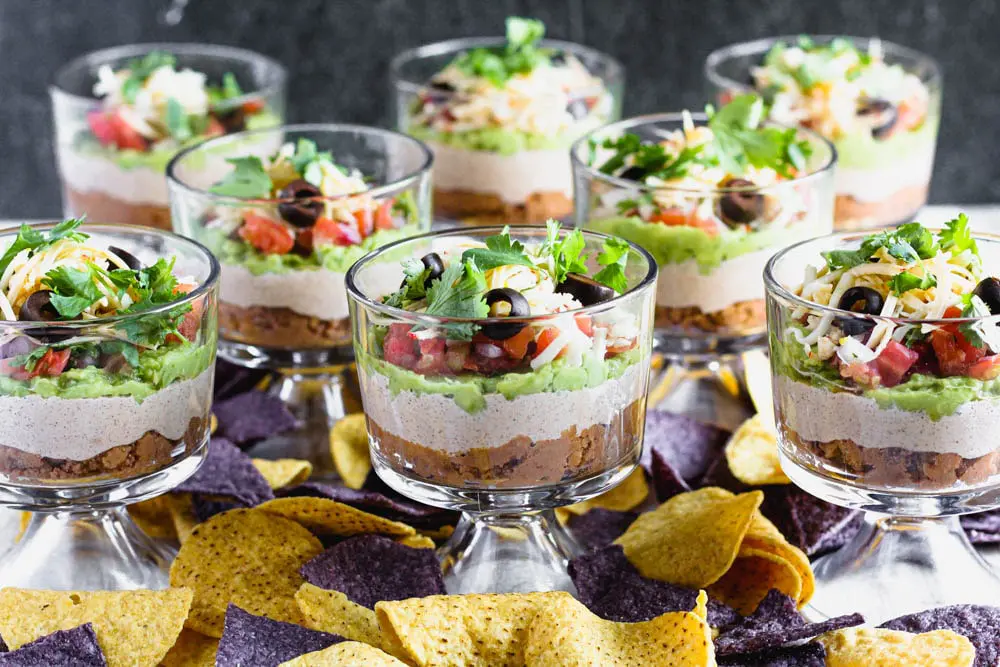
    individual sever layer dips in small trifle dishes with blue and yellow corn tortilla chips scattered around
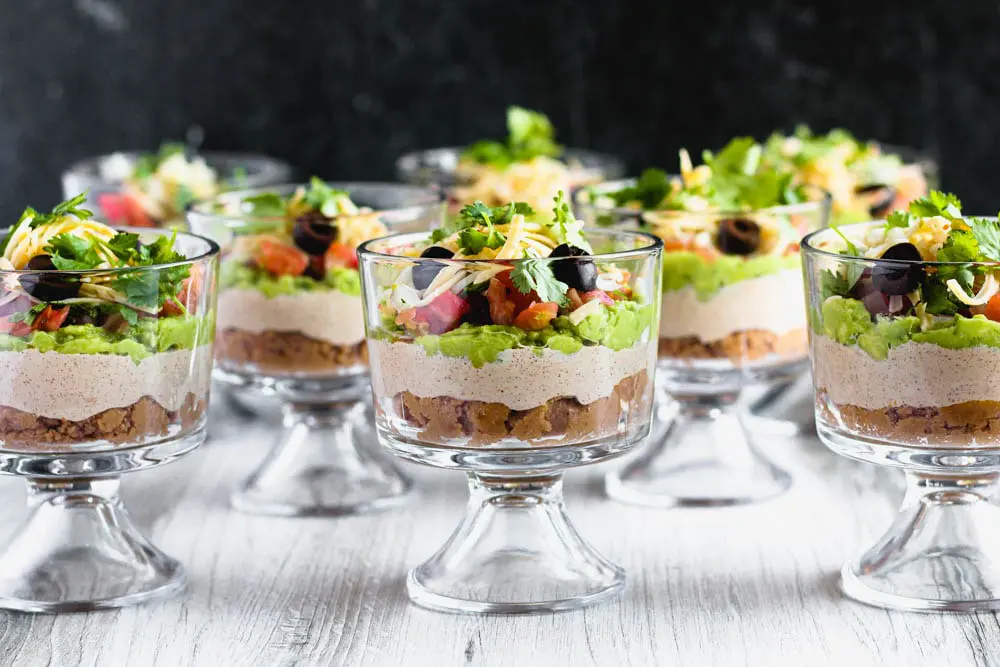
    individual sever layer dips in small trifle dishes

    One of my favorite times of year, the start of the college football season, arrived this weekend, and I can’t think of a better way to celebrate than with the tailgate classic, Seven-Layer Dip. If you’re not familiar with this nostalgic dish made popular in the 80s, it’s a layered concoction (probably f*cking obvious already) that consists of beans, sour cream, avocado, cheese and variety of toppings depending on the version.

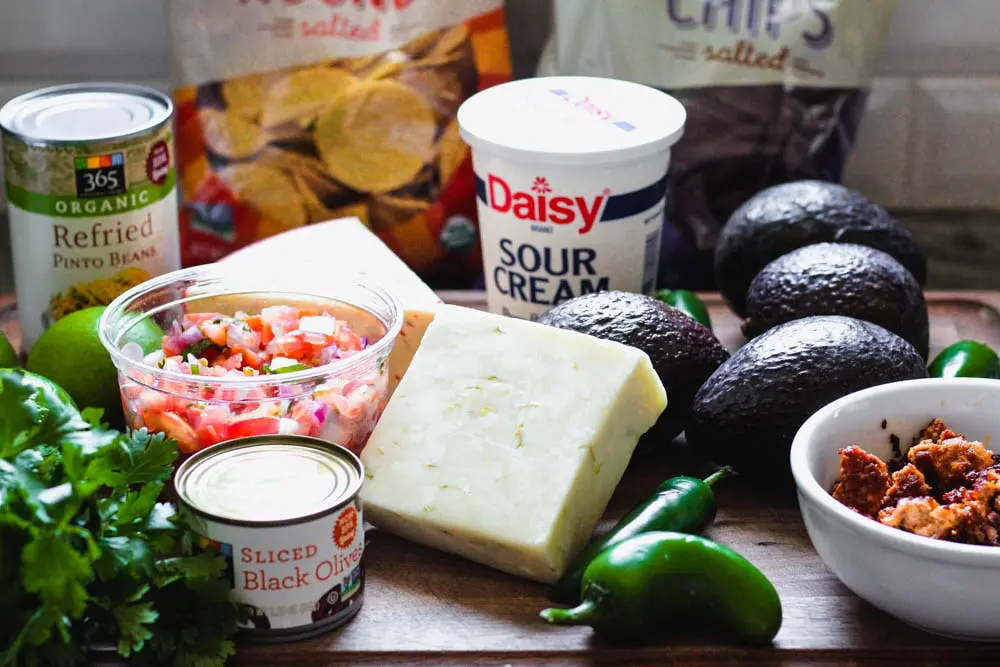
    ingredients for seven layer dip including pico de gallo, canned refried beans and sliced olives, sour cream, avocado, block of pepper jack, jalapenos and cooked chorizo

    I love to improve a classic dish while keeping what I loved about the original in the first place. 

    (Another great example of this is my Green Bean Casserole for your holiday spread.) I did just that when I started recipe testing my Seven-Layer Dip. Slight improvements on each layer are what really make my Seven-Layer Dip stand out. I started with a nod to my Refried Beans recipe by incorporating chorizo into canned refried beans for serious flavor with very little work.

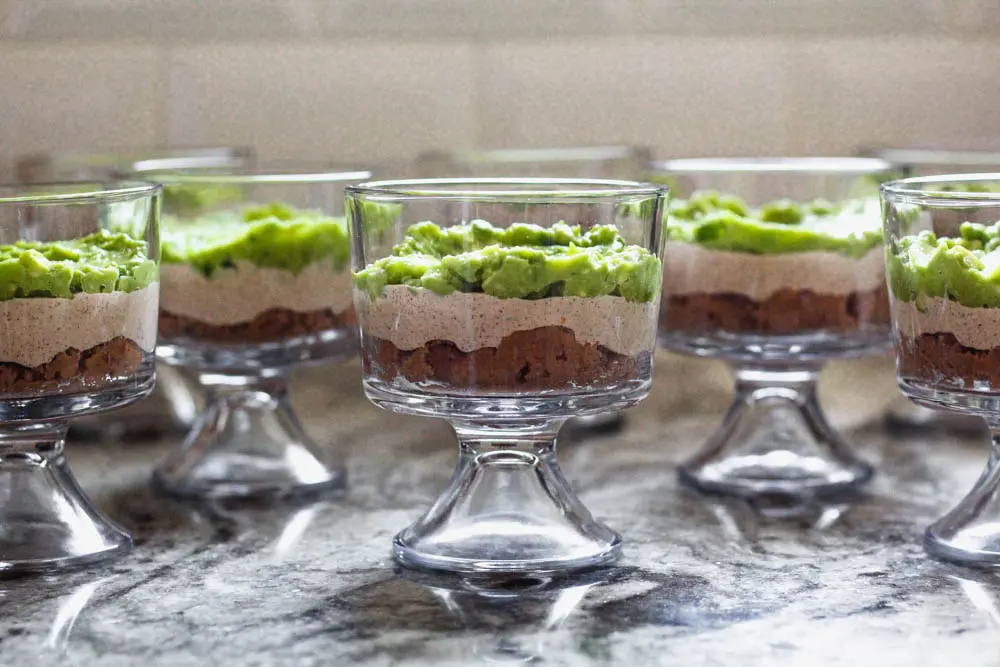
    • empty individual trifle dishes lined up in front of a white tiled wall
    • Beginning of seven layer dip prep with the first three layers place in individual trifle dishes

    The next layer is sour cream. Most old school recipes add a taco seasoning packet to the sour cream, but I like to season the sour cream with a ton of lime zest and chipotle chili powder. No shame in a good seasoning packet, but they usually have a thickening agent that really isn’t necessary for your dip.

    Guacamole or mashed avocados are up next in this heavenly dip. This is probably my favorite layer of them all, and where I looked to keep it as simple as possible. I’m always game for a little added spice so I incorporate minced jalapeno into my mashed avocado, but that’s totally optional.

    What is not optional is adding a shit ton of lime juice. The lime juice adds a much-needed acidity to the dish, but it also helps ensure that the color stays bright green and doesn’t turn brown on you. It’s not cute when that happens.

    Once you’ve laid down the beans, sour cream and avocado, it’s time for the toppings. I start with a store-bought pico de gallo. You often seen chopped tomatoes as a topping on Seven-Layer Dip, but I like the added punch of flavor pico de gallo offers. If you’re not a fan of raw onions or the spice from jalapeno, you can always stick with chopped tomatoes.

    individual sever layer dips in small trifle dishes with blue and yellow corn tortilla chips scattered around

    Sticking with my theme of spicing things up a bit, I also used a peppered cheddar in my recipe.

    You can use a plain sharp cheddar, but I found an awesome Hatch Chile Cheddar that I thought was a fun addition. Any sort of pepper jack cheese would be a fine substitute if it’s not Hatch season.

    Last, you can’t have Seven-Layer Dip without good old sliced black olive from the can. I tried dressing up this layer in some of my early recipe testing, but it just wasn’t right. The olives are meant to be a nice salty accent to the other flavors, and I found more high-end olive overwhelmed the classic flavor I was going for.

    individual sever layer dips in small trifle dishes with blue and yellow corn tortilla chips scattered around

    I’m a total sucker for cilantro, so I couldn’t help but add a little final splash of freshness with roughly chopped cilantro. I also think it makes for a prettier final product. Speaking of prettying-up Seven Layer Dip, individual servings are also a great way to present this recipe if you have a fixed number of people attending your fiesta.

    It’s totally fine to stick with a 2-quart glass dish for serving if you have a big crowd coming or want to serve this dip up family style. Just try to keep those first three layers, beans, sour cream and avocado, neat, and your dip will be ready for the big game! Let me know what you think of this football snack!

    Helpful Utensils

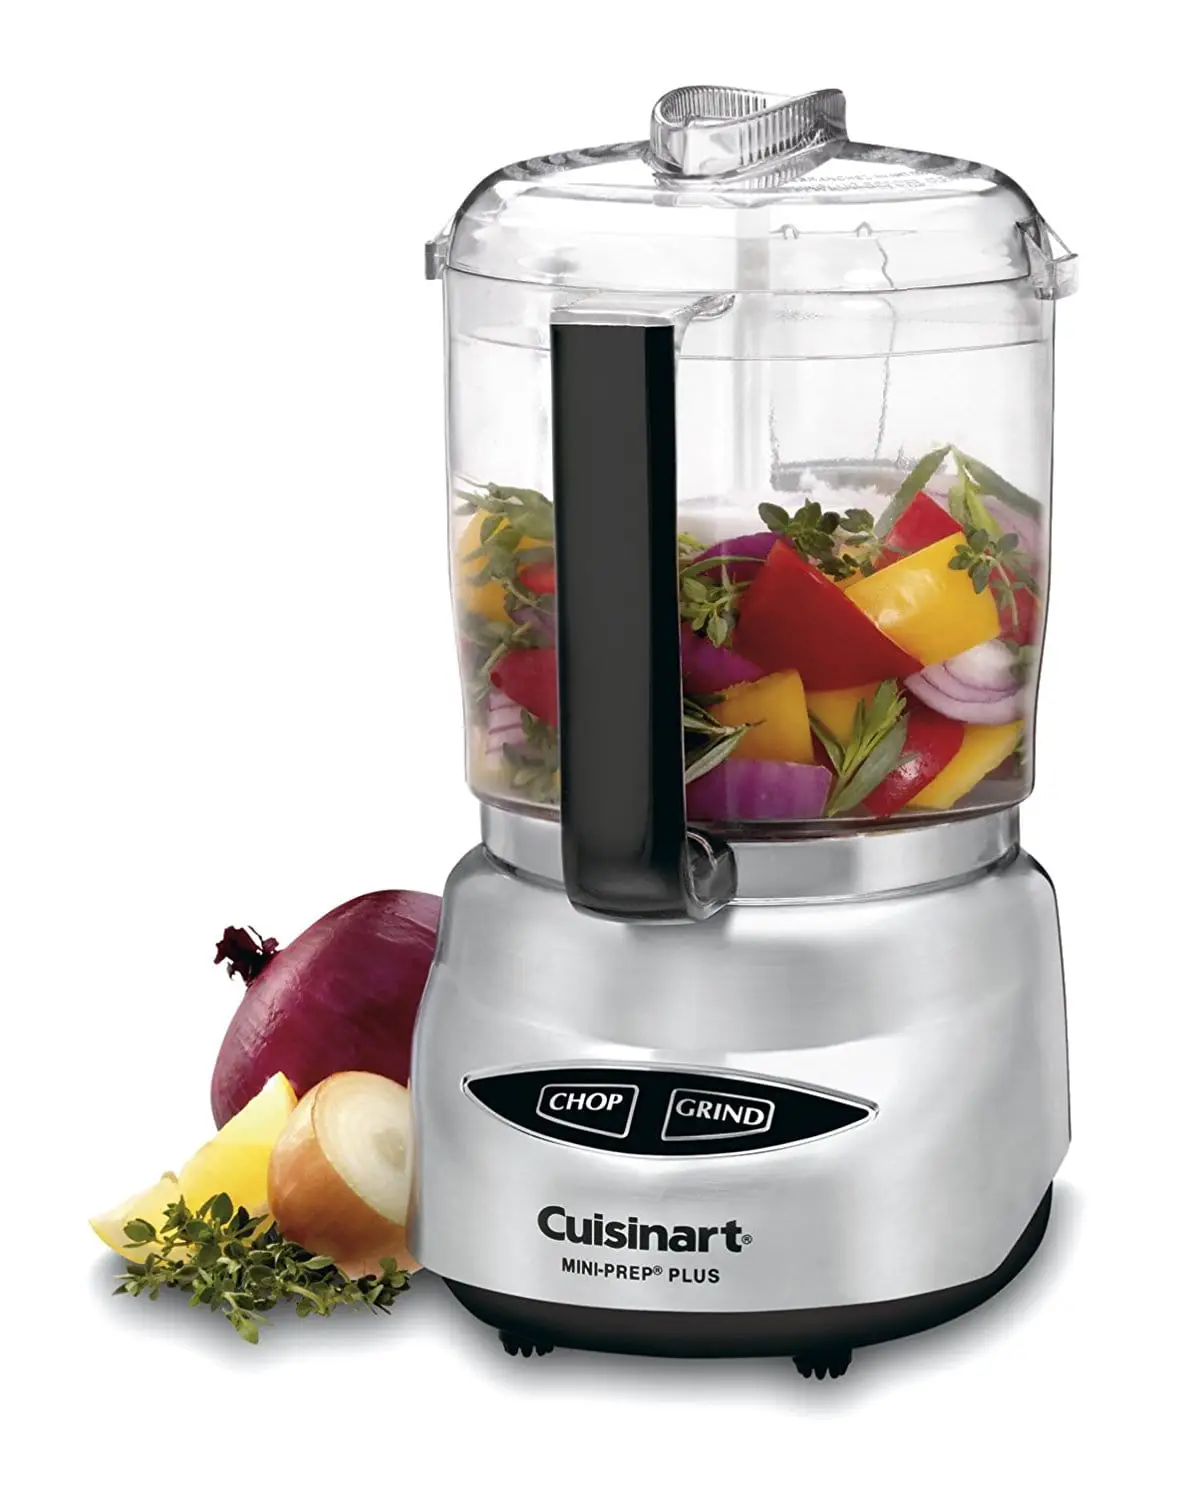
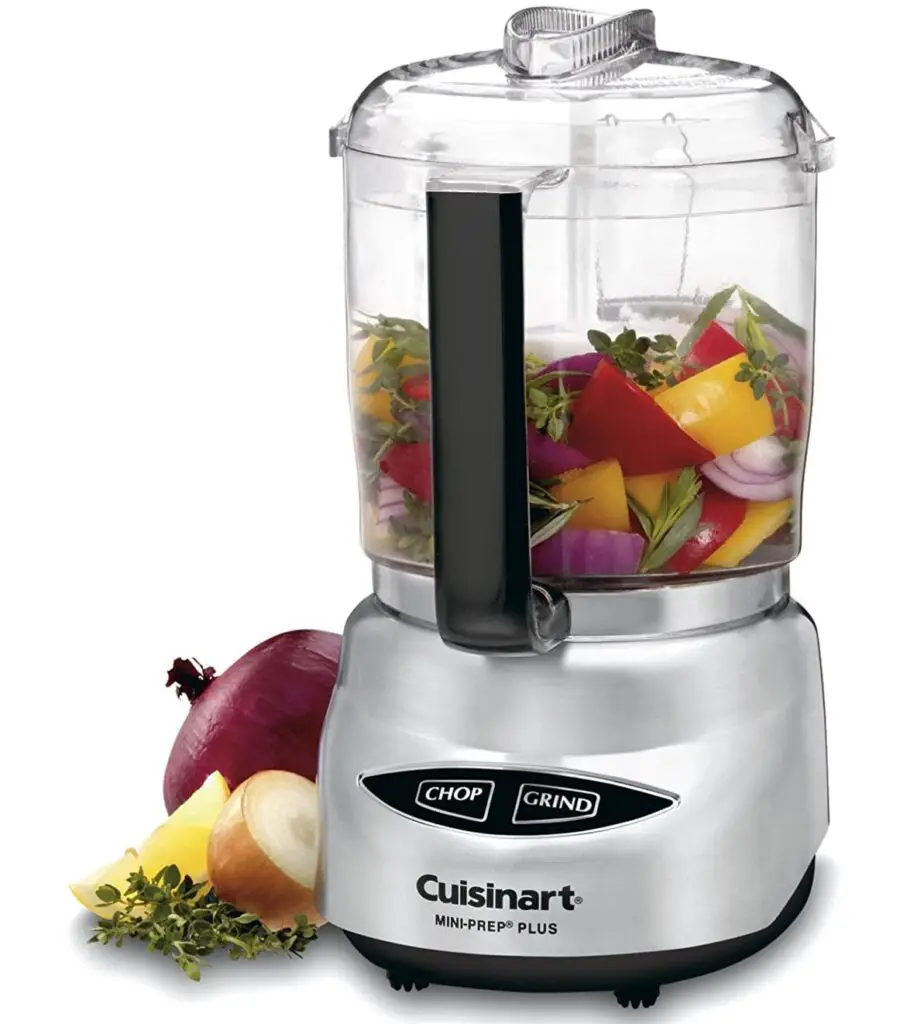
    small food processor

    4-Cup Food Processor

    There is no piece of equipment I use more often than my food processor. It's a must-have, and this one is perfect if you have a smaller kitchen or are on a budget.

    individual sever layer dips in small trifle dishes
    Print Recipe
    5 from 2 votes

    Seven Layer Dip

    An update on this classic tailgate dish. Chips and dip are essential party food, but it doesn't have to be fancy to be delicious. Fresh, quality ingredients and plenty of flavor make for an easy appetizer or snack that everyone loves.
    Prep Time24 minutes mins
    Cook Time6 minutes mins
    Course: Appetizer, Snack
    Cuisine: American, Mexican
    Servings: 12 servings

    Ingredients

    Bean Layer

    • 1 teaspoon olive oil
    • 4 oz chorizo pork sausage
    • 1 16 oz can refried beans
    • 2 Tb pico de gallo liquid

    Sour Cream Layer

    • 2 C sour cream
    • 1 -3 teaspoon chipotle chili powder*
    • zest of 2 limes
    • ½ teaspoon salt

    Mashed Avocado

    • 4 ripe avocados
    • 1 small jalapeno
    • juice of 2 limes

    Toppings

    • 1 C store-bought pico de gallo
    • 1 C shredded pepper jack cheese
    • 1 2.25 oz can sliced black olives drained
    • cilantro roughly chopped

    Instructions

    • To make the bean layer, heat a small pan over medium-high heat. Once hot, add the oil and the chorizo to the pan. Cook for about 6 minutes, stirring occasionally.
    • Once the chorizo is browned, turn off the heat and allow it to cool for a few minutes. Then place the chorizo in a small food processor and grind to a fine crumb. If you don't have a processor, you can finely chop by hand.
    • Place the chorizo and refried beans into a small mixing bowl and stir well to combine. Add 1-2 Tb of pico de gallo liquid to the beans and mix well so that they have spreadable consistency. Place the bean layer on the bottom of the dish.
    • Mix together the sour cream, chili powder, lime zest, and salt. Spread over the bean layer. Place in the refrigerator while you smash the avocados to let the sour cream firm up a bit.
    • Half each avocado and remove the seed. Remove the skin and place the avocados into a large mixing bowl. Using a potato masher, smash the avocados until they are mostly smooth. Add the juice from 2 limes, and combine with a spatula. Half the jalapeno and remove the seeds and stem. Mince finely and add to the avocados.
    • Take the dish out of the fridge and spread the mashed avocados over the sour cream layer. Top with pico de gallo then shredded cheese, sliced olives and cilantro to suit your taste. Serve with tortilla chips.

    Notes

    This dish can be made into 8 individual servings (approx. 1C per serving) or family-style in a 2-quart glass dish.
    * Chipotle chili powder has heat unlike regular chili powder as it's made from jalapenos. The amount of chipotle chili powder you use is totally up to you. If you like spicy, I would recommend all 3 teaspoons, but if you're feeding a crowd, I would lean closer to 1-2 teaspoons. You can also switch to regular chili powder if you prefer no heat at all. 

    Falafel Waffles

    August 11, 2019 by Hailey 3 Comments

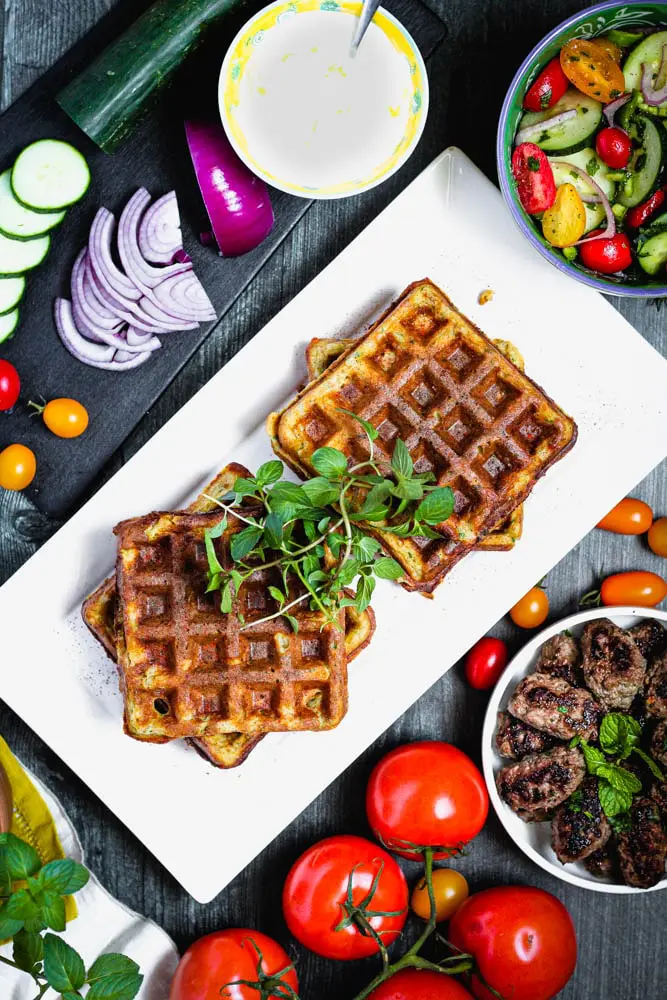
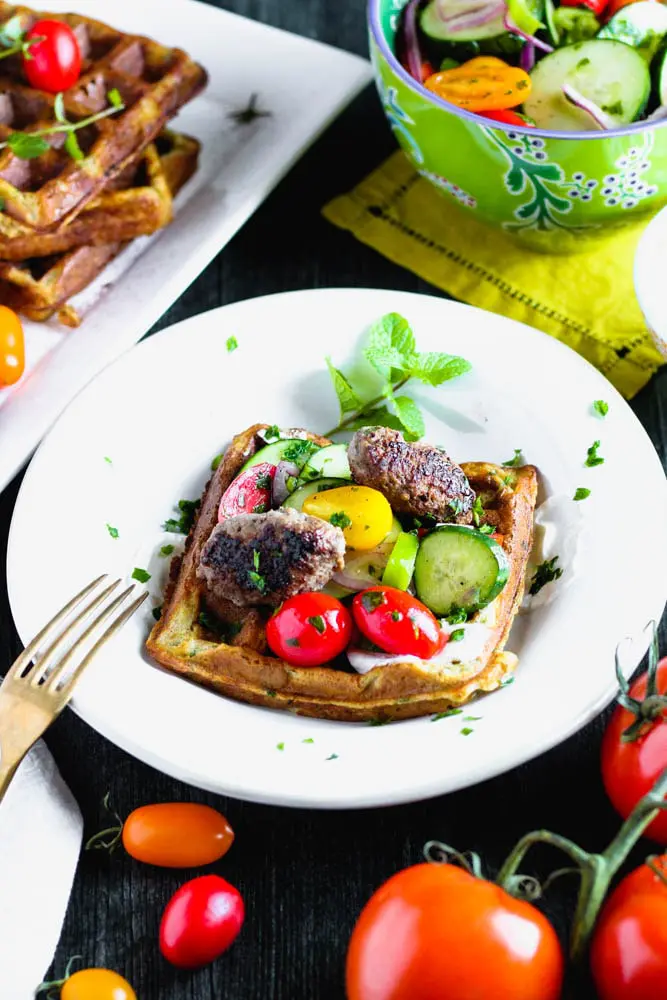
    overhead shot of falafel waffles topped with fresh mint and surrounded by red onions, tomatoes and lamb sausage

    Holy falafel! Today marks the one-year anniversary of my very first blog post. In celebration, I’m bringing you a new, fun twist on a waffle, Falafel Waffles! I loved creating the recipe for my Black Bean and Corn Waffles so much that I continued to dream up savory recipes that would be a good excuse to eat waffles for dinner. I serve my Falafel Waffles with homemade lamb sausage and tomato-cucumber salad.

    falafel waffles topped with fresh mint and surrounded by red onions, tomatoes and lamb sausage

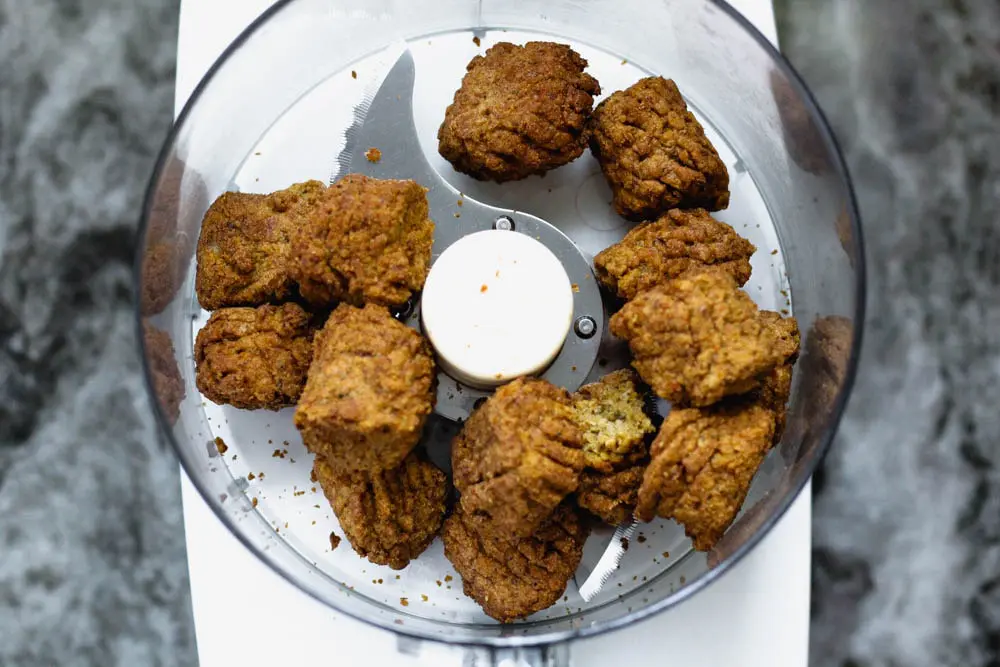
    My Falafal Waffles start with premade falafel balls that I crush to a crumb and then combine with my delicious buttermilk waffle recipe. The waffles have the distinct flavor of falafel but also the crisp edges and delicate texture of the best homemade waffles.

    store bought falafel balls in a food processor being being pulsed

    Paired with a super fresh tomato and cucumber salad and a smear of Greek yogurt, these waffles are perfection. If you’re a carnivore, add my quick and easy lamb sausage for a complete feast. These waffles are delicious, different and fun to eat.

    Call them breakfast, brunch or dinner…whatever you call them, they’re damn good! ?

    You probably didn’t even see the very first blog post that I published at this time last year. I hadn’t done any social media at that point. I quietly worked to get about ten blog posts published before I presented Cooking and Cussing to the world. The early days were so exciting. Dreaming up the endless possibilities of life as a food blogger became an (almost) obsession.

    I still spend a lot of time daydreaming about what life as a food blogger will be like because I’ve had an amazing first year immersing myself in this world. I attended a food blogging conference this year where I met so many badass people and got inspired in so many different ways.

    I was also struck by just how f*cking many people there are, like me, who dream of making a full time career out of food blogging. It was exciting in one way to know that I had this wonderful community around me, but the competitive part of me thought, can I really find my tribe in this super crowded space?

    dressed falafel waffle that is topped with yogurt sauce, cucumber tomato salad and lamb sausage

    I confess that the hard reality of making it as a full-time food blogger has definitely set in, but I don’t feel disheartened or intend to quit. I just realize that it’s going to take a little bit longer than I originally anticipated to get to my end goal.

    Food blogging may not pay the bills yet, but it definitely feeds my soul in a much-needed way. 

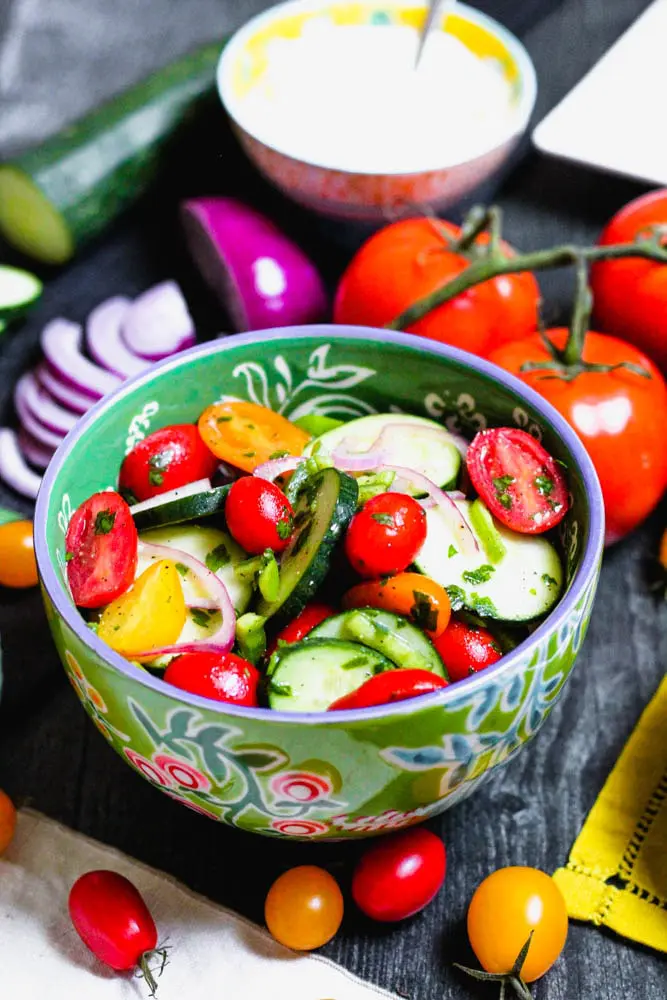
    cucumber tomato salad in a green bowl with a small bowl of yogurt sauce in the background

    Brainstorming new ideas and recipe testing is seriously the shit that keeps me sane when life gets too complicated. I lay in bed and think of crazy things like Falafel Waffles instead of grueling work projects or things around the house that need to be fixed.

    I’ve also learned a lot about how much I can manage this year and when to take a break. When I first started food blogging, it felt like a race, a race to get to a dream life where I could stay home all day, cooking and cuddling Gus. All of my free time went to the blog, and I never took a weekend off. The race is over now. Now, I’m marathon training.

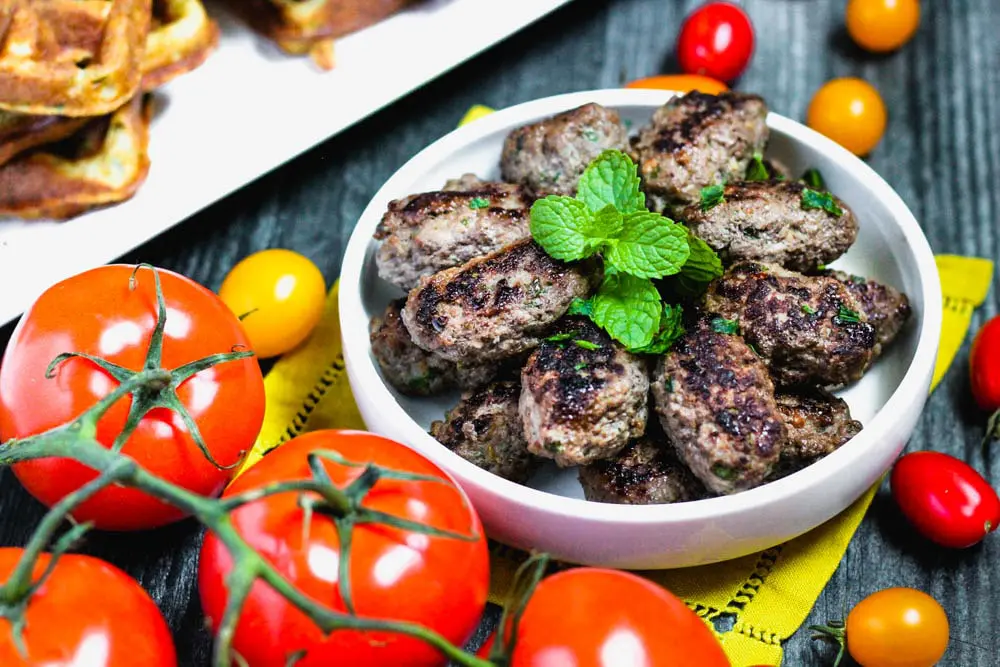
    lamb sausage topped with fresh mint and surrounded by fresh tomatoes

    I no longer plan for every hour of my weekend. I leave a good chunk of it open for whatever might happen, nothing or something wonderfully spontaneous. The funny thing is that quite often, I still end up in the kitchen fiddling around. It’s just a much more organic way of getting there.

    In fact, that’s how Falafel Waffles came to be. I bought premade falafel balls on my way home from work one day and thought, I’m going to figure out how to make these balls into waffles because nothing is more fun that breakfast for dinner! The end result was pretty close to the recipe I’m sharing with you today.

    overhead shot of falafel waffles topped with fresh mint and surrounded by red onions, tomatoes and lamb sausage

    I hope this next year is filled with more experiences just like that. Sure, I’ll still plan out plenty of holiday content and have a goal list that seems never ending, but I also want to stay in touch with why I started doing this in the first place, because I love to cook.

    Sorry today’s post wasn’t much about the recipe, but trust it’s a good one! I hope you enjoyed some small part of my ramblings or at least weren’t bored to tears. LOL! Let me know if you have any questions or feedback about the recipe. I’d love to hear from you!

    Helpful Utensils

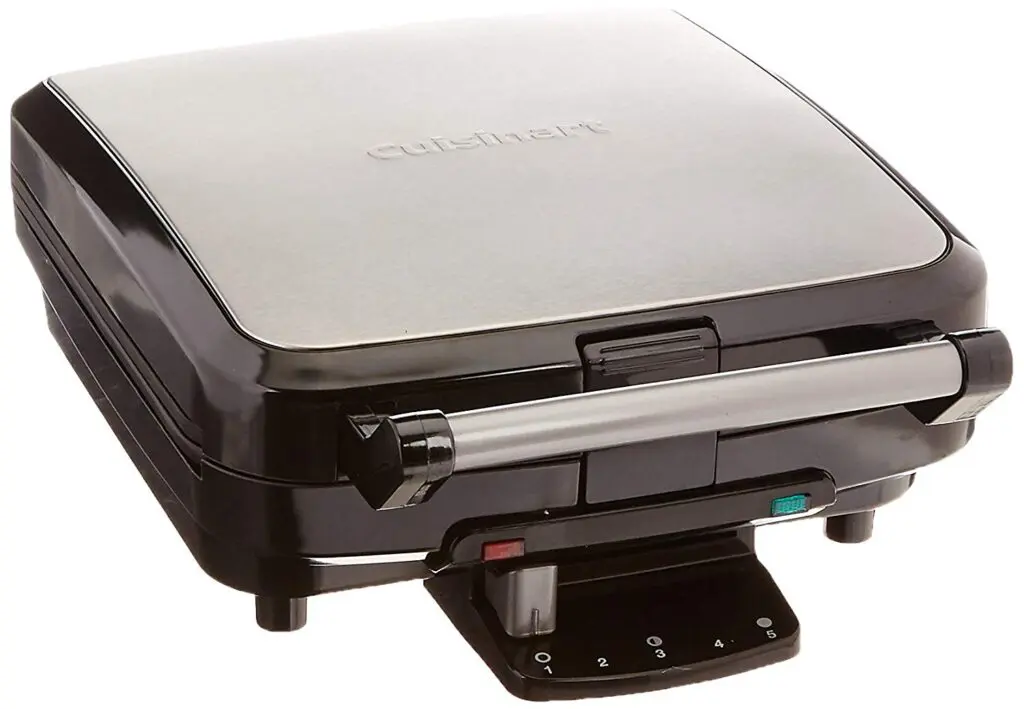
    cuisinart waffle maker

    Waffle Maker

    Once you have a waffle maker, you'll find so many cool and different ways to use it. Oh, and good ol' fashion buttermilk waffles are also well worth the investment!

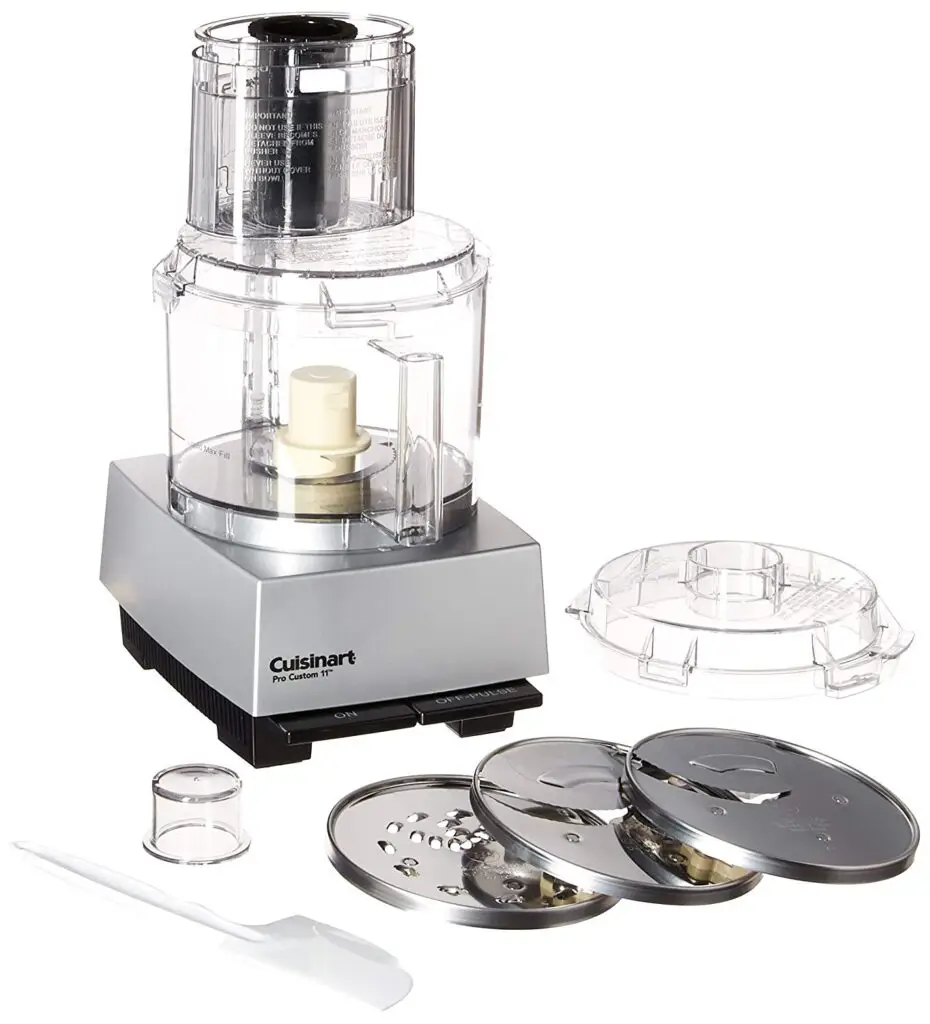
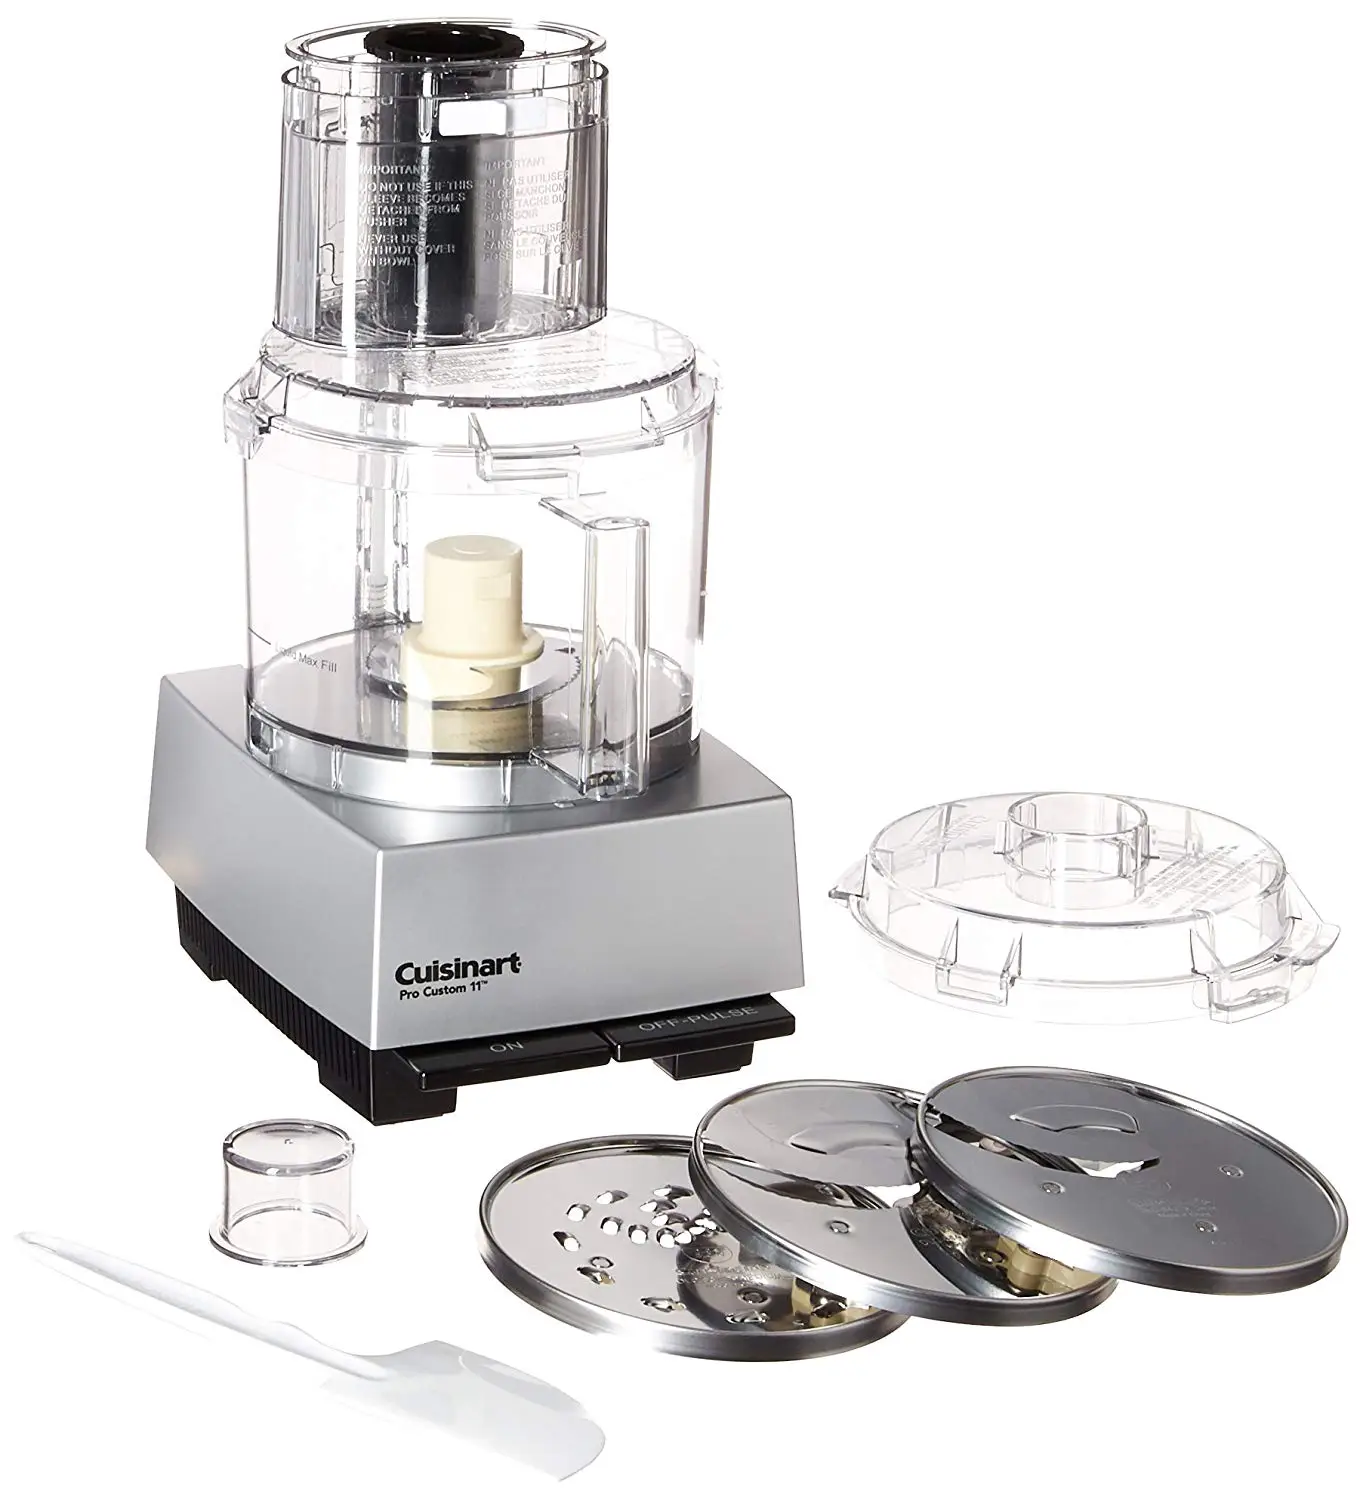
    Cuisinart Large Food Processor

    11-Cup Food Processor

    There is no piece of equipment I use more often than my food processor. It's a must-have!

    overhead shot of falafel waffles topped with fresh mint and surrounded by red onions, tomatoes and lamb sausage
    Print Recipe
    5 from 1 vote

    Falafel Waffles with Cucumber Tomato Salad and Easy Lamb Sausage

    Falafel balls meet buttermilk waffles for an awesome flavor combination. Great for brunch or dinner, Falafel Waffles are served with fresh cucumber tomato salad, easy homemade lamb sausage and a smear of yogurt. Mix up your weeknight dinner routine with this fun recipe!
    Prep Time30 minutes mins
    Cook Time30 minutes mins
    Course: Breakfast, brunch, Main Course
    Cuisine: American, Mediterranean, Middle Easten
    Servings: 12 waffles

    Ingredients

    Falafel Waffles

    • 8 oz package of premade falafel balls*
    • ¼ parsley roughly chopped
    • 1 C all purpose flour
    • 1 Tb white sugar
    • 2 teaspoon baking powder
    • 1 teaspoon baking soda
    • ½ teaspoon cumin
    • ½ teaspoon garlic powder
    • 1 teaspoon kosher salt
    • ¼ teaspoon cayenne
    • 1.5 C buttermilk
    • 2 eggs separated
    • ⅓ C butter melted and cooled
    • zest of 1 lemon
    • ½ C greek yogurt plus more for garnish

    Tomato Cucumber Salad

    • 2-3 roma tomatoes or 1 cup cherry tomatoes
    • 1 seedless cucumber
    • ½ C parsley
    • ½ red onion
    • 1 teaspoon salt
    • ½ teaspoon black pepper
    • 2 Tb olive oil
    • juice of 1 lemon
    • 1 gypsy or anaheim pepper optional

    Easy Lamb Sausage

    • 1 lb ground lamb
    • ½ red onion grated
    • 2 cloves garlic minced
    • 2 Tb mint minced
    • 1 Tb parsley minced
    • 1 teaspoon salt
    • ½ teaspoon black pepper

    Instructions

    To make the waffles

    • If you don't have a food processor, check out my link above to purchase one. I use my processor more than any other piece of equipment in my kitchen. Place the falafel balls into the food processor, and pulse until finely crumbed. Add roughly chopped parsley and pulse until minced. You can also crumble the falafel by hand if you prefer.
    • Separate the egg yolks from the egg whites. Using a hand mixer, whisk the egg whites until they reach stiff peaks. Combine all of the dry ingredients including the seasonings in a large mixing bowl. Add the falafel to the dry ingredients and mix well. Add cooled butter, buttermilk, egg yolks and lemon zest to the dry ingredients and stir until combined. Last, fold in the yogurt then egg whites, being careful not to deflate the egg whites.
    • Follow the instructions for the appropriate amount of waffle batter for your machine. For mine, it is ½ C per waffle. I have included a link to purchase the waffle maker I use above. I set my waffle iron to a setting of 3 which is the middle setting for my machine. Once cooked, serve with a smear of yogurt, tomato cucumber salad, and lamb sausage if desired.
    • The waffles can be frozen and reheated in a toaster.

    To make tomato cucumber salad

    • Cut the tomatoes into 1-inch dice. If using cherry tomatoes, slice in half if the tomato is larger than a quarter. Cut the cucumber into ¼-inch slices. Split the pepper vertically and remove the seeds and ribs. Slice each half into thin strips. Half and peel the red onion. Reserve one half for the lamb sausage, if making. Slice the other half into very thin strips.
    • Roughly chop the parsley and add to a large mixing bowl with the tomato, cucumber, onion, and pepper. Add the olive oil, lemon juice, salt, and pepper and toss gently to combine.

    To make lamb sausage

    • Use your hands to mix together all the ingredients. Form the meat mixture into a cylinder or football shape. I like this shape over a round meatball because it seems to cook a little faster.
    • Heat a medium nonstick pan over medium-high heat. Add 1 teaspoon of olive oil to the hot pan and then add the sausages. Cook on the first side for about 4 minutes or until well browned. Turn the heat down to medium and turn the sausage over. Allow the lamb to cook for another 5 minutes or until cooked through.

    Notes

    *I used Yves Veggie Cuisine brand (see below) 

    Fish and Farro Bowls

    July 7, 2019 by Hailey 3 Comments

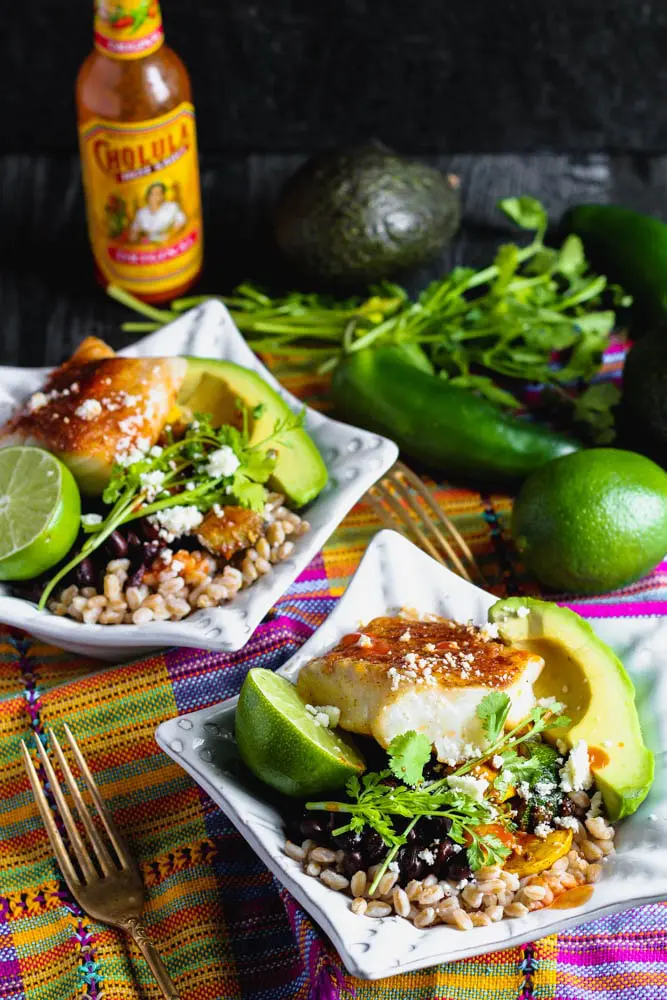
    Two bowls of cooked farro topped with taco seasoned cod, fresh avocado, lime, black beans, cilantro and cooked vegetables with hot sauce and lime in the background
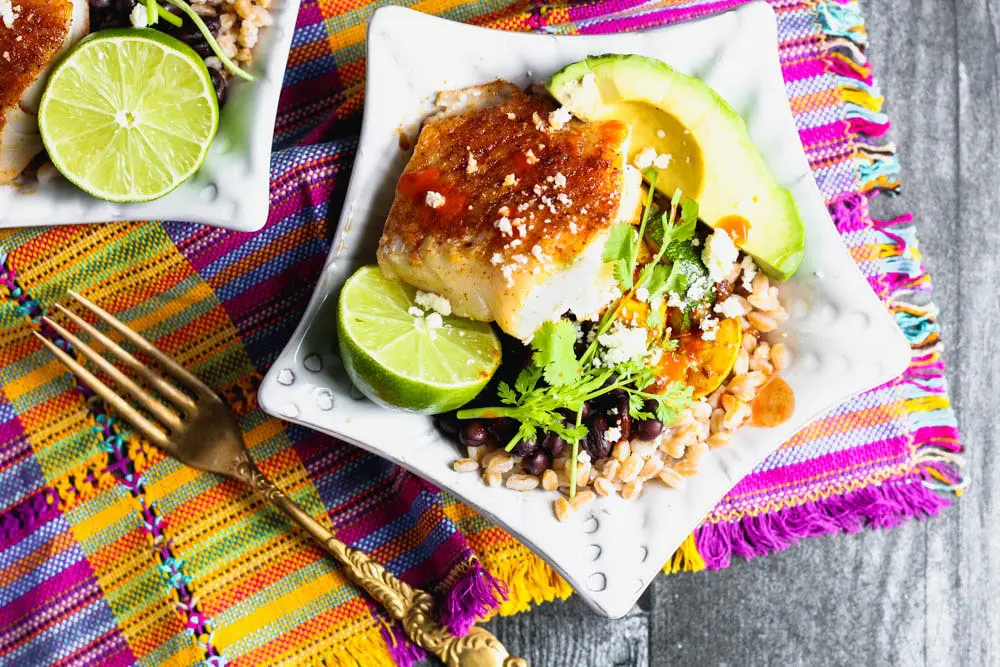
    closeup of a bowl of cooked farro topped with taco seasoned cod, fresh avocado, lime, black beans, cilantro and cooked vegetables

    When the weather turns warm and attire scanter, eating a little lighter feels right, and Fish and Farro Bowls are the perfect way to fill up on all the right foods without feeling weighed down. Simple cod filets and summer vegetables are tossed in your favorite taco seasoning for a quick flavor boost and served over farro and black beans for an easy dinner packed with flavor.

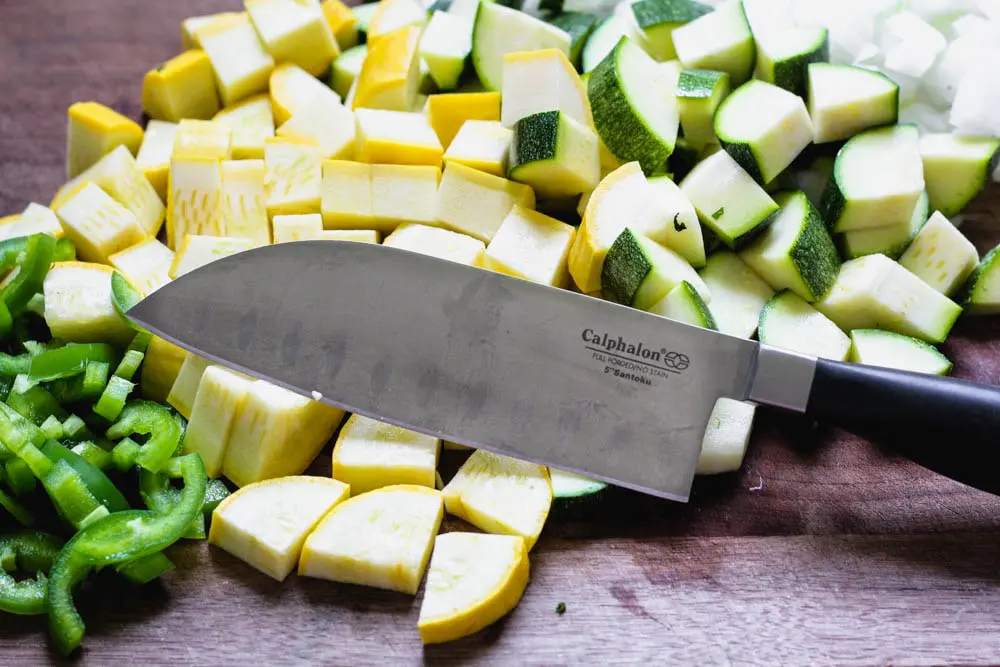
    The farro in this recipe takes a little bit of time, but the most labor-intensive part, if you even want to call it that, is cutting all the vegetables and herbs. Evenly cut fish and vegetables are essential to fast and consistent cooking. Cutting the haul of vegetables in this recipe was made an easier task by using my new Calphalon Contemporary™ SharpIN™ 20-Pc. Cutlery Set.

    set of Calphalon knives

    I was lucky enough to meet with a PR representative from Calphalon while I attended the Everything Food Conference in May. I was delighted to be offered the opportunity to try out one of their latest inventions, SharpIN™ technology.

    Not only are dull knives more difficult to use. They are also much more dangerous. You are more likely to cut yourself with a dull knife than a sharp one. Using a sharp knife is easy, not forced, preventing many haphazard accidents that happen with an annoyingly dull blade. That being said, I know I never think to sharpen my knives. It’s like cleaning your baseboards or blinds…these sorts of tasks just don’t happen as often as we would like in the busy lives we lead.

    Calphalon has eliminated the task altogether! The maple wood block that holds all the knives is not only really, really good looking, it will also ensure you are ready for any slicing and dicing a recipe requires at any time. I don’t know about you, but I’m game for kitchen cutlery that is beautiful, functional and timesaving!

    As the wife of a chef, to say we have quite the nice knife collection is putting it mildly, but the Calphalon Contemporary™ SharpIN™ 20-Pc. Cutlery Set is a wonderful contribution to my kitchen. The knives fit nicely in the hand due to ergonomic handles and are easy to use.

    Perhaps the most impressive part of this cutlery set beyond the SharpIN™ technology is the huge variety of knives included in the set for such a reasonable price.

    closeup of the names of the knives included in the Calphalon self sharpening knife set

    There is knife for any type of knifework a recipe might require. The set includes:

    • 4-½-inch Paring Knife
    • 5-inch Boning Knife
    • 5-inch Santoku
    • 5-½-inch Tomato/Bagel Knife
    • 6-inch Fork
    • 6-inch Utility Knife
    • 7-inch Santoku
    • 8-inch Slicer
    • 8-inch Chef's Knife
    • 8-inch Bread Knife
    • Kitchen Shears
    • 8 Steak Knives
    • Sharpening Knife Block

    The 5-inch Santoku is my favorite knife in the set. It’s an excellent size for handling a plethora of jobs, but it’s also small enough that it doesn’t feel intimidating to use.

    diced squash and sliced jalapeno with a closeup shot of the 5-inch chef's knife used to cut the vegetables

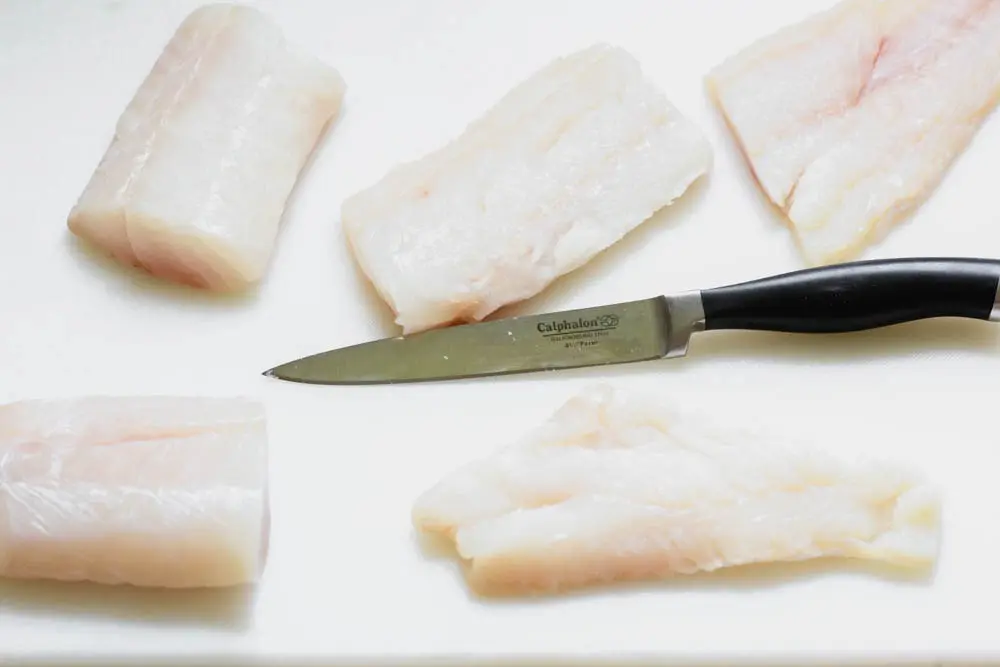
    The Paring Knife is also a super slick option to keep handy for delicate jobs like cutting the fish into filets.

    raw cod on a while plastic cutting board with a Calphalon knife

    If you’re interested in learning more about the Calphalon Contemporary™ SharpIN™ 20-Pc. Cutlery Set, head over to Calphalon to get more details. The knives are a pleasure to use and the sharpening knife block is such a smart addition to any home cook’s arsenal.

    Two bowls of cooked farro topped with taco seasoned cod, fresh avocado, lime, black beans, cilantro and cooked vegetables with hot sauce and lime in the background

    A good knife set is essential to quick and easy prep like that in my Fish and Farro Bowl recipe. Once the farro, fish and veggies are cooked, you simply need to slice cilantro, avocado, and lime for a light and fresh weeknight dinner that is ready in a snap.

    I hope you’ll check out the Calphalon Contemporary™ SharpIN™ 20-Pc. Cutlery Set and give this easy, summer recipe a try. Both will bring a smile to your face!

    Two bowls of cooked farro topped with taco seasoned cod, fresh avocado, lime, black beans, cilantro and cooked vegetables with hot sauce and lime in the background
    Print Recipe
    5 from 1 vote

    Fish and Farro Bowls

    Easy to make, light and super fresh, Fish and Farro Bowls are simple but filled with flavor. Cod filets and summer vegetables are tossed in taco seasoning and served over farro and garnished with cilantro, lime and avocado for a hearty weeknight dinner that won't weigh down.
    Prep Time15 minutes mins
    Cook Time30 minutes mins
    Course: Main Course
    Cuisine: American, Mexican
    Servings: 4

    Ingredients

    • 1 lb cod cut into 4 filets
    • 1.5 C dried farro
    • 1 Tb kosher salt
    • 1 zucchini
    • 1 yellow squash
    • 1 yellow onion
    • 1-2 jalapeno , optional
    • 3 Tb olive oil
    • 1 pack or 3 Tb taco seasoning
    • 1 can reduced sodium black beans
    • cilantro
    • avocado
    • cotija cheese
    • lime
    • kosher salt to taste
    • ground black pepper to taste
    • hot sauce

    Instructions

    • Rinse the farro in a strainer. Place the farro in a large saucepan and cover with water and 1 Tb of kosher salt. Boil like pasta for about 25-30 minutes or until tender. Drain any remaining liquid from the farro and put it back in the hot saucepan. Place a lid over the pan and allow the farro to steam for 5-10 minutes before serving.
    • Trim the ends from the zucchini and squash. Cut them both into quarter moon size pieces. Dice the onion into ¼-inch pieces. If you like a little spice, prepare the jalapenos by removing the ribs and seeds and finely dicing. Heat a large nonstick pan over medium high heat.
    • Once hot, add 2 Tb of olive oil, onions, squash, zucchini and jalapenos to pan. Cook for 7-8 minutes, stirring occasionally, until the veggies are soft and browned around the edges. Once browned, season the veggies with 1 Tb of taco seasoning and salt and pepper to taste (depending on the salt in your taco seasoning). Stir to combine. Remove the veggies to a plate and set aside.
    • Place the cod filets on a plastic cutting board. Dry the filets with a paper towel and season each side of the fish with 1 Tb of taco seasoning (2 Tb total). Add 1 Tb of olive oil to the same pan used for the veggies and turn the heat to medium high again.
    • Once hot, add the fish and cook for about 3 minutes per side. The fish should be opaque and flaky when done. If you have a digital thermometer, you're looking for 145 degrees in the center of the fish. Once cooked, remove from the heat. Dust each filet with a pinch of kosher salt to finish.
    • Place the beans into a strainer and rinse well until the water runs clean off the beans. Allow to drain. Roughly chop the cilantro, dice the avocado, cut the limes in half and crumble the cotija cheese.
    • To assemble the bowls, Place a 1C serving of cooked farro in the bottom of a bowl. Top with 1 C of seasoned veggies and a fish filet. Garnish with cilantro, avocado, cotija and hot sauce. Serve with half a lime.

    Black Bean and Corn Waffles

    June 25, 2019 by Hailey 5 Comments

    black bean and corn waffle on a small plate topped with a sunny side up egg and cilantro and a side of lime
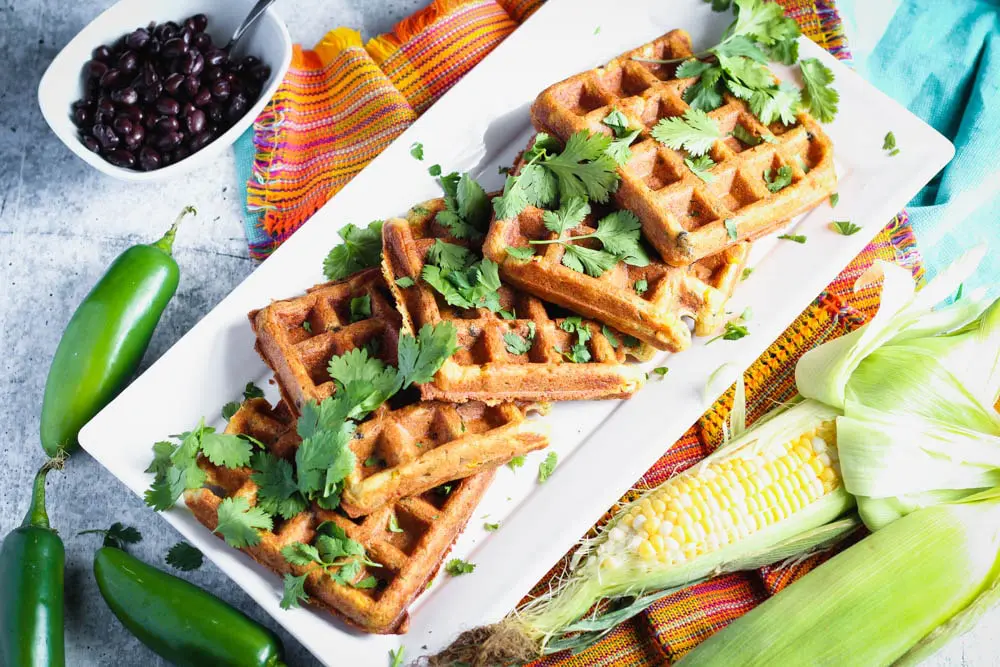
    a long rectangular plate of black bean and corn waffles topped with cilantro and a small bowl of black beans on the side

    Black Bean and Corn Waffles are a delightful combination of tender waffles and spicy Latin flavors. There are so many options to garnish these bad boys. A fried egg, avocado, lime, hot sauce, butter or syrup are just a few of your options. You could also take your brunch game to new heights by combining my Braised Salsa Verde Pork recipe from last week and combining it with these waffles!

    raw black bean and corn waffles on the waffle iron
    cooked black bean and corn waffles on the waffle iron

    That’s actually how this recipe was originally created. When I was asked to write a few new recipes for a feature in Edible OKC earlier this year, I immediately knew I wanted to include a breakfast/brunch option. I also wanted to include a nod to Latin flavors in my chosen recipes to represent my South Texas heritage.

    After some brainstorming, I decided a black bean waffle could be a fun idea. Fast forward through multiple iterations later, and you have the recipe I’m bringing to you today.

    The black beans give a wonderful flavor and hardiness to the dish that makes it filling enough for any meal of the day, but the waffle needed some freshness to lighten up the recipe. Me personally, I never tire of corn. During the summer when corn has its peak flavor, I swear we eat it almost every other day!

    This recipe is so good with fresh corn cut from the cob, but if it’s not in season well-drained frozen corn can be substituted.

    When I was brainstorming of what else we should add to the waffle to keep the Latin flair but brighten up the dish, corn and cilantro were my first two obvious additions.

    The corn adds a nice touch of sweetness to the waffle and gives a textural contrast to balance the denser quality of the black beans. I also keep the waffles light in texture by separating the eggs, beating the egg whites to stiff peaks and folding into the batter just before cooking.

    Anytime I add cilantro to a recipe, the next ingredient that comes to mind is jalapeno. I like the added spice in this dish, but feel free to omit it if you have spice-sensitive eaters in your crew. It’s not just the heat that I like though. Jalapenos have a distinct, green or grassy flavor that is a great complement to the other ingredients in this recipe.

    black bean and corn waffle on a small plate topped with a sunny side up egg and cilantro and a side of lime

    As a stand-alone dish, Black Bean and Corn Waffles are packed with flavor, and you can take them in so many different directions. If you want the fully loaded version like I have pictured here, you’ll need to include my Braised Salsa Verde Pork which is a super easy, Crock Pot recipe that you can put together the night before.

    Top the waffle with a heaping pile of green pork, a sunny side up egg, cilantro, cotija cheese, hot sauce, avocado and a drizzle of agave nectar for the loaded version. 

    black bean and corn waffle on a small plate topped with a sunny side up egg and cilantro and a side of lime

    PHEW! That’s a mouthful, but don’t be intimidated. The only additional cooking required for a pile of epic garnishes is cooking the egg. I’ve included my technique for a perfect sunny side up egg in the recipe below if you don’t make them often.

    If you’re thinking, “shit, that’s too much work,” just know that these waffles are just as delicious, and filling I might add, with a smear of room temperature butter and a drizzle of syrup of your choice. It may sound strange, but Black Bean and Corn Waffles with the traditional butter and syrup topping are the perfect sweet and savory combination.

    black bean and corn waffle on a small plate topped with a sunny side up egg and cilantro and a side of lime

    Black Bean and Corn Waffles are just the excuse you need to have breakfast at any damn time of day you please! I’ve taken my go-to light and fluffy waffle batter and taken it a whole new savory direction. Filled with corn, black beans, and plenty of spice, these waffles will have you daydreaming of all the delights you could put in your next waffle creation.

    Try this recipe out along with my Braised Salsa Verde Pork and let me know what you think of this extraordinary brunch combo!

    Helpful Utensils

    cuisinart waffle maker

    Belgian Waffle Maker
    A Waffle Maker is such a fun addition to your kitchen! Traditional waffles are great, but there are endless other possibilities. 

    aqua Kitchenaid Artisan stand mixer

    Kitchen Aid Stand Mixer
    A stand mixer is one of the most worthwhile investments you can make in your kitchen. It makes baking of any kind a pleasure.

    a long rectangular plate of black bean and corn waffles topped with cilantro and a small bowl of black beans on the side
    Print Recipe
    5 from 2 votes

    Black Bean and Corn Waffles

    Light and fluffy waffles filled with fresh corn, black beans and plenty of Latin spice! Served with the traditional toppings of butter and syrup or as a fully loaded brunch dish, these waffles are for breakfast anytime. If you love a sweet and savory flavor combo, this recipe is for you!
    Prep Time20 minutes mins
    Cook Time15 minutes mins
    Course: Breakfast, brunch
    Cuisine: American, Mexican
    Servings: 12 waffles (varies with size)

    Ingredients

    Waffles

    • 2 eggs separated
    • 1.5 C buttermilk
    • ⅓ C butter melted and cooled
    • 1 and ¼ C all-purpose flour
    • ½ C yellow cornmeal
    • 1 Tb white sugar
    • 2 teaspoon baking powder
    • 1 teaspoon baking soda
    • 1 teaspoon cumin
    • ½ teaspoon garlic powder
    • 1 teaspoon coriander
    • 1 teaspoon kosher salt
    • ¼ teaspoon ground black pepper
    • 1 C canned low sodium black beans drained and rinsed
    • 1 C corn kernels*
    • ¼ C cilantro
    • 1 jalapeño

    Garnish

    • eggs
    • lime
    • sour cream
    • queso fresco or cojita
    • agave nectar
    • butter room temperature
    • hot sauce
    • cilantro roughly chopped

    Instructions

    • Separate the egg whites from the yolks and place whites into a small mixing bowl and the yolks into a large liquid measuring cup. Whip the egg whites with a hand mixer until they reach stiff peaks. Set aside.
    • To the yolks, add the buttermilk and melted butter and whisk to combine. In a large mixing bowl, combine the flour, cornmeal, baking powder, baking soda, sugar, salt, black pepper, cumin and coriander. Mix well to combine.
    • Using a stand mixer with a paddle attachment or by hand, add the yolk mixture to the dry ingredients and combine just until there are no visible dry ingredients left in the batter. A couple of lumps are okay at this stage.
    • Remove the stem, seeds and ribs from the jalapeño and finely mince the pepper. Rinse the canned black beans well and strain off any remaining liquid. Roughly smash 1C of the beans using a potato masher. Remove the corn from the cob if using fresh corn. Finely chop the cilantro. Add the beans, jalapeño, corn kernels and cilantro to the waffle batter and fold the mix together by hand with a spatula.
    • Once the ingredients are well combined, gently fold in the beaten egg whites. Try to not overwork the batter but be sure there aren't any pockets of egg white in the mix.
    • To cook, heat your waffle maker to medium-high heat. Add a heaping ½ C of batter for each waffle (for a 4-waffle iron) and continue to cook through the batter in batches. You can keep the waffles warm in an oven set to 200 degrees while you finish or eat the waffles fresh from the maker and make the remaining batter after you eat.

    To serve with "Fully Loaded"

    • For a sunny side up egg, heat a nonstick pan over medium-low heat and add about 1 Tb of butter per egg. Crack as many eggs as needed into the pan. Season the eggs with salt and pepper to taste.
    • As the egg white starts to cook, gently move the egg white to expose very small spots of the pan underneath and then allow the uncooked eggs whites to fill the gap. Repeat this process all around the egg white. and cook for a couple of minutes or until the whites are cooked but the yolks are still very soft and runny.
    • Make the lime crema by combining ½ C of sour cream with 1 Tb of lime juice and a pinch of salt.
    • Start the plate with two hot waffles and lightly butter each waffle. Drizzle the waffles with agave nectar to suit your preference for sweetness. Next layer on the Salsa Verde Braised Pork, being sure to include some of the cooking liquid over the pork.
    • Sprinkle the pork with crumbled cojita then top the dish with an egg, a sprinkle of chopped cilantro and a dash of hot sauce. Serve with lime crema on the side.
    • Feel free to exclude any of the garnishes that don’t suit your taste.

    Notes

    *If corn on the cob is in season or looks fresh at the store, use fresh kernels cut from the cob. Otherwise, frozen is fine. Just thaw and drain any excess liquid before using.
    ** Leftover waffles can be frozen in a single layer and reheated in a toaster oven or oven until warm and crisp.

    Braised Salsa Verde Pork Tacos

    June 16, 2019 by Hailey 8 Comments

    braised salsa verde pork tacos on flour tortillas topped with cilantro and diced avocado
    closeup shot of braised salsa verde pork tacos on flour tortillas topped with cilantro and diced avocado

    Braised Salsa Verde Pork is a simple crockpot dinner that is completely set it and forget it! Rich pork shoulder is cooked until fall-apart tender in a homemade salsa verde that is a little bit spicy and super fresh. You can use your pork verde in so many different ways! The options are almost endless.

    When featured in a simple taco like the recipe I have included here, Braised Salsa Verde Pork becomes a quick weeknight dinner. Next week, I’ll show you a super fun brunch recipe that utilizes the same delicious pork. But don’t let me limit your imagination. Quesadillas, burritos, breakfast tacos, taco salad, or flautas would all be a great use for this recipe.

    I f*cking love me some pig. Pork is my second favorite protein (chicken is my numero uno if you’re curious…I know, very basic bitch of me). 

    I prefer pork to beef in any braised or slow-cooked recipe. In my opinion, pork maintains a perfectly succulent texture after slow cooking that comes from the glory that is pork fat.

    I trim off a lot of the fat cap from my boneless pork shoulder before searing so that the finished pork isn’t too fatty but be sure to leave some behind. That’s where all the flavor is, and it’s what gives you a moist and fall-apart tender finished product.

    Speaking of flavor, let’s take a moment to discuss the importance of searing the meat well before putting it in the crockpot. Whatever you do, don’t you dare skip this step! It’s really the only cooking required in the entire recipe, so do it, damn it.

    braised salsa verde pork tacos on flour tortillas topped with cilantro and diced avocado

    Before searing, also be sure to season the entire outside of the pork shoulder well with salt and pepper. This is a big piece of meat. You want enough seasoning to penetrate throughout. Also, be sure to sear on every single side. That usually means 3-4 turns one way and then the other two remaining sides.

    By sealing up all the edges with a hard sear, you lock in juices, fat, and FLAVOR. This picture should give you an idea of the color you should look for after searing.

    • seared pork shoulder on a plate
    • seared pork shoulder on a plate

    The salsa verde that the pork is braised in is super easy to make and requires no cooking!

    cooked, braised salsa verde pork being shredded with tongs in a large yellow bowl

    I love this recipe for hot summer nights because I don’t have to stand over a stove to prepare it! You just throw all the ingredients into a food processor and process until smooth. Pour the salsa over the seared pork, and you’re in business.

    Time is another required ingredient in this recipe. You want to braise the pork for a minimum of 12 hours or up to 18. It may seem like a lot, but if you put it in the crockpot before bed, it’s ready in the morning. This meat can easily be made in advance and kept for up to 3 days in the fridge before shredding.

    overhead shot of braised salsa verde pork tacos on flour tortillas topped with cilantro and diced avocado

    For unctuous, slow-cooked meat like my Braised Salsa Verde Pork, I like to keep my taco toppings simple and fresh. Cilantro is a must in my taco game. Diced white onion, fresh lime juice, crumbled cotija, and avocado complete these humble Green Pork Tacos.

    You could easily add sour cream, salsa, or guacamole if that’s what you’re feelin’ that night. My Creamy Avocado Sauce for Tacos would also be perfect!

    There are so many fun possibilities for how to use this Braised Salsa Verde Pork recipe. I can’t wait to here how you use it! Let me know what you think of the recipe. Oh, and stay tuned for another fun recipe include my green pork recipe next week!

    Helpful Utensils

    food processor

    11-Cup Cuisinart Food Processor

    If you don't have a food processor, check out the link above. You need this piece of equipment in your kitchen!

    closeup shot of braised salsa verde pork tacos on flour tortillas topped with cilantro and diced avocado
    Print Recipe
    3.50 from 4 votes

    Braised Salsa Verde Pork Tacos

    Boneless Pork Shoulder braised in a homemade salsa verde that is a little bit spicy and super fresh. This recipe is so easy. It's a true Crock Pot recipe that is set it and forget it! You can make the pork in advance and use it in so many different ways. Tacos, quesadillas, burritos, and more can all be made with this simple green pork.
    Prep Time15 minutes mins
    Cook Time12 hours hrs
    Course: Main Course
    Cuisine: American, Mexican
    Servings: 12 small tacos

    Ingredients

    • 3.0-3.5 lb pork shoulder roast
    • 3.5 teaspoon kosher salt divided
    • 1 teaspoon coriander
    • 1 teaspoon cumin
    • 1 teaspoon chili powder
    • 2 bay leaves
    • 1 teaspoon black pepper
    • 2 large or 3 small jalapeños
    • 2 green bell peppers
    • 1 poblano pepper
    • 1 yellow onion
    • 2 cloves garlic
    • 1 C chicken stock
    • 1 bunch cilantro
    • 1 Mexican beer such as Corona or Dos Equis

    Garnish for Simple Green Pork Tacos:

    • flour or corn tortillas
    • cilantro roughly chopped
    • avocado diced
    • cojita cheese crumbled
    • white onion diced
    • lime wedges

    Instructions

    • Trim the pork shoulder to remove any thick layer of fat. You want fat on the pork so definitely don’t trim it all, but you want the flavors to penetrate the meat so if there is a thick fat cap, trim it down to show the meat.
    • Season the pork shoulder on all sides with 1 teaspoon black pepper and 2 teaspoon kosher salt. Heat a heavy bottomed sauté pan over medium high heat. Add a drizzle of olive oil and place the pork shoulder in the hot pan. Cook on all sides for about 2-3 minutes each or until well browned all the way around.
    • While the pork is searing, make the salsa verde. Core and cut the bell peppers and poblano into 2-inch pieces. Remove the seeds and stem from the jalapenos and cut into 1-inch pieces. Roughly chop the onion and smash the garlic cloves. Roughly chop the cilantro.
    • Place the peppers, onions, garlic cloves and cilantro in a food processor with the remaining 1.5 teaspoon of salt, cumin, coriander, and chili powder and puree until smooth or when the peppers are very finely minced. If you don't have a food processor, I recommend purchasing one like the Cuisinart I've linked to above. It's an essential utensil in my kitchen.
    • Pour the salsa verde into a crock pot and add the beer, chicken stock, and bay leaves. Mix with a wooden spoon. Add the seared pork shoulder. Turn the crock pot heat on to low and cook for at least 12 hours or up to 18 hours. Turn the pork over in the Crock Pot roughly halfway through cooking. No need to be exact, but you want both sides to have time to simmer in the salsa verde. The pork will be fall apart tender when cooked.
    • Once cooked, remove the pork roast and shred in a large mixing bowl. Add about ½ of the salsa verde cooking liquid to the pork and mix to combine. Season to taste with salt.

    Notes

    To recreate the tacos I've pictured here, place a generous portion of pork in a tortilla and top with cilantro, avocado, cotija onion, and a squeeze of fresh lime.

    New Orleans BBQ Shrimp and Cheesy Grits

    June 8, 2019 by Hailey 2 Comments

    Black bowl filled with bright yellow grits, topped with shrimp smothered in a new orleans style buttery barbecue sauce and tossed with green onions, red bell peppers and mushrooms
    Black bowl filled with bright yellow grits, topped with shrimp smothered in a new orleans style buttery barbecue sauce and tossed with green onions, red bell peppers and mushrooms

    I could have called this recipe simply Shrimp and Grits, but that would be undermining the complexity and downright deliciousness of the recipe. Instead, let me present to you, New Orleans Style BBQ Shrimp and Cheesy Grits. Plump shrimp are marinated in a rich, New Orleans style BBQ sauce that is filled with bold and spicy flavors. The shrimp are served on a bed of sinfully rich, creamy, cheesy grits that will convert you to a grits-lover.

    Now the internet is filled with different iterations of Shrimp and Grits, so why then did I choose to pile on and add to the recipes already out there? Well, I thought I could create a uniquely tasty version of Shrimp and Grits based on my Southern experiences, but I also wanted to pay homage to a dish that is close to my heart.

    I say that Shrimp and Grits is close to my heart because the dish originated in the low country of South Carolina and can be found all over Charleston, one of my favorite cities of all time. It’s a city dripping in history, culture, and f*cking AMAZING food.

    Black bowl filled with bright yellow grits, topped with shrimp smothered in a new orleans style buttery barbecue sauce and tossed with green onions, red bell peppers and mushrooms

    Be sure to also check out my Buttermilk Biscuits recipe which was also inspired by my time in Charleston.

    Those characteristics are also part of the fabric of one of my other favorite cities, New Orleans. I spent a summer living in New Orleans while I interned with the Brennan family. I could write an entire post simply about my experiences that summer, but for the sake of time, I’ll just say that food was central to my time in New Orleans.

    New Orleans Style BBQ Shrimp was one of my absolute favorite things to eat for lunch when I worked in the French Quarter.

    ingredients for new orleans bbq shrimp and cheesy grits

    What is New Orleans style barbecue?

    The style of Nola BBQ Shrimp is nothing like smoky, red sauce barbecue. New Orleans BBQ sauce is packed with plenty of herbs, spices, lemon and garlic, and the most important ingredient of all, butter; lots and lots of butter.

    My shrimp and grits recipe incorporates those BBQ flavors with a couple of unexpected twists. I include Worcestershire, soy and oyster sauce in my shrimp marinade for added umami, or savory notes. There is also plenty of bacon and mushrooms in my shrimp and grits which is unique to many recipes.

    shrimp cooking in a saute pan with an orange handle and a bowl of sauteed veggies on the side

    I’ve never had grits. Are there other options for serving?

    There really is nothing more appropriate or delicious to serve with shrimp with than grits. It honestly would be like putting meatballs and red sauce with rice to try to substitute a different starch here. Even if you’ve never had grits before, or worse yet, have had poorly prepared grits, I promise you, you will LOVE my cheesy grits.

    ingredients for cheesy grits

    The secret to grits is plenty of dairy to bring the richness and flavor grits naturally lack.

    My recipe includes tons of fresh shredded cheddar-jack cheese, heavy cream for the right texture, and a bit of buttermilk for a nice tangy addition. 

    saucepan filled with bright yellow corn grits being whisked

    For those of you who have made grits before, you might be thinking, “Buttermilk in my grits?!?” It may sound crazy, but buttermilk is delicious in cheesy grits. Buttermilk adds a creamy texture and tangy flavor to the grits which is a perfect balance to all the richness from the heavy cream and cheese.

    Don’t try to use quick or instant grits for Shrimp and Grits

    One mistake you should avoid making is using instant or quick grits. They are just not the same as stone ground grits. I’m all about a shortcut, but this is not worth it for what you sacrifice in flavor. Stick with stone ground grits for this shrimp and grits recipe.

    orange saute pan filled with cooked shimp, green onions, bell peppers and mushrooms with a bowl of bright yellow grits and small bowls filled with bacon, green onions and lemon zest on the side

    Cajun seasoning recommendations

    The shrimp marinade and the cheesy grits both include Cajun seasoning. If you’ve ever shopped the spice aisle for Cajun or Creole seasoning, you already know that there are a lot of options out there.

    Saute pan filled with bright yellow grits, topped with shrimp smothered in a new orleans style buttery barbecue sauce and tossed with green onions, red bell peppers and mushrooms

    Two of my favorite Cajun spices are Paul Prudhomme’s Magic Seasoning Blend and Tony Chachere‎ No Salt.

    Prudhomme’s is my absolute favorite. It’s subtle enough that you can add other flavors to it, but the flavors are strong enough to stand on their own too.

    Paul Prudhomme’s Magic Seasoning Blend is not widely available as Chachere’s though, so feel free to use it instead. Go for the No-Salt version though so you can control how much salt is in the recipe. The original version is super salty in my opinion.

    Is marinating the shrimp required for good Shrimp and Grits?

    It’s not required, but it will make a significant difference in the flavor your shrimp have. The marinade serves as the sauce for the shrimp and grits so you’re going to have to make it either way, and the added two hours of marinade time add an incredible amount of flavor to the shrimp.

    raw shrimp being tossed with marinade in a clear glass bowl

    Shrimp can sometimes lack in the flavor department, so I think marinating makes this dish so much tastier. Also, you don’t have to make the marinade in any sort of electronic gadget even though I use a blender.

    The marinade will taste just as good if you whisk it by hand instead of blending, so don’t let the recipe’s call for a blender scare you away!

    Saute pan filled with bright yellow grits, topped with shrimp smothered in a new orleans style buttery barbecue sauce and tossed with green onions, red bell peppers and mushrooms

    New Orleans Style BBQ Shrimp and Cheesy Grits was a recipe I originally created for my feature in the January/February issue of Edible OKC, but it has now become a regular request by my family.

    Black bowl filled with bright yellow grits, topped with shrimp smothered in a new orleans style buttery barbecue sauce and tossed with green onions, red bell peppers and mushrooms

    I even made it for my mom for Mother’s Day. That’s how special the flavors in this dish are! Try out the recipe to treat your family and friends to a restaurant-quality comfort food classic.

    Helpful Utensils

    black cast iron skillet

    10-inch cast iron skillet- perfect for cooking any Southern classic recipe

    Shun paring knife with black handle

    Shun Paring Knife- the knife you need for delicate jobs like de-veining shrimp

    Black bowl filled with bright yellow grits, topped with shrimp smothered in a new orleans style buttery barbecue sauce and tossed with green onions, red bell peppers and mushrooms
    Print Recipe
    5 from 1 vote

    New Orleans BBQ Shrimp and Cheesy Grits

    Shrimp smothered in a New Orleans Style BBQ sauce served over cheesy, creamy grits. New Orleans BBQ sauce includes plenty of butter with lemon, garlic, herbs and spices.
    Prep Time30 minutes mins
    Cook Time30 minutes mins
    Marinamede Ti2 hours hrs
    Course: Main Course
    Cuisine: American
    Servings: 6

    Ingredients

    BBQ Shrimp Seasoning (makes about ½ C)

    • 1 Tb ground black pepper
    • 1 Tb cayenne pepper
    • 1 Tb kosher salt
    • 1 Tb Cajun seasoning
    • 2 Tb Italian seasoning
    • 2 teaspoon onion powder

    BBQ Shrimp

    • 2 cloves garlic smashed
    • 2 Tb BBQ Shrimp Seasoning (see above) see recipe above
    • 1 Tb oyster sauce
    • 1 Tb soy sauce
    • 1 Tb Worcestershire sauce
    • 2 Tb honey
    • 1 lemon
    • ¼ C butter melted and cooled
    • 4 slices thick cut bacon
    • 8 oz mushrooms*
    • 1 red bell pepper
    • 6 green onions divided
    • ½ C finely diced celery hearts
    • 1½ lb shrimp 16-20 size; peeled, deveined, and tail removed
    • 1 14.5 oz can petite diced tomatoes drained

    Cheesy Grits

    • 3½ C chicken stock
    • 1 C stone ground or old fashion grits
    • ¾ C heavy cream
    • ½ C buttermilk
    • 1 C shredded colby jack or cheddar cheese
    • reserved green onions
    • ½ teaspoon kosher salt
    • ground black pepper to taste
    • 1 teaspoon Cajun seasoning

    Instructions

    To make the seasoning

    • Combine all of the ingredients. The seasoning will keep for up to 12 months in an airtight container.

    To marinade the shrimp

    • Zest the lemon and reserve for garnish. Juice the lemon and reserve 2 Tb for the marinade.
    • Chop the garlic into ¼-inch pieces and combine the garlic cloves, 2 Tb BBQ Shrimp Seasoning, oyster sauce, soy sauce, Worcestershire sauce, 2 Tb lemon juice, and honey in a blender or food processor. Blend the mixture on high speed until smooth.
    • With the blender or processor on, slowly drizzle in ¼ C of melted, cooled butter. You're looking for an emulsification, like salad dressing.
    • Once the marinade has emulsified, add the marinade and shrimp to a mixing bowl. Toss to coat the shrimp in marinade. Cover the bowl in plastic wrap and place in the fridge for at least 2 hours or up to 8 hours.

    To make shrimp

    • Core the bell pepper and slice into thin strips. Cut the strips into 1-inch pieces.
    • Finely slice the green onions, separating the green and white portions. Reserve the green portions- half for garnish and half for the grits. Finely dice the celery including any leaves.
    • Start by placing 4 strips of bacon in a cold, large nonstick pan. Turn the heat on to medium and allow the bacon to cook until totally crisp, turning as needed.
    • Turn off the heat and remove the cooked bacon. Place the strips on a paper towel to soak up any excess grease. Reserve 2 tablespoons of bacon fat and discard the rest.
    • Prepare the mushrooms by wiping clean with a damp cloth, removing any tough part of the stem and slicing into ½-inch pieces.
    • Add 2 Tb of bacon drippings back to the same large nonstick pan used to crisp the bacon. Turn the heat onto medium-high. Add the mushrooms and sauté for about 3 minutes.
    • Once the mushrooms start to brown, add the peppers, celery, and white portion of the green onions. Saute for another 5 minutes or until the vegetables are soft. Once cooked, pour the mushrooms and vegetables into a bowl and set aside.
    • Turn the heat down to medium and add a drizzle of olive oil along with the shrimp and marinade to the pan. Cook for about 2-3 minutes until the shrimp becomes firm and the marinade starts to boil.
    • Turn the shrimp over and add the drained can of diced tomatoes and mushroom-vegetable mix to the pan. Cook for another 5 minutes or until the vegetables and tomatoes are warm.

    To make grits

    • Bring chicken stock to a boil in a large saucepan. Once the stock is rapidly boiling, add dry grits and stir. Reduce the heat to low and continue to cook for about 5 minutes, whisking constantly.
    • Once the grits have thickened to about the consistency of pudding and the mix starts to pull away from the sides, add the heavy cream and buttermilk. Cook for about 10 minutes, whisking constantly.
    • Add the cheese, reserved green portion of the scallions, salt, pepper and Cajun seasoning. Stir to combine and cook until the cheese is totally melted or about 2 minutes.
    • Keep the grits warm on the very lowest heat setting, stirring occcassionally. If the grits get too thick, add a touch of chicken stock to loosen the mix.

    To serve

    • Chop the cooked bacon into small pieces. Serve with about 1 C of grits topped with shrimp and sauce, green onions and crumbled bacon. Finish with lemon zest.

    Notes

    *You can use any type of mushroom you like in this recipe. I've used baby portabella (or creminis as they are sometimes called), beech, and oyster before, but I generally avoid white button mushrooms. They lack flavor and tend to have a spongy texture. 

    Frequently Asked Questions

    Can I use frozen shrimp?

    Yes. Just be sure to thaw before marinading.

    What size shrimp should I use?

    I typically use 16-20 count shrimp (meaning there are 16-20 shrimp to a pound), but you can use whatever size you like.

    Can I use instant/quick grits?

    No. I only recommend stone ground grits for this recipe.

    What type of Cajun seasoning should I use?

    I like Paul Prudhomme's Magic Seasoning Blend or Tony Chachere No Salt.

    I don't have time to marinade the shrimp. Can I still make the recipe?

    Yes, but every minute the shrimp spend in the marinade adds to the flavor of the finished dish. Even just 30 minutes in the marinade would be great.

    Chocolate Delight aka Chocolate Junk

    June 2, 2019 by Hailey 8 Comments

    Chocolate Cheesecake Trifles layered in individual trifle dishes served with fresh raspberry and mint as garnish
    Chocolate Cheesecake Trifles layered in individual trifle dishes served with fresh raspberry and mint as garnish

    This may be the post I’m most excited about sharing since some of my very first recipes. Chocolate Junk is a dessert that speaks directly to my heart. I’ve mentioned the decadent delight the is “Junk” previously on the blog when I featured my Strawberry Junk recipe.

    It’s time for the real crowd favorite at my house to take center stage. Chocolate Junk is what one might also describe as a Chocolate Cheesecake Trifle.

    Call it what you want. It’s f*cking delicious.

    Chocolate Junk is easily my favorite dessert of all-time. When I was a kid and my mom would make it for us, I would get up early to eat it for breakfast in addition to dessert the night before. I wanted to be damn sure I got more than my fair share of it.

    I’m pretty sure the recipe for Chocolate Junk is like a horse of many colors. It’s a dessert found all over the South with different names and slightly varied ingredients.

    chocolate cheesecake trifles being made; trifle dishes filled with the first two layers which are shortbread crust and the cheesecake filling
    chocolate cheesecake trifles being made; trifle dishes filled with the first three layers which are shortbread crust, the cheesecake filling and chocolate pudding

    One thing is for sure though. It’s always an easy-to-make, crowd-pleasing layered dessert. Of the different Junks I’ve encountered, the common layers include cookie/cake, custard, and whipped cream.

    From there, the additions are endless. I could probably make a blog solely dedicated to creating the latest and greatest Junk, but for now, I’ll stay on topic.

    Chocolate Junk specifically is formed by first creating a buttery, crumbly shortbread pecan crust. On top of that is a fluffy no-bake cheesecake layer and then rich chocolatey pudding. Whipped cream is spooned over the top as the final layer.

    Now my mom’s original recipe always made me weak in the knees as a kid, but as I’ve gotten older, I’ve played with the recipe to up the richness and quality of ingredients. The recipe featured here today is the result of countless tweaks and experiments, and I’m proud to say it shows in the exceptionally tasty end result.

    The biggest changes I made to the original recipe were to double the amount of cream cheese in the cheesecake layer and make my chocolate pudding from scratch. The original cheesecake layer is mostly whipped cream with some mild cream cheese flavors.

    closeup shot of Chocolate Cheesecake Trifles layered in individual trifle dishes served with fresh raspberry and mint as garnish

    I wanted to switch that ratio to a lot of cream cheese flavor and a little added fluffiness from the whipped cream. I mean, let’s be real, if you follow my recipes often you know that I’m totally obsessed with cream cheese. That’s the real reason I doubled the cream cheese, and I stand behind that decision.

    Making the chocolate pudding from scratch is the biggest improvement to this recipe. The original recipe calls for instant pudding, which is fine in a pinch, but the flavor the Chocolate Junk gets from taking the time to make custard from scratch is so worth it!

    It’s also surprisingly easy to make. In total, it takes less than 15 minutes. I also really like making my own chocolate pudding so I can seriously increase the punch of chocolate in the recipe.

    I like using a high quality dark cocoa powder and bittersweet chocolate chips in my pudding recipe so that the taste isn’t just sweet; it’s earthy, rich, bitter, AND sweet! 

    overhead shot of Chocolate Cheesecake Trifles layered in individual trifle dishes served with fresh raspberry and mint as garnish and fresh flowers in the background

    My love for Chocolate Junk runs so deep in fact that I decided to feature this recipe when I was recently chosen to present some recipes in a local magazine. Edible OKC was gracious enough to include this recipe in their January/February 2019 issue.

    I knew immediately when they asked me for recipes to include that I wanted to share Chocolate Junk. It’s so authentic to my cooking and connected to my family memories, but I will say that when made in a 9”x13” baking pan, as it usually is, it leaves something to be desired from a food photography perspective.

    Chocolate Cheesecake Trifles layered in individual trifle dishes served with fresh raspberry and mint as garnish

    Now, if you’re making this for a casual gathering of family and friends, please make this family-style and keep it movin’! But if you want to dress it up as I have in the photos here, I provided instructions below on how to make it both ways.

    Either way, I like to garnish my Chocolate Junk or Chocolate Cheesecake Trifle for an extra special finish. Finely chopped pecans and dark chocolate shavings are the perfect finishing touch for this humble dessert.

    It is true that something called Chocolate Junk by nature cannot be pretentious or overly complicated, but it sure as hell can be blow-your-mind, decadent, TASTY!

    Helpful Utensils

    Cuisinart Small Food Processor

    4-Cup Food Processor
    A small food processor is a relatively inexpensive piece of kitchen equipment that you'll use again and again. If you don't have one, click the image to purchase one!

    aqua Kitchenaid Artisan stand mixer

    Kitchen Aid Stand Mixer
    It may be an investment piece, but you'll find yourself wondering, "How did I ever cook/bake without one?"

    Chocolate Cheesecake Trifles layered in individual trifle dishes served with fresh raspberry and mint as garnish
    Print Recipe
    5 from 4 votes

    Chocolate Delight aka Chocolate Junk aka Chocolate Cheesecake Trifle

    Chocolate Delight or Junk is an easy-to-make, layered dessert that is pure chocolate decadence. Pecan shortbread crust is the base for layers of chocolate pudding and no-bake cheesecake all topped with whipped cream. This classic summer dessert can be made family-style for a crowd or dressed up as individual trifles. Either way, it's the best summer dessert ever!
    Prep Time30 minutes mins
    Cook Time30 minutes mins
    Chilling Time6 hours hrs
    Course: Dessert
    Cuisine: American
    Servings: 8 servings

    Ingredients

    Shortbread Crust

    • ½ C butter melted
    • 2 Tb white sugar
    • ½ teaspoon ground cinnamon
    • ½ C pecans finely chopped*
    • 1.5 C all-purpose flour
    • ½ teaspoon kosher salt

    Cream Cheese Filling

    • 2 8-oz blocks cream cheese room temperature
    • 1.5 C powdered sugar
    • ½ C heavy whipping cream
    • 1 teaspoon vanilla extract
    • pinch kosher salt

    Chocolate Pudding

    • 2 C whole milk
    • ½ C white sugar
    • ⅓ C good quality cocoa powder
    • 4 teaspoon cornstarch
    • 3 egg yolks
    • 2 teaspoon vanilla extract
    • ¼ teaspoon salt
    • 1 T brewed coffee
    • ½ C semisweet or bittersweet chocolate chips

    Whipped Cream

    • 1.5 C heavy whipping cream
    • ½ C powdered sugar
    • 1 teaspoon vanilla extract

    Garnish (optional)

    • 1 C pecans finely chopped
    • dark chocolate bar

    Instructions

    To make the crust

    • Preheat the oven to 350 degrees.
    • Add sugar, cinnamon, and salt to the melted butter and mix to combine. Add the flour and combine the ingredients with a fork to form large crumbles. Add the finely chopped pecans and continue to mix until the pecans are well incorporated.
    • To make a family style trifle, gently press the crust into the bottom and slightly up the sides of a 9” x 13” baking dish. To make individual trifles, press the crumbles together in a large rectangle shape on a baking sheet.
    • Bake for 20-22 minutes or until golden brown around the edges. Set aside to cool. If making individual trifles, crumble half the crust into roughly half-inch pieces and the remaining half into fine crumbs resembling bread crumbs either in a food processor or by hand.

    To make chocolate pudding

    • Add 1.5 C whole milk, white sugar, and cocoa powder to a medium saucepan and place over medium heat. Bring the mixture to a simmer or until bubbles start to form around the outer edge.
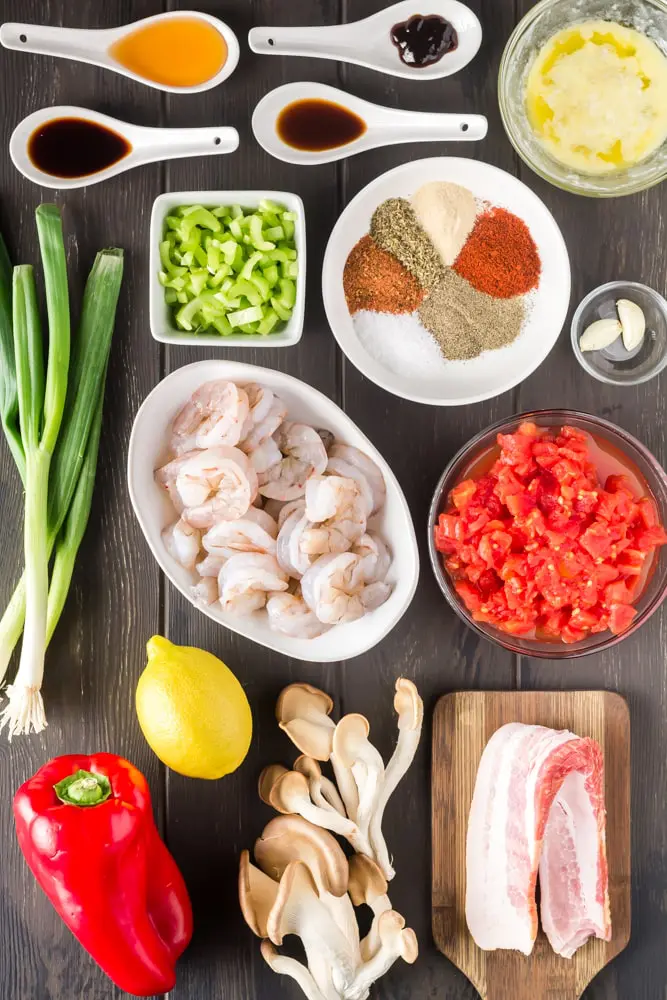
    • In a 4-cup liquid measuring cup, add the remaining ½ C milk, cornstarch, egg yolks, and salt. Whisk well to combine and set aside until the cocoa and milk mix begins to simmer. Once ready, slowly add the hot cocoa mixture to the egg yolks and cornstarch, whisking constantly.
    • Once the two liquids are completely combined, add the liquid back to the saucepan and bring the mixture to a full rolling boil. Boil for approximately 90 seconds or until a thick custard forms.
    • Place the chocolate chips, vanilla and coffee in a small mixing bowl and add the hot custard when ready. Whisk the pudding together until the chocolate chips have completely melted and are well combined.
    • Cover the pudding with plastic wrap so that the plastic is touching the surface of the pudding. If the plastic wrap and pudding are not in contact, a skin will form on the pudding.
    • Chill the pudding in the fridge for about 4 hours or you can jump start the process by placing the pudding in the freezer for one hour followed by an additional hour in the fridge.
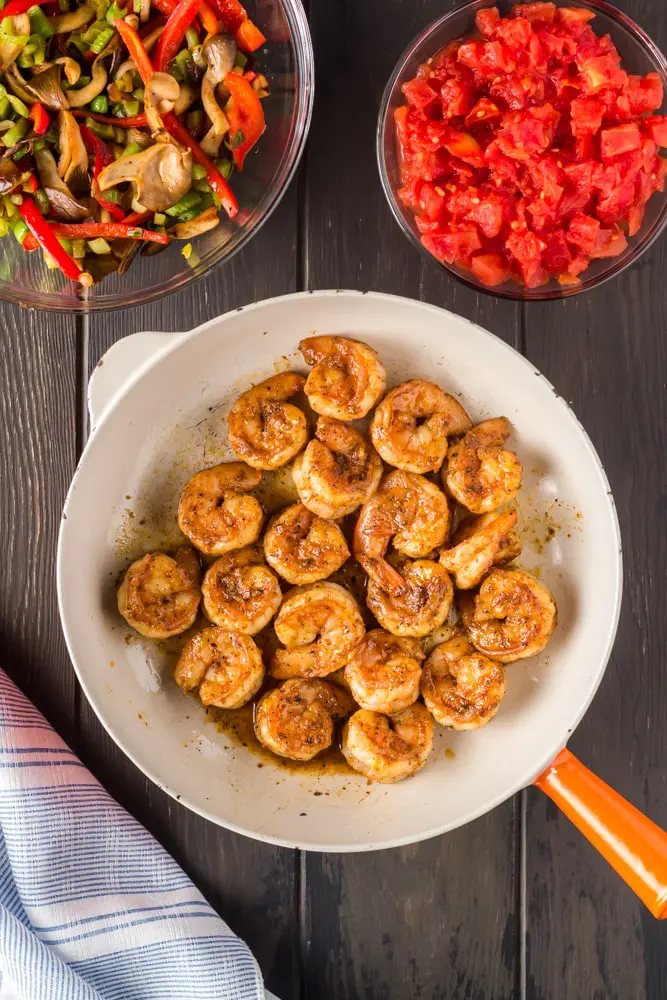
    To make cream cheese filling

    • Place the softened cream cheese into a large mixing bowl. Whip the cream cheese either with a stand or hand mixer on medium-high speed for about 2 minutes or until light and fluffy. Stop the mixer halfway through to scrape down the sides and bottom of the bowl.
    • Once the cream cheese is whipped, add the powdered sugar and mix on low first, increasing the speed once the sugar is combined to medium-high. Whip for another 1 minute.
    • Turn the mixer off and add the heavy whipping cream, vanilla and salt. Turn the mixer back on to low until the cream is combined. Then increase the speed to high and whip for 1 more minute.

    To make whipped cream

    • Add the heavy cream and powdered sugar to a medium mixing bowl. Whip the cream on high speed with a whisk attachment until the cream forms stiff peaks. Last, add the vanilla and whisk for just a few more seconds until the vanilla is incorporated.

    To assemble the trifle(s)

    • The trifle starts with shortbread topped with cream cheese filling then chocolate pudding and, last, whipped cream.
    • If you’re making a family style trifle, you can start by spreading the cream cheese filling across the cooled crust.
    • If you’re making individual trifles, place about 1 inch of crumbs in each mini trifle cup. Start with the finer crumb to fill in the edges and then use the large crumbs after placing an even layer of fine crumb. This will help ensure a clean finish. Then place ¼ C size scoops of cream cheese filling on top of the crumbs and gently spread the filling to the edges of the cups.
    • Next, layer on the chocolate pudding which will be about half the height of the cream cheese filling. For a family style portion, you can place large dollops of the pudding on top and spread to cover the surface. For individual trifles, use about 3 Tb of pudding per cup and spread evenly across the cream cheese filling all the way to the edge.
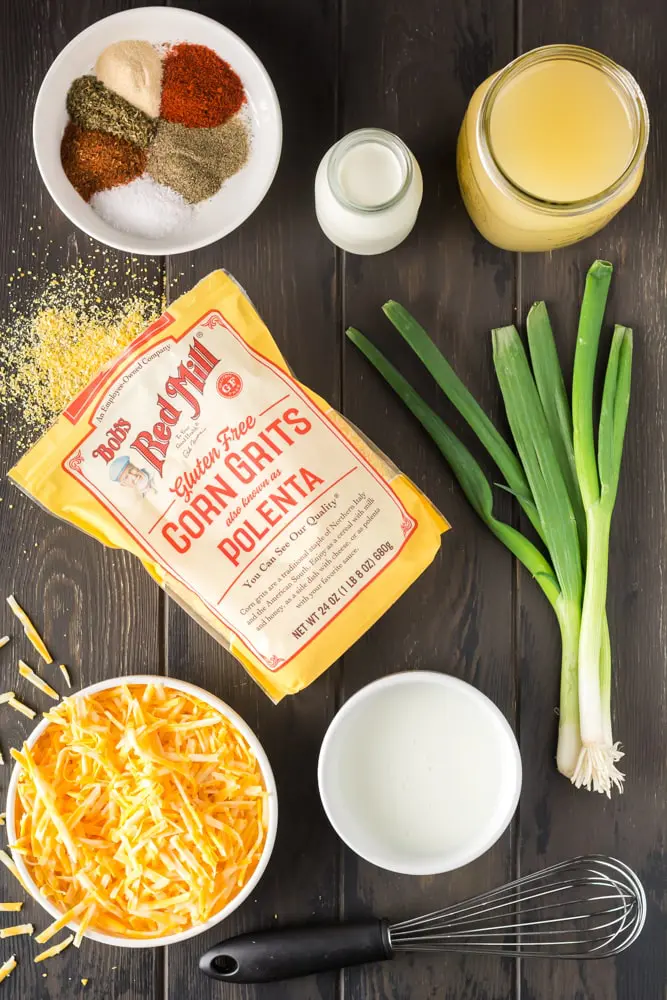
    • The last layer is whipped cream. Spread the whipped cream all the way across the family style trifle or place a dollop on top of each individual trifle, leaving a rim of chocolate pudding showing around the edge. A piping bag is helpful if you’re making individual trifles to keep the glass looking tidy, but it’s not required.
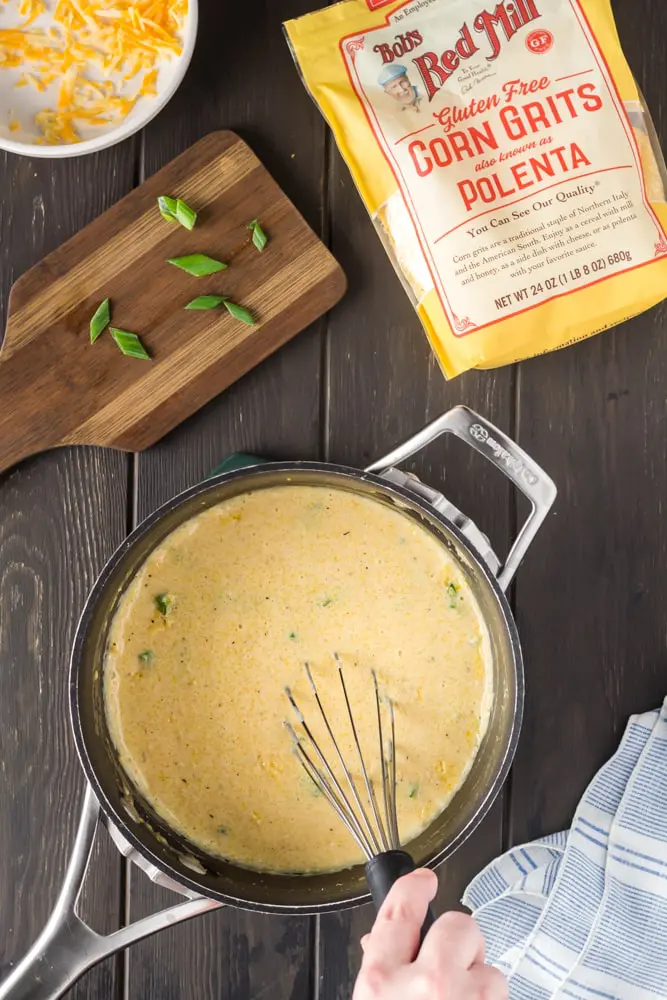
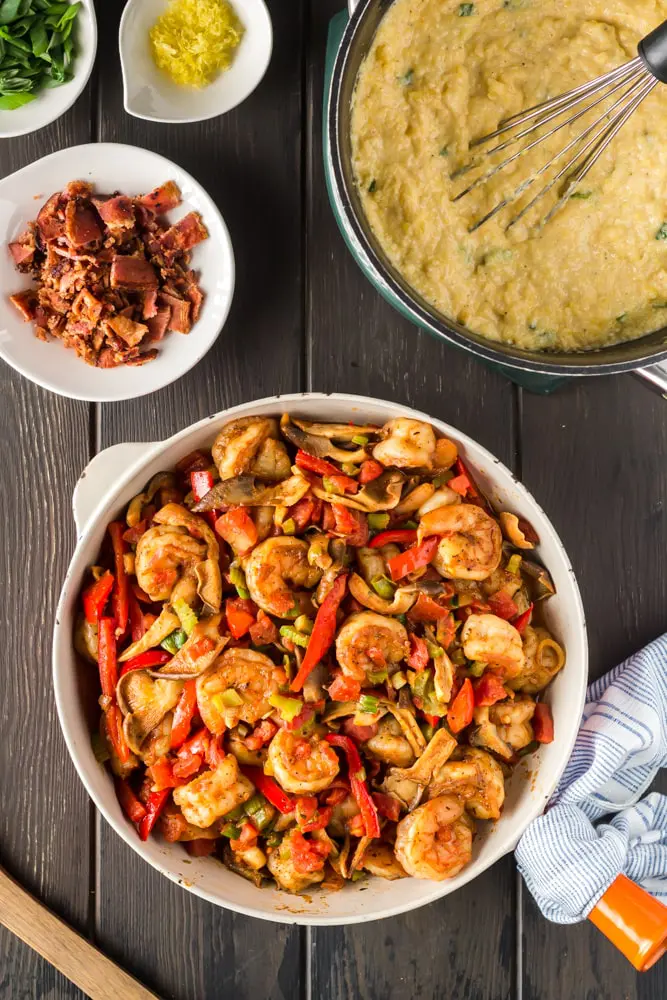
    • Before garnishing, chill the trifle(s) for a minimum of 2 hours or until all the layers are ice cold.
    • The top can optionally be garnished with toasted finely chopped pecans and shaved dark chocolate. To toast the pecans, place the pecans on a baking sheet and place in a 350 degrees oven for about 10 minutes. To shave the dark chocolate, run a vegetable peeler along the edge of the chocolate bar.

    Notes

    *Even if you purchase “chopped pecans” you’ll need to chop the pecans finer than they come. I’d recommend doing so by hand as the pecans can go quickly to a puree in a food processor. You want you pecan pieces to be the size of green peas or smaller.
    The trifles are pictures as individual servings, but the recipe is traditionally made as a family-style dessert served from a 9” x 13” dish. I’ve included instructions to prepare it both ways.

    Pineapple Teriyaki Steak Sandwich with Peppers and Onions

    May 26, 2019 by Hailey 3 Comments

    closeup shot of teriyaki steak and pineapple sliders with shredded cabbage peaking out

    Everyone loves Hawaiian roll sliders, but my Pineapple Teriyaki Steak Sandwich with Peppers and Onions will blow the ham and cheese variety away! These steak sandwich sliders are unlike any steak sandwich you’ve ever had before.

    three teriyaki steak and pineapple sliders on a long rectangular white plate with a pineapple and the sweet chili mayo in the background

    Pineapple Teriyaki Sliders combine steak sandwiches with Asian flavors and sweet pineapple for a dish that everyone will love. This may be blasphemous for a Texas-born woman, but I’m not much of a steak person. Sure, I’ll eat one, but I personally need more flavor to my meal than steak can offer.

    Pineapple Teriyaki Steak Sandwich with Peppers and Onions are just the kind of steak I like. I like my steak spicy with a touch of sweetness, and this recipe fits the bill!

    Ingredients

    The list of ingredients for this recipe may appear lengthy at first glance, but if you like to make Asian food at home, you probably have most of the marinade ingredients in your pantry. The Sweet Chili Mayo Is also optional if you’re not a mayo fan.

    • Marinade
      • Soy sauce
      • Sweet chili sauce- Also called Thai Sweet Chili Sauce or Asian Sweet Chili Sauce.
      • Garlic
      • Chili garlic sauce- This sauce is tangy, spicy and garlicky. I love the Huy Fong brand.
      • Fresh ginger
      • Honey
      • Black Pepper
      • Pineapple juice
    • Steak Sandwich
      • Steak- See my tips below on recommended beef cuts.
      • Hawaiian roll slider buns- Any bun will work, but sweet Hawaiian rolls are great in this recipe.
      • Onion
      • Jalapeno
      • Pineapple Ring
      • Green Cabbage
    • Sweet Chili Mayo
      • Mayo
      • Sweet chili sauce
      • Sriracha hot sauce

    Instructions

    Steak sandwich sliders are easier than you might think to make. The primary steps in the process are:

    1. Marinade the steak.
    2. Cook the steak, peppers, and onions.
    3. Shred the cabbage.
    4. Prepare the sweet chili mayo.
    5. Build the most epic steak sandwich imaginable!
    cast iron skillet with two seared steaks and sliced white onions and jalapenos

    I also love to speed up this recipe by using leftover steak. Oftentimes, I’ll make a double batch of the teriyaki steak, cook all of it together, and save half to make these delightful sandwiches.

    The teriyaki steak is delicious served with simple sides like white rice and veggies. Check out my Perfect Basmati Rice post for the easiest, most fail-proof rice you’ve ever made. The steaks would also be a perfect match with Vegetarian Fried Rice.

    Substitutions

    The marinade for this recipe has some flexibility. If you can't find:

    • ...sweet chili sauce, double the chili garlic sauce and honey in the recipe.
    • ...chili garlic sauce, double the garlic and add 1 Tb of sriracha hot sauce.
    • ...fresh ginger root, use ground ginger instead.

    For anyone who does not enjoy red meat, this recipe would also work well with pork. I recommend thick-cut pork chops as a substitute for steak.

    To cut down the heat in the recipe, the jalapeno can be totally omitted. You could also substitute bell pepper in its place. Also, red cabbage would be a fine replacement for green.

    closeup shot of teriyaki steak and pineapple sliders with shredded cabbage peaking out

    What cut of beef is best for Teriyaki Steak?

    There is no need for expensive steak for this recipe. The steak is marinated in a sweet and spicy Asian infusion that tenderizes the meat while imparting flavor. The recipe card recommends sirloin steak as I find it’s usually one of the least expensive cuts and it’s regularly available.

    You have plenty of other options besides sirloins. Any of the following would make excellent teriyaki steak.

    • Eye of round
    • Ribeye
    • New York strip
    • Flank
    • Hanger
    • Chuck

    If you’re feeling extra adventurous, teriyaki marinades also go well with game meats like venison and elk.

    Storage

    • Serve: Pineapple Teriyaki Steak Sandwich with Peppers and Onions are best served while the steak and veggies are freshly cooked and the sliders are freshly assembled. Do not assemble the sandwiches until you’re ready to eat, or the buns will get soggy.
    • Store: To safely store, all of the components should be put in separate airtight containers and placed in the fridge. Do not cut the steak until you’re ready to serve; steaks should be stored whole. All items will keep for up to three days in the fridge.
    • Freeze: This recipe does not freeze well.
    • Reheat: Only the steak and sauteed peppers and onions need to be reheated. A microwave is recommended to reheat both. Work in 30-second increments so you do not overheat the steak.

    Top tip

    The trick to a juicy steak is letting the steaks rest after cooking, and the trick to a tender steak is slicing against the grain. If you’re thinking, “against the what?!” then think of the steak like a piece of fabric that is woven in one direction. Once you locate the direction of the fibers, turn your knife 90 degrees and get to slicing.

    closeup shot of steak with chef's knife showing the direction of the grain of the meat
    With the grain
    closeup shot of a cooked steak on a cutting board with a chef's knife indicating how to cut against the grain of the meat
    Against the grain

    Check out this video for a demonstration of how to cut meats against the grain.

    closeup of steak in the process of being sliced showing a pink center

    There’s nothing worse than biting into a sandwich and all the contents falling out because the meat isn’t tender enough to bite through. Cut against the grain to avoid this!

    Pineapple Teriyaki Steak Sandwich Sliders have so much flavor in a cute little package. Umami, sweet, spicy, bitter, tropical, salty…the list of flavors in this recipe are almost endless! Try out the recipe and see for yourself.

    Let me know what you think by rating the recipe below.

    Helpful Utensils

    digital thermometer

    Digital Thermometer

    Take the guesswork out of a perfectly cooked steak with a digital thermometer!

    closeup shot of teriyaki steak and pineapple sliders with shredded cabbage peaking out
    Print Recipe
    5 from 1 vote

    Pineapple Teriyaki Steak Sandwich with Peppers and Onions

    Sweet and spicy teriyaki steak layered with sauteed peppers and onion, shredded cabbage, and pineapple makes for a one of a kind steak sandwich. Pineapple Teriyaki Steak Sandwich with Peppers and Onions is a flavor bomb!
    Prep Time15 minutes mins
    Cook Time25 minutes mins
    Marinade Time4 hours hrs
    Course: Main Course, Snack
    Cuisine: American, Japanese
    Servings: 8 sliders

    Ingredients

    Marinade

    • ⅓ C soy sauce
    • ⅓ Thai sweet chili sauce
    • 2 cloves garlic minced
    • 1 Tb chili garlic sauce
    • 1 teaspoon fresh ginger grated
    • 1 Tb honey
    • ½ teaspoon ground black pepper
    • ¼ C pineapple juice*

    Sliders

    • 1 lb sirloin steak
    • 1 teaspoon ground black pepper
    • 8 Hawaiian roll slider buns
    • 1 yellow onion
    • 2 large jalapenos
    • 1 can pineapple rings in juice*
    • ½ head green cabbage

    Sweet Chili Mayo

    • ¼ C mayonnaise
    • 1 Tb Thai sweet chili sauce
    • 1-2 Tb sriracha hot sauce optional

    Instructions

    • Make the marinade by mixing all of the ingredients together in a small mixing bowl. Place the sirloin steaks into the marinade. Massage the marinade around to make sure the steaks are totally covered. Marinade for a minimum of 4 hours or up to 8 hours.
    • Preheat the oven to 375 degrees. Cut the onion into ¼-inch thick strips. Split the jalapenos in half vertically and remove the seeds. Slice into thin strips.
    • Once marinated, remove the steaks from the marinade, blot with a paper towel, and season with black pepper. Allow the meat to sit at room temperature while the oven preheats or about 10 minutes to take the chill off the meat.
    • Place a large cast iron or saute pan over medium-high heat. Add enough olive oil to coat the bottom of the pan. Once the oil is smoking hot, add the steak. Cook for 2 minutes. Turn the steak over. Add the onions and jalapenos to the empty space in the pan and stir to coat in oil.
    • Place the pan into the oven for 10 minutes. Remove from the oven, turn the steaks over and toss the veggies around. Bake for another 10 minutes depending on the thickness of your steaks or until the steaks reach an internal temperature of 145 degrees for a steak cooked to medium.
    • Once the steaks are cooked to the desired temperature, remove the pan from the oven. Take the steaks out of the hot pan to rest for 5 minutes. Leave the veggies in the pan to stay warm.
    • While the steaks are resting, prepare the mayo by mixing together all the ingredients in a small bowl.
    • If you like toasted buns, split the slider buns in half and place on a baking sheet. Place in the preheated oven for about 5 minutes.
    • Remove the pineapple rings from their juice and blot dry with a paper towel. Cut the green cabbage head in half and finely shred one half.
    • Once the steak has rested, thinly slice the steak against the grain (see the blog post and photos above for reference).
    • To make the sandwiches, first layer on the sliced steak then top with sauteed onions and jalapenos and shredded cabbage. Slather the top bun in Sweet Chili Mayo. Top the cabbage with a pineapple ring and the top bun.

    Notes

    * Purchase the pineapple rings stored in juice so you can use the canning liquid in the marinade. If your pineapple rings are stored in syrup, don't add to the marinade.
    Can I use leftover steak?

    Yes, but be sure it's teriyaki marinated for maximum flavor!

    I don't have hours to marinate my steak. Can I still make the recipe?

    Yes, but the longer the steak can marinate, the better. A minimum marinade time is best.

    Chicken Pot Pie Crostata

    May 12, 2019 by Hailey 6 Comments

    three triangular pieces of chicken potpie crostata with a rich brown crust and creamy white chicken filing with flecks of orange from the carrots and green from the peas served on a wooden platter

    three triangular pieces of chicken potpie crostata with a rich brown crust and creamy white chicken filing with flecks of orange from the carrots and green from the peas served on a wooden platter

    Chicken Pot Pie Crostata is everything you love about hand pies and comforting chicken Pot Pie combined into one. All the traditional ingredients including chicken, carrots, celery and onions are bathed in a creamy sauce before being wrapped in flaky pie crust. My Chicken Pot Pie Crostatas also have a unique finishing touch.

    After the crostatas are baked and starting to brown, they are topped with a sprinkle of shredded Fontina cheese because why not?? Melted, browned cheese is one of my favorite things in life so I’m always looking for a chance to incorporate it into a recipe. Chicken and cheese are comfort food 101 in my book.

    Chicken Pot Pie Crostata is somewhere between a Pot Pie and a pizza. What could be wrong with that?!

    I think the pie crust in this recipe instead of pizza dough makes for a much better flavor complement to the creamy chicken filling, but I kept the portability factor of the pizza by going with a crostata instead a more traditional pie dish.

    ingredients for chicken potpie crostata

    What is a crostata?

    If you haven’t heard of a crostata before, you may have heard of a galette. Both are a fancy way of saying free form pie, or a pie made without a pie plate. I love to make them because they always come out beautiful in a rustic way without the fuss of a traditional pie.

    green celery, orange carrots, white onion with cilantro and thyme being diced and prepared fo recipe on a light wooden cutting board

    Store-bought pie crust is a great option, but you can make it from scratch if you prefer.

    With busy weeknights in mind, I made this recipe easy and simple by using store-bought pie dough. My mom is dying inside somewhere as she reads this, but sometimes a store-bought dough is the way to go. Don’t worry mom (or anyone else who would prefer to make their own pie crust), check out my Shepherd’s Hand Pies post for my mom’s amazing pie pastry recipe.

    raw chicken breast on a plastic clear cutting board being cut into one inch chunks

    If you can’t find fontina cheese, you’ve got options.

    If you’re never had Fontina cheese before, this is a great time to try it out. It melts beautifully and has a creamy texture. The flavor is mild but more flavorful than a jack or mozzarella cheese.

    Fontina is slightly sweet with an amazing nutty taste, but it is a bit pricey and can be hard to find. If you can’t find it or don’t want to pay the price, I would recommend smoked gouda, gruyere, or a good quality cheddar cheese

    Diced chicken, carrots, celery, onions and parsley in a black saute pan

    Can Chicken Pot Pie Crostatas be made in advance?

    I would not recommend making the crostatas ahead of time because the crust will become soggy but making the chicken Pot Pie filling ahead of time is a great idea. It will keep in an airtight container in the fridge for up to 3 days. Just add a few minutes to the cooking time if the filling is cold when you start baking your crostatas.

    large black saute pan filled with creamy chicken filling consisting of diced chicken, carrots, peas, celery and onion being stirred with a white spatula

    The filling has to be totally cool before putting it into the pie pastry. The first time I tested this recipe, I was in a bit of a hurry and rushed through this step. The end result was still tasty, but the filling leaked out in several places. Not what you want. If you can, make the filling ahead of time for speedy assembly.

    chicken potpie crostata process shot 1
    chicken potpie crostata process shot 3
    chicken potpie crostata process shot 2
    chicken potpie crostata process shot 4

    What to serve with Chicken Pot Pie Crostatas?

    I love a simple salad with Chicken Pot Pie Crostatas. Cookie and Kate's Little Green Salad is one of my favorite recipes.

    Cooked chicken pot pie crostata sliced into 6 triangular pieces sitting on a round wooden serving platter on a black backdrop with green parsley leaves scattered around

    Chicken Pot Pie Crostatas is the dinner your family and friends will be requesting again and again. The combo of flaky pie crust, creamy chicken filling, and a crisp cheesy topping is just as good as it sounds, and you’ll be delighted with how easy this recipe is to make!

    Try it out and let me know how it goes.

    three triangular pieces of chicken potpie crostata with a rich brown crust and creamy white chicken filing with flecks of orange from the carrots and green from the peas served on a wooden platter
    three triangular pieces of chicken potpie crostata with a rich brown crust and creamy white chicken filing with flecks of orange from the carrots and green from the peas served on a wooden platter
    Print Recipe
    5 from 3 votes

    Chicken Pot Pie Crostata

    Chicken Pot Pie Crostata features a rich, creamy chicken filling wrapped in a flaky pie crust. This recipe is all flavor no fuss and makes a perfect weeknight dinner.
    Prep Time30 minutes mins
    Cook Time45 minutes mins
    Total Time1 hour hr 15 minutes mins
    Course: Main Course
    Cuisine: American
    Servings: 4 servings

    Ingredients

    • 1 lb chicken breasts
    • 2 large carrots
    • 1 small celery heart approximately 4-5 stalks
    • 1 yellow onion
    • 3 Tb fresh parsley
    • ½ C heavy cream
    • ½ C frozen peas
    • 4 sprigs fresh thyme
    • 4 Tb butter divided
    • 1 Tb olive oil
    • 2 Tb all purpose flour
    • 1 C chicken stock
    • 1 teaspoon salt
    • ½ teaspoon black pepper
    • ½ teaspoon celery salt
    • ½ teaspoon onion powder
    • 1 teaspoon garlic powder
    • 1 teaspoon Italian seasoning
    • 2 premade pie dough
    • 2 oz fontina cheese
    • 1 egg

    Instructions

    • Preheat the oven to 425 degrees. Line a sheet pan with parchment paper.
    • Peel the carrots and dice into ¼-inch pieces. Finely dice the celery, being sure to include all of the leaves. Peel, half and finely dice the onion.
    • Remove the thyme and parsley leaves from the stem and roughly chop. Cut the chicken breast into 1-inch chunks.
    • Place 2 Tb butter and 1 Tb olive oil in a large nonstick pan over medium-high heat. Once melted, add the carrots first and cook for 2 minutes. Next, add the chicken breast and cook for 3-4 minutes or until the first side starts to brown.
    • Turn the chicken over and then add the celery, onions, and thyme to the chicken. Cook for about 5 minutes or until the onions and celery are soft.
    • Turn the heat down to medium and add the flour to the pan. Stir to combine. Cook for 2 minutes then add the chicken stock, heavy cream, peas, salt, pepper, celery salt, onion powder, garlic powder, and Italian seasoning. Mix well.
    • Once the sauce has thickened to a creamy, thick consistency (you're looking for thicker than gravy but not quite pudding texture), turn the heat off and add 2 Tb chopped parsley.
    • Spread the chicken mixture out on a small sheet pan to cool for about 15 minutes. The mix should be room temperature or cooler when you pour it into the pie dough.
    • Spread the two pie doughs out on the prepared sheet pan. It's okay if the edges overlap since you're going to fold up the edges before baking. Split the chicken mixture between the two doughs. Spread out, leaving about 1½ inches around the edge empty.
    • Crack the egg into a small bowl and whisk with 1 Tb of water. Using a pastry brush, spread a thin even layer of egg wash on the clean edge of the pie dough.
    • After the dough edge is coated in egg, start folding the dough back on top of the filling in the center. See the photo above for reference. You should see about 4-5 inches of filling in the center once you'll fold all the edges up. There is no wrong way to fold a crostata so don't worry. Just be careful not to pull too hard or you'll tear the bottom of the crust.
    • Coat the top of the pie dough with egg wash and season with a pinch of salt and pepper. Place in the oven for 20-25 minutes until golden brown.
    • Remove from the oven and increase the oven heat to 450 degrees. Grate the fontina cheese. Sprinkle the top of the dough and filling with the grated cheese (1 oz for each crostata) and put the crostatas back in the oven.
    • Bake for another 7-8 minutes until the cheese is starting to brown. Allow the crostatas to cool for at least 5 minutes before cutting.

    Frequently Asked Questions

    What is a crostata?

    A pie made without a pie plate or a free form pie.

    Can I make my own pie dough instead of using store-bought?

    Yes.

    What is a good substitute for fontina cheese?

    Smoked gouda, gruyere, or cheddar.

    Can the recipe be made in advance?

    The chicken filling can be made up to 3 days in advance, but the crostatas should not be made ahead of time.

    Cilantro Chicken Sandwiches with Chili-Spiced Tater Tots

    March 24, 2019 by Hailey 3 Comments

    Cilantro Chicken Sandwiches with Chili-Spiced Tater Tots on a long rectangular white plate
    Cilantro Chicken Sandwiches with Chili-Spiced Tater Tots on a long rectangular white plate with a bowl of limes in the background

    Cilantro Chicken Sandwiches with Chili-Spiced Tots is a recipe inspired by so many of my favorite things. Cilantro is hand-down my favorite herb, always and forever, and I never met a chicken sandwich that didn’t speak to my soul. Paired that with tater tots, and you’ve got incredible comfort food.

    ingredients to make the marinade for Cilantro Chicken Sandwiches in a small food processor before blending

    Cilantro chicken starts out a marinade so packed with herbs and spices that that chicken only needs an hour in it to become flavorful. I start out the recipe by making a spice mix that, honestly, would be good on anything. The spices include all of the classic Tex-Mex spices, coriander, cumin, and oregano. Chili powder rounds out the flavors and gives the chicken a deep, rich color.

    Half of the spice mix goes into the marinade with fresh cilantro and lime and the rest is reserved for the tater tots. The tater tots in this recipe are far from homemade. I use Ore Ida frozen tater tots because tots, in the form that we all know and love, are pretty damn tricky to make, and I wanted this recipe to be easy and approachable.

    I may not make the tater tots from scratch, but coating the tots in my amazing Tex-Mex spice rub takes them from boring to a recipe you’ll crave again and again.

    To make the tater tots even more over-the-top, I drizzle them with Mexican crema for extra decadence.

    The other noteworthy choice I made on the tater tots is their size. Ore Ida makes mini tater tots, that I f*cking LOVE! Sometimes frozen and oven-baked fries and tots lack the crispiness of the real fried product. I think the ratio of crunchy outside and creamy inside is just right when it comes to these mini tater tots.

    Once the chicken is marinated, the meal comes together really quickly. The sandwiches are built on a ciabatta bun, but if you’re watching carbs, this meal would be just as flavorful and amazing without the bun. In fact, that’s how I ate it when I was recipe testing, and I loved it!

    closeup view of a Cilantro Chicken Sandwich with Chili-Spiced Tater Tots on a long rectangular white plate

    Just a few simple ingredients are needed to finish off this beautiful dish. The chicken is topped with sliced avocado, caramelized onions, fresh arugula, and lime juice. That’s it! The chicken is richly spiced so that you really don’t need to add too much to it.

    The creamy texture of the avocado acts almost like the condiment for this sandwich, while the caramelized onions bring a touch of sweetness that is the perfect balance to the spicy chicken. Fresh arugula and lime juice elevate the sandwich to new heights and bring a bright freshness to the flavors.

    grilled cilantro chicken thighs with halved avocados and limes in the background

    Cilantro Chicken Sandwiches with Chili-Spiced Tots is a perfect weekend lunch or dinner to share with family and friends. 

    Cilantro Chicken Sandwiches with Chili-Spiced Tater Tots on a long rectangular white plate

    The only thing that would make this sandwich taste better would be pairing it with an ice cold beer and enjoying it on a patio in the sunshine.

    You could also easily make this recipe for a crowd and grill the chicken outside on the barbecue pit for extra warm weather fun! Try this delicious recipe out and let me know what you think.

    Helpful Utensils

    Cuisinart Small Food Processor

    4-Cup Food Processor

    A small food processor is a relatively inexpensive piece of kitchen equipment that you'll use again and again. If you don't have one, click the image to purchase one!

    closeup view of a Cilantro Chicken Sandwich with Chili-Spiced Tater Tots on a long rectangular white plate
    Print Recipe
    5 from 1 vote

    Cilantro Chicken Sandwiches with Chili-Spiced Tater Tots

    Chicken marinated in a Tex-Mex spice mix layered with avocado, caramelized onions, fresh arugula, and lime juice make an insanely flavorful sandwich. Served with tater tots tossed in the same spices as the marinade for extra punch! A perfect lunch or dinner to share with family and friends. 
    Prep Time15 minutes mins
    Cook Time20 minutes mins
    Marinade Time1 hour hr
    Total Time35 minutes mins
    Course: Main Course, Side Dish, Snack
    Cuisine: American, Mexican
    Servings: 4 sandwiches

    Ingredients

    Spice Mix

    • 2 teaspoon salt
    • 4 teaspoon chili powder
    • 1 teaspoon ground coriander
    • 1 teaspoon ground cumin
    • 1 teaspoon dried oregano
    • ½ teaspoon cayenne pepper

    Chicken Marinade

    • ½ bunch cilantro
    • 1 lime zested
    • ½ C canola oil

    Sandwiches

    • 1 lb boneless skinless chicken thighs or breasts if you prefer
    • 1 yellow onion
    • 2 Tb butter
    • 1 Tb olive oil
    • 4 ciabatta rolls
    • 2 C arugula
    • 2 avocados
    • Mexican crema or sour cream
    • lime juice

    Ore Ida Mini Tater Tots

    Instructions

    To make marinade

    • Roughly tear the cilantro bunch into 2 to 3-inch sections. Place all of the ingredients and half of the spice mix (reserve the remaining half for your tater tots) into a blender or small food processor and blend until the cilantro is finely minced and the ingredients are well combined.
    • If you don't have a blender or food processor, you can also finely mince the cilantro by hand and mix together with the remaining ingredients. Whisk vigorously though so that you create a nice emulsified (a fancy way of saying thick and creamy like salad dressing) marinade. I've also linked to a small food processor for purchase above that is an amazing kitchen tool for very little money.
    • Place the chicken thighs into a gallon size Ziploc bag or a glass bowl and cover with marinade. Rub the chicken with the marinade to ensure every piece is thoroughly covered. Marinade for at least one hour and up to four.

    To make tater tots

    • Prepare the tater tots according to the package instructions. I usually add about 5-10 minutes to the cook time to make extra crispy tots. Also, be sure to stir and flip the tots halfway through the baking for even cooking. 
    • Once the tots are cooked, remove from the oven and season with as much of the remaining spice mix as desired. I usually use almost all of it, but you may want to use a lighter hand if you're feeding kids or sensitive palettes.

    To make sandwiches

    • Once the chicken has marinated and while the tots are cooking, prepare the caramelized onions. Check out my Caramelized Onions post for details on how to make them.
    • Once the onions have softened and have started to caramelize around the edges, turn the heat down to medium-low and cook for about 10-15 minutes, stirring often. You want the onions to be a rich caramel color all over but not burned so turn the heat down at any sign of too much darkening. Once cooked, season the onions with a pinch of salt and pepper.
    • While the onions are cooking, place a large nonstick saute pan over medium-high heat. Once the oil is hot, remove the chicken from the marinade, shaking off any excess, and place directly into the hot pan. There is enough oil in the marinade that you won't have to worry about sticking. 
    • Cook the chicken for 6-7 per side or until a nice char starts to develop around the edges and the meat is cooked through. If the outside starts to darken too quickly, turn your heat down to medium. Remove the chicken from the heat once cooked.
    • Split the ciabatta rolls down the middle and smear the inside with a little butter, about 1-2 teaspoon per roll. Place in the hot oven (whatever temp your tater tots need is fine or 400 degrees if you're skipping the tots) for 5-10 minutes until the rolls are hot and the edges are toasty.
    • Once the chicken has cooked and the rolls are toasted, build your sandwiches by first placing a chicken thigh on the bottom half of the bun. Top the chicken first with half of an avocado sliced, then ½ C of arugula, and a drizzle of crema and lime juice. Top with the other bun half and serve the sandwich with the seasoned tots. For extra deliciousness, drizzle the tots with crema too.

    Italian Meatloaf with Italian Roasted Vegetables

    March 17, 2019 by Hailey 3 Comments

    Sausage and Peppers Meatloaf sliced and served on a silver platter with parchment paper and Italian Roasted Vegetables in the background
    single serving of Sausage and Peppers Meatloaf with Italian Roasted Vegetables served on a white plate with a gray border with the meatloaf in the background

    Sausage and Peppers Meatloaf is the classic flavor combination you know and love but wrapped up in a whole new package. We love Italian sausage and simply sautéed bell peppers and onions at my house, but I was looking for a way to reinvent the familiar in a new but approachable way. Enter Italian meatloaf.

    Sausage and Peppers Meatloaf in a loaf pan before baking

    Everybody loves the classic American comfort food of meatloaf. It is so easy to make and packed with flavor. All it takes is smooshing a few good ingredients together (playing with your food basically) and baking them for about an hour. Voila!

    Good ingredients that bring a real f*cking flavor punch to the table are necessary for a good meatloaf.

    In this recipe, the sautéed peppers and onions provide a sturdy flavor base for the Italian sausage. I decided to use ground chicken in the recipe instead of combining the sausage with beef to lighten up the dish a bit.

    Because ground chicken can be a little bland and lame on its own, I also include plenty of spices and seasonings in the recipe so that every single bite is rich and flavorful. Spices like paprika, fennel, and oregano are combined with some of the more usual suspects like garlic and onion powder to produce a beautifully balanced taste.

    As with most comfort food recipes, so much of the oomph of this dish is in the sauce. I’m a big fan of the old school ketchup-based sauce, so I didn’t want to deviate away from that too much. I just fancied it up a little the addition of balsamic vinegar and Italian seasoning. It’s the perfect complement to the meatloaf.

    Sausage and Peppers Meatloaf with Italian Roasted Vegetables with two servings white plates with gray rim

    My initial thought of what to serve with my Italian Meatloaf was perhaps pasta with red sauce, but that was too close to the standard sausage and peppers dish we frequently make. Instead, I thought potatoes of some variety would be more appropriate given they are the natural bestie of meatloaf.

    The Italian Roasted Veggies that I eventually settled on are a combination red potatoes, zucchini, peppers and onions that I season liberally with dried Italian seasoning before slow roasting in the oven.

    a sheet pan scattered with diced red potatoes and sliced zucchini, green & red bell pepper, and white onion

    Once the vegetables are tender, the heat is cranked up to make sure the vegetable have lovely dark-charred edges. Those edges are the good shit…the best, really. When the veggies come of the oven, they are finished with fresh basil and parsley, and for me, a pinch of finishing salt like a Maldon Sea Salt.

    Italian Roasted Vegetables in a small white bowl

    Roasted vegetables like these are so simple but completely soul satisfying.

    I love this meal not only for its comfort food factor but also because it’s such a low maintenance recipe. Once you’ve done your initial chopping, you’re pretty much just kicking back waiting for your scrumptious Italian meatloaf and veggies to bake in the oven.

    Sausage and Peppers Meatloaf sliced and served on a silver platter with parchment paper and Italian Roasted Vegetables in the background

    I have formulated the recipes so that both the vegetables and the meatloaf not only share ingredients but also cook time and oven temperature. I would love to have a double oven one day, but I don’t yet so I try to make my recipes, like this one, one-oven-friendly.

    Sausage and Peppers Meatloaf with Italian Roasted Vegetables will be a pleasant surprise at your dinner table. The idea itself will have everyone applauding your push to make dinner more exciting, and the flavor combination will have everyone licking the plate.

    Try out the recipe and let me know what you think in the comments section below!

    Sausage and Peppers Meatloaf sliced and served on a silver platter with parchment paper and Italian Roasted Vegetables in the background
    Print Recipe
    5 from 2 votes

    Sausage and Peppers Meatloaf with Italian Roasted Vegetables

    An Italian-inspired twist on a classic American comfort food. Meatloaf made with Italian pork sausage and ground chicken and flavored with sauteed onion, peppers and garlic will remind you of the classic sausage and peppers flavor combination you love but will also surprise you a little. Slow roasted potatoes, zucchini, peppers, and onions are the perfect complement. 
    Prep Time20 minutes mins
    Cook Time1 hour hr
    Total Time1 hour hr 20 minutes mins
    Course: Main Course
    Cuisine: American, Italian
    Servings: 4 servings

    Ingredients

    Meatloaf

    • 1 lb Italian pork sausage
    • 1 lb ground chicken
    • 1 Tb olive oil
    • ½ red bell pepper
    • ½ green bell pepper
    • ½ yellow onion
    • 1 garlic clove minced
    • 1 egg
    • ¼ C Italian seasoned breadcrumbs
    • 1 Tb tomato paste
    • 1 teaspoon Italian seasoning
    • 1 teaspoon paprika
    • 1 teaspoon kosher salt
    • ½ teaspoon garlic powder
    • ½ teaspoon onion powder
    • ½ teaspoon black pepper
    • ½ teaspoon fennel seed crushed
    • ¼ teaspoon ground oregano
    • ¼ teaspoon cayenne pepper

    Meatloaf Sauce

    • ½ C ketchup
    • 1 Tb balsamic vinegar
    • ½ teaspoon Italian seasoning
    • 1 Tb brown sugar
    • pinch black pepper

    Vegetables

    • ½ red bell pepper
    • ½ green bell pepper
    • ½ yellow onion
    • 1 lb small red potatoes
    • 1 large zucchini
    • 3 Tb olive oil
    • ½ Tb Italian seasoning
    • 1 teaspoon kosher salt
    • ½ teaspoon black pepper
    • 2 Tb fresh basil
    • 1 Tb fresh Italian flat leaf parsley

    Instructions

    To make meatloaf

    • Preheat the oven to 350 degrees.
    • Dice the onion and red and green bell pepper into ¼-inch pieces. Add 1 Tb olive oil to a medium saute pan and place over medium-high heat. Once the pan is hot, add the peppers and onions and cook for 5 minutes or until soft.
    • Add the minced garlic and stir to combine. Cook for one additional minute. Then pour the cooked vegetables into a large mixing bowl and set aside to cool for a few minutes.
    • Once the vegetables have cooled slightly, add the egg, tomato paste, and all of the spices and mix together with a small whisk or fork. Next, add the breadcrumbs and mix to combine.
    • Add the ground sausage and chicken and use your hands to mix together all of the ingredients thoroughly. Your hands are really the only way to mix the ingredients well. If you're squeamish about it, invest in some disposable kitchen gloves.
    • Once the mixture is well combined, press the mix into a meatloaf or loaf pan. If you don't have one, you can also shape the loaf in a free form way on a sheet pan. Bake for 45 minutes.
    • Make the sauce by combining all the ingredients in a small bowl. Once the meatloaf has baked for 45 minutes, remove it from the oven and coat the top in half of the sauce. 
    • Turn the oven heat up to 450 degrees. Place the meatloaf back in the oven for 12 minutes or until the sauce is hot and starting to caramelize. Let the meatloaf stand from the oven for at least 5 minutes before slicing.
    • The remaining sauce can be heated in the microwave for about 30 seconds and used for extra dipping.

    To make vegetables

    • As you are prepping your vegetables for the meatloaf, slice the remaining half of the onion and red and green bell peppers into ¼-inch strips. Place the sliced veggies on a baking sheet prepared with baking spray or nonstick foil for easy cleanup.
    • Next, dice the red potatoes into no bigger than ½-inch pieces. You want the potatoes to be small so they cook at a similar rate to the other vegetables. Cut the zucchini in half lengthwise and remove the two ends. Cut into ½-inch thick half moons.
    • Use your hands to mix all of the vegetables together well on the sheet pan. Spread them out evenly in a single layer. Drizzle with 3 Tb of olive oil and sprinkle with salt, pepper, and Italian seasoning.
    • Place in a preheated 350-degree oven at the same time as the meatloaf and cook for 45 minutes. Pull the pan from the oven and toss the vegetables. Spread them back out across the pan and turn the oven heat up to 450 degrees. Put the veggies back in the oven for 20 minutes or until they start to develop a nice char.
    • Roughly chop the fresh basil and parsley and sprinkle on the roasted vegetables. Serve immediately.

    Pork and Collard Greens Biscuit Sandwiches

    March 9, 2019 by Hailey 3 Comments

    Pork and Collard Greens Biscuit Sandwich with layers of biscuit, whole grain mustard, fried pork chop, cooked collard greens, sliced tomato and a sunny side up egg
    Pork and Collard Greens Biscuit Sandwich with layers of biscuit, whole grain mustard, fried pork chop, cooked collard greens, sliced tomato and a sunny side up egg

    When I was dreaming up all the things I would love to put on my Buttermilk Biscuits, only one green thing came to mind, collard greens. Now greens on their own just wouldn’t feel like a real biscuit sandwich, so I partnered up collard greens with a pork chop for a real southern biscuit sandwich experience.

    collard greens with the vein removed on a dark wooden cutting board

    My Pork and Collard Greens Biscuit Sandwich starts with my Buttermilk Biscuit recipe. It’s the perfect base for a sandwich because the texture is like a pillow inside, but the outside has enough crisp to hold together even with all of the delicious toppings this sandwich includes.

    I will say that this sandwich is probably more a knife and fork experience, but if you’re feeling like a savage and no one is watching, do your thing!

    The layers in this biscuit sandwich include buttery biscuit, stone ground mustard, a crispy fried pork chop, tender collard greens, a slice of fresh tomato, and a sunny side up egg to top everything off. It’s a combination of so many different flavors and textures that you’ll keep going back for bite after bite to try and figure it out.

    If you’ve never had collards greens before, then you’re missing out on this classic Southern vegetable. Paired with a little pork and cooked down over a long period of time, they are perfection. Collards have a wonderful earthy and slightly bitter flavor that I love to pair with smoky, salty bacon. A little bit of sautéed onions also brings a bit of sweetness to the greens.

    Two Pork and Collard Greens Biscuit Sandwiches served open face to show the sunny side up egg and served with sliced tomato

    Collard greens take a little bit of time to reach the perfect soft texture, but they could easily be made up to a few days in advance so they’re ready for your Southern brunch preparation. The remainder of the recipe is not too time-consuming.

    The robust taste of the collard greens is perfect with the meaty pork chop and rich biscuit base. I chose a center cut pork loin for the short cook time and tender meat. If you’d prefer to not bread and fry your pork chop as I have, the biscuit sandwich would be equally good with a simply grilled chop too. I personally just love the added crunch from panko breading on my pork chop.

    golden brown fried pork chops on a plate with a paper towel to capture excess grease

    Last, the mustard and tomato add the acidity and freshness this dish needs to be balanced and bright. 

    I chose a nice stone ground mustard with lots of texture from mustard seeds, but a good Dijon would work as well. The sunny side up egg acts as a final sauce over the dish. As you break the egg yolk with your first bite, the runny yolk will bathe the sandwich making it super decadent. The egg is, of course, optional if you’re not a fan of the soft yolks.

    Pork and Collard Greens Biscuit Sandwich with layers of biscuit, whole grain mustard, fried pork chop, cooked collard greens, sliced tomato and a sunny side up egg

    Pork and Collard Greens Biscuit Sandwiches emulate so much of what I love about Southern food. Yes, there is butter and a little something fried, but it’s more than that. There is a combination of sour, sweet, salty, smoky, earthy and bitter flavors that all come together for an amazing breakfast experience. Make this your next weekend cooking project, and you won’t be disappointed!

    Helpful Utensils

    red Staub cocotte with lid

    Staub Cocotte

    I absolutely LOVE my Staub Cocotte. It cooks anything and everything beautifully with even heat distribution and no sticking. This one is the perfect size for everyday use.

    meat tenderizer with black handle

    Meat Tenderizer Mallet

    The best way to pound out the frustrations of your day, and you'll end up with nice, thin cutlets that are perfect for frying.

    Pork and Collard Greens Biscuit Sandwich with layers of biscuit, whole grain mustard, fried pork chop, cooked collard greens, sliced tomato and a sunny side up egg
    Print Recipe
    5 from 1 vote

    Pork and Collard Greens Biscuit Sandwiches

    Fried pork chops and collard greens are a match made in heaven. Put them both on a buttery, flaky biscuit, and you've got amazing Southern comfort food. Stone ground mustard, a tomato slice and a sunny side up egg finish off this epic brunch recipe. 
    Prep Time15 minutes mins
    Cook Time1 hour hr
    Total Time1 hour hr 15 minutes mins
    Course: Breakfast, Main Course
    Cuisine: American
    Servings: 8 Biscuit Sandwiches

    Ingredients

    Collard Greens

    • 1 bunch collard greens
    • 2 Tb bacon fat
    • 1 yellow onion
    • 2 C chicken stock
    • ½ teaspoon salt
    • ¼ teaspoon ground black pepper
    • 2 Tb apple cider vinegar

    Pork Chops

    • 1 lb boneless center cut loin chops
    • ½ C panko bread crumbs
    • ½ C Italian seasoned breadcrumbs
    • 1 Tb seasoned salt or Cajun seasoning
    • 2 egg whites
    • canola oil
    • salt and pepper

    Garnish

    • tomato
    • whole grain mustard
    • eggs

    Instructions

    To make collard greens

    • Begin by removing the leaves from the center stem of the collard greens. See the photo above for a visual reference. As you remove the leaves from the stem, tear the leaves into large or 2 to 3-inch pieces. The greens will shrink down considerably when cooked. Place the torn leaves in a strainer and rinse them well.
    • Half and then thinly slice the onion. Put a large saucepan or small Dutch oven over medium heat. The Staub Cocotte I've linked to above is such a worthwhile investment for slow cooking like this recipe. Add the bacon fat and allow the fat to become hot.
    • Once the bacon fat is hot, add the thinly sliced onions and saute for about 5 minutes or until softened. Add the rinsed greens and chicken stock and immediately place a lid over the pan to allow the greens to start wilting down. After 2 minutes, remove the lid and stir the greens and onions to combine well.
    • Season with salt and pepper and place the lid back on the pot. Turn the heat down to medium-low and simmer for 45 minutes, stirring every 15 minutes. After 45 minutes, add the apple cider vinegar and stir to combine. Lid the pot again and allow the greens to simmer for another 15 minutes. Turn the heat down on low to keep the greens warm until ready to serve.

    To make pork chops

    • Cut each pork chop in half to create a more square piece. Using a mallet (like the one I've linked to purchase above), lightly pound each pork chop piece to about ¾-inch thickness. Season both sides of the pork with salt and pepper.
    • Create a breading station by first adding 2 egg whites to a small mixing bowl and whisking until frothy. Separately mix the panko, breadcrumbs and seasoned salt in a large shallow bowl and set aside.
    • Bread each pork chop by first dipping each piece into the egg whites. Flip the pork over to make sure all sides are thoroughly coated in egg white. Remove from the egg whites and shake off any excess. Then place the pork chop into the breadcrumbs and press down gently. Repeat on all sides until the pork chop is totally coated.
    • Heat a large nonstick pan over medium-high heat. Add enough oil to have ¼-inch across the whole pan. Test to see if the oil is hot by adding a few breadcrumbs to the oil. If the crumbs rise to the top and start to bubble right away, the oil is ready.
    • Fry the pork chops for 3 minutes per side. Turn down the heat if the breading starts to darken too quickly. Work in batches if necessary to make sure you aren't overcrowding the pan. Once the pork is browned on both sides, remove the chops from the pan and place on a plate lined with a paper towel to drain.

    To make biscuit sandwich

    • As I mentioned in the post above, the sunny side up egg is totally optional, but it's a really lovely way to finish your sandwiches. For a sunny side up egg, heat a nonstick pan over medium-low heat and add about 1 Tb of butter per egg. Crack as many eggs as needed into the pan. Season the eggs with salt and pepper to taste.
    • As the egg white starts to cook, gently move the egg white to expose very small spots of the pan underneath and then allow the uncooked eggs whites to fill the gap. Repeat this process all around the egg white. and cook for a couple of minutes or until the whites are cooked but the yolks are still soft and runny.
    • Split a biscuit and first smear the bottom half with stone ground mustard. Next place a fried pork chop half and then top with a neat pile of cooked collard greens. Top the greens with a slice of fresh tomato and lastly the sunny side up egg.

    Notes

    *Here is a link to my Buttermilk Biscuit recipe. Don't be afraid. Making your own biscuits is easier then you think!

    Buttermilk Biscuits and Sausage Gravy

    March 5, 2019 by Hailey 3 Comments

    two Buttermilk Biscuits covered in Sausage Gravy with a bowl of biscuits in the background
    two Buttermilk Biscuits covered in Sausage Gravy on a round white plate

    As promised, today’s posts are all about how to dress up my Buttermilk Biscuit recipe. Don’t get me wrong, Buttermilk Biscuits are amazing with a just a little smear of jam or jelly, but if you’re looking to make a hardy, stick-to-your-ribs meals with your biscuits, there is nothing better than Biscuits and Sausage Gravy.

    The combination of buttery, pillow-soft biscuits smothered in piping hot, rich country gravy is breakfast bliss in my eyes. 

    two Buttermilk Biscuits covered in Sausage Gravy with a fork in the background

    I can remember the first time I ordered biscuits and gravy as a kid from our local diner. I thought, holy cow, where has this been all my life?!

    There really is nothing to making gravy. All that good gravy requires is a little patience and the knowledge that no two batches of gravy are exactly alike, so you have to be nimble with your style and have an eye for the perfect gravy consistency. The good news is…”perfect” consistency is totally in the eye of the beholder.

    Some may like it on the thick side so you’ll add a bit less milk, or if you prefer your gravy to be a bit more like a sauce than you might add a bit more and keep the heat down on low. I recommend working slowly if it’s your first time to make gravy so you can really keep an eye out for how the gravy changes as it continues to cook. Taste it often as the consistency changes to find what makes your taste buds happy.

    Sausage Gravy has very few ingredients. This recipe only has 5 ingredients so it’s important to not tinker with those ingredients too much. First, you should always use whole milk. I’ve tried gravy with 2% milk because that’s what I use for my coffee and cereal, but the mouthfeel of the finished gravy is just not the same.

    sausage gravy being poured over two buttermilk biscuits

    You can, of course, reduce gravy made with low-fat milk to a thick consistency, but you won’t get the same silky texture that whole milk provides. I’ve also tried making gravy with half and half to see if additional decadence would make for a better gravy. Nope…not the case. In fact, gravy made with half and half was almost impossible to keep thin enough to pour.

    In addition to using whole milk, you have to make sure that your milk is hot when you add it to the flour or fat, or roux. I cover this in detail in the recipe below, but I have found heating my milk up before adding it to the gravy is really the trick to making sure you don’t have a lumpy gravy. Be sure to not boil your milk though.

    The other ingredient that it’s important to not substitute is the use of bacon fat or salted butter. Part of the fat content for the recipe comes directly from the cooked breakfast sausage, but in my experience, you usually only get about 1 Tb of fat from the sausage. In total, you’ll need 3 Tb of fat to make your roux.

    I highly recommend adding bacon fat to the sausage fat for the most pork-alicious gravy possibly. 

    two Buttermilk Biscuits covered in Sausage Gravy with a bowl of biscuits in the background

    We always have a jar of bacon fat handy so this doesn’t add an additional step to the gravy-making process for me, but if you don’t have bacon fat handy, salted butter is the only acceptable substitute. Unsalted butter has no flavor, and we need every ingredient bringing flavor to the party!

    If you follow the recipes and practice a little bit of patience, your Sausage Gravy will turn out amazing. I promise…even if you’ve never made gravy before. On a cold winter morning like today, there’s nothing I’d rather do than stand over a steaming pan of sausage gravy.

    Buttermilk Biscuits and Sausage Gravy will become a family favorite once you’ve mastered this simple recipe. Give it a try, and let me know how your gravy turns out in the comments section below!

    Helpful Utensils

    black and red plastic ground meat chopper utensil

    Ground Meat Chopper

    If you've never used one, you'll be pleasantly surprised by what a handy gadget this is. It makes breaking up ground meat so fast and easy.

    two Buttermilk Biscuits covered in Sausage Gravy with a fork in the background
    Print Recipe
    5 from 1 vote

    Buttermilk Biscuits and Sausage Gravy

    Buttery, soft buttermilk biscuits smothered in a simple but decadent country sausage gravy. With only 5 ingredients, this gravy is so easy but deeply soul-satisfying in a way that only Southern comfort food can be. Biscuits with Gravy is perfect for breakfast or brunch, but it's also a fun dinner surprise for your family.
    Prep Time5 minutes mins
    Cook Time15 minutes mins
    Biscuits*45 minutes mins
    Total Time20 minutes mins
    Course: Breakfast
    Cuisine: American

    Ingredients

    Buttermilk Biscuits*

    • See the notes below for a link to my Buttermilk Biscuit recipe

    Sausage Gravy

    • 1 lb ground breakfast sausage
    • 2 Tb bacon fat or salted butter
    • 3 Tb all purpose flour
    • 3.5 to 4 cups of whole milk
    • salt and pepper to taste

    Instructions

    • Once the biscuits are cooked, start your sausage gravy. You want to serve gravy piping hot so make sure your biscuits are ready for their gravy bath before starting the process.
    • Pour 4 C of whole milk into a medium saucepan and turn the heat on to medium. Stir the milk occasionally to ensure even heating. Make sure the milk doesn't reach a boil. If you start to see small bubbles around the edge of the pan, just turn the heat down to a lower setting. As the milk heats up, start your gravy.
    • Place a large cast iron or nonstick skillet over medium-high heat. Once the pan is hot, add the breakfast sausage. Using a wooden spoon or a ground meat chopper to break up the sausage into bite size pieces. A ground meat chopper is one of my favorite gadgets. You can find a link to purchase one above.
    • Cook the breakfast sausage for 5-7 minutes until the sausage starts to develop crispy, browned edges. Those browned bits are where all of the flavor lives! Once the sausage is browned, remove from the pan with a slotted spoon and set aside. Leave as much of the fat in the pan as possible.
    • You need a total of 3 Tb of fat to start your roux.** If you feel more comfortable measuring the fat, feel free to strain your cooked sausage, reserving the fat in a separate bowl so you can measure. I typically eyeball the amount to be honest. Add enough bacon fat or salted butter to the sausage fat to equal 3 Tb.
    • Turn the heat down to medium. Once the fat is totally melted, add the flour to the pan. Using your wooden spoon, stir the fat and flour together until well incorporated. Be sure to also scrape all the browned bits from the bottom of the pan as the roux cooks. Cook the roux over medium heat, stirring constantly, for 2 minutes.
    • Once the roux has cooked for 2 minutes, it's time to switch your utensil to a whisk and start slowly adding the hot milk. This is the most important step in gravy making. If you add too much liquid at once or if the milk isn't hot, you risk a lumpy gravy. If you add too little milk though, the roux will tighten up too quickly which, again, can make for a lumpy gravy. You want a slow, steady stream of hot milk poured evenly around the pan ask you whisk vigorously.
    • Start by adding 3 to 3.5 cups of milk to the gravy. Reserve at least ½ C for further additions as the gravy thickens. Bring the gravy to a low boil and cook for 2-3 minutes, stirring constantly, or until the gravy has reached a lovely thick consistency. If the gravy gets too thick, just add a bit more warm milk to thin the gravy back out.
    • Once the gravy has reached the right consistency, add the cooked sausage and stir into the gravy with a wooden spoon. Season with salt and pepper to taste, but don't skimp on the black pepper. Good gravy has plenty of black pepper flavor. Cook for another 1-2 minutes or until the sausage is warm. Serve immediately over hot biscuits.

    Notes

    *Here is a link to my Buttermilk Biscuit recipe. Don't be afraid. Making your own biscuits is easier then you think!
    **A roux is simply a mixture of fat and flour that is cooked down and used to thicken a sauce. It's a great technique to master for making all kinds of sauces.

    Thin Mint No-Bake Chocolate Cheesecake

    February 3, 2019 by Hailey 10 Comments

    whole and unsliced brown thin mint no bake chocolate cheesecake with white dollops of whipped cream on each slice topped with bright green sprinkles and a thin mint cookies

    Thin Mint No-Bake Chocolate Cheesecake is just as dreamy as it sounds. If you’re a chocoholic, you’ve come to the right place because this recipe is filled with rich, chocolaty flavor. Not only is this recipe overflowing with chocolaty goodness, but it’s also a celebration of the glory that is the Thin Mint- one of the best Girl Scout Cookies.

    Single slice of brown thin mint chocolate cheesecake on a white plate with the whole cheesecake plate on the side missing a slice and thin mint cookies falling from the box

    Damnit if I don’t love me some Girl Scout Cookies. Samoas are my favorite, but a very close second is Thin Mints. Thin Mints are so wonderfully uncomplicated. They’re the perfect balance of mint and chocolate with a smooth, creamy outside and a crunchy cookie inside. I can easily eat a whole sleeve in one sitting.

    Ingredients

    Let me first set the record straight that this recipe is not like a traditional cheesecake recipe. There are no eggs in the recipe meaning the texture of the filling is different. The chocolate cheesecake filling in this recipe is velvety smooth, thick, and creamy.

    It is not as light as traditional cheesecake, but it still melts in your mouth. More importantly, the recipe takes a fraction of the time to make when compared to traditional cheesecake. To make the recipe, you need:

    • Thin Mint cookies
    • Butter
    • Cream cheese
    • Sweetened condensed milk
    • Semisweet chocolate chips
    • Vanilla extract
    • Peppermint extract
    • Salt
    • Heavy cream
    • Powdered sugar
    ingredients for thin mint no bake chocolate cheesecase

    Instructions

    The entire cheesecake is no-bake, both the crust and the filling. I love traditional cheesecake but hate all the baking and cooling time that most recipes require. Thin Mint No-Bake Chocolate Cheesecake gets you to next-level cheesecake satisfaction way faster. To make it, follow the instructions that follow.

    1. Grind cookies into a fine crumb and combine with melted butter. Press into a pie plate.
    2. Whip cream cheese until light and fluffy. Combine with sweetened condensed milk, melted chocolate, salt, and vanilla and peppermint extracts.
    3. Pour the filling into the crust and chill overnight.
    4. Make whipped cream by whisking cream, vanilla, and powdered sugar.
    5. Serve a slice of cheesecake with a dollop of whipped cream and a cookie.
    stand mixer whisk attachments covered in thick creamy brown chocolate cheesecake filling

    Equipment

    No special equipment is required! Most cheesecakes require a springform pan for baking, but Thin Mint No Bake Chocolate Cheesecake can be made in a standard pie plate. If you have a springform pan and want to use it, go right ahead.

    Making a Thin Mint Cookie Crust is a breeze, particularly if you have a food processor to grind the crumbs. If not, don’t worry! You can also crush the cookies by placing them in a secured plastic bag and use a rolling pin to pulverize the cookies.

    thin mint cookie crumbs in a food processor with a small bowl of melted butter and an empty white pie plate on the side

    Substitutions

    If you have stumbled upon this recipe outside of Girl Scout cookie season, not to worry! You can always find Keebler Grasshopper Cookies year-round which are very similar in flavor and texture. They would be a perfect substitute for Thin Mints.

    unbaked thin mint cookie crust being pressed by hand into a white pie plate

    The type of chocolate you use in this recipe is totally up to you. The recipe calls for semisweet but dark or milk chocolate would also be delicious.

    Melted chocolate closeup as it drips off a spoon

    Top Tip

    The filling is super simple. The base is made up of cream cheese, sweetened condensed milk, and a sh*t ton of chocolate to make sure this no-bake cheesecake is unmistakably CHOCOLATE.

    Because the filling is so simple, it’s important to get all the ingredients right. Don’t try to skip properly softening your cream cheese. If you do, you’ll end up with little white flecks, or worse yet white lumps, in your lovely cheesecake filling. Not cute. I usually leave my cream cheese out overnight to make sure it’s completely soft.

    whole and unsliced brown thin mint no bake chocolate cheesecake before garnishing

    Storage

    • Serve: Garnish the cheesecake with whipped cream, a Thin Mint cookie and a sprinkle of green sanding sugar.
    • Store: The cheesecake can be kept in the fridge for up to a week. Cover tightly with plastic wrap before storing.
    whole and unsliced brown thin mint no bake chocolate cheesecake with white dollops of whipped cream on each slice with thin mint cookies and green sprinkles on the side before adding

    Both the sanding sugar and extra cookie are completely optional. I recommend only using the sanding sugar right before serving. The sugar will lose its crunch and the color will start to bleed into the whipped cream after a few hours.

    Thin Mint No-Bake Chocolate Cheesecake gives you all the yummy crunch of Thin Mint cookies with smooth, creamy, chocolaty cheesecake and fluffy whipped cream. It doesn’t get much better than that!

    Single slice of brown thin mint chocolate cheesecake on a white plate with the whole cheesecake plate on a cake pedestal in the background

    Make this for a special occasion or for no reason at all. You really don’t need a reason to enjoy this delicious treat! Be sure to check out my No Bake Peanut Butter Bars and No Bake Chocolate Cheesecake if you're looking for more delicious and easy desserts. Let me know what you think in the comment section below.

    Helpful Utensils

    Cuisinart Large Food Processor

    11-Cup Food Processor

    I link to a food processor constantly because it's so essential to my kitchen. If you don't have one, it's a great investment.

    red Emile Henry pie plate

    Emile Henry Pie Plate

    Beautiful and well made, Emile Henry Pie Plates provide even cooking every time.

    Single slice of brown thin mint chocolate cheesecake on a white plate with the whole cheesecake plate on a cake pedestal in the background
    Single slice of brown thin mint chocolate cheesecake on a white plate with the whole cheesecake plate on the side missing a slice and thin mint cookies falling from the box
    Print Recipe
    4.75 from 4 votes

    Thin Mint No-Bake Chocolate Cheesecake

    Thin Mint Cookies are crushed to form a cookie crust that is filled with velvety smooth and thick chocolate cheesecake filling. It is so easy to make and completely no-bake
    Prep Time30 minutes mins
    Chill Time8 hours hrs
    Total Time30 minutes mins
    Course: Dessert
    Cuisine: American
    Servings: 8 slices

    Ingredients

    Thin Mint Cookie Crust

    • 24 Thin Mint cookies
    • ¼ C salted butter melted

    Filling

    • 12 oz semisweet chocolate chips
    • 14 oz sweetened condensed milk
    • 8 oz cream cheese room temperature
    • 1 teaspoon vanilla
    • ¼ teaspoon peppermint extract
    • ¼ teaspoon kosher salt

    Whipped Cream

    • 1 C heavy cream
    • ¼ C powdered sugar
    • 1 teaspoon vanilla extract

    Garnish

    • 8 Thin Mint cookies
    • green sanding sugar

    Instructions

    To make crust

    • Using a food processor, grind the Thin Mint cookies to a fine crumb. If you don't have a food processor, I've included a link to purchase one above, or you can break up the cookies by-hand by placing the cookies in a plastic bag and crushing with a rolling pin.
    • Once the cookies are a fine crumb texture, add the melted butter and pinch of salt and combine. Press the crumbs into an even layer in a pie plate.

    To make the filling

    • Melt the chocolate in a microwave-safe bowl. Microwave in 15-second increments stirring in between each. Continue microwaving until the chocolate is totally smooth. Set aside to cool.
    • Place the cream cheese into a large mixing bowl and whip the cream cheese on medium-high speed until light and fluffy. Add the sweetened condensed milk and turn the mixer back on medium until well mixed.
    • Turn the mixer off, scrape down the bottom and sides of the bowl, and add the vanilla and peppermint extract and cooled melted chocolate. Turn the mixer back on to medium and mix until the cheesecake is smooth and well combined.
    • Once the pie shell has cooled, pour the cheesecake filling into the pie and smooth out the top. Put in the fridge for at least 8 hours to cool.

    To garnish

    • Make the whipped cream by combining the heavy cream, powdered sugar and vanilla in a small mixing bowl and whip on high speed until the cream reaches soft peaks.
    • Garnish each of the 8 slices of cheesecake with a dollop of whip cream and optionally, a sprinkle of green sanding sugar and a whole Thin Mint cookie.

    Notes

    * You can also substitute with Keebler Grasshopper Cookies if it's not the Girl Scout Cookie time of year

    FREQUENTLY ASKED QUESTIONS

    I can't get Thin Mint Cookies. Is there any alternative?

    Yes, Keebler Grasshopper Cookies are very similar in taste and texture to Thin Mints and can be used as a substitute in this recipe.

    I don't have a food processor. Can I still make the Thin Mint Cookie Crust?

    Yes, just place the cookies in a secured plastic bag and using a rolling pin to crush the cookies.

    Do I need a special pan to make the recipe?

    No. This recipe is prepared in a standard pie plate.

    Refried Beans

    January 28, 2019 by Hailey 6 Comments

    Refried Beans with Chorizo garnished with cilantro leaves in a star shaped white bowl sitting on colorful Mexican-style linens with a cilantro bunch in the background
    brown refried Beans with Chorizo garnished with cilantro leaves in a star shaped white bowl sitting on colorful Mexican-style linens

    Refried Beans are an absolute essential with any Mexican-style meal in my house. Don’t get me wrong, I love beans any way you make them, but the refried variety is rich and flavorful with a smooth and creamy texture that makes them top notch.

    For years, I’ve relied on bacon to enrich the flavor of my refried beans. There is nothing wrong with that route, but they never tasted like the kind you find in authentic taquerias.

    I learned recently that the quickest way to make taqueria-style beans at home is to blend leftover chorizo into the beans. GENIUS! This refried bean recipe is super simple, but holy sh*t are these beans good!

    The chorizo provides the smoky, salty taste of bacon but also gives the beans just the right amount of heat and spice. 

    a tube of Cacique premade chorizo that is used in the refried beans recipe sitting on a wooden cutting board

    I learned another essential trick previously from a woman named Teresa in my hometown of Corpus Christi, Texas that I also incorporated into this recipe. She told my stepmom that you should never add the aromatics (onions, peppers, bacon, etc.) to your beans until they are done cooking. I always added those things with the dried beans before boiling, but Teresa taught us that all the flavor just cooks out if you do it that way.

    In this recipe, I sauté the chorizo and onions separately, puree the mix and then add it back to the cooked beans to make sure all of the robust chorizo flavors carry through to the finished refried beans. Because these beans are so meaty in flavor, they are perfect for any bean and cheese dish you please. Think bean and cheese quesadiilas, tostadas, or gorditas!

    Refried Beans with Chorizo garnished with cilantro leaves in a star shaped white bowl sitting on colorful Mexican-style linens with a cilantro bunch in the background

    There is one last step that I take in making this refried bean recipe that makes it exceptionally delicious. To cook the dried beans, I just add salt to a big pot of water and boil away. Though there are no aromatics in the bean cooking liquid, it still has an intensely beany flavor that shouldn’t be tossed out.

    Instead, I reduce that cooking liquid to a very thick consistency after the beans are cooked through and then add the reduced liquid to the smashed refried beans. It gives the finished beans the most velvety rich mouthfeel and flavors that only come from low and slow cooking.

     You can speed up the time needed for this recipe by either cooking dried beans in advance and keeping them in the fridge or you can also use canned pinto beans if you’re in a pinch.

    Just keep in mind that you won’t have the reduced cooking liquid if you go with canned beans, but the beans will still be flavorful.

    This refried bean recipe will be a staple in your house once you try it. In fact, once you’ve made it once or twice, you won’t even need a recipe. It will just be how you make your refried beans. ? Please let me know how it goes in the comments section below.

    Helpful Utensils

    Cuisinart Small Food Processor

    4-Cup Food Processor

    A small food processor is a great kitchen gadget for quick purees and sauces. 

    brown refried Beans with Chorizo garnished with cilantro leaves in a star shaped white bowl sitting on colorful Mexican-style linens
    Print Recipe
    5 from 1 vote

    Refried Beans

    Refried Beans with just a few simple ingredients and tons of flavor. The secret to these rich and meaty beans is chorizo sausage. Sauteed, pureed and mixed into the beans, the chorizo gives the beans just the right amount of the salt and spice. There are also a couple of other key tricks to perfect beans in this recipe.
    Prep Time10 minutes mins
    Cook Time3 hours hrs 30 minutes mins
    Total Time3 hours hrs 40 minutes mins
    Course: Side Dish
    Cuisine: American, Mexican
    Servings: 4 C

    Ingredients

    • 16 oz dried pinto beans*
    • 1 teaspoon salt
    • ½ yellow onion
    • 2 Tb pork fat** or vegetable shortening
    • 4 oz chorizo

    Instructions

    • Rinse dried beans in a strainer. Add to a large heavy-bottomed saucepan and cover with 3 inches of water. Turn the heat on high and allow the mixture to come to a boil. Once it reaches a boil, turn the heat down to medium-low. Cover and simmer the beans for 2-3 hours on medium-low until completely tender.
    • Once the beans are tender, strain the beans, reserving the cooking liquid. Place the cooking liquid back into the saucepan and turn the heat up to medium. Allow the cooking liquid to reduce for about 10 minutes or until it has thickened to the consistency of heavy cream. Set the reduced cooking liquid aside.
    • Place a large saute pan over medium-high heat. Finely dice the yellow onion. Add 1 Tb of pork fat and diced onion. Saute for 2 minutes to soften onions. Add the chorizo and break up with your spoon.
    • Cook the chorizo for about 7 minutes or until completely cooked. Add the chorizo and onion mixture to a food processor, and process until the mixture is a smooth paste. I've linked to a small food processor above that is perfect for this kind of job.
    • In the same saute pan used to fry the chorizo over medium-high heat, add another Tb of pork fat and the cooked beans. Using a potato masher, mash the beans until they reach a rough-paste texture. Add the reduced cooking liquid and pureed chorizo and mix well to combine. Reduce the heat to low and warm until heated through. Season to taste with additional salt. 

    Notes

    *The pinto beans can be cooked ahead of time to shorten the final cooking time. Once cooked but before reducing the cooking liquid, the beans can be kept in the fridge for up to a week before refrying. If you're in a hurry, you can also substitute with canned pinto beans.
    **Pork fat, manteca or lard is simply pork fat that can be found in most Latin supermarkets. Plain old Crisco works as well.

    Chocolate Conchas

    January 27, 2019 by Hailey 5 Comments

    Chocolate Conchas or Mexican Sweet Bread flavored with chocolate and orange in a woven basket lined with a colorful Mexican style linen and surrounded by fresh oranges
    Chocolate Conchas or Mexican Sweet Bread flavored with chocolate and orange in a woven basket lined with a colorful Mexican style linen and surrounded by fresh oranges

    Chocolate Conchas are one of the most deeply engrained food memories I have. Conchas are Mexican sweet breads that are widely available at Latin bakeries. My babysitters growing up always brought my sister and I Conchas as a special treat, and they are still one of my favorite sweet Mexican pastries to this day.

    My sister and I, along with the rest of my family, were in San Miguel de Allende last weekend for a family wedding. One of the first things I sought out as we wandered the cobblestone streets on our first morning in San Miguel was a Concha. I finally found one, and it was just as wonderful as I remember.

    The funny part about this story and what led me to create this post was the fact that my sister did the exact same thing. As we sat down for dinner that night, she said, “You won’t believe what I had for breakfast this morning?” She was surprised when I immediately replied, “A Concha? I had one too!” We both chuckled about how such a simple, humble pastry could mean so much to both of us.

    Translated from Spanish, Concha means shell, named after the patterns often found on the top of Concha breads. You can find Conchas in tons of different flavors, but my favorite has always been chocolate…duh.

    I wanted to amplify the chocolate flavor in my recipe as it’s often quite subtle in the traditional version.

    Chocolate Conchas or Mexican Sweet Bread flavored with chocolate and orange in a woven basket lined with a colorful Mexican style linen and surrounded by fresh oranges

    I did so by using dark chocolate cocoa powder hence why the color of the topping is so dark and rich. Any high-quality cocoa powder will work. If you’re not a big chocolate fan, you could also remove the cocoa powder from the recipe and substitute with ¼ C of flour. Vanilla Conchas are probably my third favorite behind chocolate and strawberry. I’m working on figuring out the strawberry topping recipe so stay tuned!

    When we got home from Mexico, I knew one of the recipes I wanted to try to recreate was a Concha recipe. I’ve had them on my list of ideas for recipe testing since I launched Cooking and Cussing, but our trip was the kick in the ass I needed to start testing.

    My mom’s yeast roll recipe which I wrote about as part of my Thanksgiving menu this year is a classic in my family. The recipe is basically a milk sweetbread with a similar texture to a Concha. I enriched her dough recipe with an extra egg, additional butter, and a dash of cinnamon and fell in love with the result. The texture is very similar to a traditional Concha, but the bread is a bit moister.

    • tan colored concha dough in stainless steel stand mixer bowl before rising
    • tan colored concha dough in stainless steel stand mixer bowl after rising but before being divided into balls

    When I started researching concha recipes, I was somewhat surprised but also delighted to find out that a Concha is basically a yeast roll with a cookie pressed on top. Well, no f*cking wonder I love them so much!! The cookie topping is similar to a basic sugar cookie recipe. The dough is then pressed very thin using a tortilla press before placing on top of the roll.

    • concha dough after being poured out onto a floured work surface
    • concha dough being portioned into equal pieces on a floured work surface
    tan colored concha dough being portioned into equal pieces on a floured work surface

    The first photo was my attempt at 12 equal pieces. This photo shows the adjustments I had to make to get the pieces equal in size. Each piece is 3 ounces. 

    If you don’t have a tortilla press, you can roll out the topping with a rolling pin, but it will take a bit more time. A tortilla press is inexpensive and so fun to have in the kitchen. I’ve linked to the one we have below. If you have kids in the house, they will also have a blast with this step in the recipe.

    • concha dough balls after rising sitting on a sheet pan lined with parchment paper
    • concha dough balls after topping with the chocolate dough sitting on a sheet pan lined with parchment paper
    • concha dough balls after cutting the chocolate dough on top of the conchas sitting on a sheet pan lined with parchment paper
    • rows of conchas after baking sitting on a sheet pan lined with parchment paper

     Chocolate Conchas are perfect with a cup of strong, black coffee in the morning, but they are also a wonderful afternoon snack. 

    a Chocolate Concha or Mexican Sweet Bread flavored with chocolate and orange on a white plate with a bite taken out of it and a cup of coffee in the background in a day of the dead coffee mug

    No matter what time of day I eat a Concha, it puts a smile on my face and takes me right back to my childhood. I hope you take the time to try this amazing Latin specialty, and please let me know if it makes you as happy as it makes me in the comments section below!

    freshly baked rows of chocolate conchas on a baking sheet lined with parchment paper

    Helpful Utensils

    Tortilla Press

    Tortilla Press

    An essential if you want to get serious about your Mexican cooking and so fun to use!

    Digital Scale

    Digital Scale

    A great kitchen gadget for ensuring equal portions like in this recipe or for precise baking.

    red digital meat thermometer

    Digital Thermometer

    Take the guesswork out of temperatures and just buy a damn thermometer already.

    freshly baked rows of chocolate conchas on a baking sheet lined with parchment paper
    Print Recipe
    5 from 1 vote

    Chocolate Conchas

    Mexican sweet bread flavored with cinnamon and topped with a chocolate and orange cookie topping. Conchas are a staple of Latin cuisine that can be enjoyed as a sweet treat for breakfast or as an afternoon snack. 
    Prep Time30 minutes mins
    Cook Time25 minutes mins
    RisingTime4 hours hrs
    Total Time55 minutes mins
    Course: Breakfast, Snack
    Cuisine: Mexican
    Servings: 12 conchas

    Ingredients

    Dough

    • 3 & ⅔ C all purpose flour
    • 1 package of instant yeast or 2.5 tsp
    • 1 C milk*
    • ⅓ C sugar
    • 1 teaspoon salt
    • 2 eggs beaten
    • ½ C butter melted and cooled
    • 1 teaspoon cinnamon

    Topping

    • ½ C butter room temperature
    • ⅔ C white sugar
    • 1 teaspoon orange zest
    • ¾ C all purpose flour
    • ¼ C cocoa powder
    • 1 teaspoon vanilla extract
    • ½ teaspoon salt

    Instructions

    • Place the milk in a microwave safe dish and heat the milk in the microwave to 120 degrees by heating in 15-second increments, checking the temperature after each round. It usually takes about 60 seconds. 
    • If the milk gets hotter than 135 degrees, allow it to cool before adding yeast as yeast can die above that temperature. If you don't have a thermometer, you can simply check by putting your finger in the milk; it should be very warm, but not uncomfortably hot. There is also a link to a great digital thermometer above.
    • Whisk the yeast into the milk and allow it to dissolve. Set the mixture aside for 5-10 minutes or until the mix becomes a bit foamy on top. If nothing is happening, start over because your dough will likely never rise.
    • Add the sugar, salt, beaten eggs, cinnamon, and melted butter to a stand mixer with a hook attachment and turn mixer on medium-low to combine. Turn off the mixer and add the yeast mixture. Turn the mixer back on low to combine. 
    • Turn the mixer off and add 2.5 C flour, turn the mixer back on low, and mix until the dough starts to come together. Add the remaining flour in small batches until the dough is cohesive but still a bit sticky. Depending on the conditions, it can take as little as 3 cups and up to 4.
    • Once the dough has come together, pour onto a well-floured work surface and knead the dough until it is no longer sticky, or you can let the mixer do the work by letting it work the dough on medium-low speed for 5 minutes.
    • Place the kneaded dough back into the mixer bowl or turn off the mixer and remove the hook attachment. Cover the bowl in a tea towel and place in a warm area to rise. I usually turn my oven on to 200 degrees and leave the bowl on top of my range. Let the dough rise for about 2 hours until it has more than doubled in size.
    • Once risen, punch the dough down and use a spatula to release the dough from the bowl and place on a lightly floured work surface. Cut the dough into 12 equal pieces of about 3 ounces. I use a digital scale to make sure the dough balls are equal. I've included a link to purchase one above.
    • Pinch the seams of each dough ball on the underneath side while rolling the ball into a sphere shape. Place on a baking sheet lined with parchment paper, leaving a couple of inches between each ball. Cover the dough balls once more with the tea towel and put back into a warm place for another 1-2 hours or until the balls have risen and are almost touching.
    • While the dough is rising for the second time, prepare the topping. Mix the butter and sugar together on medium-high speed with an electric mixer until light and fluffy. Add the remaining ingredients and mix until combined.
    • Once the dough balls have risen, separate the topping into 12 equal size portions. Use a tortilla press or rolling pin to flatten each ball into a circle a bit larger than the risen dough balls. Place 1 flattened topping on each of the dough balls.
    • Use a sharp paring knife to make a swirl or striped design in the topping.
    • Preheat the oven to 375 degrees. Bake the conchas for 20-25 minutes or until golden brown.

    Notes

    *Any type of milk will work. I use 2% milk because it is what I always have around.

    Crock-Pot Mole Pulled Pork Tacos

    January 16, 2019 by Hailey 4 Comments

    mole pork tacos topped with thinly sliced red onion, bright green cilantro and lime wedges on a dark black plate
    5 mole pork tacos topped with thinly sliced red onion, bright green cilantro and lime wedges on a dark black plate

    Crock-Pot Mole Pulled Pork Tacos are intensely flavorful while being super simple to make. There is no reason to be intimidated by the ingredient list. In fact, there are far less ingredients in this mole than a traditional one, but like an authentic mole, this recipe has sweet, sour, salty and earthy flavors all combined in one beautiful sauce.

    I love the rich flavor of pork shoulder with the robust nature of mole sauce. Mole benefits from a long cook time to let the flavors meld and develop. Pork shoulder needs plenty of cooking time to become fall-apart tender making the two a perfect match.  

    Crock-Pot Mole Pulled Pork Tacos are so simple to make. They only need a few simple garnishes because the mole is so packed with flavor.

    ingredients for crock pot mole pulled pork tacos

    What is a mole sauce?

    Mole is a traditional Mexican sauce that is made up of chiles, sour notes (from tomatoes typically), sweet flavors (from fruit and chocolate), and spice. Nuts or seeds are added as a thickener and give extra depth of flavor.

    Red mole sauce in a brown slow cooker pot

    If you want to learn all about mole, check out this Taste of Home article.

    What are ancho chiles?

    Ancho chiles are dried poblano peppers. They have an amazingly complex flavor that is smoky, sweet, earthy, and just a little bit spicy. They are less spicy than a jalapeno, but pack more of a punch than a bell pepper.

    raw pork shoulder seasoned with salt and pepper and added to a brown slow cooker pot filled with red mole sauce

    You can find dried chiles like ancho chiles with the other specialty Mexican items are your grocery store. I often use ancho chili powder which is commonly found on the spice aisle to cut down on prep time.

    A food processor or molcajete is necessary to make a mole.

    A food processor is definitely the easiest way to make a mole. I have linked to one for purchase below if you’re interested in investing in one. It’s easily the most used kitchen appliance in my house, and I’ve had mine for over ten years with no signs of it stopping yet. The point being, it’s worth the money.

    raw pork shoulder covered in red mole sauce in a brown slow cooker pot before starting the cook time

    If you don’t want to purchase one, the only solid alternative for making mole is the traditional method of using a molcajete, or the Mexican version of a mortar and pestle. I am no expert in this method, but seeing that this method was user for centuries, I’m sure it’s possible.

    Other cuts of pork can work for Crock-Pot Mole Pulled Pork Tacos

    Pork shoulder is my favorite cut of meat for this recipe because it has enough fat marbling to stand up to the long cook time and tons of flavor in the meat. Alternatives include pork sirloin roast, pork picnic roast, and pork center-cut loin roast, but each of these is leaner than a pork shoulder.

    Pork shoulder in a slow cooker after cooking for 24 hours in a deep red mole sauce with tongs reaching in to grab it

    Because these alternative options lack the fat of pork shoulder, overcooking the meat is a risk. Start checking the pork’s texture at 12 hours if using one of these leaner cuts and continue to check about every hour or so after until the pork is falling apart. Once the pork easily falls apart when pierced with a fork, turn off the heat.

    Twenty-four hours of cooking time?!?

    You may have noticed that this pork shoulder is cooked for a seemingly f*cking ridiculous 24 hours, but keep in mind, there’s no work to be done in that 24 hours. You simply let the pork shoulder simmer away while your house fills with the aromas of nuts, chocolate, chiles and other spices. I’m over here drooling just thinking of the smell!

    Cooked pork sholder being shredded with two silver forks in a clear glass bowl

    As noted above, if you choose a leaner cut alternative to a pork shoulder, reduce the cooking time to keep the pork from overcooking.

    Mole pulled pork can be made in advance.

    Mole Pulled Pork can be made up to 3 days in advance of assembling your slow cooker tacos. Just keep the pork in an airtight container in the fridge until you’re ready for tacos. To reheat, a quick zap in the microwave will work or you can add 1-2 Tb of water and reheat over low heat in a sauté pan.

    shredded pork shoulder covered in red mole sauce in a clear glass bowl

    What to serve with Crock-Pot Mole Pulled Pork Tacos

    Because the mole is so rich and flavorful, simple garnishes work best with these tacos. I like cilantro, white onion, a little cheese, and a squeeze of fresh lime juice. Refried Beans are always a solid side dish choice with tacos. Another fun option would be freshly made guacamole or my Seven Layer Dip with chips.

    garnishes for crock pot mole pulled pork tacos

    Crock-Pot Mole Pulled Pork Tacos are special in that they offer unique flavors that you may have never used at home, but they are so damn easy to make. These slow cooker tacos will certainly bring something new to your dinner routine.

    Give this recipe a try and let me know how it goes in the comments section below.

    a dozen mole pulled pork tacos in a cast iron pan topped with red onions and cilantro surrounded by a bright purple napkin, cilantro leaves, corn tortillas and extra shredded pork in a blue bowl
    5 mole pork tacos topped with thinly sliced red onion, bright green cilantro and lime wedges on a dark black plate
    Print Recipe
    3.25 from 4 votes

    Crock-Pot Mole Pulled Pork Tacos

    Crock Pot Mole Pulled Pork Tacos combine slow cooked pork shoulder and a rich, intensely flavored mole sauce. Served with corn tortillas and simple garnishes, these tacos are a great simple dinner recipe. 
    Cook Time1 day d
    Total Time1 day d
    Course: Main Course
    Cuisine: Mexican
    Servings: 8 servings

    Ingredients

    Mole

    • 2 Tb ancho chile powder or 2 dried Ancho chiles*
    • 1 28 oz can whole tomatoes
    • 1 yellow onion
    • ½ C almonds
    • 3 oz semisweet baking chocolate finely chopped
    • ¼ C raisins
    • ¼ C chicken stock
    • 1 Tb ground cumin
    • 2 Tb chipotles in adobo sauce
    • 1 teaspoon cinnamon
    • 3 garlic cloves

    Pork

    • 2 teaspoon salt
    • 3 lb pork shoulder roast

    Tacos

    • corn tortillas
    • cilantro
    • diced white onion
    • shredded Monterey jack cheese
    • lime wedges

    Instructions

    To make mole

    • Finely chop the baking chocolate and add to the food processor. Pulse until very fine. Add the almonds, and pulse again until the mix is a fine crumb.
    • Add the remaining ingredients and food process the mole until smooth. Once blended smooth, Add the mole to a crock-pot.

    To make pork

    • Season the pork shoulder with kosher salt on all sides and add to the crock-pot with the mole. Turn the crock-pot on low. Cook the pork for 18-24 hours on low, turning over every 6-8 hours. The pork will be fall-apart tender when finished.
    • Using tongs, remove the pork from the crock-pot and tear apart into bite-size shreds. Add about 1 C of the leftover mole to the pork and mix to combine. Season to taste with salt.

    To make tacos

    • Warm the corn tortillas on a dry cast iron skillet or flat top grill. Once warm, fill with mole pork and garnish with lime juice, cheese, onion and cilantro.

    Notes

    *If using dried ancho chiles, soak in hot water for 15 minutes prior to blending in the food processor.

    Frequently Asked Questions

    Where do I find ancho chili powder?

    It should be available with other spices at the store.

    Do I need a food processor for this recipe?

    Yes, or a molcajete which is a Mexican mortar and pestle.

    I can't find pork shoulder. What should I use?

    I recommend pork sirloin roast instead, but start checking the meat at 12 hours and every hour after for the meat to be fall-apart tender.

    Easy Spanish Chicken and Rice

    January 13, 2019 by Hailey 2 Comments

    white rectangular plate filled with orange rice topped with strips of red bell pepper, green onion pieces, sliced chicken breast and cilantro with a lemon wedge
    white rectangular plate filled with orange rice topped with strips of red bell pepper, green onion pieces, sliced chicken breast and cilantro with a lemon wedge

    Easy Spanish Chicken and Rice is a quick weeknight dinner packed with flavor. This recipe includes an awesome little spice trick called Sazon that gives the rice authentic color and taste with one easy seasoning packet. Top that rice with seasoned chicken and peppers, and dinner is served!

    I kept my Spanish Chicken and Rice recipe super simple, but I promise it still packs a punch. The garnishes really bring this Chicken and Rice to life.

    What makes this Spanish Chicken and Rice recipe so easy?

    Easy Spanish Chicken and Rice includes a handful of ingredients, requires no special equipment, and is ready in less than 30 minutes. I would say that’s pretty damn easy.

    ingredients for easy spanish chicken and rice including smoked paprika, salt, chicken broth, black pepper, garlic powder, cumin, Sazon seasoning, rice, red bell pepper, green jalapeno, green onions, and raw chicken breasts

    If you want to speed up this recipe even more, you could use rotisserie chicken or frozen cooked chicken instead of cooking the chicken yourself.

    white round plate with a grey rim with raw chicken breasts seasoned with spices in the background including garlic powder, salt, powder, paprika and cumin

    Don't let the seasoning mix go to waste though! If you’re going to use store-bought cooked chicken, cut the seasoning mixture recipe in half and season the peppers and onions to taste.

    seasoned chicken breasts cooked in a dark saute pan

    But I don’t think cooking rice is that easy…

    Well-seasoned, perfectly cooked rice is a great way to start any weeknight dinner, but I know many of you are thinking, “Cooking rice is the opposite of easy, bitch.” I, too, was on the rice struggle bus for many years. My rice always overcooked and never light and fluffy.

    That was until I documented my foolproof recipe for Perfect Basmati Rice.

    large decorative blue and white bowl with orange rice and a wooden spoon

    I’ve found the method outlined in that post to be failproof, but if you have your own way of making rice that you trust, go with it.

    I’m not reading a second post just for a rice recipe…

    No problem! All the tips and techniques you need for perfectly cooked rice are in my Perfect Basmati Rice post, but if you can’t be bothered to read another recipe post then I’ll cover the most important tip here.

    white rectangular plate filled with orange rice topped with strips of red bell pepper, green onion pieces, sliced chicken breast and cilantro with a lemon wedge

    I like to rinse my rice well and then soak it for 30 minutes before cooking. I’ve found this ensures you remove all the excess starch from the rice and end up with lovely individual grains of fluffy rice.

    Can I use 90-second or boil in a bag rice for Spanish Chicken and Rice?

    Shortcuts are always an option, but you may sacrifice some flavor in the pursuit of faster prep times. My only heartburn about using fast-cook rice is that you will have to leave out my beloved Sazon seasoning. For this particular recipe, I use the cilantro y achiote variety, and it brings so much flavor to the dish.

    white rectangular plate filled with orange rice topped with strips of red bell pepper, green onion pieces, sliced chicken breast and cilantro with a lemon wedge

    There are quick-cook Spanish rice options that you can find at the grocery store that would be perfectly fine substitutes in this recipe. That being said, Perfect Basmati Rice is really low effort and worth it in my opinion.

    How do I make yellow rice?

    Sazon, my friend. Making yellow rice requires nothing more than a little help from a packet of seasoning known as Sazon. They make several flavors, but Easy Spanish Chicken and Rice features the cilantro y achiote variety. Trust me when I tell you that this one little packet bring so much flavor along with the signature yellow color of a good Spanish rice.

    You can find Sazon with the other Mexican specialty items at the store.

    wooden cutting board with a silver knife and chopped green onions, sliced jalapenos and red bell pepper strips

    Garnishes make my Spanish Chicken and Rice extra delicious

    The garnishes include slivered almonds, raisins, lemon juice, cilantro and green onions. All the garnishes are super simple, but together they make this dish a balance of sweet, salty, sour and spicy flavors.

    garnishes including raisins, slivered almonds, bunch of cilantro, whole lemon, and green onions

    Can I Easy Spanish Chicken and Rice be turned into a vegetarian recipe?

    This recipe could also easily be made vegetarian by substituting portabella mushrooms in place of chicken breast. In fact, you could use a whole variety of meat substitutes in place of chicken.

    strips of red bell pepper cooking in a dark saute pan

    Is Spanish Chicken and Rice just for dinner?

    This meal is an easy dinner choice, but it also would work as a make-ahead option. If you like to meal prep your lunches for the week, Easy Spanish Chicken and Rice is a solid choice!

    white rectangular plate filled with orange rice topped with strips of red bell pepper, green onion pieces, sliced chicken breast and cilantro with a lemon wedge

    Easy Spanish Chicken and Rice will become part of your regular dinner rotation once you try it. Let me know what you think in the comments section below.

    white rectangular plate filled with orange rice topped with strips of red bell pepper, green onion pieces, sliced chicken breast and cilantro with a lemon wedge
    Print Recipe
    5 from 2 votes

    Easy Spanish Chicken and Rice

    Quick, simple and packed with flavor, Easy Spanish Chicken and Rice is a perfect weeknight dinner or make-ahead lunch. Rice seasoned with Sazon, topped with sauteed chicken, peppers and onions.
    Prep Time10 minutes mins
    Cook Time20 minutes mins
    Course: Main Course
    Cuisine: American
    Servings: 4 servings

    Ingredients

    Rice

    • 1 packet Goya Sazon cilantro y achiote seasoning*
    • 4 C Perfect Basmati Rice**

    Chicken/Veggies

    • 4 boneless skinless chicken breast thin cut
    • 1 red bell pepper
    • 1 jalapeno optional
    • 4 large green onions divided
    • 1 teaspoon ground cumin
    • 1 teaspoon garlic powder
    • 1 teaspoon smoked paprika
    • 1 teaspoon kosher salt
    • ½ teaspoon ground black pepper
    • olive oil

    Garnish

    • slivered almonds
    • raisins
    • cilantro roughly chopped
    • green onions
    • 1 lemon

    Instructions

    • Prepare Perfect Basmati Rice. Be sure to use Cilantro y Achiote Sazon to season the rice. While rice is cooking, make the chicken and vegetables.
    • Mix together the cumin, garlic powder, paprika, salt, and pepper. Season the chicken breasts liberally on both sides with spice mix.
    • Core the bell pepper and jalapeno and slice both into thin strips.
    • Slice the green onion on an angle into ¼-inch strips, separating the green ends from the light green and white. Reserve the green ends to be used as garnish.
    • Heat a large nonstick pan over medium-high heat. Add enough olive oil to lightly coat the bottom of the pan. Once the pan is hot, place the chicken breasts in the pan.
    • Cook on the first side for 3-4 minutes until well browned. Turn the chicken breasts over and cover the pan with a lid or a piece of foil. Cook covered for another 3-4 minutes or until the second side is browned.
    • Depending on the thickness of the breast, you may need to turn over once more time and cook for another 2-3 minutes. Chicken breasts will be firm to the touch when cooked through or you can take the temperature. 165 degrees is what you're looking for.
    • Once the chicken has cooked, remove from the pan and set aside. Add on more tablespoon of olive oil to the same pan and add the sliced peppers and white/light green portion of the green onions. Sautee the veggies for about 5 minutes until softened and browned on the edges. Season with salt and pepper to taste. 
    • To serve, fill a bowl with 1 C of rice, slice the chicken breasts and lay on top of the rice. Add cooked peppers and onions and then garnish with chopped cilantro, reserved green onions, slivered almonds, raisins and a squeeze of lemon juice. 

    Notes

    * Sazon can be found in the grocery store with specialty Mexican ingredients.
    ** Check out my Perfect Basmati Rice recipe for a foolproof method. Use Sazon Cilantro y Achiote in place of the Con Azafran variety.

    Frequently Asked Questions

    Can I use boil-in-a-bag or 90-second microwave rice?

    Yes, but you won't be able to include the Sazon seasoning.

    Where do I find Sazon seasoning at the grocery store?

    It's typically with the Mexican specialty items or with the stock and broth.

    Can I make the recipe vegetarian?

    Yes. Treat portabella mushrooms just like the chicken in the recipe.

    Crock-Pot Italian Beef Sandwiches

    January 8, 2019 by Hailey 4 Comments

    four Crock-Pot Italian Beef Sandwiches on a white platter garnished with whole basil leaves
    beef sandwiches topped with cooked sliced vegetables on browned buns

    Crockpot Italian Beef Sandwiches are as easy to make as they are delicious to eat. A simple chuck roast is transformed into succulent, fall apart shredded beef with just a few spices that you probably already have in your pantry.

    The Italian Beef in this recipe is so delicious, you could probably serve it on shoe leather, and it would be delicious. 

    Instead, I made sandwiches that are perfect football food like for tonight’s big College National Championship game or the upcoming Super Bowl.

    For my Italian Beef Sandwiches, I start with a ciabatta roll. I’m partial to ciabatta because I feel like it holds up better to a hearty sandwich like this one without being tough on the outside. There is nothing worse than trying to bite into a sandwich and having everything go out the other end because you can’t bite through the bread! It’s the f*cking worst!

    • chunks of cooked beef in pan juices in a white bowl
    • shredded cooked beef in a white mixing bowl

    To ensure the ciabatta rolls have a nice crunch to the outside, I toast them before I start layering on the fillings. Just a drizzle of olive oil and a little salt and pepper is all you need before toasting these rolls up in the oven. Once the ciabatta is starting to brown around the edges, you’re ready to start building some killer sandwiches!

    four Crock-Pot Italian Beef Sandwiches on a white platter garnished with whole basil leaves

    I first add a heaping pile of tender shredded beef to the bottom bun. You don’t need any condiments under the beef because the sexy meat juices will soak into the bun. Next, I add a healthy serving of peppers and onions.

    I’m a big fan of the peppers and onions in this recipe. I’ve added pepperoncini peppers and a dash of red wine vinegar for acidity. The sandwich really needs that bump of acid to balance all the rich, fatty deliciousness of the Italian beef. The peppers and onions are fresh and zingy. In fact, they’re even good enough to make a vegetarian sandwich if you have an herbivore in your crew.

    sliced red, green, and yellow peppers with sliced onions sauteing in a black skillet

    I then top off the peppers and the top bun with a few slices of Monterey jack cheese. You could use mozzarella, pepper jack or any cheese you like as long as it melts well. 

     Once you’ve added the cheese, the sandwiches just need a little more time in the oven to become a vision of melty, cheesy, beefy goodness.

    The final layer is a slathering of pesto mayo that includes a bit of fresh lemon juice. The mayo adds a subtle herby flavor and a little freshness to the sandwiches that makes them legit irresistible. If your mouth isn’t watering right now, your brain may not be working correctly.

    the top portion of a bun upside down and covered in baked melted herbed cheese

    Well, if you aren’t already sold on how tasty these sandwiches are, also consider that these sandwiches are extremely inexpensive to make. Not including the spices and mayo which I already had in my kitchen, the groceries for this recipe cost me $25, and that’s for 8 assembled sandwiches!

    That’s less than $4 per sandwich people! I can guarantee that you can’t find any sandwich this damn good for less than $5. Hell, you can barely get a shitty fast food burger for $5 these days.

    an open bun topped with beef, sauteed peppers and onions, and cheese surrounded by assembled sandwiches with the same ingredients

    Whether you’re serving it at your next football (or other sports) watch party or family dinner, Crockpot Italian Beef Sandwiches are sure to impress. I can’t wait to hear your thoughts on this awesome recipe. Please don’t leave me hanging! Post your feedback in the comments section below.

    beef sandwiches topped with cooked sliced vegetables on browned buns
    Print Recipe
    5 from 1 vote

    Crock-Pot Italian Beef Sandwiches

    Fall-apart tender shredded beef roast cooked slowly with Italian spices. Layered with sauteed peppers and onions, sliced cheese and pesto mayo on a ciabatta roll, these little sandwiches are perfect football party food or an easy weeknight dinner. This simple crock pot preparation is so delicious.
    Prep Time15 minutes mins
    Cook Time8 hours hrs 20 minutes mins
    Total Time8 hours hrs 35 minutes mins
    Course: Main Course
    Cuisine: American, Italian
    Servings: 8 sandwiches

    Ingredients

    Italian Beef

    • 1 C water plus more to bring water to halfway up roast
    • 2 teaspoon soy sauce
    • 2 teaspoon Worcestershire sauce
    • 1.5 teaspoon dried basil
    • 1 teaspoon dried oregano
    • 1 teaspoon garlic powder
    • 1 teaspoon onion powder
    • ½ teaspoon cayenne pepper
    • 2-3 lb beef chuck roast

    Peppers and Onions

    • 1 Tb olive oil
    • 1 red bell pepper
    • 1 green bell pepper
    • 1 yellow onion
    • 1 C sliced peperoncinos jarred
    • 2 cloves garlic minced
    • 1 teaspoon kosher salt
    • ½ teaspoon black pepper
    • 2 teaspoon red wine vinegar

    Pesto Mayo

    • ½ C prepared mayonnaise
    • 3 Tb prepared basil pesto
    • 2 teaspoon lemon juice
    • salt and pepper to taste

    Sandwich

    • 8 oz Monterey jack cheese sliced
    • Ciabatta rolls
    • Fresh basil

    Instructions

    To make Italian beef

    • Combine 1C of water and all of the rest of the ingredients but the chuck roast in a liquid measuring cup. Place the chuck roast in the bottom of your Crock-Pot and pour the mixture over the beef. Add enough water to bring the liquid halway up the sides of the roast. Cook on low for 8 hours.*

    To make peppers and onions

    • Heat a large nonstick skillet over medium-high heat with 1 Tb olive oil. Thinly slice the onion and bell peppers. When the oil is hot, add the sliced onion and stir to coat evenly in oil. Let the onion cook for 2-3 minutes.
    • Once the onion has started to soften, add the sliced bell pepper and cook for another 3 minutes, stirring occasionally. Next, add the peperoncino and garlic and stir to combine. After 2 minutes, add the red wine vinegar, salt and pepper, and stir. Cook for another 2 minutes until the garlic and onions have browned slightly and the peppers are crisp-tender.

    To make pesto mayo

    • Combine all ingredients and refrigerate.

    To make sandwiches

    • Preheat the oven to 400 degrees. Prepare a baking sheet with nonstick foil or parchment paper for easy cleanup.
    • Split the rolls in half and lay on the baking sheet. Drizzle with a bit of olive oil and season with salt and pepper. Place in the oven for 5-7 minutes until beginning to brown around the edges.
    • Once the buns are toasted, remove the pan from the oven. Top the bottom bun with a healthy portion of beef and then peppers and onions. Place a couple of slices of cheese on top of the beef and on the top bun and put back in the oven for 7-10 minutes or until the cheese is bubbly.
    • Before serving, smear the top bun with a couple of teaspoons of pesto mayo, garnish with torn basil leaves, and put the two sides together.

    Notes

    * You can easily cook the beef overnight then simply store the beef in its juices in a Tupperware before starting your day. Just reheat the beef when you're ready to assemble your sandwiches. The beef will keep in the fridge for up to 5 days.

    Asian Pork Meatballs

    January 6, 2019 by Hailey 10 Comments

    Close up of white bowl filled with brown meatballs sprinkled with green onions.

    Asian Pork Meatballs are flavorful, tender, and so easy to make. The addition of sesame oil and soy sauce brings the Asian flavors, but the real secret ingredient is mushrooms.

    Close up of white bowl filled with brown meatballs sprinkled with green onions.

    Minced mushrooms are the secret to how tender these mushrooms are. Mushrooms also bring plenty of umami flavor to the meatballs. The savory notes from the mushrooms balance the natural saltiness of ground pork perfectly.

    The meatballs are baked in the oven for easy cleanup and added convenience. They are an easy weeknight dinner. Serve them over Perfect Basmati rice with a veggie of your choosing for a quick and satisfying meal.

    Ingredients

    Asian Pork Meatballs are made from simple ingredients. I bet you have several of them in your pantry already.

    • Ground pork- You don’t want sausage, just plain ground pork.
    • Mushrooms- I use baby portabella mushrooms which can also be labeled as cremini mushrooms.
    • Panko
    • Egg
    • Salt
    • Pepper
    • Soy sauce- Reduced sodium soy sauce is my go-to for cooking, but I like the regular version for garnish. Use whichever you prefer.
    • Sesame oil
    • Green onions
    • Ginger- This recipe calls for fresh ginger. I would not recommend substituting with powdered, candied, or any other kind.
    Ingredients for Asian Pork Meatballs.

    Instructions

    Asian Pork Meatballs are so simple to make. There are three steps to making them.

    1. Finely mince the mushrooms in a food processor or blender.
    2. Combine mushrooms with the remaining ingredients and form the meatballs.
    3. Bake in the oven and serve!

    I like to bake the meatballs in the oven for quick clean-up, but they can also be prepared on the stovetop. Cook them over medium heat for 10-12 minutes, stirring often.

    Sheet pan topped with parchment paper and uncooked meatballs before going into the oven.

    Substitutions

    If you don’t eat pork or can’t find ground pork at your store, you have a couple of different options. Ground chicken or lean ground beef would both work as a substitute for ground pork. If you want to make the recipe totally vegetarian, you could use your favorite plant-based meat substitute.

    Variations

    You can play around with what kind of mushrooms you include. I hate white button mushrooms; they have zero flavor, so I wouldn’t recommend them. Other than that, feel free to try any mushroom you’d like. A few mushrooms that come to mind for this recipe are:

    • Portabella,
    • Shitake
    • Oyster, or
    • Chanterelle

    Equipment

    A food processor or blender is helpful in finely mincing the mushrooms. A small food processor is a relatively inexpensive piece of kitchen equipment that you will get tons of use out of. If you already have a blender, that will also do the trick.

    You can certainly make this recipe even if you don’t have a food processor or blender. The option to chop the mushrooms by hand is a bit more time-consuming but totally doable.

    Close up of white bowl filled with brown meatballs sprinkled with green onions.

    Storage

    • Serve: I like to serve the meatballs fresh from the oven over a bed of rice with steamed snap peas or broccoli.
    • Store: The meatballs can be kept in an airtight container in the fridge for up to five days.
    • Freeze: Meatballs freeze well. Just be sure to let the meatballs cool completely in the fridge before moving them to the freezer. Store in a plastic store bag; try to remove as much air from the bag as possible before freezing.
    • Reheat: There are so many ways to reheat frozen meatballs depending on how much time you have and the equipment in your kitchen. Check out this article for eight different ways to reheat frozen meatballs.

    Top tip

    Finely mincing the mushrooms is key to the texture of the cooked meatballs. If the mushroom pieces are too big, the meatballs will have chunks of shrooms in them. Mince the mushrooms until they are in pieces smaller than a pea.

    After being combined, the pork and mushrooms emulsify into one smooth mix as long as the mushrooms are cut small enough.

    Glass bowl filled with finely minced mushrooms.

    Another tip for this recipe (and others) is to peel your fresh ginger as soon as you bring it home from the store. Once peeled, I store fresh ginger in an airtight container in the freezer for up to three months.

    The frozen ginger can then be grated straight from the freezer and used in your recipe. I use this same technique in my Easy Chicken Curry.

    Close up of white bowl filled with brown meatballs sprinkled with green onions.

    Asian Pork Meatballs are perfect for your weeknight dinner rotation. I’d love to hear what you think of the recipe in the comments section below.

    HELPFUL EQUIPMENT

    Cuisinart Small Food Processor

    4-Cup Food Processor

    Close up of white bowl filled with brown meatballs sprinkled with green onions.
    Print Recipe
    4.63 from 8 votes

    Asian Pork Meatballs

    Asian Pork Meatballs are tender, flavorful, and easy to make. The addition of ground mushrooms brings tons of savory flavor to this simple weeknight dinner.
    Prep Time15 minutes mins
    Cook Time15 minutes mins
    Total Time30 minutes mins
    Course: Main Course
    Cuisine: Asian
    Servings: 24 meatballs

    Ingredients

    Meatballs

    • 1 lb ground pork
    • 8 oz baby portabella mushrooms cleaned and stem removed
    • ½ C panko breadcrumbs
    • 1 egg beaten
    • ½ teaspoon kosher salt
    • 1 teaspoon black pepper
    • 2 teaspoon reduced sodium soy sauce
    • ½ teaspoon sesame oil
    • ¼ C green onions finely chopped
    • 2 teaspoon fresh ginger grated

    Garnish (optional)

    • sesame seeds
    • green onions greens only, finely chopped

    Instructions

    • Preheat the oven to 400°F. Line a baking sheet with parchment paper for easy cleanup.
    • Cut the mushroom caps into one-inch chunks and place in a food processor or blender. Pulse until finely minced. The mushrooms should be super fine (see image above).
    • Add the mushrooms to a large mixing bowl with the remaining ingredients. The best tool to mix up meatballs is your hands. Feel free to wear disposable gloves.
    • Once the ingredients are thoroughly combined, form the meat into half-ounce balls and place on the prepared baking sheet.
    • Bake for 15 minutes, turning each meatball over halfway through the cook time.

    Frequently Asked Questions

    Can I make this recipe without a food processor or blender?

    Yes. You can finely mince the mushrooms by hand. Just be sure the pieces are smaller than a pea.

    Can the meatballs be cooked on the stovetop instead of in the oven?

    Yes. Cook them over medium heat for 10-12 minutes, stirring often.

    Do I have to use baby portabella mushrooms?

    No, but I don't recommend white button mushrooms (sorry, they have no flavor). Any other mushroom you like will work.

    Gouda Cheese Straws

    December 30, 2018 by Hailey Leave a Comment

    a white bowl filled with twisted baked cheese straws on a wooden surface
    a white bowl filled with twisted baked cheese straws on a wooden surface

    Gouda Cheese Straws are light, crisp, caramelized and cheesy. Honestly, what else could you possibly ask for in a snack?! Cheese is the star in this classic appetizer. Just a little flour and butter and a touch a cayenne and Worcestershire is all you need to change cheese into crunchy, snackable form.

    If you grew up in the South, you’ve probably had a cheese straw before. If not, you’ve probably had a Cheez-It which sort of, just sort of, gives you an idea of the flavor of a cheese straw. But if you’ve never had a homemade version of a cheese straw, you are missing out BIG TIME!

    Cheese straws are as addictive as all the weird, processed cheesy shit we all love…think Cheetos, Cheez-Its, etc.

    I can’t lie. I f*cking love all these diabetes-inducing snacks, but I would never serve them to party guests. Cheese straws are a different story.

    Homemade Gouda Cheese Straws have the texture of a perfect buttery pie crust. They have a snap when you break them, but the straws crumble apart and melt in your mouth from all the butter in the recipe.

    a white bowl filled with twisted baked cheese straws on a wooden surface

    The gouda cheese is applewood smoked so you get lovely smoky notes in the cheese straws. I use half gouda and half extra sharp cheddar in my recipe because I don’t think you can have a proper cheese straw without some cheddar. I also have tried making cheese straws without cheddar, and I think they lack the tangy bite of the classic.

    Making the dough for the cheese straws is so easy especially if you have a food processor. Check out the link below if you’re interested in buying one. They last for decades and the uses are endless.

    To make the dough you simply grate the cheese and then mix all the ingredients until the dough comes together. 

    The more labor-intensive part of this recipe is cutting and twisting each cheese straw. The dough is quite forgiving so rolling it out isn’t bad.

    • a disc of unbaked pastry dough on a silpat mat
    • a thin sheet of pastry dough sandwiched between two silpat mats
    • a sheet of pastry dough cut into long, narrow rectangles
    • rows of unbaked cheese straws on a parchment lined baking sheet

    The task of twirling each strip of dough to create a corkscrew shape is somewhat fiddly or meticulous, but it’s a great cooking project if you like that sort of thing. I find it relaxing to solely focus my mind on the task at hand, but if you’re thinking f*ck that, you can also bake them as flat crackers. They just may not be quite as festive.

    a white bowl filled with baked gouda cheese straws

    The light, crispy texture and cheesy, salty flavor of cheese straws make them the perfect party appetizer. Whether you’re having a martini or a cold beer, these cheese straws are just the right snack. Let me know what you think of them in the comments section below!

    a pile of twisted golden brown baked bread stick style pastries on a wood surface

    Helpful Utensils

    Cuisinart Large Food Processor

    11-Cup Food Processor

    The uses for a food processor are endless. In this recipe, it grated the cheese and made the pastry dough. It's worth every penny.

    metal bench scraper

    Bench Scraper

    A bench scraper is absolutely essential to working with any sort of pastry. It makes delicate work a breeze.

    silpat mats

    Set of 2 Silpats

    The ultimate nonstick surface and they are dishwasher-safe for easy cleanup.

    a pile of twisted golden brown baked bread stick style pastries on a wood surface
    Print Recipe
    3 from 2 votes

    Gouda Cheese Straws

    Super light and crispy but packed with rich cheesy flavor, Gouda cheese straws are the party snack everyone craves. These are the perfect little bite with cocktails. The salty and smoky notes from the Gouda make these homemade snacks extra special. 
    Prep Time45 minutes mins
    Cook Time25 minutes mins
    Total Time1 hour hr 10 minutes mins
    Course: Appetizer, Snack
    Cuisine: American
    Servings: 6 dozen

    Ingredients

    • 10 Tb salted butter room temperature
    • ¼ lb smoked gouda cheese grated
    • ¼ lb extra sharp cheddar grated
    • 1 ¾ C all purpose flour
    • 1 teaspoon Worcestershire sauce
    • ½ teaspoon cayenne optional

    Instructions

    • Grate the cheese. Combine with remaining ingredients in a food processor.*
    • Once the dough is smooth, split the dough in two and place half on a Sil-Pat or a sheet of parchment paper.**
    • Place the other half of dough into the fridge while you work the first half.
    • I like to roll out on a nonstick surface so I don't have to add more flour to the dough. It can become too crumbly if you add too much flour.
    • Bring the dough together into a disc shape. Place another Sil-Pat or sheet of parchment paper on top of the dough and roll out to about ⅛-inch thickness. Trim off the edges to give a straight edge.
    • Cut the dough into ½-inch strips. A ruler is quite handy for this task. I like my cheese straws anywhere between 4-6 inches long, but I really don't think it has to be exact. In fact, I love the look of all the different shapes and sizes so don't lose your mind trying for even strips.
    • Once the dough has been cut into strips. Take each one and rotate it to form a corkscrew shape. Do this gently or you can tear the dough. If you do, no worries, just pinch it back together. This is a time-consuming process but so worth it for the lovely brown ridges the corkscrew shape provides.
    • Preheat the oven to 325 degrees. Prepare a baking sheet with parchment paper and place the cheese straws on the baking sheet. You can put them close together since the straws don't contain any leavening ingredients.
    • Bake for 25 minutes or until golden brown. Allow to cool completely.

    Notes

    * I use my food processor for this entire recipe, but you can also grate the cheese with a box grater and combine with a mixer if you don't have one. Check out the link above if you're interested in purchasing a food processor. There one of my favorite kitchen tools. ** A Sil-Pat is the ultimate nonstick surface. Evenly melted sugar won't stick to it. It's also dishwasher safe so it's a breeze to cleanup. Check out the link above to buy one.

    5-Cup Salad

    December 22, 2018 by Hailey 1 Comment

    Large white bowl filled with Five Cup Salad
    Five Cup Salad being scooped from a large white bowl with a wooden spoon and served into small clear glass trifle dishes

    5-Cup Salad is essential for Christmas, and it could not be easier to make. 5-Cup Salad is my family’s version of ambrosia, a classic Southern fruit salad that also includes shredded coconut and mini marshmallows.

    For those of you who are thinking, what the f*ck…fruit and marshmallows?! Just chill and trust me. This fruit salad is sweet and tangy with a little added tartness from sour cream. 

    You will be surprised at how much you like it once you try it.

    ingredients for five cup salad

    I realize that ambrosia salad is in a class of foods that includes Jello salads and generally really freaks people out, but I just couldn’t resist posting this recipe before Christmas. I can’t deny that my family loves this shit in all of its simple glory!

    Five Cup Salad ingredients in a large glass mixing bowl with a white spatula

    We always have 5-Cup Salad at holidays like Christmas and Easter. It’s the perfect sweet and citrusy addition to the typical holiday dinner. Not only it is scrumptious right after being made, but it’s also even better once the salad has sat in the fridge overnight. My sister, mom and I have been known to have it for breakfast the next day.

    Five Cup Salad mixed and prepared in a large glass mixing bowl with mini marshmallows scattered around

    Because this recipe is so low maintenance, it’s also a great one to have on Christmas morning with some crispy bacon and homemade Buttermilk Biscuits. Be sure to check out my biscuit recipe- they are incredible!

    Five Cup Salad mixed and prepared in a large glass mixing bowl with mini marshmallows scattered around

    If I’m being totally honest, I made this salad, took the pictures and then ate half of it (don’t judge me…I went HAM…Hard As a Mofo….this morning at spin class) all in less than an hour today. Assembling the recipe takes less than 5 minutes and zero effort is required.

    Five Cup Salad being scooped from a large white bowl with a wooden spoon

    As the name implies, there are five ingredients and a cup of each one in the recipe. You mix all five of the ingredients together and that’s it!

    Five Cup Salad being scooped from a large white bowl with a wooden spoon

    It’s shamelessly easy to make, so easy in fact that you’ll be tempted to make it for yourself in celebration of no holiday at all.

    Large white bowl filled with Five Cup Salad

    If you’ve never had ambrosia fruit salad before, you have to give 5-Cup Salad a try. You will love it and so will your friends and family, young and old. It’s a classic recipe for a good reason.

    I can’t wait to hear whatcha’ think! Post your feedback in the comments section below.

    Five Cup Salad being scooped from a large white bowl with a wooden spoon and served into three small clear glass trifle dishes and two orange halves
    Five Cup Salad being scooped from a large white bowl with a wooden spoon and served into small clear glass trifle dishes
    Print Recipe
    4.84 from 6 votes

    5-Cup Salad

    Ambrosia fruit salad with five ingredients that takes less than five minutes to make. 5-Cup Salad is sweet and tangy and shamelessly easy to make. Its the perfect addition to your holiday table especially since it can easily be made ahead or right before a meal. 
    Prep Time5 minutes mins
    Total Time5 minutes mins
    Course: Salad
    Cuisine: American
    Servings: 6

    Ingredients

    • 1 C mandarin orange slices canned
    • 1 C pineapple chunks canned
    • 1 C sour cream
    • 1 C sweetened shredded coconut
    • 1 C mini marshmallows

    Instructions

    • Drain the mandarin oranges and pineapple chunks. Combine drained fruit with remaining ingredients. Mix gently with a spatula until thoroughly combined. Try not to break up the fruit as you mix. Keep refrigerated.

    Pork, Bacon and Apple Pasta Bake

    December 16, 2018 by Hailey 12 Comments

    a square baking dish filled with a mixture of diced apple, pork, and spinach topped with melted cheese
    a mixture of pasta with ground meat, bacon, diced apple, and spinach topped with melted cheese in a baking dish

    Pork, Bacon and Apple Pasta Bake combines ingredients you know and love in a way you’ve probably never had before. You may be thinking apple and pasta, WTF? But pork and apples is a flavor combo we’re all familiar with.

    So what makes this pasta dish so unique? There is a lot that is special about this recipe, but the use of apple cider for the base of the pasta sauce is what makes it so cool! You might think that the apple cider would be too sweet, but, you will taste tons of apple flavor without being overwhelmed by sweetness.

    I'm a big fan of using apples in savory recipes. My Sweet Potato, Apple and Kale Galette is another one of my favorites.

    Bacon is key to this recipe. I added it after trying out the recipe for the first time. The sauce needed more smoky, meaty flavors to balance all the brightness from the apple, lemon and thyme. Just a little bit of bacon was all it needed!

    The combination of salty and sweet flavors with earthy vegetables is an epic party in your mouth.

    a square baking dish filled with a mixture of diced apple, pork, and spinach topped with melted cheese

    Pork, bacon and apples in a pasta bake…seriously??

    The idea may seem completely wacky, but it’s based in the fundamental and classic flavor combination of pork and apples. I mean, who didn’t have pork chops and applesauce as a kid? There’s nothing wrong with roasted pork tenderloin with apples, but I wanted to take the classic flavor combo and apply it to totally new ingredients.

    If you like salty and sweet flavors together, you are going to love this recipe.

    Still not convinced, eh? If you skipped ahead to the recipe and thought, “Cream cheese and apple cider in a pasta bake?! What’s this chick smoking?” Don’t fret! I promise this recipe is tested and approved.

    The apple cider is the backbone of the sauce for my Pork and Apple Pasta. Without it, the recipe would not have nearly as much apple flavor. To balance out the cider, I cut it with half chicken stock. This ensures that flavor of the sauce is savory.

    And why does the recipe also include cream cheese you might ask. Well, for starters, I love the shit out of some cream cheese. Those of you who follow all my recipes are probably thinking this bitch needs cream cheese rehab, but it really is perfect in this sauce.

    Chive and garlic cream cheese gives just the right amount of tang and creaminess to the sauce. You may have never had apple cider and cream cheese in the same bite, but believe me when I tell you, it’s heavenly!

    It’s bacon and cream cheese together…what could possibly go wrong here?

    a spoon lifting a portion of a pork, bacon, apple, and pasta casserole from a baking dish

    Can you substitute apple juice for apple cider?

    Disclaimer, I’ve never tried making this recipe with apple juice, but I think you could make this substitute work if necessary. Apple juice will definitely be sweeter, so it’s best to increase the chicken stock to 2 cups and reduce the apple juice to 1 cup instead of the equal parts cider and stock in the recipe.

    Do I have to use honey crisp apples for Pork and Apple Pasta?

    You can use whatever kind of apple you like in this recipe, but I recommend a variety with a balance of sweetness and acidity. I would not recommend granny smith apples for this recipe because they don’t have enough sweetness to balance all the salty and savory flavors from the pork and bacon.

    Why egg noodles?

    Egg noodles are one of my all-time favorites, so that’s main reason I use them in my Pork and Apples Pasta Bake. I also like their slightly sweet and rich flavor with the salty pork in this recipe. Last, they have a wide structure that holds as much of the creamy sauce as possible.

    a portion of pork, bacon, and apple pasta casserole in a round white bowl

    It's a one-pot meal (if you don’t count boiling the pasta)

    I love this recipe because it’s a one-pot dish (if you ignore the need for a pot to boil pasta but come on…you don’t even really have to clean that pot). I built this recipe to be about layering flavors. Every ingredient is added in a certain order to ensure that each is cooked perfectly without requiring multiple pots and pans.

    Can I make Pork, Bacon and Apple Pasta ahead of time?

    Pork and Apples Pasta is an awesome make-ahead meal. The entire recipe takes about 45 minutes to prepare so it wouldn’t be crazy to make and eat it right away on a busy weeknight. If, on the other hand, you’re a weekend meal prepper, you can easily pour the prepared recipe into a casserole dish and reheat when you’re ready to have a pig and pasta party!

    The prepared casserole will hold in the fridge for up to 3 days before baking and serving.

    Pork and Apple Pasta Bake is a crowd-pleasing recipe. It’s also inexpensive to prepare and will give you plenty of leftovers. There are tons of reasons to love this recipe but none is more important than how tasty it is!

    Try it out and you’ll see. Let me know what you think in the comments section.

    Helpful Utensils

    black and red plastic ground meat chopper utensil

    Ground Meat Chopper

    This may seem like a one-trick pony, but I use mine ALL THE TIME. It makes breaking up ground meat in a saute pan so fast and easy!

    red Staub cocotte with lid

    Staub Cocotte 

    Staub makes cookware of exceptional quality, and this size is perfect for one-pot meals like this recipe. There are tons of colors available too!

    a mixture of pasta with ground meat, bacon, diced apple, and spinach topped with melted cheese in a baking dish
    Print Recipe
    4.25 from 4 votes

    Pork, Bacon and Apple Pasta Bake

    Salty bacon and ground pork cooked with apples and earthy kale and carrots for a sweet and salty experience like none other. This recipe is unique because the pasta sauce is made from apple cider balanced with chicken stock and cream cheese. You've got to try this amazing combination. 
    Prep Time15 minutes mins
    Cook Time30 minutes mins
    Total Time45 minutes mins
    Course: Main Course
    Cuisine: American
    Servings: 6

    Ingredients

    • 2 strips bacon
    • 1 lb ground pork
    • 1 onion
    • 2 carrots
    • 1 teaspoon fresh thyme
    • 1.5 C non-alcoholic apple cider
    • 4 oz garlic and chive cream cheese room temperature
    • 1.5 C chicken stock
    • 8 oz egg noodles
    • 2 honey crisp apples
    • 6 oz kale
    • 1 lemon
    • 1 Tb olive oil
    • 1.5 teaspoon salt
    • ½ teaspoon black pepper
    • 1 teaspoon dry mustard
    • 1 teaspoon paprika
    • 1 teaspoon garlic powder
    • ¾ C grated parmesan cheese

    Instructions

    • Bring a large pot of water to a boil. Season the water with a generous tablespoon of salt.
    • While the water comes to a boil, dice the onion and peel and dice the carrots. Rinse the kale well and remove from the stem. Cut into large strips. The kale will wilt down quite a bit after being cooked so don't cut it too small. Cut the bacon strip in half vertically and then cut into ½-inch pieces.
    • Once the salted water has come to a boil, add the egg noodles and cook until al dente based on package instructions. Drain the pasta once cooked and coat with a bit of olive oil to avoid sticking. Set aside.
    • In a large dutch oven or heavy bottom pan, add 1 Tb of olive oil and the bacon pieces. Turn the heat on to medium-high and sauté the bacon, stirring occasionally, until well browned or for 5-7 minutes. Next, add the onion and carrot. Cook for another 5-7 minutes until the vegetables have softened and begun to brown on the edges.
    • Add the ground pork next and break up the meat into bite size pieces. You can use a wooden spoon for the job or check out the awesome gadget I've linked to above. A ground meat chopper is so handy! Cook the pork for about 10 minutes until it is cooked through and no pink remains.
    • While the pork is cooking, dice the apple into half-inch chunks. There is no need to peel the apple. The skin will soften while the sauce cooks. Next add the salt, pepper, dry mustard, paprika, and garlic powder. Mix well to combine. Add the apple and cook for about 3 more minutes or until the apple barely start to soften.
    • Last, add the chopped kale and cook for another 2-3 minutes until the kale is wilted and well combined.
    • To begin making the sauce, add the apple cider and chicken stock to the pan. Stir well so that you lift all the yummy pan drippings from the bottom of the pan. Cut the cream cheese into chunks to help it break down faster in the sauce. Add to the pan and stir occasionally until well combined. Reduce the heat to medium and let the sauce low boil for about 12 minutes or until it has reduced by about half.
    • Last, add the juice of 1 lemon, thyme, and ½ C grated parmesan to the sauce. Reserve the remaining ¼ parmesan for garnish. Stir to combine and continue to cook until the cheese is melted. Add the cooked pasta and mix well to combine.
    • At this point, the pasta is ready to serve or you can make the dish ahead. If eating right away, garnish with the remaining ¼ C grated parmesan and enjoy!
    • If you're making ahead, pour the pasta mixture into a lightly greased 9" x 13" casserole dish. Top with the grated parmesan and cover with foil. The dish will keep in the fridge for up to 3 days before baking. When ready to eat, place the covered dish into a preheated oven at 350 degrees and cook for 30 minutes. Uncover and bake an additional 15 or until golden and bubbly.

    Frequently Asked Questions

    Can I use apple juice instead of apple cider?

    Yes, but reduce the apple juice to 1 cup and increase the chicken stock to 2 cups.

    Can I use any type of apple?

    Any apple with a good balance of sweet and acidity will work.

    Can I make Pork, Bacon and Apple Pasta Bake ahead of time?

    Yes. The prepared casserole will hold in the fridge for up to 3 days before baking and serving.

    Sausage Butternut Squash Pasta

    December 16, 2018 by Hailey 2 Comments

    White star shaped bowl filled filled with orange butternut squash cubes, sausage pieces, rigatoni and fleck of white parmesan cheese and green chopped parsley and a blue casserole dish in the background filled with the recipe
    White star shaped bowl filled filled with orange butternut squash cubes, sausage pieces, rigatoni and fleck of white parmesan cheese and green chopped parsley

    Sausage Butternut Squash Pasta is the perfect recipe for a crisp fall night. Italian sausage gives the pasta rich flavor, and butternut squash makes the sauce creamy and luxurious. Italian sausage and butternut squash are a classic flavor pairing. The earthy, sweet notes of the squash are the perfect complement to the spicy and salty Italian sausage.

    What really makes this dish unique is the preparation of the butternut squash. I love to roast squash and that’s usually how I prepare it, but for this recipe I wanted the butternut to act as the thickening agent for the sauce and give that velvety mouthfeel that we all love in a sauce.

    White star shaped bowl filled filled with orange butternut squash cubes, sausage pieces, rigatoni and fleck of white parmesan cheese and green chopped parsley and a blue casserole dish in the background filled with the recipe

    Is there an easy way to cut butternut squash?

    The best tip I can provide for preparing butternut squash is to use a sharp knife that is heavy. A knife with some weight to it will do most of the work for you.

    You can also find peeled and cubed butternut squash at many grocery stores these days, so feel free to use that convenience if it’s available at your local store. You will need about 2 cups of cubed butternut squash

    Light wooden cutting board with a split bright orange butternut squash, diced butternut squash, a spoon for scooping out the squash pulp and a chef's knife

    The butternut squash is boiled in chicken stock until tender which then becomes the base for the sauce.

    As the butternut squash breaks down, it releases some of its starch into the chicken stock helping to thicken the sauce. Also, as you boil the butternut, the chicken stock reduces by about half, amplifying the chicken flavors and further thickening the sauce.

    a large black high rimmed saute pan filled with bright orange butternut squash cut into one inch cubes and covered with chicken stock
    Large high rimmed saute pan filled with cooked orange butternut squash in a mixture of chicken stock and heavy cream

    Once the chicken stock and squash have cooked to perfection, a bit of heavy cream makes the Sausage Butternut Squash Pasta sauce insanely delicious.

    ingredients for sausage butternut squash pasta

    For a lighter version of Sausage Butternut Squash Pasta, try Italian turkey sausage

    Italian pork sausage is scrumptious, but it is high in fat. I absolutely love Italian turkey sausage as a substitute for the pork variety when I want to lighten up a recipe. This recipe would be excellent with turkey sausage as a replacement.

    Large round black saute pan filled with cooked sausage and white onions
    Large high rimmed saute pan filled with complete recipe before mixing together; one section contains cooked pasta, one the cooked sausage and onions mixture and last the bright orange cooked butternut squash

    Why fresh nutmeg?

    You may find nutmeg to be an odd inclusion in a savory recipe. That’s probably because you’ve never cooked with fresh nutmeg. It has a much more subtle flavor than ground nutmeg. I keep whole nutmeg in my freezer for years, yes years, along with a small nutmeg grater that I’ve linked to purchase below.

    garnishes for sausage butternut squash pasta

    A dash of fresh nutmeg brings cream sauce to life.

    Can Sausage Butternut Squash Pasta be made in advance?

    Yes, it is a great make ahead recipe. The dish will keep in the fridge for up to 3 days before reheating.

    the completed recipe mixed together in a large high rimmed saute pan featuring butternut squash, rigatoni and sausage

    I hope you get a chance to try this amazing pasta recipe. If you're looking for another creative fall pasta recipe, check out my Pork, Bacon and Apple Pasta Bake next!

    Sausage and Butternut Squash Rigatoni is wonderful comfort food that your entire clan is sure to love. I can’t wait to hear what you think!

    White star shaped bowl filled filled with orange butternut squash cubes, sausage pieces, rigatoni and fleck of white parmesan cheese and green chopped parsley and a blue casserole dish in the background filled with the recipe

    Helpful Utensils

    black and red plastic ground meat chopper utensil

    Ground Meat Chopper

    This may seem like a one-trick pony, but I use mine ALL THE TIME. It makes breaking up ground meat in a saute pan so fast and easy!

    nutmeg grinder with a whole nutmeg inside

    Nutmeg Grinder/Container

    Fresh ground nutmeg is amazing and so different from what you buy already ground. Whole nutmeg will keep in the freezer for up to three years, and this is a convenient way to store and process it.

    a bowl filled with a mixture of rigatoni pasta, ground sausage, and butternut squash
    Print Recipe
    5 from 3 votes

    Sausage Butternut Squash Pasta

    Sausage Butternut Squash Pasta is the perfect sweet combo of sweet and salty fall flavors. Italian sausage and rigatoni covered in a delicious parmesan cream sauce which gets part of its creaminess from the squash.
    Prep Time15 minutes mins
    Cook Time30 minutes mins
    Total Time45 minutes mins
    Course: Main Course
    Cuisine: American, Italian
    Servings: 6

    Ingredients

    • 8 oz rigatoni
    • 1 butternut squash
    • 1 lb ground Italian sausage
    • 1 teaspoon fresh sage
    • 1 yellow onion
    • 4 C chicken stock
    • ½ C C grated parmesan
    • 1 lemon
    • 1 C heavy cream
    • 2 Tb fresh Italian flat leaf parsley
    • 2 Tb olive oil
    • ½ teaspoon salt
    • ½ teaspoon black pepper
    • pinch fresh ground nutmeg*

    Instructions

    • Bring a large pot of water to a boil. Season the water with a generous tablespoon of salt.
    • While the water comes to a boil, peel the butternut squash then split down the middle vertically and remove the pulp and seeds from the inside. Once cleaned, dice into 1-inch pieces. Finely dice the onion and set aside. Finely mince the sage.
    • Place the butternut squash in a large heavy bottom saucepan. Cover the squash with chicken stock and heat the pan over high heat. Bring the mixture to a boil and boil for about 15-20 minutes or until tender.
    • Once the salted water has come to a boil, add the rigatoni and cook until al dente based on package instructions. Drain the pasta once cooked and coat with a bit of olive oil to avoid sticking. Set aside.
    • As the squash cooks, heat 2 Tb olive oil in a large nonstick saute pan over medium-high heat. Add the diced onion to the preheated pan and let it soften for about 3 minutes. 
    • Add the ground sausage and break up into bite size pieces. You can use a wooden spoon to break up the meat, but if you want a super efficient tool for the job, check out the ground meat chopper that I've linked to above. It's an awesome kitchen gadget!
    • Season and sausage with salt and pepper. Cook the pork until browned and cooked through. Turn off the heat and set aside.
    • Once the butternut squash is fall apart tender and the chicken stock has reduced, add the heavy cream and ground nutmeg to the pot. Continue to boil for about 5 minutes stirring occasionally until the sauce has reduced by about half. 
    • Add the juice of 1 lemon, sage and ¼ C of grated parmesan (reserve ¼ for garnish) and stir until cheese is melted and ingredients are combined. Boil for another 2 minutes stirring constantly until the sauce thickens up to a nice creamy consistency.
    • Add the sausage mixture and pasta to the sauce and mix well to combine. Roughly chop the fresh parsley and add to the pasta. Mix well.
    • At this point, the pasta is ready to serve or you can make the dish ahead. If eating right away, garnish with the remaining ¼ C grated parmesan and enjoy!
    • If you're making ahead, pour the pasta mixture into a lightly greased 9" x 13" casserole dish. Top with the grated parmesan and cover with foil. The dish will keep in the fridge for up to 3 days before baking. When ready to eat, place the covered dish into a preheated oven at 350 degrees and cook for 30 minutes. Uncover and bake an additional 15 or until golden and bubbly.

    Notes

    * You can find whole fresh nutmeg that can be grated when needed in the spice aisle. I've linked above to a great grinder/container that I always keep stocked in my freezer where it will keep for up to a year.

    FREQUENTLY ASKED QUESTIONS

    Can I make this recipe without sausage for a vegetarian version?

    Absolutely. You may want to increase the salt slightly to taste.

    Can I make the recipe ahead of time?

    Yes! See the last step in the instructions for details.

    Do I have to use rigatoni?

    No, but you want a tubular pasta like penne or ziti.

    Can I use ground nutmeg instead of freshly grinding my own?

    Sure, but use it very sparingly as the flavor is stronger.

    Peanut Butter Honey Cookies

    December 9, 2018 by Hailey 2 Comments

    light brown colored cookies garnished with salt on a red plate
    close view of salted peanut cookies on a red platter

    Peanut Butter Honey Cookies are unlike any other peanut butter cookies you’ve ever had. The flavor of these cookies is crazy delicious. Peanut butter is combined with sweet, floral honey and a dash of cinnamon and then topped off with a pinch of flaky Maldon sea salt leaving you with a dance of sweet, salty, and nutty flavors in your piehole.

    The texture is also different than a lot of peanut butter cookies. These cookies spread a bit more in the oven leaving a thinner cookie. Also, the texture isn’t as crumbly as a lot of peanut butter cookies, but the cookies aren’t chewy because there are too many peanuts in the recipe for them to not have a good crunch. Honey helps hold the dough together in a way I think is unique to peanut butter cookies.

    It is also the secret in this recipe. Adding honey really seems like a no-brainer to me given how many peanut butter, honey, and banana toasts I’ve made for myself before, or duh, how much I love honey roasted peanuts. When I first made this recipe, it didn’t include the honey roasted peanuts, but I felt like I wanted to amp up the peanut flavor and texture.

    light brown colored cookies garnished with salt on a red plate

    Once I decided that honey roasted peanut would be a rad addition, I thought well what the hell, why not just add honey to the recipe too! The cinnamon was a last minute addition after tasting the dough and feeling like it needed more of a holiday taste. Such a good decision though. The cinnamon makes the honey flavor more prominent and adds a little needed warmth to the cookies.

    Two additions to the standard peanut butter cookie have transformed them into something special enough to gift to your family and friends but simple enough to please even the pickiest little cookie eaters in your clan. You’ll never return to plain peanut butter cookies after making these Peanut Butter Honey Cookies. Let me know how it goes in the comments section below.

    unbaked discs peanut butter honey cookie dough on a parchment lined baking sheet
    close view of salted peanut cookies on a red platter
    Print Recipe
    5 from 1 vote

    Peanut Butter Honey Cookies

    Thin peanut butter cookies that are flavored with honey and a hint of cinnamon. These cookies are jam packed with peanuts for added crunch. The addition of honey ensures the cookies stay moist and have a nice chew to them.
    Prep Time15 minutes mins
    Cook Time12 minutes mins
    Total Time27 minutes mins
    Course: Dessert
    Cuisine: American
    Servings: 36 large cookies

    Ingredients

    • ¾ C butter room temperature
    • ½ C brown sugar
    • ½ C white sugar
    • ¼ C honey
    • 1 cup peanut butter crunchy or creamy
    • 1 extra-large egg
    • 1 teaspoon vanilla extract
    • ½ teaspoon cinnamon
    • 1 teaspoon baking soda
    • ½ teaspoon baking powder
    • ½ teaspoon kosher salt
    • 1 and ⅓ C and ⅓ C all purpose flour
    • 1 C honey roasted peanuts
    • sea salt optional*

    Instructions

    • Preheat the oven to 350 degrees, and prepare 2 baking sheets with parchment paper or nonstick foil.
    • Place the butter in a stand mixer bowl or a large mixing bowl. Using a mixer, cream the butter on medium speed for about 30 seconds. Add the brown and white sugar and cream on high for 2-3 minutes. Scrape down the sides and bottom of the bowl. Add the peanut butter and mixer on medium speed for another 2 minutes or until smooth.
    • Add the egg and vanilla and mix on low speed until well combined. Add the honey with the mixer still on low and continue to mix until combined. Scrape down the bowl one more time.
    • Add the cinnamon, salt, baking powder, and baking soda and mix on low until combined. Turn off the mixer and add the flour. Mix on medium speed just until combined. Don't overmix your cookie dough, or you will end up with tough cookies.
    • Roughly chop the honey roasted peanuts either by hand or with a small food processor. (If you don't have a small food processor for quick jobs like this one, I've linked to a great one above!) Fold the chopped peanuts into the dough with a spatula.
    • Scoop 1.5 Tb cookies onto prepared baking sheets leaving plenty of room between the cookies. They will spread out quite a bit. Top each cookie with a few flakes of sea salt. Place the baking sheets into the preheated oven. Bake for 10-12 minutes, rotating the pans halfway through the cook time. Allow the cookies to cool for 5 minutes on the baking sheet before moving to a wire rack to cool completely.
    • Store in an airtight container for up to a week.

    Notes

    * I use Maldon Sea Salt. It has a really nice light, flaky texture and a mild saltiness. It's a great finishing salt for savory and sweet dishes. I've included a link to purchase above.

    Fig Pecan Newtons

    December 7, 2018 by Hailey 3 Comments

    Fig Pecan Newton cookies stacked in a pyramid on a long red serving platter
    Fig Pecan Newton cookies stacked in a pyramid on a long red serving platter

    Fig Pecan Newtons are one-part copycat recipe and one-part holiday special. You could easily also call this recipe Fig Pecan Rugelach, but when I’ve used the word amongst less-kitchen-savvy individuals, they look at me like I’m speaking Russian. It’s actually Yiddish if you’re curious. It’s a very popular Jewish pastry and for good reason!

    The cream cheese dough that is the foundation for this cookie is sublime. I’ve discussed this quite a bit in other posts so if you follow me closely, you know I’m f*cking obsessed with cream cheese. I’m always looking for new ways to use it, and cream cheese pastry dough is a classic application.

    The tang of the cream cheese is a perfect balance to the butter in the recipe, and the cream cheese gives the dough a lovely, soft texture.

    You might even call the dough supple if you were feeling frisky.

    The cream cheese dough in this recipe is the little black dress in your wardrobe. It’s simple and classic and something you’ll return to again and again, but the fig filling is like the jewelry and shoes….sorry guys. So as not to be too gender-specific, let’s say the cream cheese dough is your power suit, but the fig filling is your cufflinks and tie. What I’m trying to say is, each is good on its own, but together they are MAGIC!

    Fig Pecan Newton cookies stacked in a pyramid on a long red serving platter

    I said this recipe is one-part copycat because the cookies have an undeniable resemblance to store-bought Fig Newtons. That being said, this recipe is a huge upgrade. First, the dough has tons of flavor where the old classic is a little more on the bland side. But the differences are the most pronounced in the fig filling.

    The fig filling for this recipe is so rich and deep in flavor, you won’t believe it only has a handful of ingredients. It is made using dried figs as fresh are a rare treat. Feel free to substitute fresh figs in the recipe if you can find them. There is no need to soak them though if they are fresh. Just proceed immediately to making the jam.

    The flavor of the fig jam is truly a taste of the holidays.

    The combination of fig, honey, and vanilla is earthy and sweet, and the smell of this jammy concoction bubbling away on the stove is so intoxicating and rich. It’s plain sexy.

    I’ve added the pecans and demerara sugar on top for added texture. I always thought Fig Newtons needed a little more bite to them, and besides, I love to add pecans to any holiday treat. Be sure to chop the pecans super fine though so they meld well with the fig filling. I love the combination of the slightly bitter and buttery pecans with the fig filling!

    a sheet of pastry dough scored into strips measured by a metal ruler laying on the dough

    The demerara sugar is the perfect finish for these cookies. It adds a little crunch to the cookie as you bite into it, and it makes the cookies sparkle too. What could possibly be better than a twinkling cookie during the holidays?!

    • cut rectangles of cookie pastry dough on a floured dark marbled counter top
    • rectangles of cookie pastry dough topped with spoonfuls of fig filling
    • fig puree spread onto rectangles of pastry dough
    • three rows of pastry dough rectangles spread with fig puree and sprinkled with chopped pecans

    You could easily combine this cream cheese dough with other fruit fillings or even use store bought jam if you’re looking for a shortcut, but I hope you try this Fig Pecan Newtons recipe just as it is. It will be a cookie you, your family and friends will adore. Let me know what you think in the comments section below.

    unbaked filled fig & pecan cookies on a parchment lined baking sheet
    Fig Pecan Newton cookies stacked in a pyramid on a long red serving platter

    Helpful Utensils

    packages of coarse brown demerara sugar from Mauritius

    Demerara Sugar

    Demerara sugar creates cookies with a beautiful finish and a little added crunch. 

    metal bench scraper

    Bench Scraper

    A bench scraper is absolutely essential to working with any sort of pastry or cookie dough. It makes delicate work a breeze.

    Fig Pecan Newton cookies stacked in a pyramid on a long red serving platter
    Print Recipe
    5 from 1 vote

    Fig Pecan Newtons

    Pillow-soft cream cheese pastry dough is filled with a homemade fig filling made from dried figs that are soaked overnight in cherry juice. The tart cherry juice blended with the intense jammy flavors of the fig is a lovely balance to the tangy cream cheese dough. These cookies are a classic holiday dessert that you will love!
    Prep Time45 minutes mins
    Cook Time20 minutes mins
    Chill Time2 hours hrs
    Total Time1 hour hr 5 minutes mins
    Course: Dessert
    Cuisine: American

    Ingredients

    Cream cheese pastry

    • 8 oz cream cheese room temperature
    • 1 C butter room temperature
    • ½ C white sugar
    • 1 teaspoon vanilla extract
    • 2 C all purpose flour
    • 1 teaspoon kosher salt

    Fig filling

    • 10 oz dried mission figs
    • 2 C cherry juice
    • ½ C honey
    • ½ teaspoon vanilla extract

    Toppings (optional)

    • 1 egg
    • demerara sugar optional

    Instructions

    To make the pastry

    • Place the butter in a stand mixer bowl or a large mixing bowl. Using a mixer, cream the butter on medium speed for about 30 seconds. Add the cream cheese and white sugar and cream on high for 3 minutes or until pale and fluffy. Scrape down the sides and bottom of the bowl.
    • Add the vanilla and salt and mix on low speed until well combined. Turn off the mixer and add the flour. Mix on medium speed just until combined. Don't overmix your cookie dough, or you will end up with tough cookies. Bring the dough together by hand with a spatula.
    • Turn out the prepared dough onto a sheet of plastic wrap, and chill for at least 2 hours. It's best to let the dough chill overnight, but you'll need to chill for at least 2 hours so the dough is easy to roll out. If you're short on time for chilling, split the dough into two equal halves before wrapping in plastic wrap. The dough will keep in the fridge for up to one week.

    To make the fig filling

    • Place all of the ingredients in a medium mixing bowl and allow the figs to soak for a minimum of two hours but preferably overnight. Once soaked, add the fig mix to a saucepan and cook over medium heat until the liquid becomes a thick syrup or about 15-20 minutes. Add the hot mixture to a food processor and blend until it is a nice jammy consistency. Allow the jam o cool completely before using in the rugelach.

    To make the rugelach

    • Once chilled and ready to cook, remove the dough from the fridge and allow to warm up just enough so that you can roll it out, usually about 30 minutes. Preheat the oven to 350 degrees and prepare two baking sheets with parchment paper.
    • Flour your work surface well.
    • Roll out the cream cheese dough into something resembling a rectangle (don't worry, we're going to trim the rough edges), rotating the dough 90 degrees every few rolls to ensure it's not sticking. Add flour as necessary to keep the dough from sticking to your surface.
    • Once the dough is about a quarter-inch thick, trim the edges off the dough to form an even rectangle. I like to measure using a classic metal ruler that I keep in the kitchen, but you can also eyeball it. They will taste great even if they aren't exactly the same size, but do aim for at least similar cookie sizes so they cook evenly.
    • Cut the dough into 1.5-inch strips using a pizza wheel or a bench scraper. If you don't have a bench scraper, GET ONE. They are a secret weapon when it comes to working with pastry. I've linked to one above for easy purchasing.
    • Cut each strip into approximately 3-inch pieces. Smear each piece with a heaping teaspoon of fig filling and spread gently across the dough leaving a rim around the edges so the filling doesn't spill out.
    • Using your bench scraper to lift the dough, fold the dough in half to sandwich the jam in the middle being careful to try and keep the dough from breaking at the crease. Gently lift the cookies from your work surface with the bench scraper and place on the prepared baking sheets, about two inches apart from each other.
    • Make an egg wash by beating the 1 egg with 1 teaspoon of cool water. Using a pastry brush, brush the tops of each cookie lightly with the egg wash and then sprinkle with demerara sugar*
    • Bake the cookies for 15 minutes, rotating the pan halfway through the cook time. Allow the cookies to cool for 5 minutes on the baking sheet before moving to a wire rack to cool completely. 

    Notes

    * The demerara sugar adds a nice texture to the soft cream cheese cookie, but it's not required. I've included a link above to purchase some. It's a baking weapon for finishing. 

    Frito Shortbread & Caramel Cookie Sandwiches

    December 6, 2018 by Hailey 4 Comments

    shortbread sandwich cookies filled with caramel and garnished with fritos
    shortbread sandwich cookies filled with caramel and garnished with fritos

    Frito Shortbread and Caramel Sandwich Cookies are straight up f*cking delicious. I’m going hard on my intro here because seriously guys, these cookies are insanely good. I took a couple of batches to work and they disappeared before lunch time! This recipe is basically caramel corn in cookie form. I took one bite the first time I made these and thought, “Holy shit! It’s like a Cracker Jack!”

    The inspiration for these amazing Frito shortbread cookies came from a Corn Nut Shortbread recipe I saw (which also inspired my Corn Flake with Cranberry Jam Cookie Sandwiches recipe). 

    Wait, hold up, like Frito corn chips?!?.....yep, those Fritos.

    The dough has a bit of cornmeal included which helps tie the salty, corn chips and the buttery shortbread dough together. The end result is a cookie that melts in your mouth but still has a nice bite from the cornmeal and Fritos.

    And the caramel sauce and the corn flavor together are seriously like heaven! The homemade caramel sauce that is sandwiched between the cookies is so damn good. It has a rich, toffee-like flavor that you only get from scratch-made caramel. The caramel also has a healthy amount of salt in it which just keeps the sweet and salty play of the cookie going strong.

    shortbread sandwich cookies filled with caramel on a round red plate

    The caramel is the most labor intensive part of this recipe. Rolling out shortbread is really a cinch, so I don’t think you’ll find that part difficult at all. In fact, I find rolling out dough therapeutic in some ways. It’s a good time to just zone out and calm my wild mind.

    I digress. The caramel is a labor of love that takes a bit of time, but it is so worth it. This sauce is mind-blowing, melt your panties scrumptious. And the best part is, you will have leftovers after the cookie sandwiches are made. 

    This caramel would be delicious on anything, but here are just a few ideas of how to use it:

    • Ice cream sundaes
    • Folded into brownie batter
    • By the f*cking spoonful…alright, have an apple with the spoonful to make yourself feel better
    a sheet of cookie dough being scored into squares
    a square shortbread cookie spread with a swirl of light brown colored caramel
    shortbread sandwich cookies filled with caramel and garnished with fritos

    Any way you eat it, I promise you will love it, and the 20 minutes of stirring and watching the caramel will be a distant memory.

    I love to make shortbread. There are only a handful of ingredients, most of which I almost always have in my kitchen. The dough is also very forgiving unlike some other kinds of pastry. If you get a little tear in it while rolling it out, just pinch the dough back together and keep rolling. You can also reroll the scraps of this dough as many times as you need to use it all up.

    I’ve used the shortbread for sandwich cookies in this application, but you could also have these cookies all by themselves, and they would be wonderful. If you wanted to add a little sweetness without making the caramel, you could also dip one half of each shortbread into chocolate. I think milk chocolate would be amaze-balls with the Frito flavor.

    There are so many ways you could use this shortbread and caramel recipe, but I think Frito Shortbread and Caramel Cookie Sandwiches is the best way. I can’t wait to hear what you all think of this recipe! Please leave your feedback in the comments section below.

    Helpful Utensils

    Cuisinart Large Food Processor

    11-Cup Food Processor

    There are oodles of different ways to use a food processor, and they literally last a lifetime. Mine is nearly 15 years old! 

    metal bench scraper

    Bench Scraper

    A bench scraper is absolutely essential to working with any sort of pastry or cookie dough. It makes delicate work a breeze.

    shortbread sandwich cookies filled with caramel and garnished with fritos
    Print Recipe
    5 from 1 vote

    Frito Shortbread & Caramel Cookie Sandwiches

    Caramel popcorn in cookie form! One bite of this cookie and you'll know exactly what I mean. Homemade caramel sauce is sandwiched between two buttery, melt-in-your-mouth shortbread laced with cornmeal and salty Fritos. It may sound crazy, but it's crazy addictive. 
    Prep Time1 hour hr
    Cook Time12 minutes mins
    Chill Time2 hours hrs
    Total Time1 hour hr 12 minutes mins
    Course: Dessert
    Cuisine: American
    Servings: 20 Cookie Sandwiches

    Ingredients

    Frito Shortbread

    • 1 C butter room temperature
    • 1 egg yolk
    • ½ C white sugar
    • 1.5 C all purpose flour + more for rolling out
    • ¼ C cornmeal
    • ½ teaspoon kosher salt
    • 1 heaping C Fritos chips

    Caramel Filling

    • 2 C heavy cream
    • 1.5 C white sugar
    • ¼ C + 2 Tb light corn syrup
    • 1 teaspoon kosher salt
    • ½ teaspoon vanilla extract

    Instructions

    To make cookies

    • Place the butter in a stand mixer bowl or a large mixing bowl. Using a mixer, cream the butter on medium speed for about 30 seconds. Add the sugar and cream on high for 3-4 minutes or until pale and fluffy. Scrape down the sides and bottom of the bowl.
    • Add the egg yolk and mix on low speed until well combined. Scrape down the bowl one more time and mix briefly on low until all the ingredients are combined.
    • Turn off the mixer and add the flour, cornmeal, and salt. Turn the mixer on low at first and then mix on medium speed just until combined. Don't overmix your cookie dough, or you will end up with tough cookies.
    • Add the Fritos to a food processor (if you don't have one, you really need one- there's a link above to a great one that will last almost forever). Grind until the Fritos have the consistency of Panko breadcrumbs. Add the crumbs to the mixing bowl and mix on medium for 10 seconds. Bring the dough together and make sure the Fritos are thoroughly combined by-hand with a spatula.
    • Turn out the prepared dough onto a sheet of plastic wrap, and chill for at least 2 hours. It's best to let the dough chill overnight so the chips and the dough become one, but you'll need to chill for at least 2 hours so the dough is easy to roll out. If you're short on time for chilling, split the dough into two equal halves before wrapping in plastic wrap.
    • Once chilled and ready to bake, remove from the fridge and allow to warm up just enough so that you can roll it out, usually about 30 minutes. Preheat the oven to 350 degrees and prepare two baking sheets with parchment paper.
    • Flour your work surface well.
    • Roll out the shortbread out into something resembling a rectangle (don't worry, we're going to trim the rough edges), rotating the dough 90 degrees every few rolls to ensure it's not sticking. Add flour as necessary to keep the dough from sticking to your surface.
    • Once the dough is about a quarter-inch thick, trim the edges off the dough to form an even rectangle. I like to measure using a ruler that I keep in the kitchen, but you can also eyeball it. They will taste great even if they aren't exactly the same size, but do aim for at least similar cookie sizes so they cook evenly.
    • You can use a cookie cutter you'd like or simply cut the dough into 2" x 2" squares using a pizza wheel or a bench scraper. If you don't have a bench scraper, GET ONE. They are a secret weapon when it comes to working with pastry. I've linked to one above for easy purchasing.
    • Using your bench scraper, gently lift the cookies from your work surface and place on the prepared baking sheets, about one-inch apart from each other.
    • Bake the cookies for 12-14 minutes, rotating the pan halfway through the cook time. Allow the cookies to cool for 5 minutes on the baking sheet before moving to a wire rack to cool completely. Be sure the cookies are totally cool before filling.

    To make caramel

    • Heat the heavy cream in a saucepan over medium-low heat. Keep the cream warm but don't let it boil.
    • In a large (seriously, a BIG saucepan as the cream will vigorously bubble when you add it to the molten hot sugar…trust me it sucks if it runs all over your stove and it could be super dangerous if it got on you so be cautious and don't skimp on pot size), high-sided saucepan, combine ¾-C sugar and the corn syrup.
    • Turn the heat on to medium-high. Once the sugar starts to melt, stir the corn syrup and sugar together with a wooden spoon. Once the ingredients are combined, try not to stir it much more unless you feel like the heat isn't evenly distributed. It's okay to stir occasionally, but generally, you should just let the sugar work its magic.
    • Once the mixture begins to boil, cook for another 7-8 minutes. You're looking for an amber color in this step. If the mixture goes too dark or starts to smell burnt in the slightest way, it's definitely burnt, and you need to start over. It will serve you best to not leave the caramel at all at this point so you can turn the heat down at the right moment.
    • Once the sugar has reached the right amber color, turn the heat to the lowest setting. Add the remaining ¾-C sugar, ¼-C at a time, or in three even increments, working to combine each ¼-C batch well before adding the next. Allow the sugar to totally melt into the sauce (you don't want to see any granules) before adding the next bit.
    • After the last batch of sugar is combined, turn the heat up just slightly to medium-low and start adding the warm heavy cream in three roughly even increments. PLEASE BE CAREFUL. As I mentioned above, the caramel will rise and boil vigorously when you add the cream. Allow each batch of cream to fully incorporate and the caramel to thicken slightly before adding the next batch of heavy cream.
    • Once you have added all of the heavy cream, continue to cook for about 10 minutes, stirring often. The finished caramel should look like a very thick syrup but not quite like the caramel sauce you probably have in mind. Keep in mind, the caramel will thicken as it cools too. 
    • The caramel is ready to remove from the heat when the consistency is just between maple syrup and molasses. You can also coat the back of the wooden spoon with caramel, run a spatula across the back in a line, and watch to see if the caramel cleanly holds that line. If so, it's ready to go! For Pete's sake, don't drag your finger through molten hot caramel!
    • Once the caramel has reached the desired consistency, remove from the heat and add the salt and vanilla and stir to combine.
    • For the cookie sandwiches, you want the caramel to come to room temperature so it will be plenty thick.
    • This caramel sauce it AMAZING and will keep in the fridge for up to 6 months!

    To make cookie sandwiches*

    • Once cookies and caramel have totally cooled, turn half of the cookies over so the bottoms are facing up. Top each of the cookies with a heaping teaspoon of caramel. Gently spread the caramel out although you don't have to get it all the way to the edges. The pressure of the top cookie will help spread the caramel.
    • Top each cookie with another and gently press down so that the caramel comes just to the edges.
    • Once all the cookies are assembled, allow to chill in an airtight container for at least one more hour in the fridge to let the cookies fully set.

    Notes

    *This shortbread recipe would be delightful all by itself or you could also dip the cookies into a chocolate of your choice for another option. Milk chocolate would be yummy with the salty notes of the Fritos.

    Corn Flake Shortbread & Cranberry Jam Cookie Sandwiches

    December 5, 2018 by Hailey 7 Comments

    round sandwich cookies garnished with corn flake cereal and cranberries
    stacked Corn Flake Shortbread & Cranberry Jam Cookie Sandwiches

    HAPPY NATIONAL COOKIE DAY!

    Corn Flake and Cranberry Jam Cookie Sandwiches are a beautiful little treat to add to your holiday lineup. The Corn Flake shortbread is laced with a bit of cornmeal and pulverized Corn Flake cereal for a subtle sweetness and great texture. The homemade cranberry jam is so easy to make and has just the right balance of sweet and tart to play nice with the shortbread.

    These cookies are such a crowd pleaser!

    There’s something so wonderful about the simple pleasure of a jam cookie. They always remind me of the holiday with the beautiful bright red color. The flavor of the cookies is also reminiscent of the always popular iced sugar cookies, but these cookies are more buttery and rich.

    I personally prefer shortbread to sugar cookies. First, I can never get enough butter in my life and that is the prominent taste in shortbread. I also think it’s a bit more subtly sweet. Sugar cookies lead with a vanilla and sugar flavor where shortbread is more salty and buttery with a touch of sweetness. With the addition of a jam filling, you have a perfectly balanced sweet experience.

    The idea for adding Corn Flake crumbs to the dough was inspired by a recipe I saw for Corn Nut shortbread. I don’t love the flavor of Corn Nuts personally, but I loved the idea of a shortbread with a strong corn flavor. I tried a few different corn treats to incorporate into the shortbread dough, and the two winners were Corn Flakes and Fritos (check out the Frito Shortbread and Caramel Cookie Sandwiches recipe too).

    round sandwich cookies garnished with corn flake cereal and cranberries

    When I took a batch of these cookies to my office, no one could believe there were Corn Flakes in the dough. Everyone just kept saying these are soooo good for shortbread, what is in them?! For that reason, I absolutely love this recipe for a cookie swap or a holiday cookie spread. The recipe is simple and approachable but with a little surprise!

    I absolutely love cranberries. Cranberry sauce is an absolute must on my family’s holiday table, and it’s always fun to use fresh cranberries when they appear at the grocery store during this one special time of year. If you don’t like cranberries or if you want to make this recipe during the warmer months, strawberries or raspberries would both be delicious.

    You can use fresh or frozen berries and play with what other spices you might like to incorporate. 

    • a fluted biscuit cutter being pressed into a sheet of cookie dough
    • unbaked circles of cookie dough on a cookie sheet lined with white parchment paper

    Really any combination of fruit and spices will pair beautifully with the Corn Flake Shortbread Cookies. If you didn’t want to make cookie sandwiches, these cookies would be simply delicious all on their own. Dipping half the cookies in chocolate, in particular, white chocolate would be lovely, would also be a great way to sweeten up the cookies a bit without making the jam.

    sandwich cookies spread with cranberry filling on a green platter

    I love to make the jam for its amazing festive color and delicious holiday flavors. You’ll have leftover jam which is never a bad thing either. A piece of toast is infinitely more interesting and tasty with homemade jam!

    round sandwich cookies garnished with corn flake cereal and cranberries

    Helpful Utensils

    Cuisinart Large Food Processor

    11-Cup Food Processor

    There are oodles of different ways to use a food processor, and they literally last a lifetime. Mine is nearly 15 years old! 

    metal bench scraper

    Bench Scraper

    A bench scraper is absolutely essential to working with any sort of pastry or cookie dough. It makes delicate work a breeze.

    stacked Corn Flake Shortbread & Cranberry Jam Cookie Sandwiches
    Print Recipe
    5 from 1 vote

    Corn Flake Shortbread & Cranberry Jam Cookie Sandwiches

    Homemade cranberry preserves spiked with orange and pumpkin pie spice is sandwiched between two buttery, melt-in-your-mouth shortbread cookies, but this is not your standard shortbread. This shortbread has been loaded with Corn Flake crumbs for added flavor and texture.
    Prep Time45 minutes mins
    Cook Time12 minutes mins
    Chill Time2 hours hrs
    Total Time42 minutes mins
    Course: Dessert
    Cuisine: American
    Servings: 20 Sandwich Cookies

    Ingredients

    Corn Flake shortbread

    • 1 C butter room temperature
    • 1 egg yolk
    • ½ C white sugar
    • 1.5 C all purpose flour + more for rolling out
    • ¼ C cornmeal
    • 1 teaspoon kosher salt
    • 1 heaping C Corn Flakes cereal

    Cranberry jam filling*

    • 12 oz fresh or frozen cranberries*
    • ½ C white sugar
    • ½ C freshly squeezed orange juice
    • ½ teaspoon pumpkin pie spice
    • ⅛ teaspoon kosher salt

    Instructions

    To make cookies

    • Place the butter in a stand mixer bowl or a large mixing bowl. Using a mixer, cream the butter on medium speed for about 30 seconds. Add the sugar and cream on high for 3-4 minutes or until pale and fluffy. Scrape down the sides and bottom of the bowl.
    • Add the egg and mix on low speed until well combined. Scrape down the bowl one more time and mix briefly on low until all the ingredients are combined.
    • Turn off the mixer and add the flour and salt. Turn the mixer on low at first and then mix on medium speed just until combined. Don't overmix your cookie dough, or you will end up with tough cookies.
    • Add the Corn Flakes to a food processor (if you don't have one, you really need one- there's a link above to a great one that will last almost forever). Grind until the Corn Flakes have the consistency of Panko breadcrumbs. Add the crumbs to the mixing bowl and mix on medium for 10 seconds. Bring the dough together and make sure the Corn Flakes are thoroughly combined by-hand with a spatula.
    • Turn out the prepared dough onto a sheet of plastic wrap, and chill for at least 2 hours. It's best to let the dough chill overnight so the cereal and the dough become one, but you'll need to chill for at least 2 hours so the dough is easy to roll out. If you're short on time for chilling, split the dough into two equal halves before wrapping in plastic wrap.
    • Once chilled and ready to cook, remove from the fridge and allow to warm up just enough so that you can roll it out, usually about 30 minutes. Preheat the oven to 350 degrees and prepare two baking sheets with parchment paper.
    • Flour your work surface well.
    • Roll out the shortbread out into something resembling a rectangle (don't worry, we're going to trim the rough edges), rotating the dough 90 degrees every few rolls to ensure it's not sticking. Add flour as necessary to keep the dough from sticking to your surface. Shortbread dough is super forgiving so if the dough splits or cracks while you're rolling it out, just smoosh or pinch it back together. 
    • Once the dough is about a quarter-inch thick, trim the edges off the dough to form an even rectangle. I like to measure using a classic metal ruler that I keep in the kitchen, but you can also eyeball it. They will taste great even if they aren't exactly the same size, but do aim for at least similar cookie sizes so they cook evenly. Reroll any scraps until you've used almost all the dough. 
    • You can use any cookie cutter you'd like or simply cut the dough into 2" x 2" squares using a pizza wheel or a bench scraper. If you don't have a bench scraper, GET ONE. They are a secret weapon when it comes to working with pastry. I've linked to one above for easy purchasing.
    • Using your bench scraper, gently lift the cookies from your work surface and place on the prepared baking sheets, about one-inch apart from each other.
    • Bake the cookies for 12-14 minutes, rotating the pan halfway through the cook time. Allow the cookies to cool for 5 minutes on the baking sheet before moving to a wire rack to cool completely. Be sure the cookies are totally cool before filling.

    To make cranberry jam

    • In a saucepan, combine all of the ingredients. Bring the mixture to a boil over high heat. Once boiling, reduce the heat to medium and cook for about 15 minutes or until most of the liquids have cooked off. Place the hot mixture into a food processor or blender to smoothly puree the mixture.
    • Allow the jam to come to room temperature before making cookie sandwiches.

    To make cookie sandwiches**

    • Once cookies and jam have totally cooled, turn half of the cookies over so the bottoms are facing up. Top each of the cookies with a heaping teaspoon of cranberry jam. Gently spread the jam out although you don't have to get it all the way to the edges. The pressure of the top cookie will help spread it.
    • Top each cookie with another and gently press down so that the jam comes just to the edges.
    • Once all the cookies are assembled, allow to chill in an airtight container for at least one more hour in the fridge to let the cookies fully set.

    Notes

    * Feel free to substitute with strawberries or raspberries if you're making this recipe in the warmer months when cranberries are less popular or if you just aren't a fan of the tart cranberry flavor.
    ** This shortbread recipe would be delightful all by itself or you could also dip the cookies into a chocolate of your choice for another option. White chocolate, in particular, would be yummy with the subtle sweetness of the Corn Flakes.

    Spiced Rocky Road Cookies

    December 3, 2018 by Hailey 5 Comments

    chocolate cookies on a christmas patterned plate garnished with marshmallows and pecans
    chocolate cookies on a christmas patterned plate garnished with marshmallows and pecans

    Spiced Rocky Road Cookies are a flavor adventure with a touch of familiarity and nostalgia. The classic combination of chocolate, nuts, and marshmallows is one everybody, young or old, loves, but I didn’t stop there. Instead, I gave these cookies new life with a spice bomb that provides tons of new and exciting flavors without overpowering the fudgy chocolate essence.

    I love to use spices to bring the flavor of cocoa powder to life. On its own, cocoa can be a little flat or one note in taste, but when combined with cinnamon, cloves, cardamom, and cayenne, yep spicy cayenne pepper, it comes alive! 

    There is nothing boring about the flavor of these cookies!

    If you’re thinking, I don’t know about all this, please know that you honestly can’t even decipher the individual flavors of each spice. That’s how mild they are. When you bite into a Spiced Rocky Road Cookie, you have one of those wonderful eating experiences where you recognize and love some of the flavors but also want one bite after another to figure out that sneaky something that keeps tickling your palate.

    This recipe is a great one for family and friends of every age. You might think the cayenne would be a turn off for kids, but like I said a moment ago, it’s not a discernable strong taste. The spices just add that Christmas spice flavor that we all love this time of year. And, hello, it’s f*cking chocolate. Kids LOVE chocolate no matter what else is involved in my experience.

    brown drop cookies on a plate with marshmallows and pecans

    Also, there are marshmallows. I can’t think of a more whimsical and child-friendly ingredient than marshmallows. It’s probably part of the reason that rocky road ice cream was my favorite as a kid. I used to eat Blue Bell Rocky Road Ice Cream every summer straight from the half gallon container. The sweet chocolate, crunchy nuts, and sticky marshmallows are a party in your mouth that still hasn’t gotten old.

    I took my love for that old school flavor combination and combined it with my passion for spices to give you a cookie that is something new and exciting while also being warm and comforting. Spiced Rocky Road Cookies are perfect for any holiday celebration. 

    brown cookies cooling on a wire rack over a marbled countertop

    Even Santa would love a little spice on his cookie plate this year!?

    chocolate cookies on a christmas patterned plate garnished with marshmallows and pecans

    I love these cookies for a cookie swap or a holiday cookie spread. Ginger cookies are a classic part of the holidays, but with all the interesting ingredients in this recipe, these cookies are certain to be something special for your friends and family to try. I hope you have a chance to try out the recipe this holiday season. What do you think of the surprise ingredients? Let me know in the comments section below.

    chocolate cookies on a christmas patterned plate garnished with marshmallows and pecans
    Print Recipe
    5 from 1 vote

    Spiced Rocky Road Cookies

    Cocoa, cardamom, clove, cinnamon, and cayenne pepper come together with mini marshmallows and chopped pecans to create a spicy and unique cookie with a little touch of familiarity. Spiced Rocky Road Cookies are rich and fudgy in the center with crisp edges. 
    Prep Time15 minutes mins
    Cook Time15 minutes mins
    Total Time30 minutes mins
    Course: Dessert
    Cuisine: American
    Servings: 60

    Ingredients

    • 1 C butter room temperature
    • 1 C brown sugar
    • ½ C white sugar
    • 2 extra-large eggs
    • 1 teaspoon vanilla extract
    • ½ C cocoa powder good quality
    • 2.5 C all purpose flour
    • 1 teaspoon baking powder
    • 1 teaspoon baking soda
    • 1 teaspoon kosher salt
    • ¼ teaspoon ground cloves
    • ¼ teaspoon ground cardamom
    • ½ teaspoon ground cinnamon
    • ⅛ teaspoon ground cayenne pepper
    • 2 C mini marshmallows
    • 1 C chopped pecans

    Instructions

    • Place the mini marshmallows in the freezer while you prepare the dough. It will help ensure they stay whole in the final dough.
    • Place the butter in a stand mixer bowl or a large mixing bowl. Using a mixer, cream the butter on medium speed for about 30 seconds. Add the brown and white sugar and cream on high for 3-4 minutes or until pale and fluffy. Scrape down the sides and bottom of the bowl.
    • Add the egg and vanilla and mix on low speed until well combined. Scrape down the bowl one more time and mix briefly on low until all the ingredients are combined.
    • Add the spices, salt, baking powder, and baking soda and mix on low until combined. Turn off the mixer and add the flour and cocoa powder. Mix on medium speed just until combined.  
    • Remove the marshmallows from the freezer and add to the mixing bowl along with the chopped pecans and mix on medium speed for about 10 seconds. Ensure the marshmallows and nuts are well combined and bring the dough together by hand with a spatula.
    • I like to chill my dough for a thicker cookie, but the recipe is just as tasty if cooked right away. You just might get a bit more spread on your cookie if you don't chill the dough. I chilled mine for about an hour, but you can make ahead and chill for up to 48 hours. If you're going to chill the dough, form the dough into a disc shape and wrap in plastic wrap.
    • Preheat the oven to 350 degrees, and prepare 2 baking sheets with parchment paper or nonstick foil.
    • Once chilled, with your hands or a cookie scoop batch out the dough into 1 Tb balls of dough. Place the dough on the prepared baking sheets and place the baking sheets into the preheated oven. Bake for 15 minutes, rotating the pans halfway through the cook time. 
    • Allow the cookies to cool for 5 minutes on the baking sheet before moving to a wire rack to cool completely. Store in an airtight container for up to a week.

    Find Me on Yummly!

    December 3, 2018 by Hailey 1 Comment

    If you haven't heard of Yummly before, I'm about to BLOW YOUR MIND! I love Pinterest and Google for recipe hunting when I'm not writing my own, but the ability to filter for certain criteria is limited. Usually, with most search engines, you're confined to looking for something really specific or combing through tons of results for more generic keyword searches. Ain't nobody got time for that!

    Yummly has changed the game. The available filters are seemingly endless. They give you so many new ways to meal plan all while being conscious of every possible food allergy and diet out there. Looking for low carb options? They've got a way to search for that. Low sugar? Check! 

    Look at all these filters guys! You can filter by diet...

    ...or by allergy.

    The diet and allergy options are super handy, but my personal favorite set of filters are the "Tastes." This set of filters allows you to pick less, medium or more of all the basic tastes including:

    • Salty
    • Sweet
    • Bitter
    • Savory
    • Sour
    • Spicy

    How f*cking cool is that? I've never seen anything like it, and I absolutely love the idea. Often the cravings that cross my mind are based on a taste, like, "I want something salty right now." Yummly has made searching for the flavor you're cravin' easy!

    Another feature that is small but mighty, is the ability to search for recipes with or without a specific ingredient. When have you ever seen the ability to filter recipes based on not having a certain ingredient? This is such a unique and useful tool!

    And that's just the beginning of the search options. You can search for specific items using the search bar. There are also filters for techniques (think poaching, grilling, frying, etc.), cuisines like Chinese, Mexican, etc, and the amount of time a recipe takes to prepare. Much like boards on Pinterest, you can also build your own collections to keep all your amazing recipe finds organized and easily accessible. 

    Not in the mood to search? The "Articles" section has awesome recipe round-ups and other inspiration.

    One last thing to note before you get to Yummin'. The more you use the platform, the more useful it will become. Yummly will learn your preferences and, like any good search engine, try to bring you the best content possible.

    I'm trying to build up my Yummly following so please Yum any recipes you've tried or plan to!

    You can find me on Yummly HERE. My handle is cookingandcussing. I know you're going to love using Yummly, and if you're already active there, please show me some love. ?

    Ginger Cookies with Pomegranate Molasses

    December 2, 2018 by Hailey 3 Comments

    Ginger Cookies with Pomegranate Molasses
    a red plate stacked with brown cookies garnished with candied ginger, star anise, and cinnamon sticks

    Ginger Cookies with Pomegranate Molasses are filled with the wonderful flavors of Christmas spices but with a few little twists from the norm. The pomegranate molasses is what really makes this cookie unique. Instead of the intense sweetness that molasses or treacle usually add to a ginger cookie, the pomegranate molasses brings a subtle fruity flavor and a distinct brightness to the cookies that highlights the ginger taste.

    Let’s talk a little more about pomegranate molasses for a second. I’m sure some of are you thinking what in the actual f*ck is pomegranate molasses (or for that matter, WTF is treacle mentioned above)? Confession, I have been doing some serious binge-watching of The Great British Bake Off (formerly known as The Great British Baking Show).

    If you’ve never watched it, you are missing out! Check it out on Netflix.

    clipo from the Great British Bake off where 3D gingerbread art falls apart

    On one of the episodes from the latest season, a contestant used pomegranate molasses in her ginger cookie, and I just thought it was a brilliant idea! Sometimes the clawing sweetness of standard molasses puts me off a bit so I thought I would try it the British way. I was somewhat familiar with the ingredient prior to this recipe, but if you’re not it’s actually a very simple ingredient.

    Ginger Cookies with Pomegranate Molasses

    Pomegranate molasses is nothing more than pomegranate juice that has been reduced to a thick syrup. Unlike most syrups, pomegranate molasses isn’t super sweet. Instead, it has a nice balance of sweet, tart, and sour flavors. It really brightens up whatever you add it too particularly sweets like these cookies.

    This recipe also has a little surprise from the spice department. In addition to the standard spice additions of cinnamon, ginger, cloves, and nutmeg, this recipe also calls for a dash of black pepper. You really don’t taste the spicy or savory notes of the pepper. Instead, the black pepper just heightens the spicy notes of the ginger and bumps up the intensity of the other spices.

    The last spin that I put on this recipe was the addition of crystalized or candied ginger. Crystalized ginger has a very strong ginger flavor, somewhat like fresh ginger but nearly as hot and spicy. It also amps up the chew factor of these cookies. I absolutely adore the texture of these cookies. They have the quintessential chewy center that we all expect from a ginger cookie but with crisp golden brown edges.

    They have a chewy center as we expect from a ginger cookie but with crisp golden brown edges.

    • light brown colored ginger cookies on a wire cooling rack
    • Ginger Cookies on a round red plate with candied ginger sprinkled over top

    I love these cookies for a cookie swap or a holiday cookie spread. Ginger cookies are a classic part of the holidays, but with all the interesting ingredients in this recipe, these cookies are certain to be something special for your friends and family to try. I hope you have a chance to try out the recipe this holiday season. What do you think of the surprise ingredients? Let me know in the comments section below.

    Helpful Utensils

    nutmeg grinder with a whole nutmeg inside

    Nutmeg Grinder/Storage

    Fresh nutmeg has a lovely mild flavor that you really can't compare to the kind you buy already ground. Whole nutmeg will keep in the freezer for up to 3 years!

    Pomegranate Molasses

    Pomegranate Molasses

    Pomegranate molasses is what makes this recipe unique. It adds a subtle tart, fruity note to the cookies that make them taste brighter than your standard ginger cookie.

    a red plate stacked with brown cookies garnished with candied ginger, star anise, and cinnamon sticks
    Print Recipe
    4.17 from 6 votes

    Ginger Cookies with Pomegranate Molasses

    Ginger cookies full of rich, spicy flavors and a bright, fruity touch from pomegranate molasses. These cookies have the best of both worlds. The edges are crispy and golden brown and the middle is soft and chewy. Ginger cookies are easy to make and perfect for your holiday cookie spread!
    Prep Time15 minutes mins
    Cook Time15 minutes mins
    Total Time30 minutes mins
    Course: Dessert
    Cuisine: American
    Servings: 60 cookies

    Ingredients

    • ¾ C butter room temperature
    • 1.5 C brown sugar
    • ¼ C white sugar
    • 1 extra-large egg
    • 1 teaspoon vanilla extract
    • ¼ C pomegranate molasses*
    • 2.5 C all purpose flour
    • 2 teaspoon baking soda
    • ½ teaspoon kosher salt
    • 2 teaspoon cinnamon
    • 1 teaspoon ground ginger
    • ⅛ teaspoon fresh ground nutmeg**
    • ⅛ teaspoon ground cloves
    • ⅛ teaspoon ground black pepper
    • ½ C crystalized ginger

    Instructions

    • Place the butter in a stand mixer bowl or a large mixing bowl. Using a mixer, cream the butter on medium speed for about 30 seconds. Add the brown and white sugar and cream on high for 3-4 minutes or until pale and fluffy. Scrape down the sides and bottom of the bowl.
    • Add the egg and vanilla and mix on low speed until well combined. Add the pomegranate molasses with the mixer still on and continue to mix until well combined. Scrape down the bowl one more time and mix briefly on low until all the ingredients are combined.
    • Add all of the spices, salt, and baking soda and mix on low until combined. Turn off the mixer and add the flour. Mix on medium speed just until combined. Don't overmix your cookie dough, or you will end up with tough cookies.
    • Roughly chop the crystalized ginger either by hand or with a small food processor. Add the chopped ginger to the mixing bowl and mix on medium speed for about 10 seconds. Ensure the ginger is well combined and bring the dough together with a spatula.
    • Turn out the prepared dough onto a sheet of plastic wrap, and chill for at least 1 hour. It's best to let the dough chill overnight to let all of the spices blend but you'll need to chill for at least an hour to ensure your cookies don't spread too much in the oven.
    • Preheat the oven to 350 degrees, and prepare 2 baking sheets with parchment paper or nonstick foil.
    • Once chilled, with your hands or a cookie scoop batch out the dough into 1 Tb balls of dough. Place the dough on the prepared baking sheets and putthe baking sheets into the preheated oven. Bake for 15 minutes, rotating the pans halfway through the cook time. Allow the cookies to cool for 5 minutes on the baking sheet before moving to a wire rack to cool completely.
    • Store in an airtight container for up to a week.

    Notes

    * Pomegranate molasses is just pomegranate juice that has been reduced down to a thick syrup. It's nowhere near as sweet as normal molasses and has the tart, fruity flavor of pomegranates. There's a link to buy the same kind I used in the recipe above.
    ** Freshly grated nutmeg has a wonderful flavor, and it will keep in your freezer for up to 3 years! You can find whole nutmeg with the other spices at your grocery store, or I've included a link to a great grinder/storage container above.

    Sweet Potato, Apple & Kale Galette

    November 25, 2018 by Hailey 11 Comments

    Slice of sweet potato, apple, and kale galette being picked up with a silver spatula
    golden brown round sweet potato, apple and kale galette filled with orange slices of sweet potato, green torn kale leaves and white apple slices on a white baking sheet lined with brown parchment paper

    Sweet Potato, Apple & Kale Galette is a simple and beautiful combination of earthy flavors wrapped up in a flaky pastry crust. The filling of the galette is a creamy ricotta mixture that is flavored with caramelized onions, thyme, chopped pecans and a splash of balsamic vinegar. The creamy ricotta and tangy balsamic vinegar bring the perfect balance to the veggies.

    glass mixing bowl filled with white ricotta, golden caramelized onions, green chopped thyme and chopped pecans
    ingredients for sweet potato, apple and kale galette

    What is a galette?

    Simply put, a galette is the French way of saying a freeform crust. I could be cute and say that galette is easy as pie, but in reality, it’s actually easier than pie! There is no perfect shape to achieve when making a galette, and any tears or mishaps with the dough are easily concealed by the rustic look.

    golden brown round sweet potato, apple and kale galette filled with orange slices of sweet potato, green torn kale leaves and white apple slices on a white baking sheet lined with brown parchment paper

    The shape of the galette is formed by the filling. I use my ricotta base as a guide. I spread it out into a circle shape in the middle of the dough, stack the veggies on top and then simply fold the edges up and over the veggies. Voila! You’ve got a real stunner.

    Why store-bought pie dough?

    I use store-bought pie dough in this recipe to make it a fast recipe, but you could easily make your own pastry if you prefer. Store-bought dough already comes in a perfect circle so no trimming is required. If you use homemade pastry then do your best to trim the dough into a large circle around the filling, but, again, keep in mind it doesn’t have to be perfect!

    two round unbaked pie crusts on a white baking sheet line with brown parchment paper
    two round unbaked pie crusts topped with the ricotta and caramelized onion filling

    Take your time when slicing the vegetables for a galette

    The only real trick to this recipe is slicing the sweet potato and apple thinly and consistently. I prefer using a mandoline for this job. It takes a fraction of the time to slice the veggies and you get perfectly even, thin slices every time.

    orange sweet potatoes being cut with a mandoline on a wooden cutting board

    I’ve linked to the one I use (which happens to be very inexpensive as well) below.

    golden brown round sweet potato, apple and kale galette filled with orange slices of sweet potato, green torn kale leaves and white apple slices on a white baking sheet lined with brown parchment paper before folding edges of the pie crust over the vegetables
    golden brown round sweet potato, apple and kale galette filled with orange slices of sweet potato, green torn kale leaves and white apple slices on a white baking sheet lined with brown parchment paper before baking

    Sweet Potato, Apple & Kale Galette is a great vegetarian dinner or if you have carnivores in your crew then you can also serve it alongside a simple roasted pork tenderloin or chicken.

    golden brown round sweet potato, apple and kale galette filled with orange slices of sweet potato, green torn kale leaves and white apple slices on a white baking sheet lined with brown parchment paper

    The galette is so beautiful and tasty, you’ll find it hard to believe that you assembled it in less than 30 minutes! Let me know how it goes in the comments section below. Also, if you like this recipe, be sure to check out my Chicken Pot Pie Crostada.

    golden brown round sweet potato, apple and kale galette filled with orange slices of sweet potato, green torn kale leaves and white apple slices on a white baking sheet lined with brown parchment paper

    Helpful Utensils

    green mandoline

    Mandoline Slicer

    Using a mandoline makes thinly slicing anything a breeze. This is a must in your kitchen if you want an even consistent slice in no time.

    Two gray plates each with a slice of sweet potato, apple and kale galette and a small side kale salad
    golden brown round sweet potato, apple and kale galette filled with orange slices of sweet potato, green torn kale leaves and white apple slices on a white baking sheet lined with brown parchment paper
    Print Recipe
    4.41 from 5 votes

    Sweet Potato, Apple and Kale Galette

    Sweet Potato, Apple & Kale Galette is a simple combination of earthy flavors wrapped up in a flaky pastry crust. This recipe is so beautiful and delicious, you won't believe it takes less than 30 minutes to assemble.
    Prep Time30 minutes mins
    Cook Time45 minutes mins
    Total Time1 hour hr 15 minutes mins
    Course: Main Course
    Cuisine: American
    Servings: 2 Galettes

    Ingredients

    • 1 small sweet potato
    • 1 small yellow onion
    • 2 honeycrisp apples
    • ½ bunch kale
    • 2 store-bought prepared pie crust
    • ½ C ricotta cheese
    • 1 Tb balsamic vinegar
    • ¼ C finely chopped pecans
    • 1 teaspoon fresh thyme
    • ½ teaspoon salt
    • ¼ teaspoon pepper
    • 3 Tb butter
    • 1 Tb olive oil
    • 1 egg

    Instructions

    • Preheat the oven to 400 degrees. Prepare a baking sheet with parchment paper.
    • Caramelize the onion using the technique outlined in my Caramelized Onion post.
    • Remove the thyme from the stem and roughly chop. In a small mixing bowl combine the caramelized onions, ricotta, thyme, chopped pecans, balsamic vinegar, salt, and pepper. Mix well until combined. Set aside while you prepare the vegetables.
    • Peel the sweet potato. Using a mandoline*, slice the sweet potato and apple into thin rounds. Remove the kale from the stem. Tear into large pieces, similar in size to the apples and sweet potatoes.
    • Lay down the two pie crusts on the sheet of parchment paper. It's okay if they overlap now since you're going to fold the outer edges up. Spread half of the ricotta mixture onto each pie crust leaving about 2 inches of dough around the edges.
    • Next, layer a slice of sweet potato, a slice of apple and a piece of kale. You want a little bit of space between each slice to create a fanned-out look. Continue the pattern until you have created a full circle.
    • Once the veggies are totally assembled, gently fold the edges of the crust up to seal the edges. Dot the top of each galette with 1 Tb of butter cut into four pieces.
    • Beat 1 egg with 1 teaspoon of water. Using a pastry brush, brush the outside of the pie crust to ensure a golden brown color once baked. Bake for 45 minutes or until crust is crisp and golden brown.

    Notes

    *A mandoline makes thinly slicing vegetables a breeze. If you don't have one, check out the link above for an inexpensive one that works great.

    FREQUENTLY ASKED QUESTIONS

    Can I make my own pie dough if I don't like store-bought?

    Of course!

    How do I get my vegetable slices thin enough?

    I recommend a mandoline to prepare the vegetables in this recipe and have linked to one above that is very inexpensive. You can also cut the veggies by hand, but be sure to get them thin and even to ensure everything cooks at the same rate.

    Mexican Lasagna Verde with No-Boil Noodles

    November 23, 2018 by Hailey 25 Comments

    piece of mexican chicken lasagna on a white plate with a bite taken out

    Mexican Lasagna Verde with No-Boil Noodles is as dreamy and delicious as it sounds. This casserole is made up of layers of roasted chicken, sautéed peppers and onions, jack cheese and no-cook lasagna noodles dressed in velvety smooth poblano cream cheese sauce.

    piece of mexican chicken lasagna on a white plate with a bite taken out

    Using no-boil lasagna noodles is a huge timesaver for this recipe, but the green sauce is really what makes the dish! Poblano peppers are first charred to give a smoky flavor to the sauce and then pureed with white sauce until smooth. Cream cheese and green chiles are my secrets to a flavorful sauce you’ll crave.

    Can we just take a moment to celebrate the glory of cream cheese? It’s so f*cking good no matter what you add it to. I sometimes have to restrict myself from adding it to everything I make. For this recipe though, it was essential. It brings creaminess and a tang to that party that I adore.

    I know you’re going to LOVE Mexican Lasagna Verde.

    Ingredients

    The foundation of the recipe is a rich, creamy green sauce. It ties all the other elements of the recipe together and will have you wanting to lick your plate at the end of the meal. That’s no exaggeration.

    To make Mexican Lasagna Verde, you’ll need:

    ingredients for mexican chicken lasagna
    • No-boil lasagna noodles- also called no-cook or oven-ready noodles. Some Mexican-style lasagnas are made with corn tortillas, but I like noodles for this casserole.
    • Rotisserie chicken- remove the skin and bones before shredding. Check out this post for shredding techniques.
    • Jack cheese- plain jack or pepper jack cheese will work. I prefer to buy cheese by the block instead of pre-shredded for optimal melting.
    • Poblano peppers- charring poblanos is one of the most essential steps in this recipe, so just do it. Charring the outside skin makes the poblanos more smoky and earthy.
    • Bell peppers- I use one green and one red, but any color works.
    • Onion
    • Cilantro- if you want to omit, not a problem.
    • Cream cheese- reduced fat or full fat works.
    • Heavy cream
    • Chicken stock
    • Flour
    • Onion powder
    • Garlic powder
    • Dried oregano
    • Oil & butter
    • Salt & pepper
    Mexican chicken lasagna process shot showing peppers and onions in a pan and saucepan of cilantro poblano cream sauce

    How to Layer

    Lasagna is all about the layers. Be sure to keep all your layers as even as possible so every bite has all of the delicious ingredients. Also, try to drizzle the sauce as evenly as you can while building the layers so that you don’t end up with dry spots once the dish is baked.

    mexican chicken lasagna assembly process shots

    The layers for Mexican Lasagna are:

    1. Creamy poblano sauce
    2. No-boil noodles
    3. Shredded chicken
    4. Sauteed peppers and onions
    5. Shredded cheese

    Once you have built two full layers as listed above, the casserole is finished with one last layer of noodles then the remainder of the sauce and shredded cheese.

    full pan of mexican chicken lasagna before baking

    Substitutions

    A few of the ingredients have optional substitutions. There are also some non-negotiables. You absolutely must include cream cheese and poblano peppers to achieve maximum flavor potential. Some of your optional subs include:

    • No-boil lasagna noodles- no-cook noodles are not identical to regular noodles. For those that have never compared the two, no-boil noodles tend to be a little thicker and have a slightly doughier texture. You’re more than welcome to use standard lasagna noodles. Just be sure to cook them through before assembling your layers.
    • Rotisserie chicken- If you prefer white meat only, you can bake your own chicken breasts instead of using a rotisserie bird. To roast chicken breasts in the oven, cook them for about 15-20 minutes (depending on the thickness) at 375 degrees. Be sure to season with a little salt and pepper to taste. I also like to drizzle chicken breasts with a little olive oil before putting them in the oven to help the browning process.
    • Jack cheese- I use pepper jack cheese for this recipe to add a little spice, but plain Monterey jack also works. You could alternatively use a mild cheddar or mozzarella is you can’t find jack cheese at your market.
    • Cilantro- Are you one of those terribly unlucky people who think cilantro tastes like soap? My heart breaks a little for you because I seriously LOVE cilantro. Fortunately, the sauce in this recipe would still be equally flavorful without cilantro. Omit if you’re not a fan.
    full pan of mexican chicken lasagna

    Variations

    Vegetarian:

    It’s simple to transform this recipe into a vegetarian option (sorry vegans, this one isn’t for you). You can omit the chicken from the recipe, and vegetable broth would be an easy substitute for chicken broth. I recommend replacing the chicken with sauteed mushrooms such as sliced portabellas.

    Spicy:

    If you like your food spicy, I like you. I try not to put a lot of heat into my recipes because I find most people are sensitive to spice. The poblanos in this recipe offer a little bit of kick, but if you really like it hot, add some jalapenos or serrano peppers to your lasagna. Sautee some hot peppers along with the bell peppers, and you’ll have Spicy Mexican Lasagna.

    Equipment

    There are a few different tools you could use to puree your sauce, but an electronic gadget is not a necessity. You can finely mince your poblanos and cilantro by hand and stir them into the cream cheese sauce. It will require a little extra effort and the sauce won’t be as smooth as pictured, but it will taste amazing.

    I use an immersion blender to puree the sauce because I can blend the sauce right in the saucepan (link below). A regular blender works too, or a food processor would be another option. If you’re using a blender or food processor though, BE CAREFUL. Hot liquids spraying from a running blender is something out of a horror movie.

    pan of mexican chicken lasagna with one piece removed

    You don’t need any special baking pan for this casserole. If you don’t have a lasagna pan, a standard 9” x 13” baking dish works. What is the difference between a lasagna pan and you’re standard 9” x 13” baking pan, you ask? Basically, it’s bigger and deeper. The lasagna in the pictures was made in a standard 9” x 13” baking pan.

    No matter what pan you cook it in, the recipe will be beautiful and delicious. Don’t stress too much about the noodles perfectly fitting the dish.

    Storage

    Once prepared, the lasagna is best served hot from the oven. The dish will keep for up to 3 days if kept covered in the fridge. The lasagna can also be frozen to cook later. Just be sure to let the lasagna cool completely before freezing, and the casserole will need to thaw totally before baking.

    Top Tip: Make It Ahead

    Lasagna tends to be a time-consuming recipe simply because all of the layers need to be prepared before you can assemble. I like to assemble my lasagna a day or two before baking. It will keep in the fridge for up to 3 days before baking.

    You can make the components or the entire recipe in advance. Like the assembled lasagna, the cooked peppers and onions and completed sauce can both be kept in an airtight container in the fridge for up to 3 days.

    a serving of mexican chicken lasagna on a white plate

    If the lasagna has chilled before you’re cooking it, be sure to let it sit out at room temperature for about 30 minutes prior to baking or you can add another 15-20 minutes to the bake time.

    Serving Suggestions

    If you’re wondering what to serve with Mexican Lasagna Verde, check out these recipes for some ideas. Isabel Eats had so many awesome side dishes to choose from that it was hard to pick, so definitely check out her Sides for more ideas.

    • Refried Beans
    • Mexican Quinoa Salad

    Mexican Chicken Lasagna is a crowd-pleaser. Basically, I’ve never served it to anyone who didn’t absolutely love it. Try it out and join the crowd of Mexican Lasagna lovers.

    Helpful Utensils

    All-Clad metal immersion blender

    Immersion Blender

    An immersion blender makes blending or pureeing any type of hot item so easy and, frankly, safer than transferring from the pan to a blender. 

    Cuisinart Large Food Processor

    11-Cup Food Processor

    I often talk about how much I use my food processor and grating large quantities of cheese from the block is one of the many ways (and one of my favorites) I use mine.

    piece of mexican chicken lasagna on a white plate with a bite taken out
    Print Recipe
    4.67 from 15 votes

    Mexican Lasagna Verde with No-Boil Noodles

    Roasted chicken, sauteed peppers and onions, jack cheese and no-boil lasagna noodles are layered and smothered in a poblano cream sauce. Mexican Lasagna Verde is a great make-ahead casserole with plenty of Tex-Mex flavor!
    Prep Time50 minutes mins
    Cook Time1 hour hr
    Total Time1 hour hr 50 minutes mins
    Course: Main Course
    Cuisine: American, Mexican
    Servings: 8 servings

    Ingredients

    Lasagna

    • 1 box no-boil lasagna noodles
    • 1 whole rotisserie chicken skin/bone removed and shredded
    • 2 cups shredded pepper jack cheese
    • 1 green bell pepper
    • 1 red bell pepper
    • 1 yellow onion
    • 1 Tb olive oil
    • ½ teaspoon salt
    • ½ teaspoon black pepper

    Poblano Cream Sauce

    • 2 poblano peppers
    • 2 Tb butter
    • 2 Tb all-purpose flour
    • ½ teaspoon onion powder
    • ½ teaspoon garlic powder
    • ½ teaspoon dried oregano
    • 2 C heavy cream
    • 1 C chicken stock
    • 8 oz cream cheese room temperature
    • ½ bunch of cilantro

    Instructions

    To prepare poblano

    • Preheat broiler to high. Place two poblano peppers on a baking sheet and rub the outside of the peppers with olive oil. Place peppers in the broiler and cook for 15 minutes or until the skin is charred. Turn the pepper over halfway through cooking time. 
    • Once charred, place peppers inside a paper or plastic storage bag. Seal the bag to let the peppers steam for 5-10 minutes. Remove the peppers from the bag and peel off the skin.
    • Cut the top and seeds from the poblano and discard. Chop the pepper into large chunks

    To prepare peppers and onions

    • Slice the peppers into quarter-inch strips and thinly slice the onion.
    • Heat a nonstick saute pan over medium-high heat and add enough olive oil to cover the bottom of the pan.
    • Once the pan is heated, add the peppers and onions. Season with salt and pepper to taste and saute the bell peppers and onions for about 10 minutes or until they start to soften. Turn off the heat and set aside.

    To prepare poblano cream sauce

    • Melt 2 Tb of butter in a medium saucepan over medium heat. Add the flour and stir continuously for 2 minutes or until the flour is slightly browned. Slowly add the chicken stock and whisk until there are no lumps in the sauce. 
    • Add the heavy cream. Bring the sauce to a low boil and cook for 5 minutes.
    • Cut the cream cheese into roughtly one-inch chunks. Add the cream cheese to the sauce and continue to cook until the cream cheese is totally melted.
    • Add onion powder, garlic powder, and oregano to the sauce and mix to combine.
    • Using a blender, food processor or immersion blender, puree the charred poblanos, white sauce, and cilantro together until smooth. Season the sauce with salt and pepper to taste.

    To prepare the lasagna

    • Using a food processor or box grater, grate the cheese.
    • Preheat the oven to 350 degrees. Spray the bottom of a 9" x 13" or lasagna pan if you have one, with baking spray.,
    • To assemble the lasagna, spread a thin layer of the poblano sauce on the bottom of the pan. Next, put a single layer of oven-ready lasagna noodles on top of the sauce, overlapping just slightly.
    • Next, spread half of the shredded chicken and half of the peppers and onions evenly across the noodles. Top evenly with a third of the grated cheese. Last, spoon an even layer of sauce over the cheese, using about a third of the sauce.
    • Place another layer of noodles, then the remaining chicken and veggies, and another third of the grated cheese and sauce.
    • Top with one last layer of noodles and cover with the remaining sauce and grated cheese so the last of the cheese is at the very top.
    • Cover the pan loosely with foil and place in the preheated oven. Cook for 45 minutes covered and then remove the foil and finish for 15 minutes uncovered or until cheese starts to turn golden brown.
    • Remove from the oven and allow to set for at least 10 minutes before serving.

    Notes

    * One of my favorite ways to use my food processor is for grating large amounts of cheese. If you don't have a food processor, I've linked to a great one above. Mine is now 10+ years old and still going strong so it's a worthy investment.

    Frequently Asked Questions

    Can I use regular lasagna noodles instead of oven-ready?

    Yes, but you'll need to boil the noodles before assembling the lasagna.

    I hate cilantro. Can I leave it out?

    Sure. The poblanos will give the sauce plenty of flavor.

    I don't have a blender or food processor. Can I still make the recipe?

    Absolutely! You can finely mince your poblanos and cilantro by hand and stir them into the cream cheese sauce.

    Can the recipe be made in advance?

    Yes. You can assemble the lasagna and store it for up to 3 days covered in the fridge before baking.

    How do I cook the lasagna from frozen?

    Be sure to let the lasagna thaw completely before baking. It usually takes 24-48 hours to thaw in the fridge.

    Homemade Mini Meatballs

    November 19, 2018 by Hailey 8 Comments

    Pile of mini meatballs sprinkled with green parsley served in a white bowl.

    Homemade Mini Meatballs are a comfort food classic that anyone can make. They are super tender and flavorful but still so easy to make! This recipe is perfect for anyone with an egg allergy since ricotta is used instead of egg as a binder.

    Pile of mini meatballs sprinkled with green parsley served in a white bowl.

    When I think of simple, fast, and family-friendly meals, one of the first thing that comes to mind is spaghetti and meatballs. You might think homemade meatballs are a lot of work, but they take are so simple. I cook my meatballs in the oven for added convenience and less cleanup.

    I love this meatball recipe and use it in lots of different pasta bakes. The ricotta acts as a binder much like the egg in a recipe usually does. The ricotta also makes the meatballs extra tender.

    These meatballs are great with spaghetti or another pasta of your choice. If you don’t want pasta tonight, they would also be awesome on a meatball sub sandwich with a little marinara and fresh mozzarella on a hoagie roll. They also make a great little party snack with a side of marinara sauce for dipping.

    Ingredients

    It only takes a few simple ingredients to make Homemade Mini Meatballs.

    • Ground beef- 85/15 blend is my favorite for meatballs, but lean (90/10) or chuck (80/20) will work too.
    • Garlic
    • Ricotta cheese- Whole milk or part skim works, but I prefer whole milk ricotta.
    • Fresh basil- Fresh really is best when it comes to basil, but dried basil can be substituted in a much smaller quantity. Only use 1 teaspoon of dried basil if you’re subbing.
    • Parmesan cheese
    • Salt
    • Pepper
    • Oregano
    • Breadcrumbs- Italian style breadcrumbs are best, but panko would work too.
    Ingredients for mini meatballs.

    Instructions

    I hesitated to even include an Instructions section for Mini Meatballs given how simple the recipe steps are. There are a total of three steps from start to finish.

    1. Mix together all of the ingredients.
    2. Form the meatballs into half-ounce round balls.
    3. Bake!

    You could also cook the meatballs on the stovetop. Use a nonstick pan and cook them over medium heat for 10-12 minutes, stirring often, until all sides are brown.

    Side by side of raw mini meatballs on a parchment paper lined baking sheet versus the cooked mini meatballs.

    Substitutions

    Given the simplicity of the recipe, there aren’t a lot of substitutions. If you cannot find ricotta cheese or don’t want to use it, one egg could be substituted.

    Storage

    • Serve: Pair with your favorite marinara or pasta and serve hot from the oven.
    • Store: The meatballs can be kept in an airtight container in the fridge for up to three days.
    • Freeze: Meatballs freeze well. Let them cool completely before freezing in a plastic storage bag. Try to remove as much air from the bag as possible. They can be kept frozen for 60 days.
    • Reheat: There are so many ways to reheat frozen meatballs depending on how much time you have and the equipment in your kitchen. Check out this article for eight different ways to reheat frozen meatballs.
    Pile of mini meatballs sprinkled with green parsley served in a white bowl.

    Top tip

    Homemade Mini Meatballs are not tricky to make. The one heads up I will give you is to make sure you thoroughly mix the meat with the ricotta and spices before forming meatballs. You want to be sure that the ricotta is evenly distributed for the best meatballs.

    Mini meatball mix raw in a glass bowl.

    If you like this recipe, be sure to also check out my Meatloaf Meatballs and Pork and Mushroom Meatballs. Looking for more quick and easy recipes that use ground beef? Onion Burger Mini Meatloaf and BBQ Meatloaf Sheet Pan Dinner are great options too.

    Mini Meatballs are a recipe I use often. It will become a go-to on busy weeknights, for sure! Give this recipe a try and let me know how it goes in the comments section below!

    Pile of mini meatballs sprinkled with green parsley served in a white bowl.
    Pile of mini meatballs sprinkled with green parsley served in a white bowl.
    Print Recipe
    5 from 5 votes

    Mini Meatballs

    Homemade Mini Meatballs are flavorful, tender, and easy to make. Combine them with your favorite marinara and pasta for a quick and delicious dinner.
    Prep Time10 minutes mins
    Cook Time15 minutes mins
    Total Time25 minutes mins
    Course: Main Course
    Cuisine: American, Italian
    Servings: 22 meatballs

    Ingredients

    Mini Meatballs

    • 1 lb ground beef 85/15 lean
    • 1 clove garlic
    • ½ C ricotta cheese
    • 1 Tb fresh basil finely chopped
    • 2 Tb parmesan cheese finely grated
    • ½ teaspoon salt
    • ½ teaspoon black pepper
    • 1 teaspoon dried oregano
    • ¼ C Italian style breadcrumbs

    Instructions

    To make meatballs

    • Preheat the oven to 400 degrees.
    • Mix all of the meatball ingredients together in a mixing bowl. The best way to make sure all of the ingredients are well incorporated is to use your hands. If you're squeamish about touching the meat, use nylon kitchen gloves. 
    • Use a half-ounce scoop or spoon to portion out the meatballs and then use your hands to roll into a ball. The meatballs should be about a half dollar size or just smaller than a ping pong ball.
    • Place the meatballs on a baking sheet lined with foil for easy cleanup, leaving a little room between each meatball. Bake for 12-15 minutes or until cooked through.

    Frequently Asked Questions

    Are there any substitutes for ricotta cheese?

    You can use 1 egg instead. Also, whole milk or part skim ricotta is acceptable in the recipe.

    Can dried basil be used instead of fresh?

    If you can find it, fresh is best. If not, you can make the recipe with dried basil instead. You only need one teaspoon of dried basil if you're substituting.

    Can the meatballs cook on the stovetop instead of the oven?

    Yes. Use a nonstick pan and cook them over medium heat for 10-12 minutes, stirring often, until all sides are brown.

    Chicken Florentine Baked Potatoes

    November 18, 2018 by Hailey Leave a Comment

    three chicken florentine stuffed baked potatoes on a white platter
    three baked potatoes stuffed and topped with French fried onions and thinly cut green herbs

    Chicken Florentine Baked Potatoes bring all the elements of traditional Chicken Florentine, spinach, chicken, mushrooms, and cream sauce, but instead of the typical pasta foundation, you get a baked potato! These potatoes are rich without having tons of butter, sour cream and cheese like a normal loaded baked potato, but they are still super filling. Chicken Florentine Baked Potatoes will definitely satisfy the comfort food cravings that arrive with the cold weather.

    I don’t know about you, but as soon as the temperature gets chilly, I have this undeniable craving for casseroles, meat and potatoes, pasta, and all the other rich, soul-satisfying dishes that also tend to be a little on the heavy side. 

    What I like most about these potatoes is that though they are both rich and soul-satisfying, when you eat it, you don’t feel like a ton of bricks went into your tummy.

    The sautéed mushrooms and fresh baby spinach bring an earthy element that complements the flavor of the potatoes while also breaking up the pure starchy consistency. I think a fresh herb should be a requirement with any potato dish as it brings a much-needed contrast. I use fresh basil in this preparation to keep with the Italian theme, but parsley or thyme would also be tasty.

    You’ve got to have butter with potatoes, but I really wanted to try to keep the butter and cream to a minimum while still getting the texture just right. I add just enough butter and heavy cream to the mix to ensure you still get the wonderful creamy mouthfeel that you want from a potato, but it ends up being very little on a per potato basis meaning the added calories are minimal and f*cking worth it.

    three chicken florentine stuffed baked potatoes on a white platter

    The toppings on this potato are what really bring the richness to the recipe. The cheese and crispy onions on top also ensure that even the pickiest eaters will love this recipe.

    Fontina cheese is a scrumptious Italian semi-hard cheese with a mild nuttiness and a slightly sweet finish. It can be a pricey so feel free to substitute with mozzarella, but I will say the Fontina brings a special flavor that goes perfectly with the other ingredients.

    French’s Crispy Onions bring the crunch and saltiness this dish needs to be a home run!

    You may even have some French’s Onions in your pantry leftover from holiday cooking, but I find myself using them year-round. They are such an easy way to bring a fun textural element to a dish and let’s be real, they are damn good!

    rows of baked potatoes with most of the flesh scooped out on a metal baking sheet
    baked potato halves stuffed with a mixture of spinach, chicken, potato, and cheese on a baking sheet ready for the oven
    a chicken florentine stuffed baked potato sliced in half horizontally to show the filling

    Chicken Florentine Baked Potatoes are a great way to mix up your potato game and feed a crowd. These potatoes would make an awesome weeknight dinner especially if you bake the chicken and potatoes in advance. I’m certain this recipe will be a hit with your family and friends. Let me know what you think in the comments section below!

    three baked potatoes stuffed and topped with French fried onions and thinly cut green herbs
    Print Recipe
    5 from 1 vote

    Chicken Florentine Baked Potatoes

    The traditional elements of Chicken Florentine, chicken, spinach, mushrooms and cream sauce, all come together in a baked potato! The potatoes are topped off with Fontina cheese and French's Crispy Onions for extra flavor and crunch. This potato recipe is rich but not too heavy.
    Prep Time15 minutes mins
    Cook Time1 hour hr 30 minutes mins
    Total Time1 hour hr 45 minutes mins
    Course: Main Course
    Cuisine: American, Italian
    Servings: 8 servings

    Ingredients

    • 4 russet potatoes
    • 1 lb boneless skinless chicken thighs**
    • 8 oz cremini mushrooms
    • 4 oz baby spinach
    • 4 oz fontina cheese mozzarella can substitute
    • 4 Tb butter
    • ¼ C heavy cream
    • 2 Tb fresh basil
    • 2.8 oz French's Crispy Onions
    • garlic powder
    • onion powder
    • salt
    • black pepper
    • olive oil

    Instructions

    • Preheat oven to 400 degrees. Rinse and dry potatoes.
    • Wrap the clean potatoes in damp paper towels and put in the microwave on a microwave-safe plate. Microwave on high power for 5 minutes to start the cooking process, and speed up the time in the oven.*
    • After 5 minutes, unwrap the potatoes and place on a baking sheet. Cook in the oven for another hour to hour and fifteen minutes or until totally soft. Turn each potato over halfway through baking to avoid one side getting browned and tough. Once cooked, remove from the oven and cool for about 10-15 minutes or until you can handle.
    • Place the chicken thighs on a baking sheet lined with foil for easy cleanup. Season the top side of the chicken liberally with salt, pepper, garlic powder, and onion powder. Place in the oven for 15-20 minutes, depending on the size of the thighs, or until cooked through. Once cooked, remove from the oven and set aside to cool.
    • Dampen a paper towel and ring out well. Using the paper towel, wipe the outside of the mushrooms and then remove the stem. Dice into quarter-inch pieces.
    • Heat a nonstick pan over medium-high heat. Add enough olive oil to cover the bottom of the pan. Once the pan is heated, add the mushrooms. Stir to distribute and then leave undisturbed for 2-3 minutes, until golden brown. Stir one more time and cook for another 2 minutes until browned all over. Set aside.
    • Once the chicken has cooled, chop into bite size pieces. Grate the fontina cheese and set aside. Roughly chop the basil.
    • Once the potatoes are cool enough that you can comfortably hold (with a dish towel if necessary), split each potato in half lengthwise. Using a small spoon, scoop the inside of each potato half out into a large mixing bowl with the butter leaving about 1cm of potato around the edges to keep the shell sturdy. Season the potato shells with salt and pepper.
    • Roughly mash the potatoes with a potato masher. Add the cream and continue to mash until mostly smooth. Add the chicken, basil, and spinach and stir to combine. Last add half of the grated cheese, reserving the remainder for the top and mix. Add ½ teaspoon salt and ½ teaspoon pepper. Mix well. The mixture may seem a bit dry, but don't worry. When you put them back in the oven the cheese will melt and the spinach will release it's liquid, and they will be just right!
    • I like to use my hands to pack the potato shells with the filling but you can also use a large spoon if you prefer. Depending on the size of the potato, fill with 1 to 1.5 cups of filling. Pack the filling in tightly. You want a slight mound on top, but you don't want the potato to be overflowing either.
    • Once the potato halves are stuffed, bake for 20 minutes. Remove from the oven and top with the remaining cheese and the French's crispy onions. Bake for another 5-10 minutes or until the onions are golden brown.

    Notes

    * You can fully cook the potatoes in the microwave if you're short on time, but I think the texture isn't quite as fluffy when you completely cook in the microwave. The end product will still be super tasty so give it go if you need to.
    ** Feel free to substitute with chicken breasts if that's your preference.
    This dish would be a great weeknight dinner if you bake the chicken and potatoes in advance. Just keep the potatoes and chicken whole (do not cut) and store in the fridge for up to 5 days. Cut the chicken and scoop out the potato as instructed when ready to make the potatoes. Allow the potatoes to sit at room temperature for at least 30 minutes before scooping.

    Sheet Pan Chicken Fajitas

    November 11, 2018 by Hailey 3 Comments

    Three prepared chicken fajitas tacos with slices of chicken, peppers, onions, shredded cheese and a dollop of sour cream with a bowl of red salsa and fresh green avocadoes on the side
    Three prepared chicken fajitas tacos with slices of chicken, peppers, onions, shredded cheese and a dollop of sour cream with a bowl of red salsa and fresh green avocadoes on the side

    Sheet Pan Chicken Fajitas is a quick and satisfying sheet pan dinner, and the recipe could not be easier. It is perfect for a busy weeknight. You could have it ready for the oven in the time it takes the oven to preheat. Once you’ve sliced the peppers and onions, lay them on a baking sheet with the chicken breasts and season with the spice mix. That’s it! Dinner is in the making.

    I love fajitas for their simplicity but also because they offer all the flavor we love in Mexican food with a fraction of the calories of our favorites that are smothered in chili con carne or cheese.

    Three prepared chicken fajitas tacos with slices of chicken, peppers, onions, shredded cheese and a dollop of sour cream with a bowl of red salsa and fresh green avocadoes on the side

    Fajitas are also a great option for a crowd since everyone selects their own toppings.

    Ingredients for sheet pan fajitas

    Not only is this a great weeknight dinner, I also love this meal for lunches during the week. I often make this sheet pan meal on Sundays, and then have the chicken and veggies over greens as a quick fajita chicken salad for weekday lunches.

    What is a Sheet Pan Dinner?

    A Sheet Pan Dinner is the equivalent to a one-pot recipe, but instead of a pot, the recipe calls for a sheet pan. If you line the sheet pan with parchment paper or nonstick foil, it’s even better than a one-pot recipe. It’s a zero-pot recipe!

    Sheet pan fajitas on a gold baking sheet lined with parchment paper topped with bright green cilantro

    Sheet pan dinners are loved by busy home cooks for a reason. They are stupid easy but still offer a well-rounded meal. Chicken Fajita Sheet Pan Dinner is no exception. The most difficult part of this recipe will be slicing the onions and peppers, so try not to break a sweat during that prep step.

    Sheet Pan Chicken Fajitas are the easiest fajitas you ever made!

    Typically, when making fajitas we have to stand over the stove and add the varying ingredients at certain times to end up with everything cooked right at the end of the process. That is not the case for these easy fajitas. Sheet Pan Chicken Fajitas are totally set it and forget it. Well, don’t totally forget it because they take less than 30 minutes to cook.

    raw chicken breast on a white cutting board being sliced into thin strips
    sliced raw chicken breast tossed in stainless steel bowl with chipotles in adobo, minced garlic and lime juice

    Can I use a premade packet of taco seasoning instead of the spices in the recipe?

    No, I would not recommend taco seasoning because it usually has some sort of thickening agent included hence why the directions usually call for water. You can look for a premade seasoning blend for Fajitas though, and that would be a fine replacement.

    white onion and bright red and green bell peppers thinly sliced on a light wooden cutting board

    What are chipotles in adobo?

    Fun fact, chipotle peppers are actually jalapeno peppers that have been smoked and then preserved in a tomato-based sauce. They are spicy, smoky and delicious. They can be found near the salsa or other Mexican specialty items in your grocery store.

    raw chicken and uncooked onions and peppers spread across a baking sheet lined with parchment paper sprinkled with herbs and spices

    Sides to have along with your easy Sheet Pan Chicken Fajitas?

    Everybody loves rice and beans with fajitas, so definitely check out my Perfect Basmati Rice and Refried Beans recipes for some options. Sheet Pan Fajitas are all about the garnishes so feel free to keep it super simple and have tortilla chips to enjoy with the salsa, guacamole or other toppings you prepare.

    garnishes for sheet pan fajitas

    Tortillas and salsa or pico de gallo are an absolute must for my fajitas spread, but the number of garnishes I prepare is somewhat dependent on who I’m serving it too. If I’m going for a full fajita spread for friends and family, I serve up my Sheet Pan Fajitas with:

    • Tortillas
    • Shredded cheese
    • Sliced avocado or guacamole
    • Salsa
    • Pico de gallo
    • Sour cream
    • Lime wedges
    • Shredded lettuce
    • White onion
    • Cilantro
    • Tomato
    Sheet pan fajitas on a gold baking sheet lined with parchment paper topped with bright green cilantro

    Now, to be honest, if I’m making this as a quick weeknight dinner then may only serve some of these garnishes depending on what I have in my fridge. They are still totally delicious!

    If you’re always looking for fast dinner options that fit into your hectic schedule and leave everyone happy and full, Chicken Fajita Sheet Pan Dinner is for you. Cook yourself up a pan of this goodness and let me know how it goes in the comments section below.

    Three prepared chicken fajitas tacos with slices of chicken, peppers, onions, shredded cheese and a dollop of sour cream with a bowl of red salsa and fresh green avocadoes on the side
    Three prepared chicken fajitas tacos with slices of chicken, peppers, onions, shredded cheese and a dollop of sour cream with a bowl of red salsa and fresh green avocadoes on the side
    Print Recipe
    5 from 1 vote

    Sheet Pan Chicken Fajitas

    Sheet Pan Fajitas made fast and easy for a simple weeknight dinner! Sliced peppers and onions and chicken breasts seasoned with a blend made from scratch are the perfect start to fajita night.
    Prep Time10 minutes mins
    Cook Time20 minutes mins
    Total Time30 minutes mins
    Course: Main Course
    Cuisine: Mexican
    Servings: 4 people

    Ingredients

    • 1 clove garlic
    • 2 Tb chipotle peppers in adobo sauce
    • 1 lime
    • 1 teaspoon dried oregano
    • 1 teaspoon salt
    • ½ teaspoon pepper
    • ¼ teaspoon cayenne optional
    • 1 teaspoon cumin
    • ½ teaspoon coriander
    • 1 teaspoon onion powder
    • 1 lb chicken breast
    • 1 green bell pepper
    • 1 red bell pepper
    • 1 onion

    Garnish:

    • cilantro
    • grated cheese
    • sour cream
    • avocado
    • flour tortillas

    Instructions

    • Preheat oven to 425 degrees.
    • Mince garlic. Add garlic, adobo, and juice of 1 lime to a large mixing bowl. Toss with chicken and set aside. Mix together all of the spices. Slice the peppers and onions. into quarter-inch strips
    • Line a baking sheet with nonstick foil or parchment paper for easy cleanup. Remove the chicken breasts from the marinade and shake off excess. Place on the baking sheet. Surround with sliced peppers and onions. Drizzle everything with olive oil.
    • Season chicken and vegetables liberally with seasoning blend. Cook for 15-20 minutes or until chicken is browned and cooked through.
    • Serve with the garnishes suggested above for a build your own fajita buffet.

    Frequently Asked Questions

    Can I use premade taco seasoning instead of the spices in the recipe?

    No, because taco seasoning usually has a thickening agent. Look for a fajita seasoning blend if you want a premade seasoning mix.

    Where do I find chipotle peppers in adobo sauce?

    Chipotle in adobo can be found near the salsa or with other Mexican specialty items at the store.

    • « Previous Page
    • 1
    • 2
    • 3
    • Next Page »

    Rate This Recipe

    Your vote:


    A rating is required
    A name is required
    An email is required