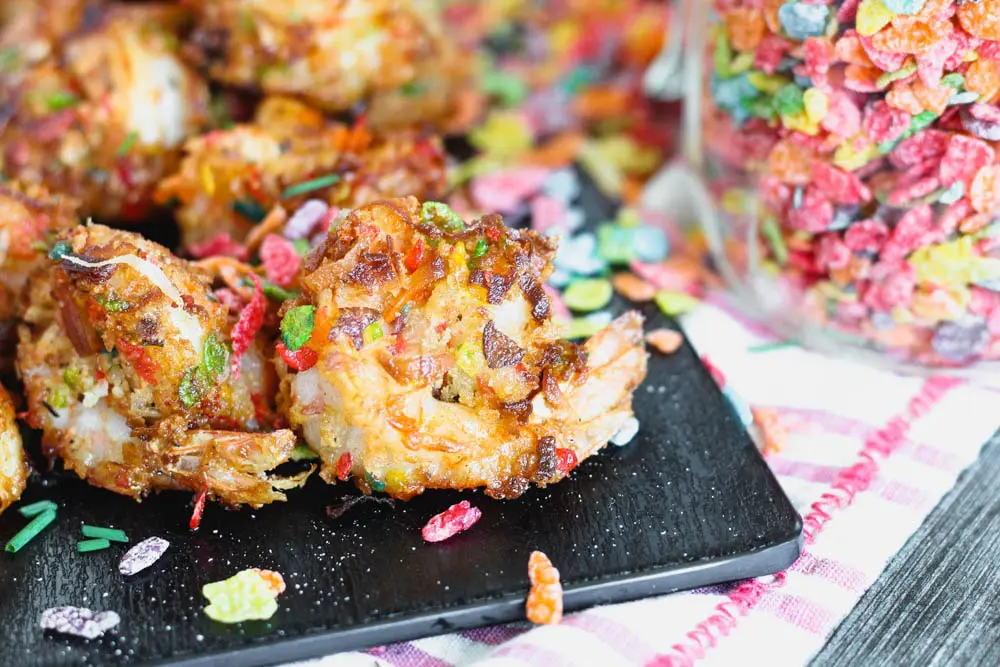
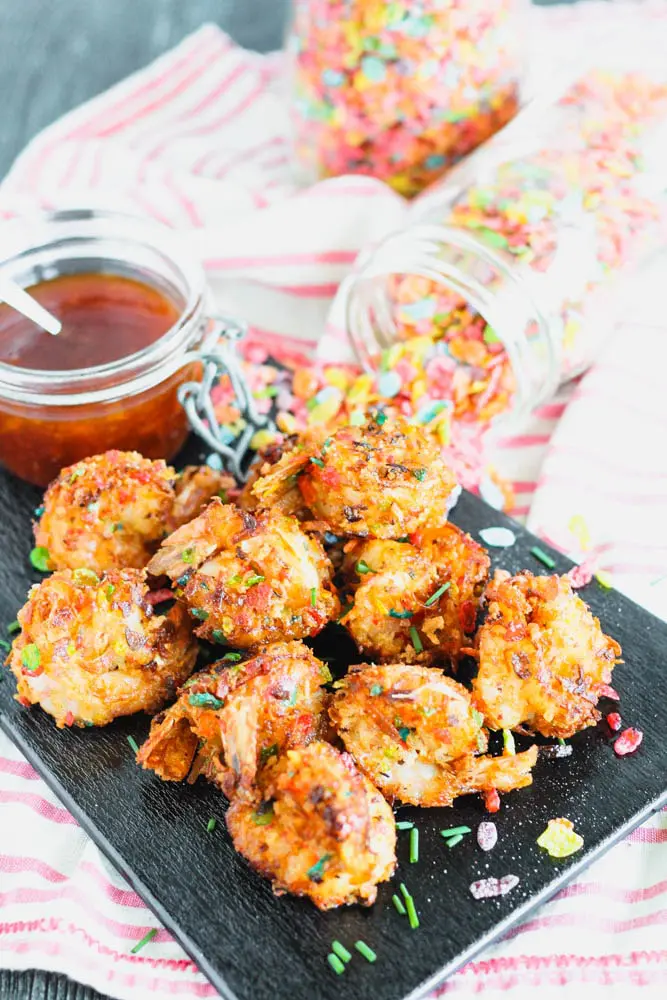
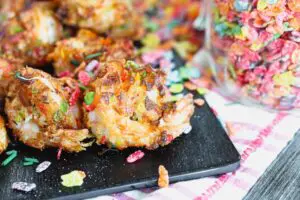
Fruity Pebble Coconut Shrimp is a super festive party snack fit for any occasion, but also, who says you can’t have your cereal for dinner?! Tell that rule follower deep inside who is screaming out, “No way!” to pipe down and follow me to the dark side. Paired with a simple salad or green veggie, Fruity Pebble Coconut Shrimp is the dinner your family is dreaming about.
A fun spin on coconut shrimp has been on my agenda for quite some time. I’ve tried a few different recipes out, but nothing really felt special enough to mess with the classic.
Alas, Fruity Pebbles come into the picture, and they are, without a doubt, special enough to warrant their own recipe as the fried seafood coating you never knew you needed.
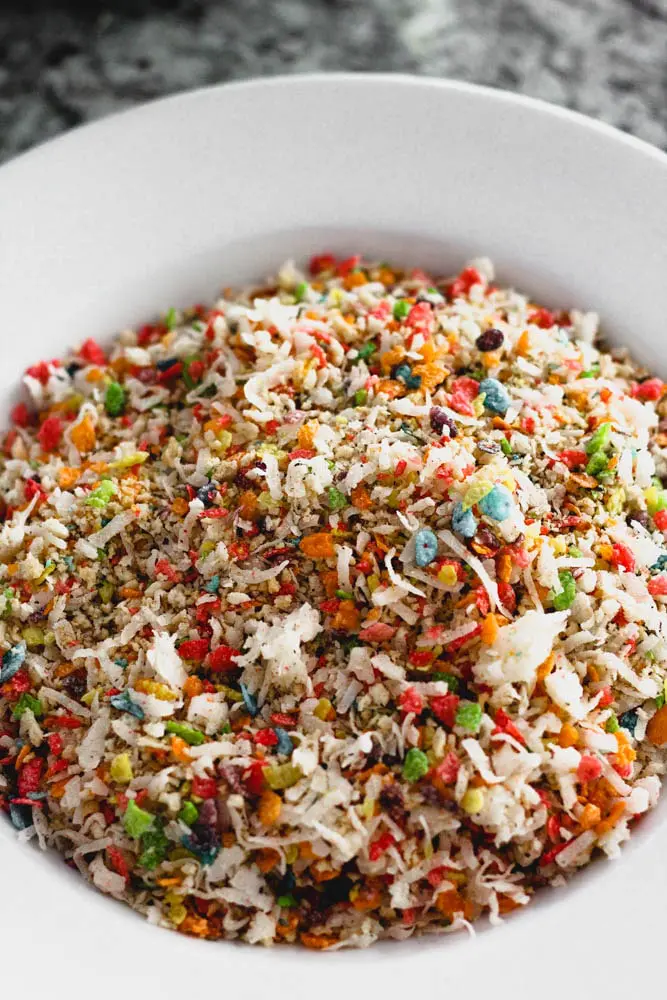
The coating for the shrimp is made up of equal parts Fruity Pebbles cereal, shredded sweetened coconut, and panko breadcrumbs. The panko brings the right crunch to the party while also ensuring the recipe has the proper balance of savory flavors.
The Fruity Pebbles really don’t give a strong, fruity taste to the shrimp. Instead, they provide a splash of color and texture to the recipe along with a sweet, citrusy aroma that lets you know they are there. Not like you could miss the rainbow of colors anyways, but you get my drift.
Making these shrimp is really easy as well. The first time I made them, my seven-year-old niece was my helper, and she LOVED making the recipe. The only prep work is getting the shrimp ready for breading, and you can always ask the fishmonger at the counter to help you out.
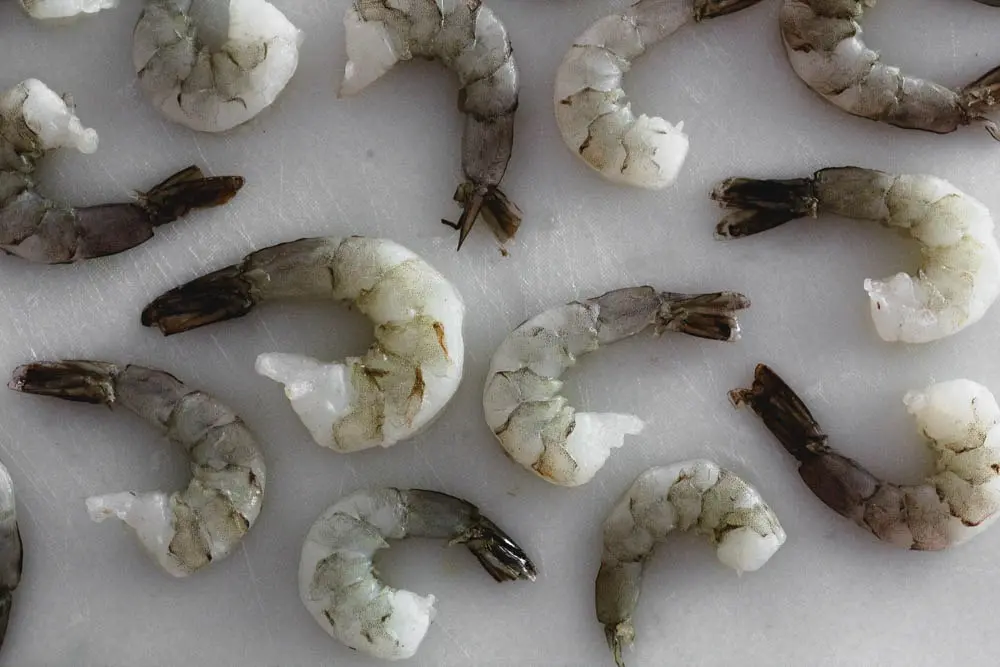
I like to buy the easy-peel shrimp so you have a head start, but if that’s cost-prohibitive then feel free to buy the shell-on version. Be sure to thoroughly devein the shrimp, even if you buy the easy-peel variety.
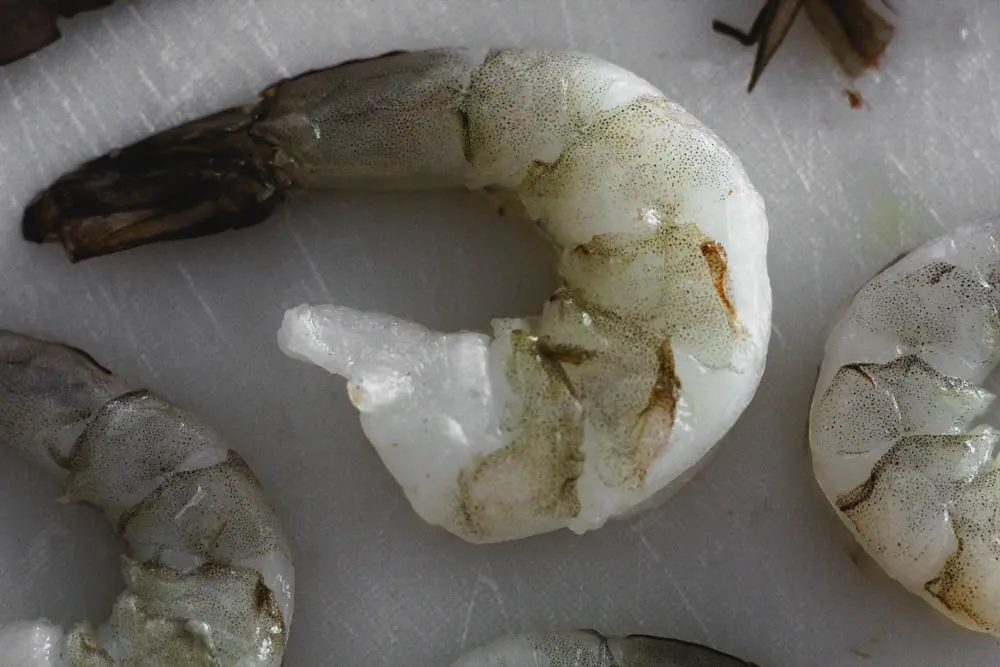
They usually leave the very end of the poop trail (sorry, that’s what it is) behind even when they say they’re deveined. It’s good practice to slice the back of the shrimp all the way to the tail and, using the tip of the knife, be sure to remove all the black insides you see.
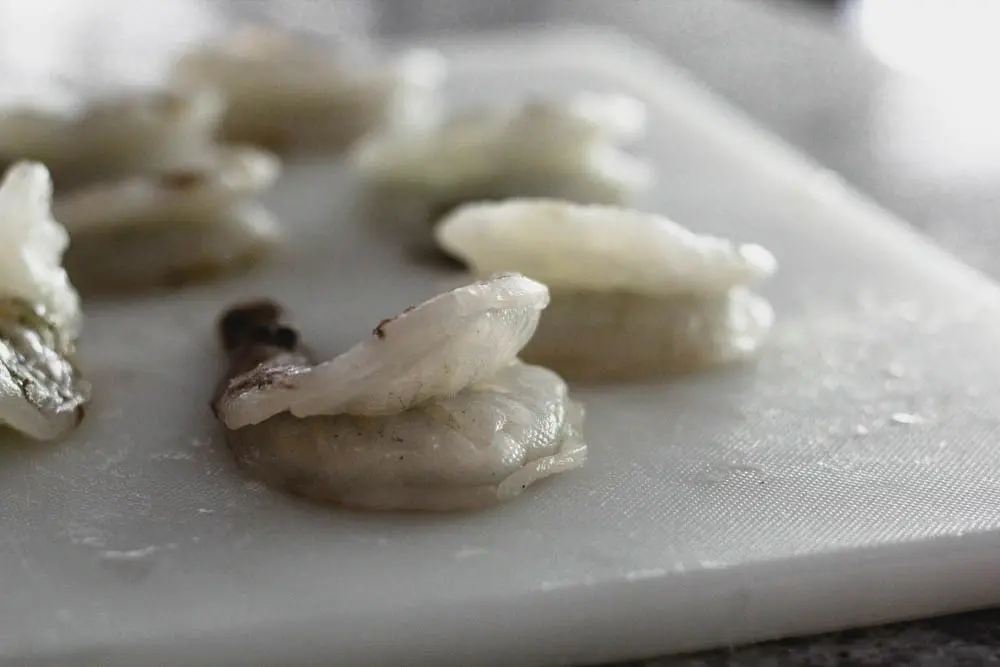
I also butterfly the shrimp for more surface area for all the Fruity Pebble glory. Here is a link to a helpful video if you’ve never cleaned or butterflied your own shrimp.
I recommend leaving the tails on for your Fruity Pebble Coconut Shrimp, so you have a handle for easy dipping. Be sure not to leave any of the shell on though, just the tail. This is totally optional though if you prefer to buy your shrimp completely peeled and ready to use.
Once the shrimp are prepared, there is a standard 3-part breading process that ensures the coating adheres to the shrimp.
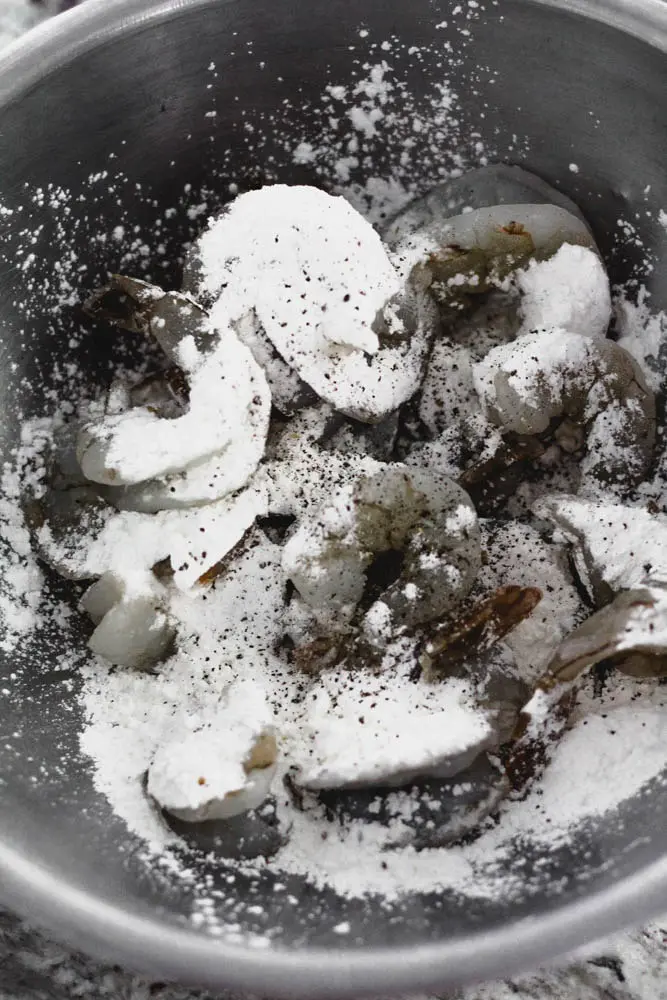
The process starts with tossing the shrimp in corn starch, then coating them in evaporated milk and last tossing them in the Fruity Pebble and coconut breading.
There are two ways you can accomplish the last step of applying the breading:
- Pour the breading into a large shallow bowl and press the shrimp into breading one at a time
- Pour the breading into a gallon-size plastic bag and toss the shrimp in batches
The first method is definitely the messier option, but you can also ensure really thorough coating of each shrimp. It’s also the eco-friendlier option if you prefer to avoid disposable goods like plastic bags.
If you go with the first method, only use half of the breading at a time. If you pour all the breading in at once, by the time you get to your last few shrimp, the breading will be too wet to stick to the shrimp.
The second option is quicker and cleaner. It is also the recommended strategy if you are having the little ones help. Add 6-8 shrimp at a time to the bag to avoid overcrowding. Be sure to still apply some pressure to press the coating into the shrimp after tossing.
A quick fry is all that is left for delicious Fruity Pebble Coconut Shrimp. If you have an air fryer, this recipe would definitely work, but you may not get as much color as you do with traditional frying.
If you’re tired of the usual dinner fare or are looking for a fun appetizer to share, Fruity Pebble Coconut Shrimp are a must-try!
Fruity Pebble Coconut Shrimp
Ingredients
Shrimp
- 1 lb shrimp easy peel, 16-20 size*
- 1 C Fruity Pebble cereal
- 1 C panko breadcrumbs
- 1 C shredded sweetened coconut
- ½ teaspoon salt
- ¼ teaspoon pepper
- ¼ C corn starch
- 0.5 oz can evaporated milk
- Vegetable oil
Sauce
- ½ C apricot preserves
- 2 Tb low sodium soy sauce
- 1 Tb rice vinegar
- 1 teaspoon sriracha hot sauce
Instructions
- To make the dipping sauce, combine all of the ingredients and whisk well to combine. Set aside until shrimp are ready.
- To prepare the shrimp, remove the entire shell for the each shrimp, leaving the tail on. Devein each shrimp thoroughly. Last, butterfly the shrimp by slicing all the way down the back of the shrimp so that the two sides lay flat. Check out this video for a visual how-to.
- To prepare the breading, crush the cereal until it resembles coarse crumbs (don't completely crush into dust). Then add the panko and coconut and mix to combine. Set aside.
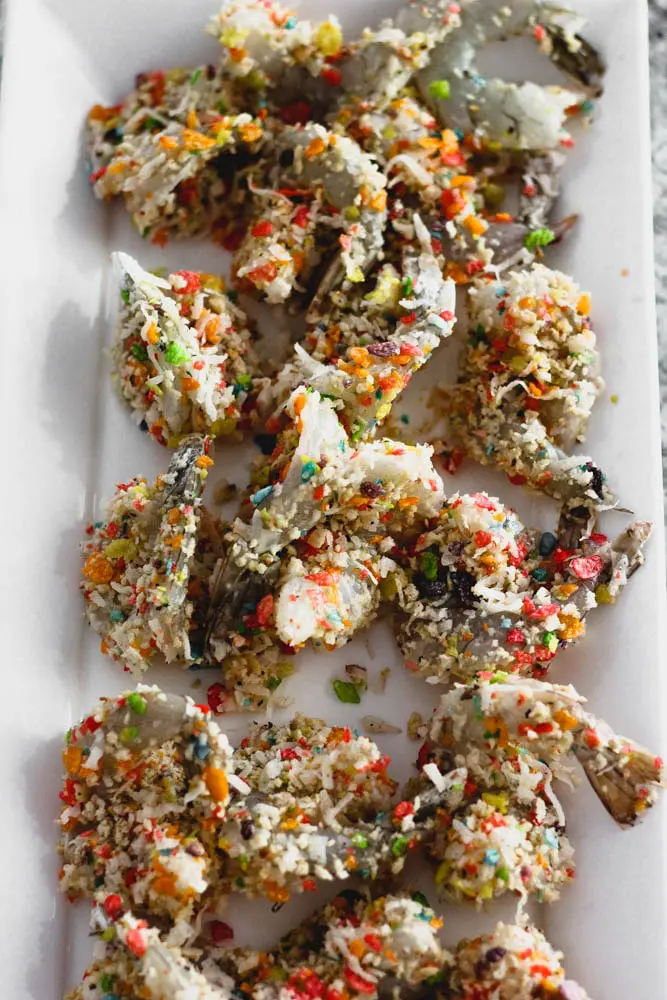
- Bread the shrimp by setting a 3-step station. First, toss the prepared shrimp with corn starch, salt and pepper in a mixing bowl. Next, set up the next two stations by pouring the evaporated milk into a small bowl, and then adding the breading to a large shallow bowl or a gallon size plastic bag (see my notes above on more details on the two methods).
- After coating the shrimp in corn starch, dip each shrimp twice, one at a time, into the evaporated milk. Allow the excess milk to drip off before adding the breading. Coat each shrimp thoroughly in breading, pressing the crumbs into the shrimp.
- Once all the shrimp are breaded and ready, place a large pan over medium heat. Pour enough vegetable oil into the pan for about 1-inch depth. To check if the oil is hot, add a few crumbs from the breading to the oil. If they rise to the top immediately and start to sizzle, you're ready to fry. If they turn black, remove the pan from the heat for 30 seconds and test again.
- These shrimp cook quickly! I find there are three sides to cook since we are pan frying, the bottom of the shrimp and the two sides. Cook each side for 30-60 seconds, depending on the size of your shrimp. Keep an eye on them. The coconut and Fruity Pebbles can burn quickly if left too long.
- Once the shrimp are golden brown and cooked through, remove to a wire rack or paper towels on a baking sheet to allow the excess oil to shake off. Serve with dipping sauce.
Notes


Latest posts by Hailey (see all)
- Sour Cream and Onion Skillet Biscuit - April 9, 2023
- Bacon Pesto Pasta - March 30, 2023
- Pimento Mac and Cheese - March 19, 2023
Leave a Reply